It’s the question faced by the props artisan on a daily basis. Whether you work in theatre, television, or film, you will be asked to build an infinite variety of objects for an infinite variety of uses. Props are found in many other places as well, such as advertising, photography shoots, commercial displays and exhibitions. You may also wish to build props for your own personal uses, such as holiday decoration or hobbies. Whatever your reason, you are reading this because you want to know how to build anything and everything.
Sometimes the answers are self-evident. If the scenic designer wants a wooden chair, you build a chair out of wood. But what if the director wants the chair to be broken during every performance? What if the designer wants a prop from a historical period where the techniques and materials used are no longer available to us? Most commonly, what if the production calls for props which have no counterpart in the real world?
The men and women who build props come from the most diverse backgrounds imaginable, and are skilled in an endless number of techniques and processes. They approach the construction of a prop from a variety of angles, honed over years of experience and trial-and-error. The “why†of props construction is often based on which materials they are most comfortable using, or by asking questions from those who have been in the business longer than they.
Is there a way to more clearly define this approach? Is there a “scientific methodâ€, as it were, to apply to every prop whose construction is not self-evident?
If you have any time over this Thanksgiving, leave a comment with any insights on your own process; what informs your decision on how to construct a prop?
It happens in a lot of plays. You need a photograph, either in a frame or not. Maybe it’s part of the story, or the designer just wants it as set dressing. First you need to do all your homework on the photograph, just as you would any other prop. Look for all the clues you can in the script; you don’t want to bring the perfect picture of a child on a beach only to have the actor in the following scene recite the line, “he used to love going to the mountains.”
Is the photograph of someone in the cast or someone who never appears? You have more options if the person in the photograph never appears on stage, and you don’t have to match his or her appearance to an actors. Either way, you have a number of options for getting a photograph onto the stage.
Have one of the actors bring a photograph in
If the photograph is supposed to be of the actor as a younger person, the most realistic option is to have the actor bring an older photo of him or herself. If possible (and it should be possible in your prop shop), you should scan the original photograph and make your own prints. This will keep the actor’s irreplaceable memories from becoming damaged or lost during the production, and will give you the option of resizing it if necessary.
Using an actor’s photograph will also work if the photograph needs to be of the character’s close relative. An older photograph of the actor can be his child or younger brother. Likewise, an actor can use a photograph of her own father for the character’s father.
Take your own photograph
If you know early enough in the process that you will need a photograph of one or more of the actors, you can schedule a photo shoot with them. You can even work with the costume designer and other production people. You will need to talk to your production manager about this, since it will involve other departments, and there are rules governing the photographing of Equity actors during a production.
You can also take pictures of other people at the theatre or your friends and family if they have the right look. You may also wish to approach strangers you see or hire someone to pose for you, though for most productions, this does not make the most sense of time and money.
Use a found photograph
You can find old and anonymous photo albums at flea markets, on eBay, or any of the other usual sources for abandoned objects. Books and magazines are other great sources. Just like borrowing an actor’s photograph, it is a good idea to scan these and print new copies for your play.
You can also, obviously, search for images online. I described a lot of these techniques in my previous article, “How to research.” Found photography can be tricky. The problem is you often want amateur photography rather than professional photography. You also don’t want to use famous or well-known people in a photograph if the subject is meant to be unknown. Amateur photographs of unknown people are much less organized and searchable. In a lot of cases, you just have to luck onto a huge group of potential images and browse through every single one to find the perfect shot.
If you search for “found photographs” on Google, you can easily get sucked in for hours looking at pictures from all decades. At this point I should remind everyone that I am not a lawyer, and while this article tells you how you can find images for your production, I make no claim as to whether you can use them or not. Defer to your production manager, or whoever is in charge of the legal aspects of the show.
Create a composite
If you can’t find or make the perfect photograph for your production, you can combine two or more photos together. You can combine two or more people together, or put people in front of a different background. Before computer-editing software, you could literally cut and paste the photographs together, and then rephotograph the result. It is much more elegant and efficient to do this nowadays on a computer, and it will behoove you to learn how or find people you can delegate this to.
Alter any of the above
If you scanned in the photograph you made or acquired from any of the above methods, you can manipulate it in the computer. You can turn it into black and white or sepia-toned. You can also print it out and use any of your favorite paper-ageing or distressing techniques.
If you really want your portfolio to shine, you need good photographs of your props. Taking photographs during a rehearsal or show is another topic entirely; in this article, I’ll be talking about taking photographs either in the shop or backstage.
Blurry and Grainy Pictures
The biggest problem and complaint about bad portfolio pictures are blurry and grainy photographs. Though caused by different things, they are both symptoms of not enough light.
Your camera determines the correct exposure in three ways: shutter speed, aperture, and film or chip sensitivity. With a fast shutter speed, moving objects are frozen in place. As the shutter speed slows down, moving objects become blurred in the photograph. At a slow enough shutter speed, the slight shaking of your hands as you hold the camera will blur the entire picture.
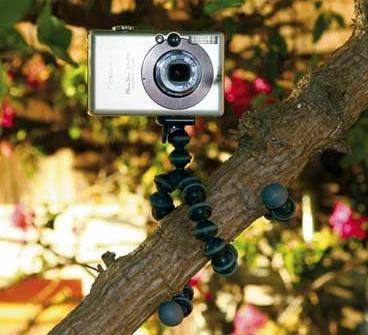
If your pictures are blurry, you need to steady the camera. A tripod is the usual solution. Expensive tripods are made for heavier cameras and able to withstand wind and rain. For smaller cameras used indoors, almost any tripod will help steady your pictures. You can even get table-top tripods, or funky ones like this: Continue reading Taking photographs of your work→
Research is a vital skill for a props person. We may be given a vague description of an object or item and be expected to build something that is either historically accurate, or something that looks “correct”. For example, we all know what a dog looks like, but when we sit down to sculpt one, our minds become incredibly blank; details like the shape of the head, the proportion of the features, and how parts transition between each other are what will sell the prop. Even when a director or designer provides us with full drawings or draftings, we may still need to do research of our own to fill in the blanks or flesh out the specifics.
In my previous post, I discussed what to include in your props portfolio. In this part, I will discuss how to layout, organize, and present your portfolio. I’m going to use my own portfolio as a guide; there are certainly many other ways you can make your portfolio.
Layout
There are a number of ways to layout your pages. You can of course do it by hand, where you make copies of all your photographs and drawings and glue them to paper or a heavier board. Or, if you want a less time-consuming and cheaper method, you can do it on your computer. For simple layouts, you can use any number of software programs, depending on what you are already comfortable using or what you have access to. I use Scribus, an open-source desktop publishing program. I know people who use Powerpoint. You can even use a word processor if that’s what you like working with. You basically need to fit images and text on a page, so your options are limitless.