
One of the first projects I worked on when arriving in Santa Fe was actually for a scenic element. One of the shows has a number of decorative balustrades way upstage, and they wanted to vacuum form them. I was tasked with turning the wooden master.
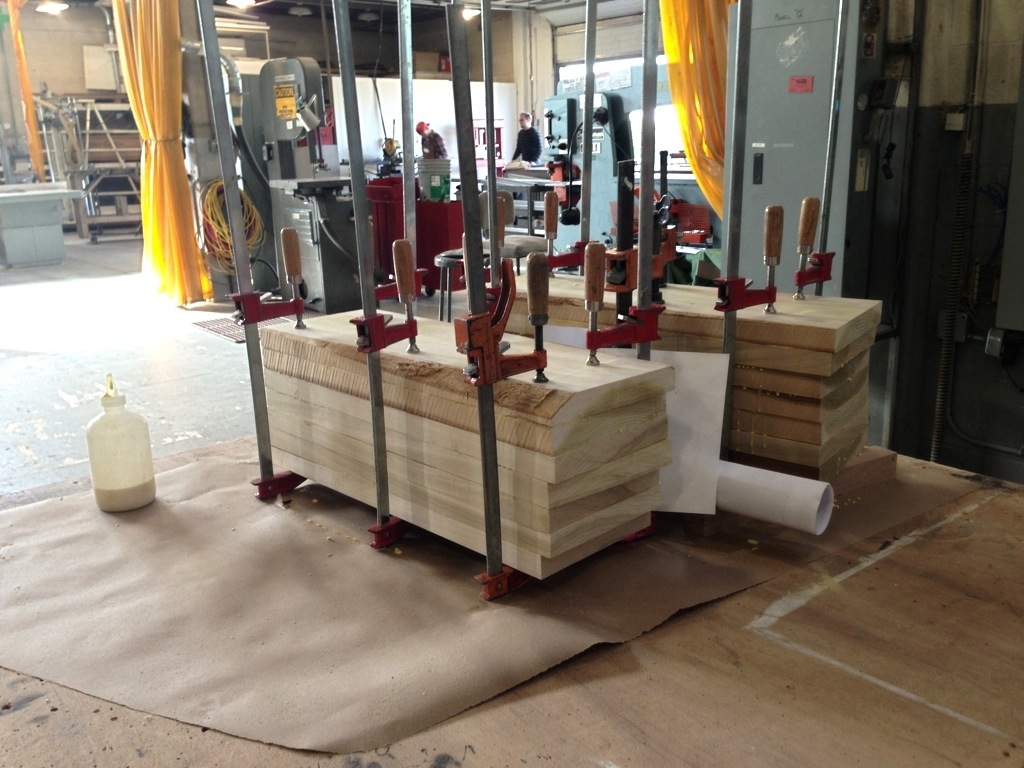
The first step was gluing up a number of poplar boards. This was going to be a fairly thick piece. I made two, so I could split them down the middle and give them four halves to vacuum form on a single sheet of plastic.
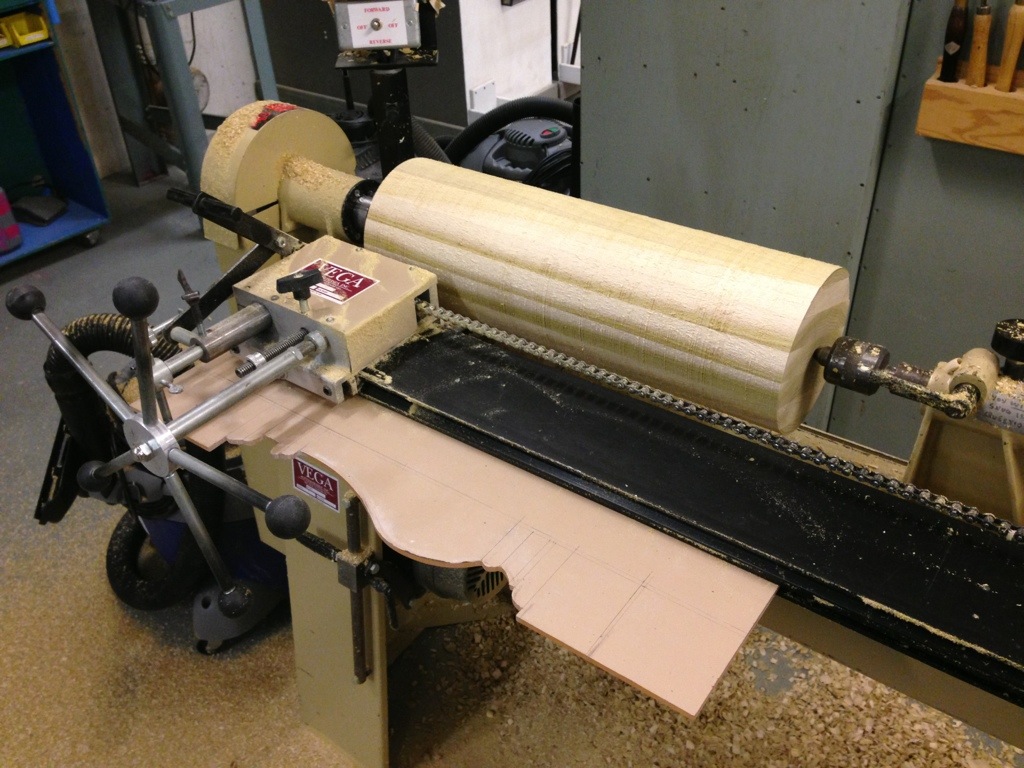
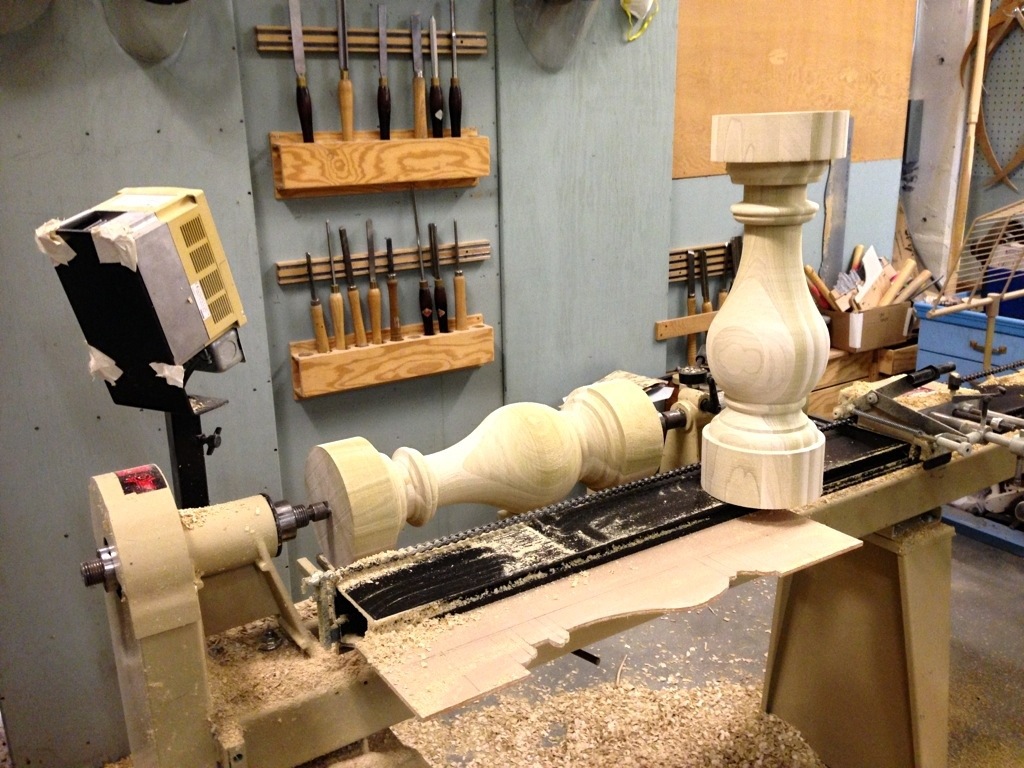
The lathe in our props shop has a duplicater set up. This allows you to cut out the profile of what you want to turn in a thin sheet of plexiglas, and the blade can follow that shape. You still need to finish it up by hand to make sharp corners and smooth it out, but it helps keep your shapes and sizes consistent across multiple pieces.
Above are the two balustrades, ready to go!
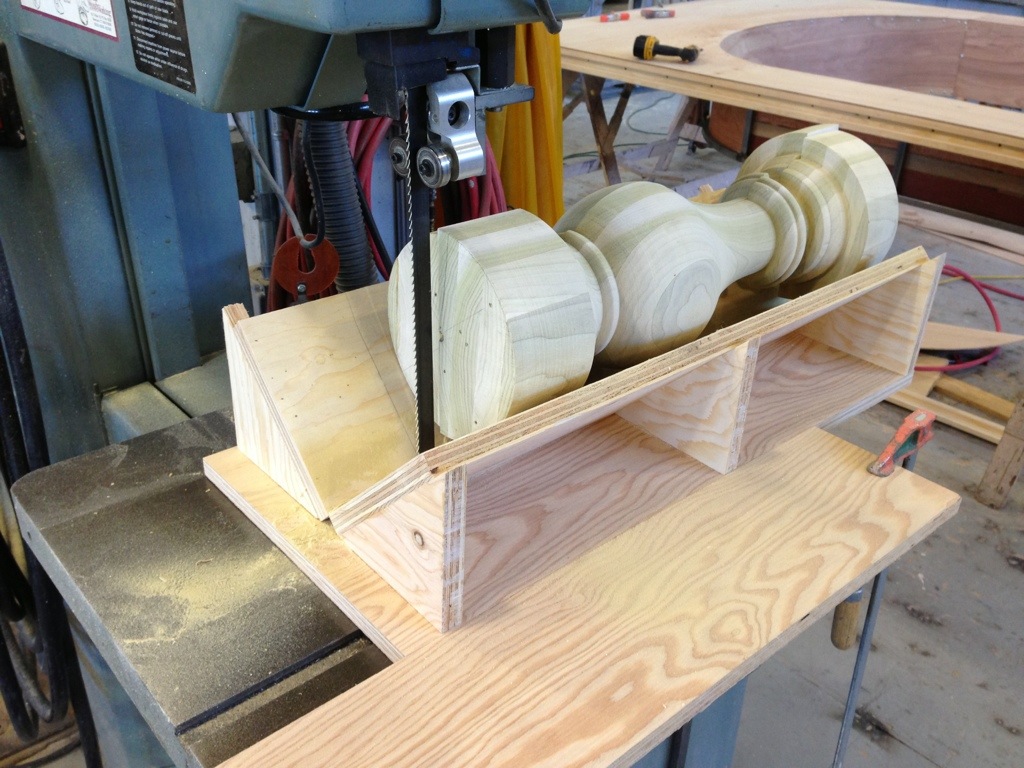
Next I had to split them directly in half. Luckily, we have a massive bandsaw, and I could build an oversized dowel-splitting jig to cut the whole baluster in half in one pass.
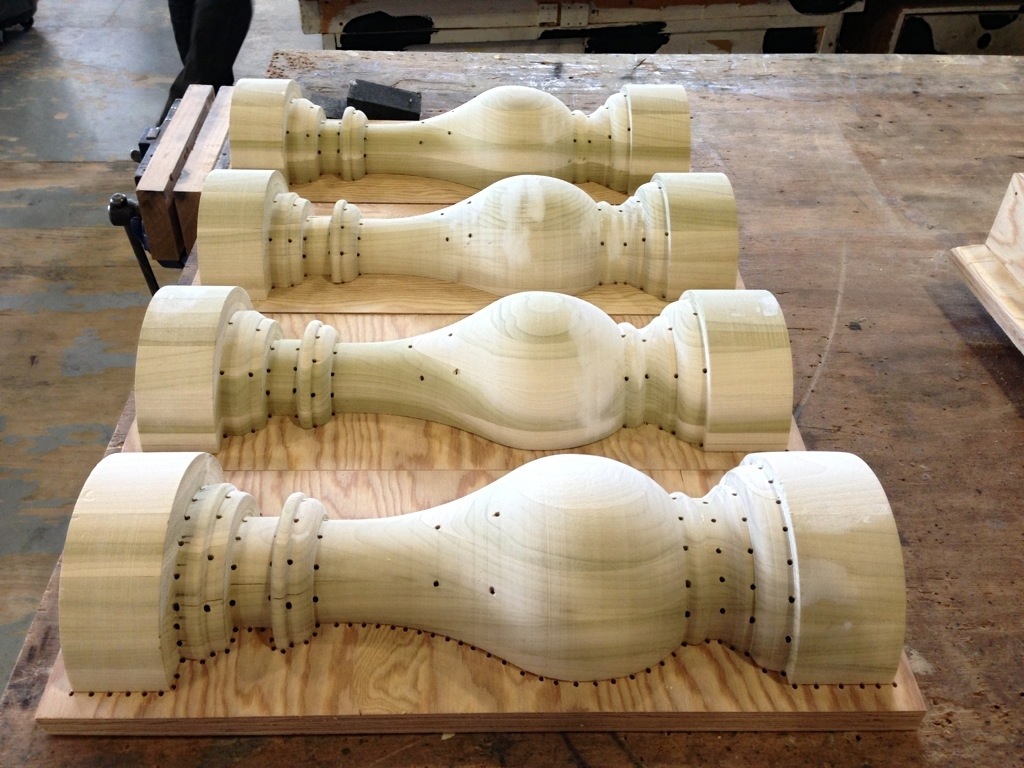
The next step included a new technique for me. I had to drill holes throughout the wooden mold for the vacuum to pull air through, paying particular attention to the undercuts. They also asked me to mount the molds on a sheet of plywood with a gap underneath, and drill holes all along the periphery. Since the vacuum form platen only has holes at regularly-spaced intervals, it would not suck the plastic tight against the bottom of the mold; this technique was like creating a custom platen to sit on top of the regular platen.
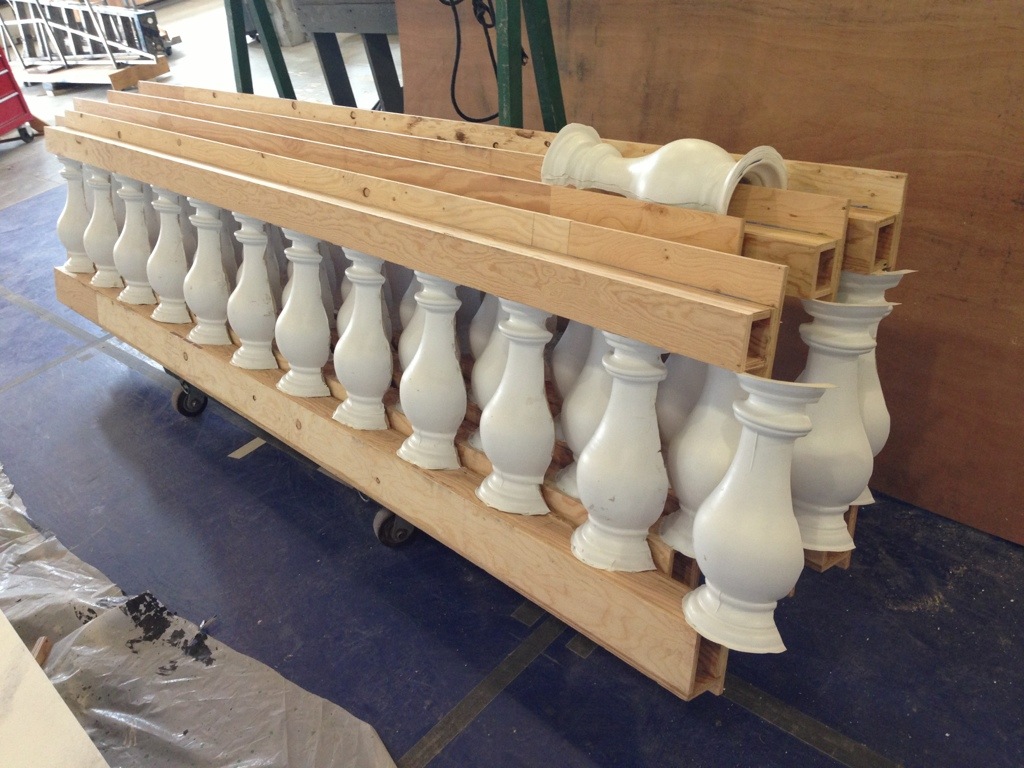
That was actually the end of my part. The scenery department took my molds and began running them through the vacuum former. I don’t have any pictures of that, but I do have a video of the machine in action. Above is a photo of the resulting pieces as they get mounted to the scenic piece.


