Happy first day of May, everyone! I’m going into tech today, so the links will be short but sweet:
Jay Duckworth made 160 candlesticks for Hamilton, the most popular show in the world right now. Read his article in Stage Directions to find out how he did it. Hint: he used his drill press like a lathe. Okay, that’s a bit more than a hint.
Behold! The quickest tutorial on Wonderflex! Demented Cosplay has a video briefly going over the properties of Wonderflex, a plastic sheet that becomes pliable with very little heat, and hardens into place at room temperature.
NPR had a cool radio story a few weeks ago on Melissa McSorley, a food stylist for Hollywood films. She’s done everything from making 800 Cubanos for Chef, to a foot-tall mound of caviar, to a cake that looks like Al Pacino.
Just down the road from me, Playmakers Rep is doing Enemy of the People.  The costume shop needed to age one of their suits, but they didn’t want to ruin it for future use. So they turned to Schmere, which makes a line of products that stain and distress fabrics, but disappear when you wash or dry clean them. I bet you can find uses for this for soft goods and fabric props, or you can just tell your costume shop manager for some brownie points.
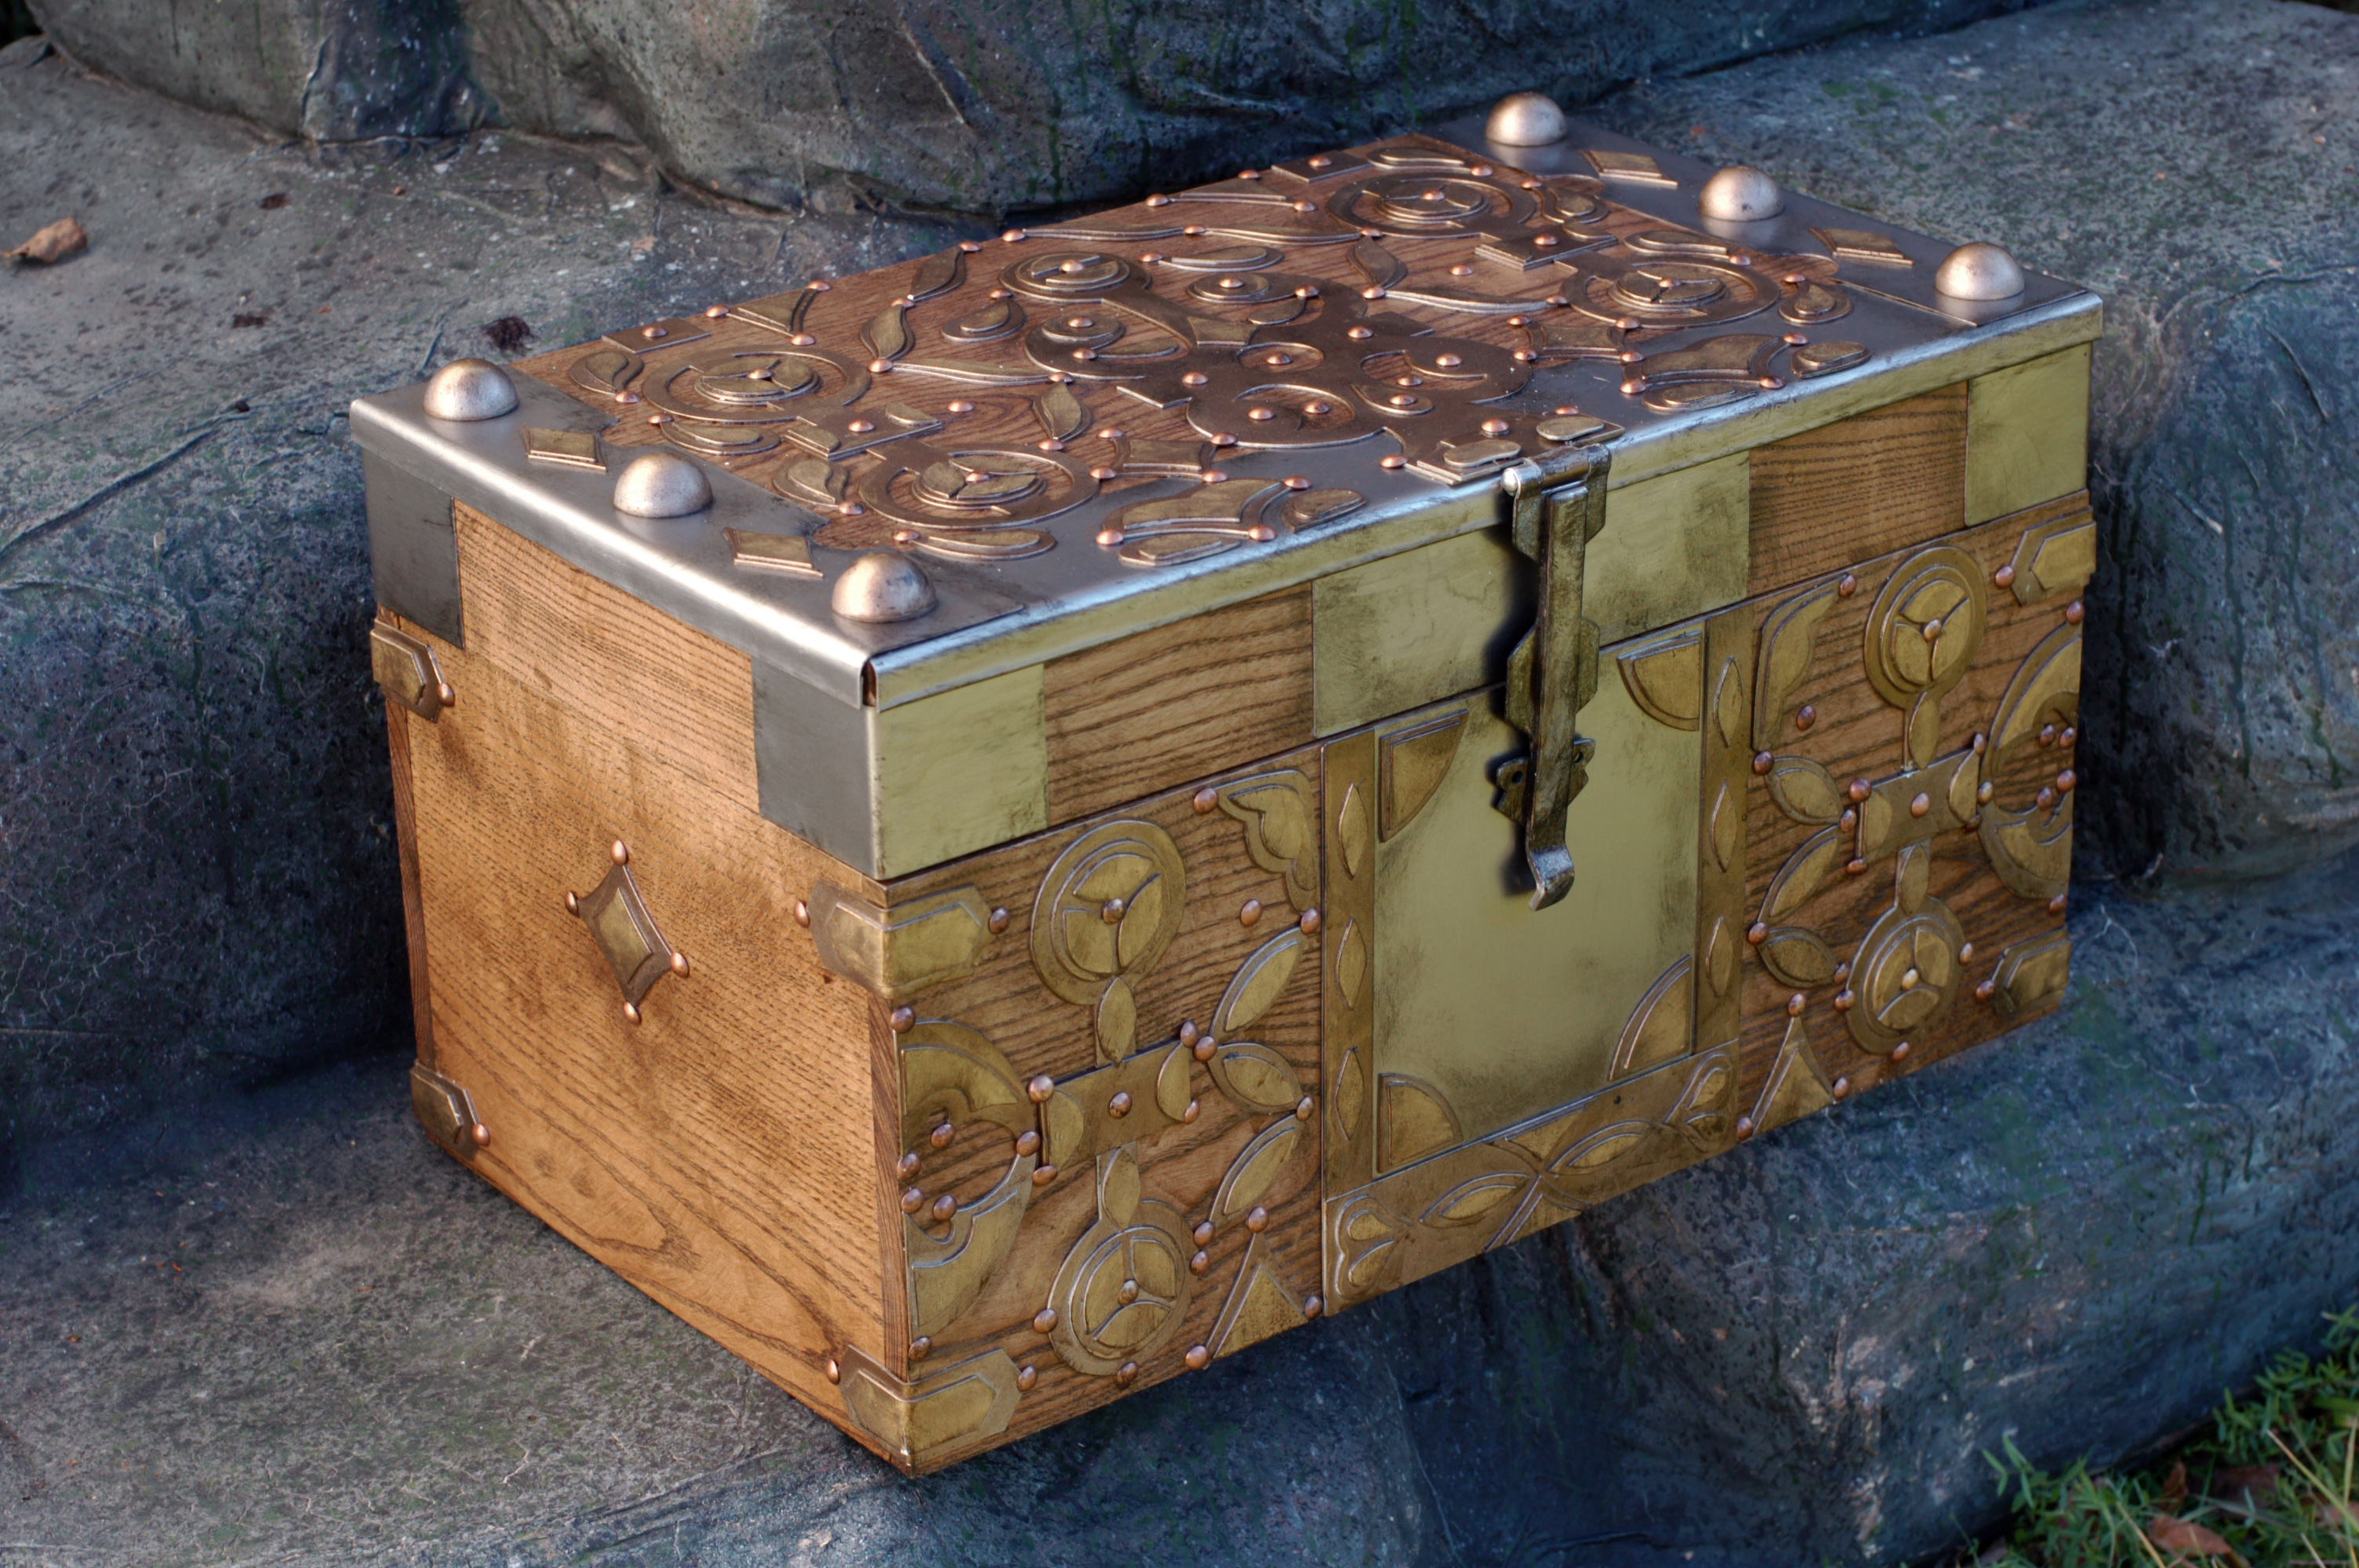
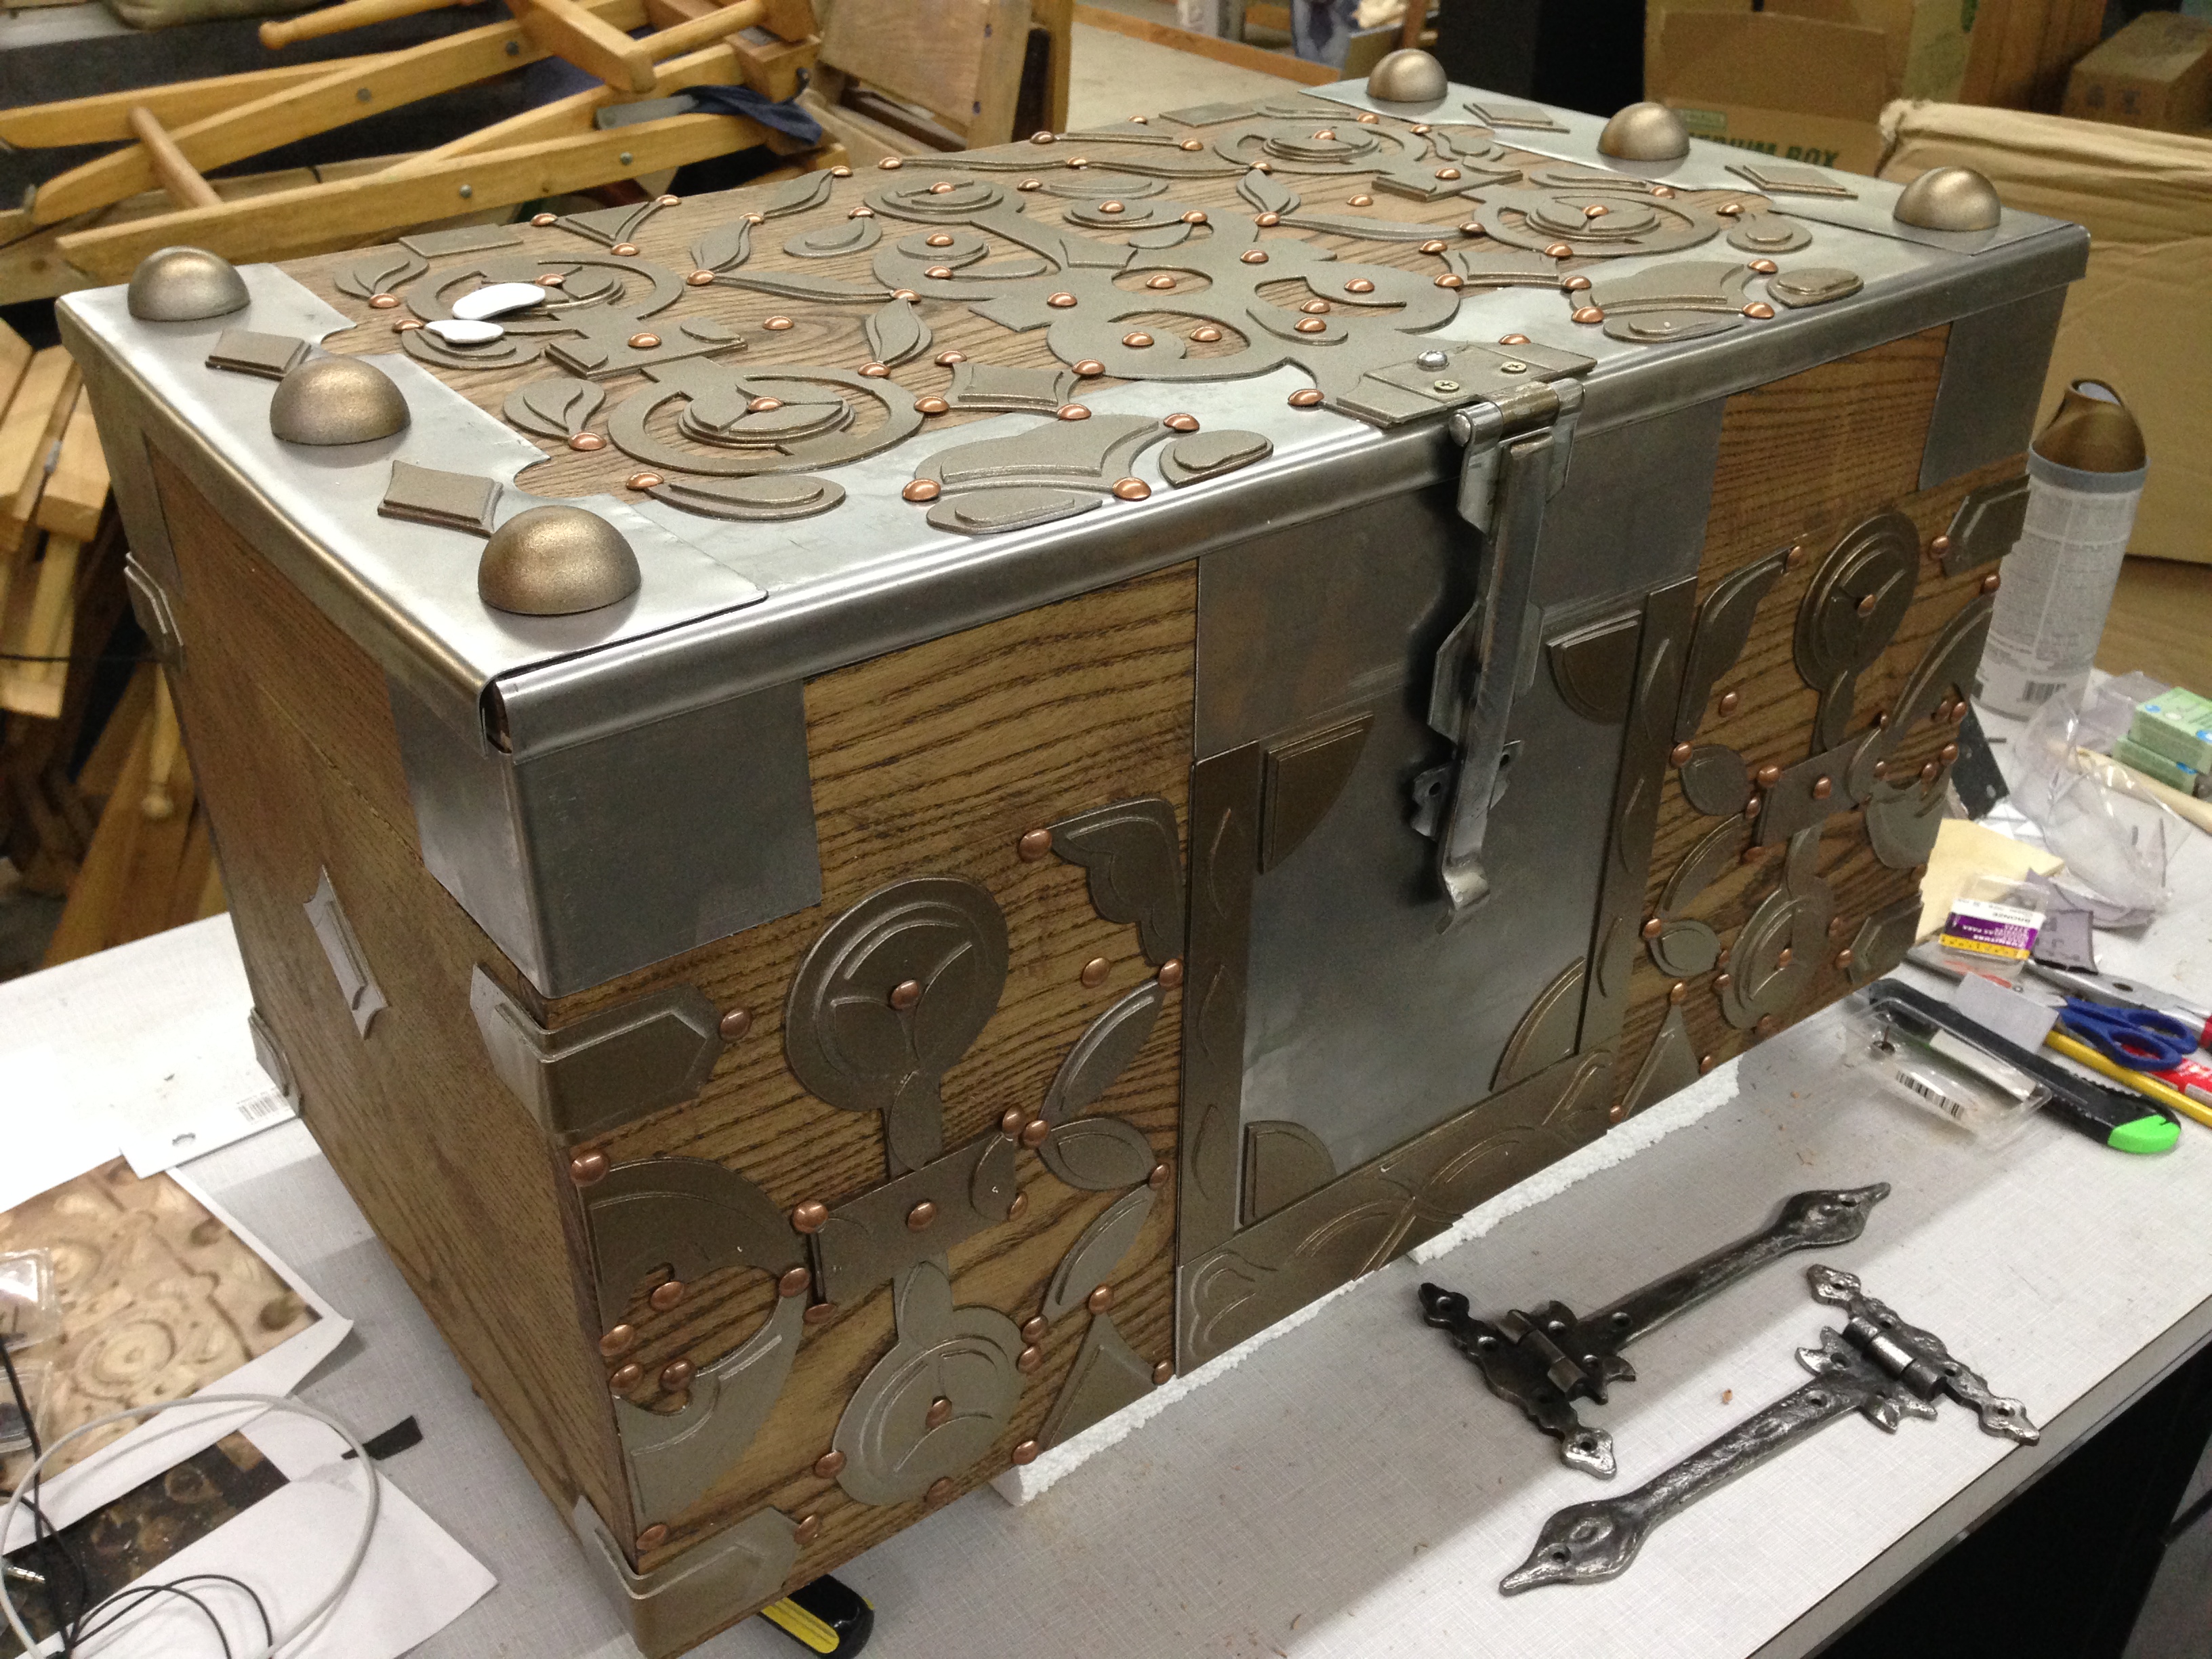
Usually, I am building props for a show or production I am working on. I rarely have time to work on my own projects. However, someone was interested to see if I could replicate a chest from the television show Game of Thrones. Now, I have nothing to do with the show itself, but it sounded like an interesting challenge to see if I could match something I could only see on screen. There wasn’t anything particularly tricky about this chest; it just had a lot of pieces and parts made of an assortment of materials, and some very time-consuming detail. For those who watch the show, this is the chest given to Daenerys in season one, which held her petrified dragon eggs.
I shot video of most of the build along the way and somehow edited several months of work into seven and a half minutes of video, giving an overview of the process.
If you are interested in more detail and photographs, read on!
Daenerys’ chest of dragon eggs
The first part was the box itself. I worked out a quick mock-up of the whole piece in SketchUp to figure out the sizes and proportions of all the parts. I decided to use ash on this because it is hard and strong like oak, but I really hate working with oak. The grain pattern of ash was also a better match to the real chest than oak. We have a great local hardwood store that I visited, and I was able to find boards wide enough that I could build every side (except the top) from a single width of wood. The bottom was a piece of oak plywood.
Wooden box
The chest has a number of areas covered in metal. I bought a sheet of 22 gauge steel and cut it up by hand with my airplane snips. I used my sheet metal bending brake on the corner pieces, while the rolled-over edges of the top pieces were bent by hand with sheet metal tools and pliers. Although I could have saved time by making these out of plastic and painting them to look like metal, the “roll over” parts would have ended up too fragile; on the very corners, you can see how thin the metal is, and any plastic that thin would flex whenever you touch it. The hasp on this chest also rests against a metal section, so it gives that solid metal-to-metal sound every time you open and close the lid.
Sheet metal layers
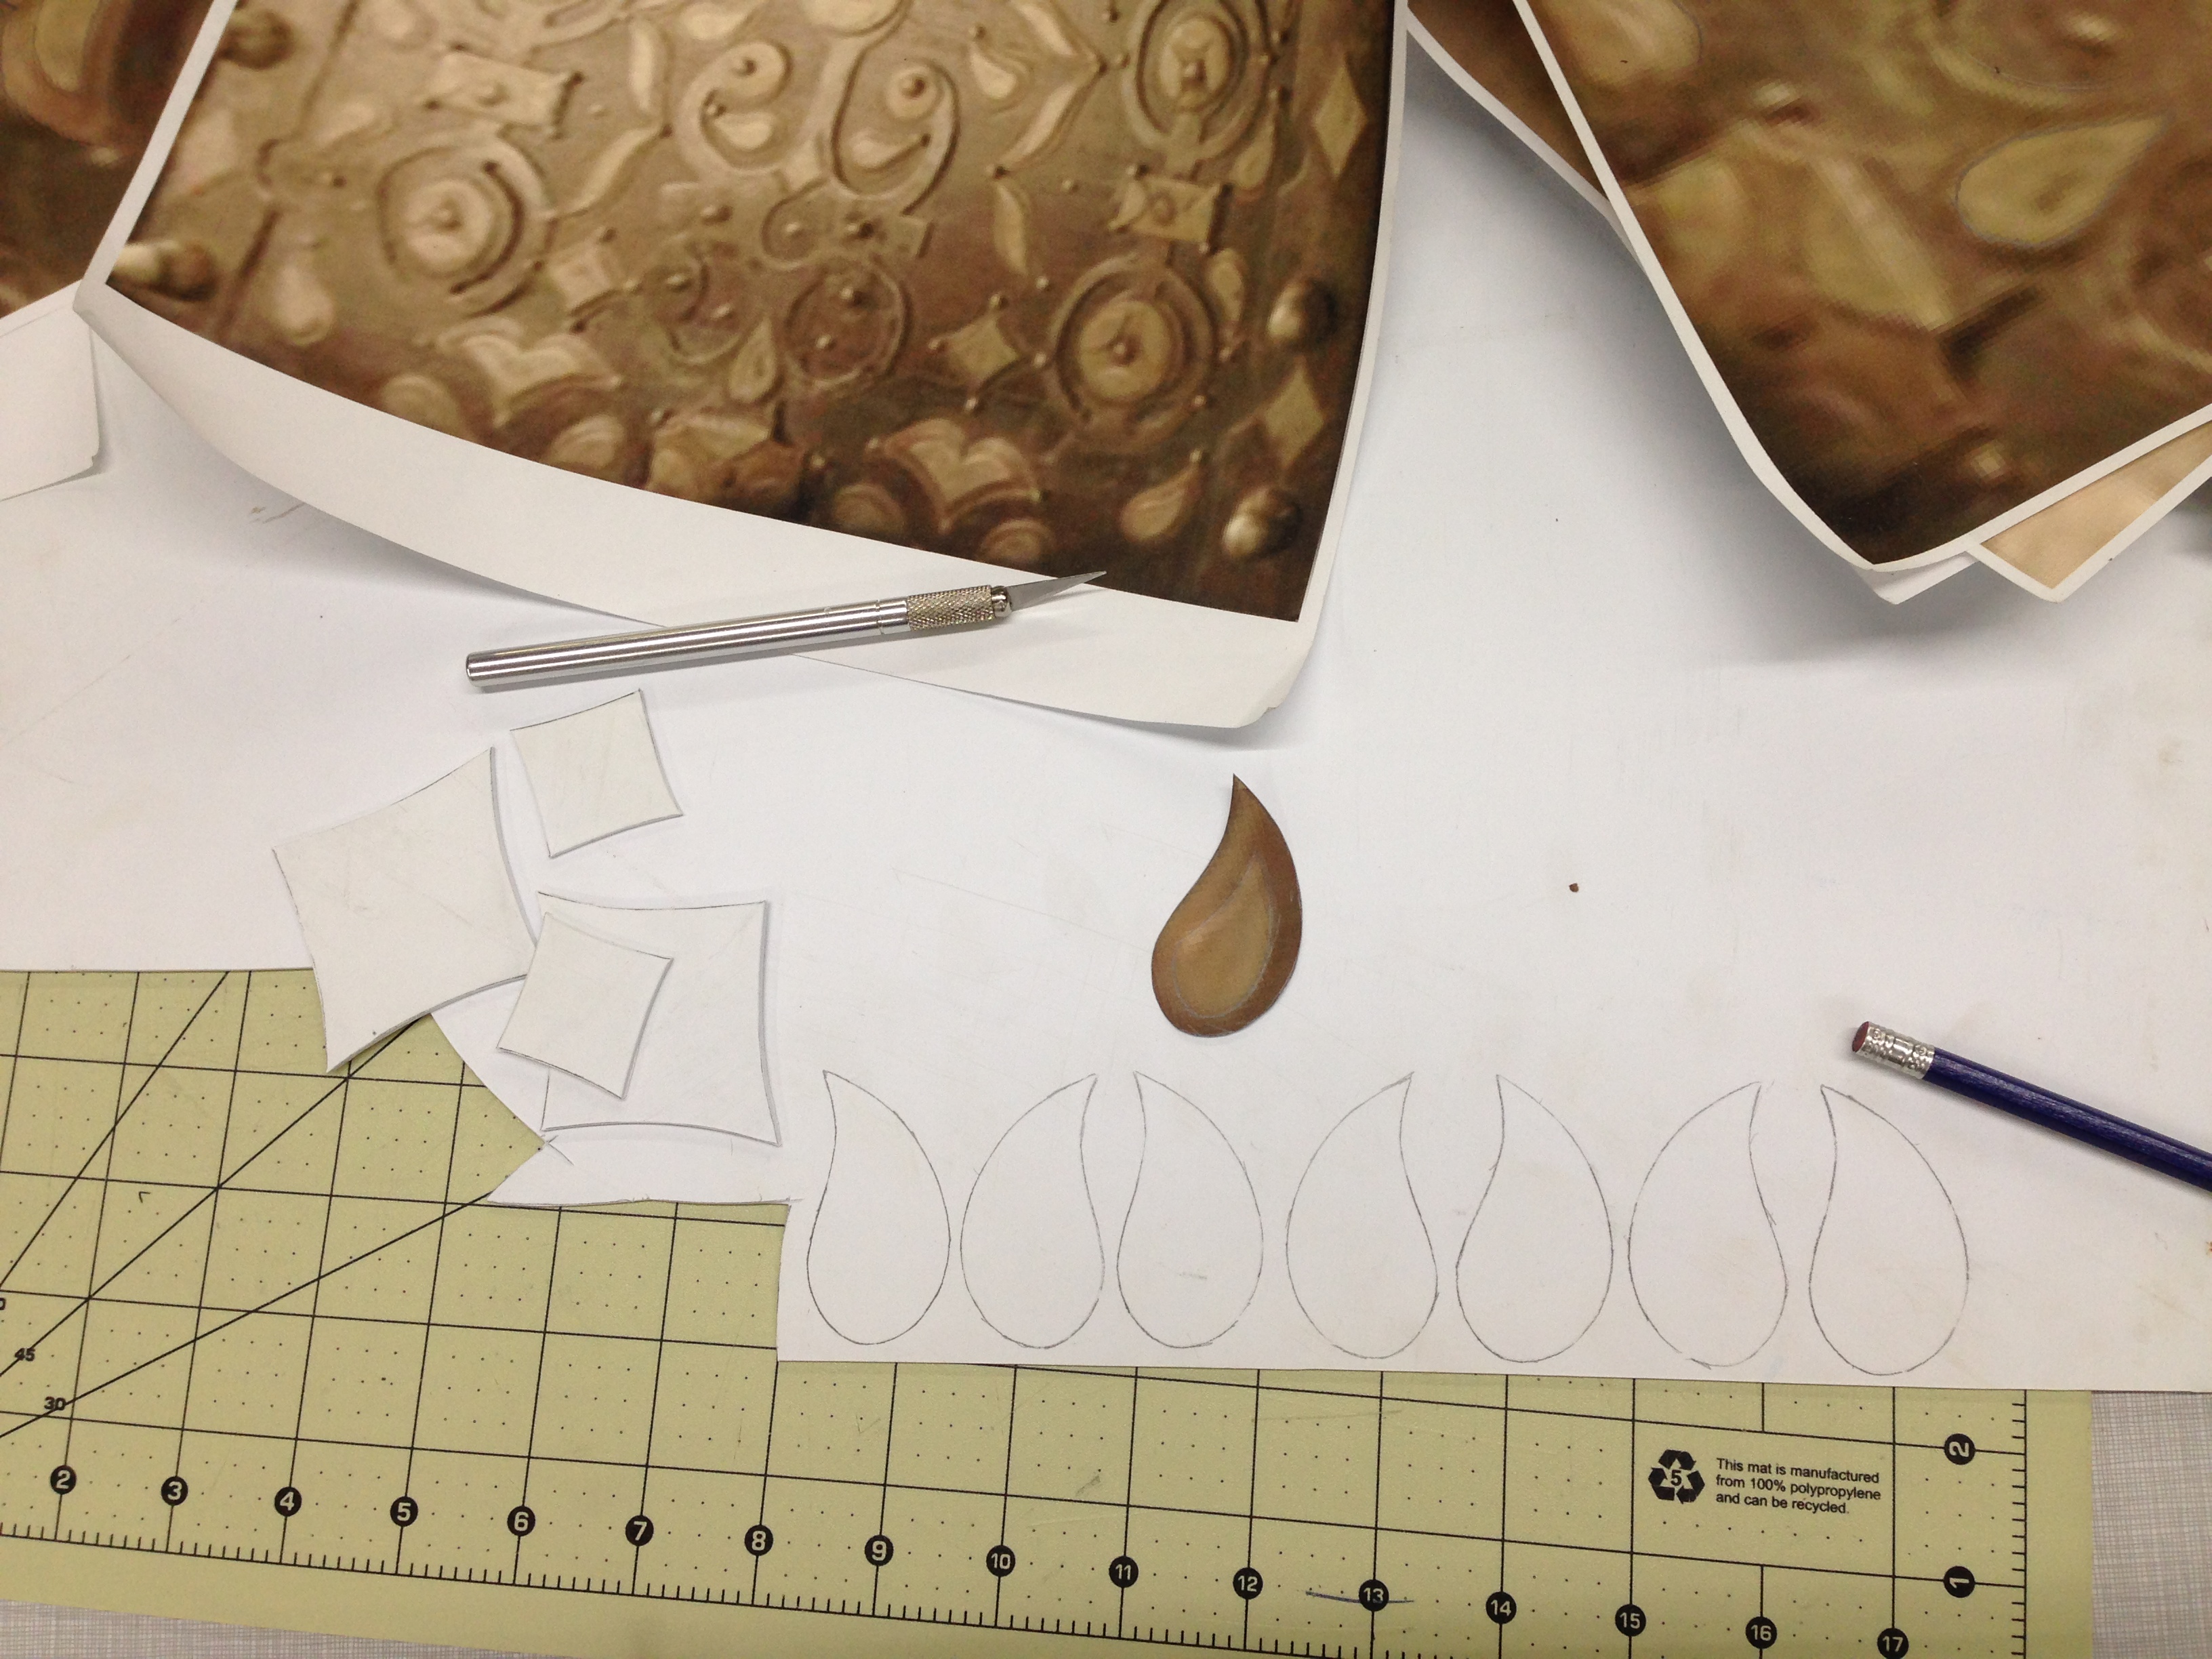
The most time-intensive part was the applied decoration. I used styrene plastic for this because using actual brass would have been prohibitively expensive and time-consuming, and a cheaper metal would have required just as much paint to match the appearance that the added labor was not worth it. I began by going through all the scenes in the TV show where the chest appeared and pulling out as many clear screen shots as I could, and then manipulating them in Photoshop to get a straight-on view. I scaled them up to full-size, printed them out and cut the pieces into patterns to trace on the styrene. Some parts of the design needed to be extrapolated slightly because I never got a clear view, but because it was symmetrical, repetitive and followed a certain logic, I was pretty confidant with how well my version matched the original.
Patterns and reference
Nearly every element was made of at least two layers of styrene, so after cutting the several hundred pieces out, I began gluing them together using model airplane glue. I did not attach them to the box just yet, but I did lay them out to test fit everything.
Unpainted decoration
With all the pieces ready, I began painting. They received a base coat of hammered silver spray paint, followed by a heavy dusting of hammered bronze spray paint. They would receive more paint later on, but at this point I began attaching them. Working on one side at a time, I first laid every piece out and used careful measurements to make sure everything was symmetrical and evenly-spaced. I then traced every single piece in place and labeled them by number before taking them off. I did some tests and found contact cement gave the strongest bond, though that meant I had to apply it to both the plastic piece and the box, and I could not apply it to the parts of the box where the wood was visible, so I had to carefully paint it within the traced outlines I had made. Luckily, the contact cement bonds almost instantly, so I could begin working on another side after one was completed.
Spray painted pieces
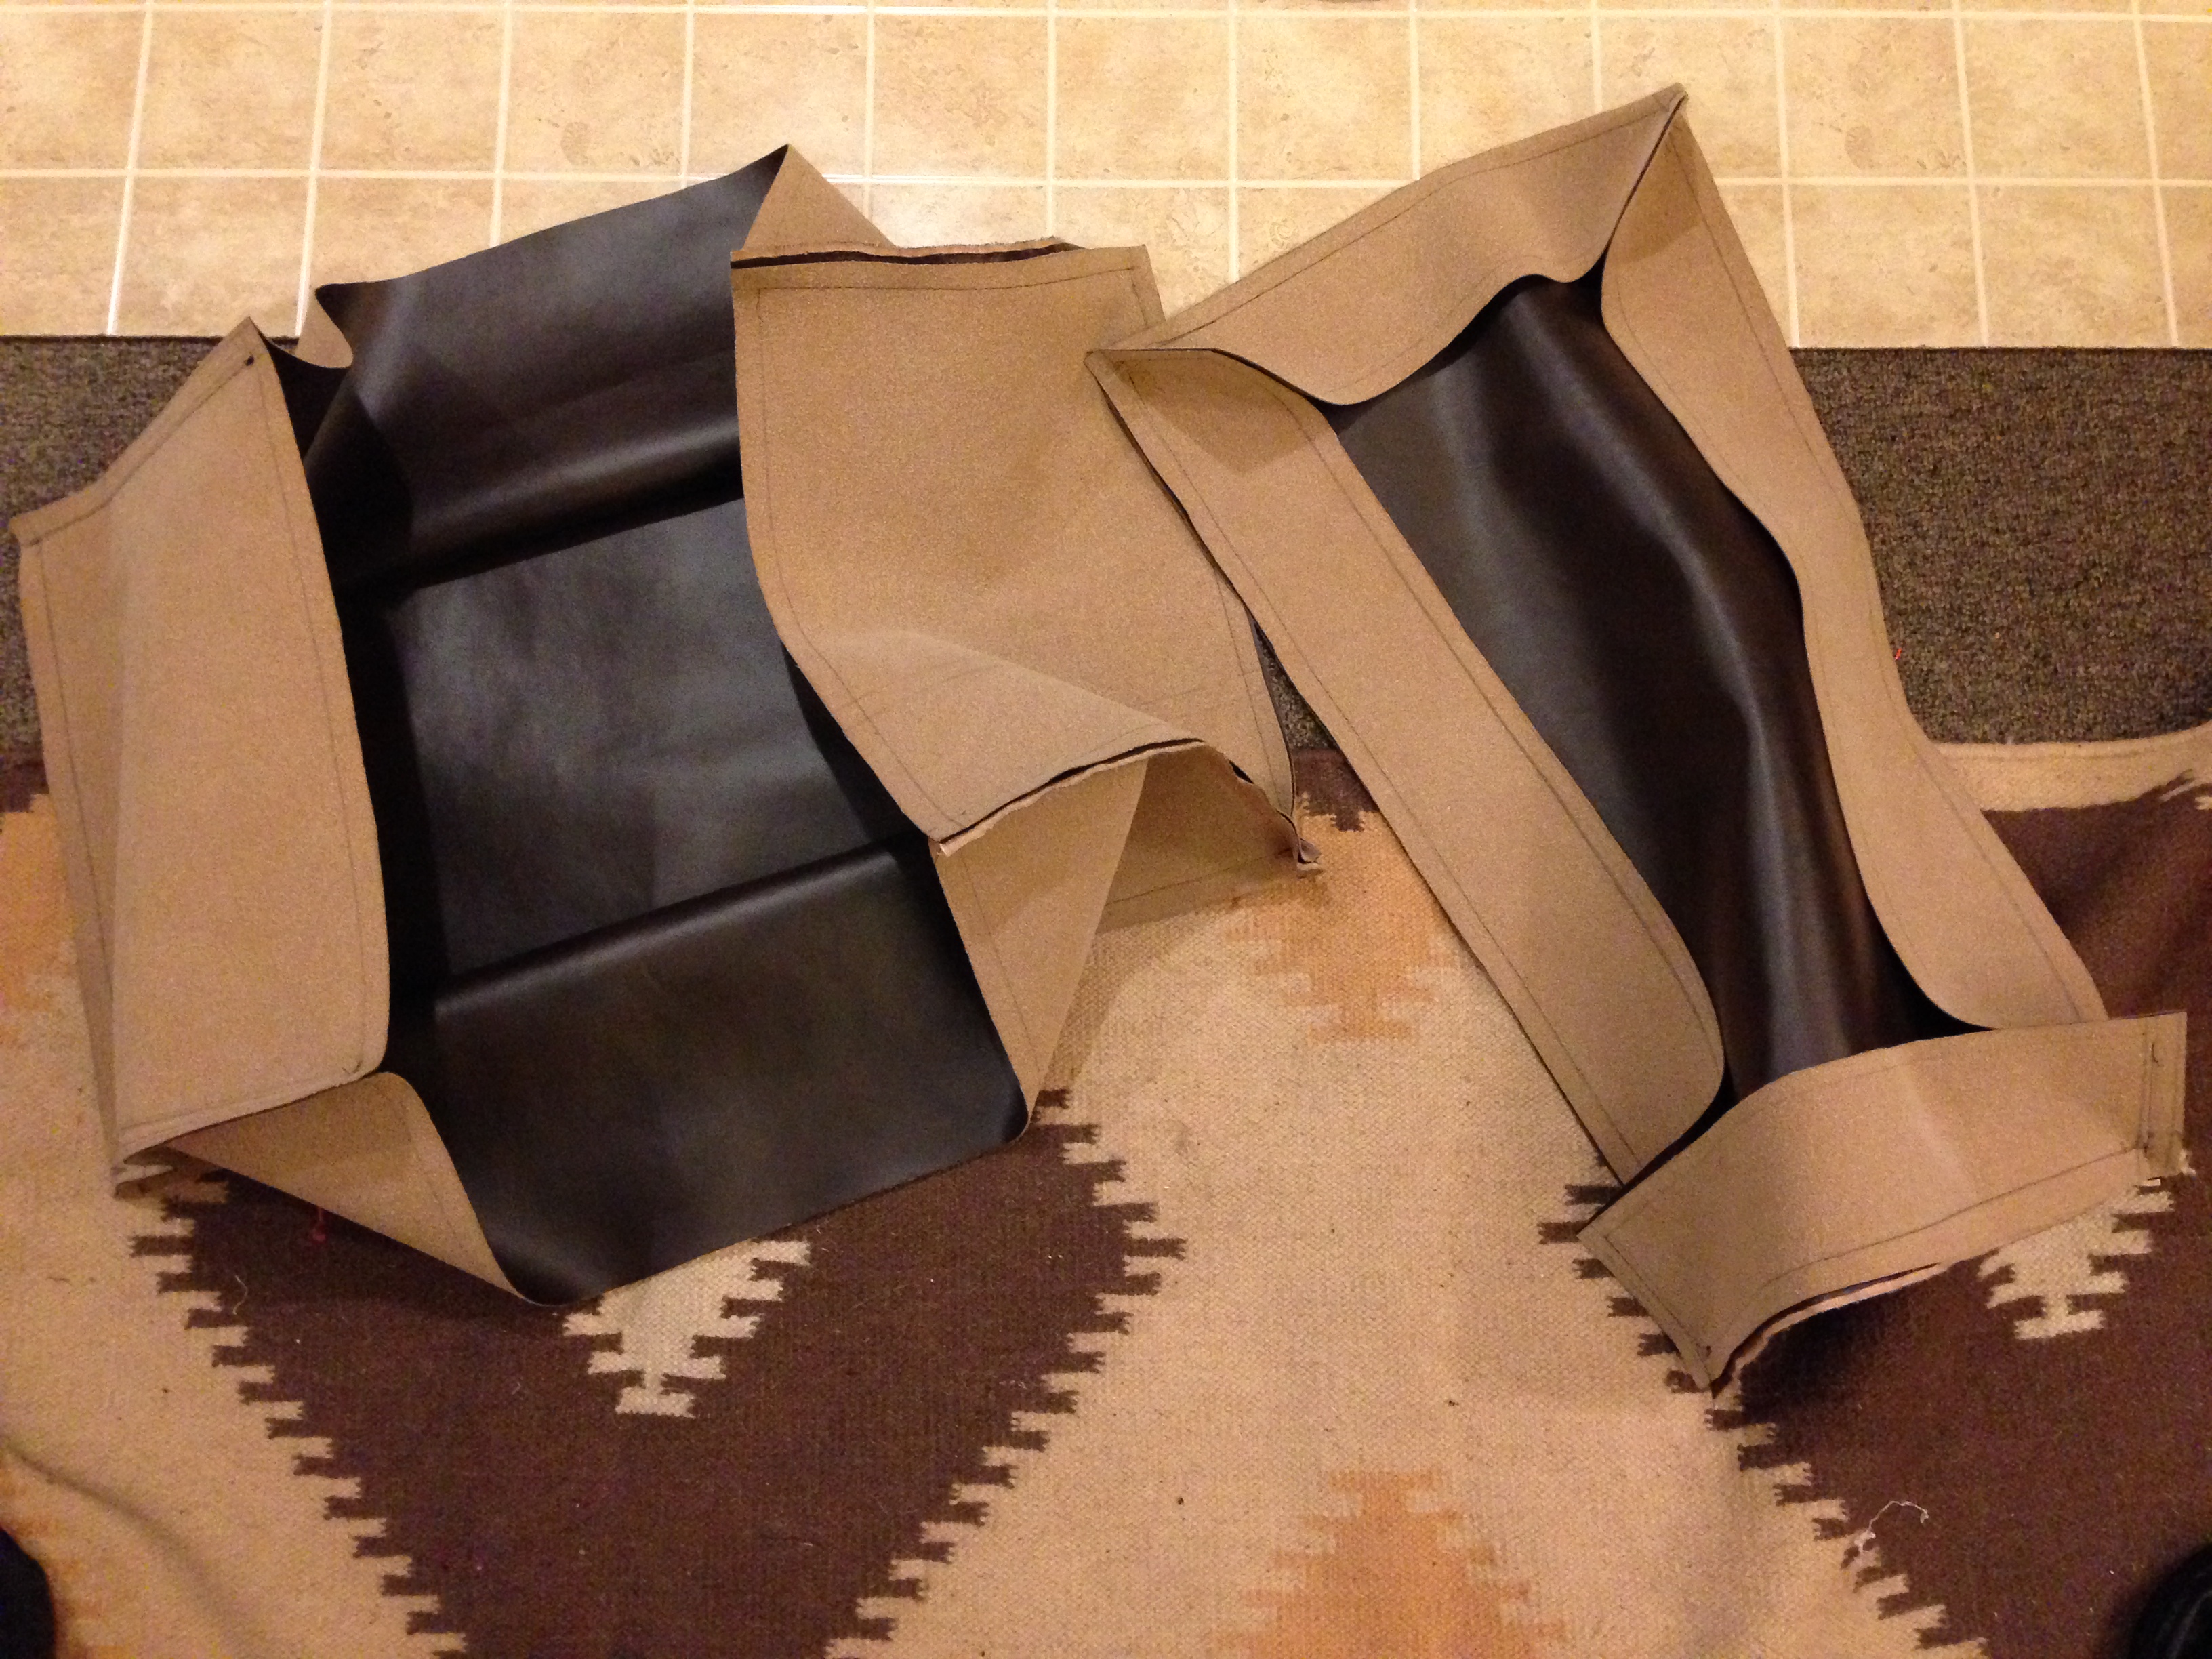
The inside of the chest was leather, though I went with a slightly-more processed version which was already finished and could fit through my sewing machine. I stitched all the pieces together first, and then attached them in as a single unit. I used a bit of spray adhesive to keep them from shifting around, but they are mostly held in place with the visible upholstery tacks. I pre-drilled holes for the tacks so I could make sure the spacing was even, and also because the ash was too hard to just hammer the tacks straight in.
Leather interior
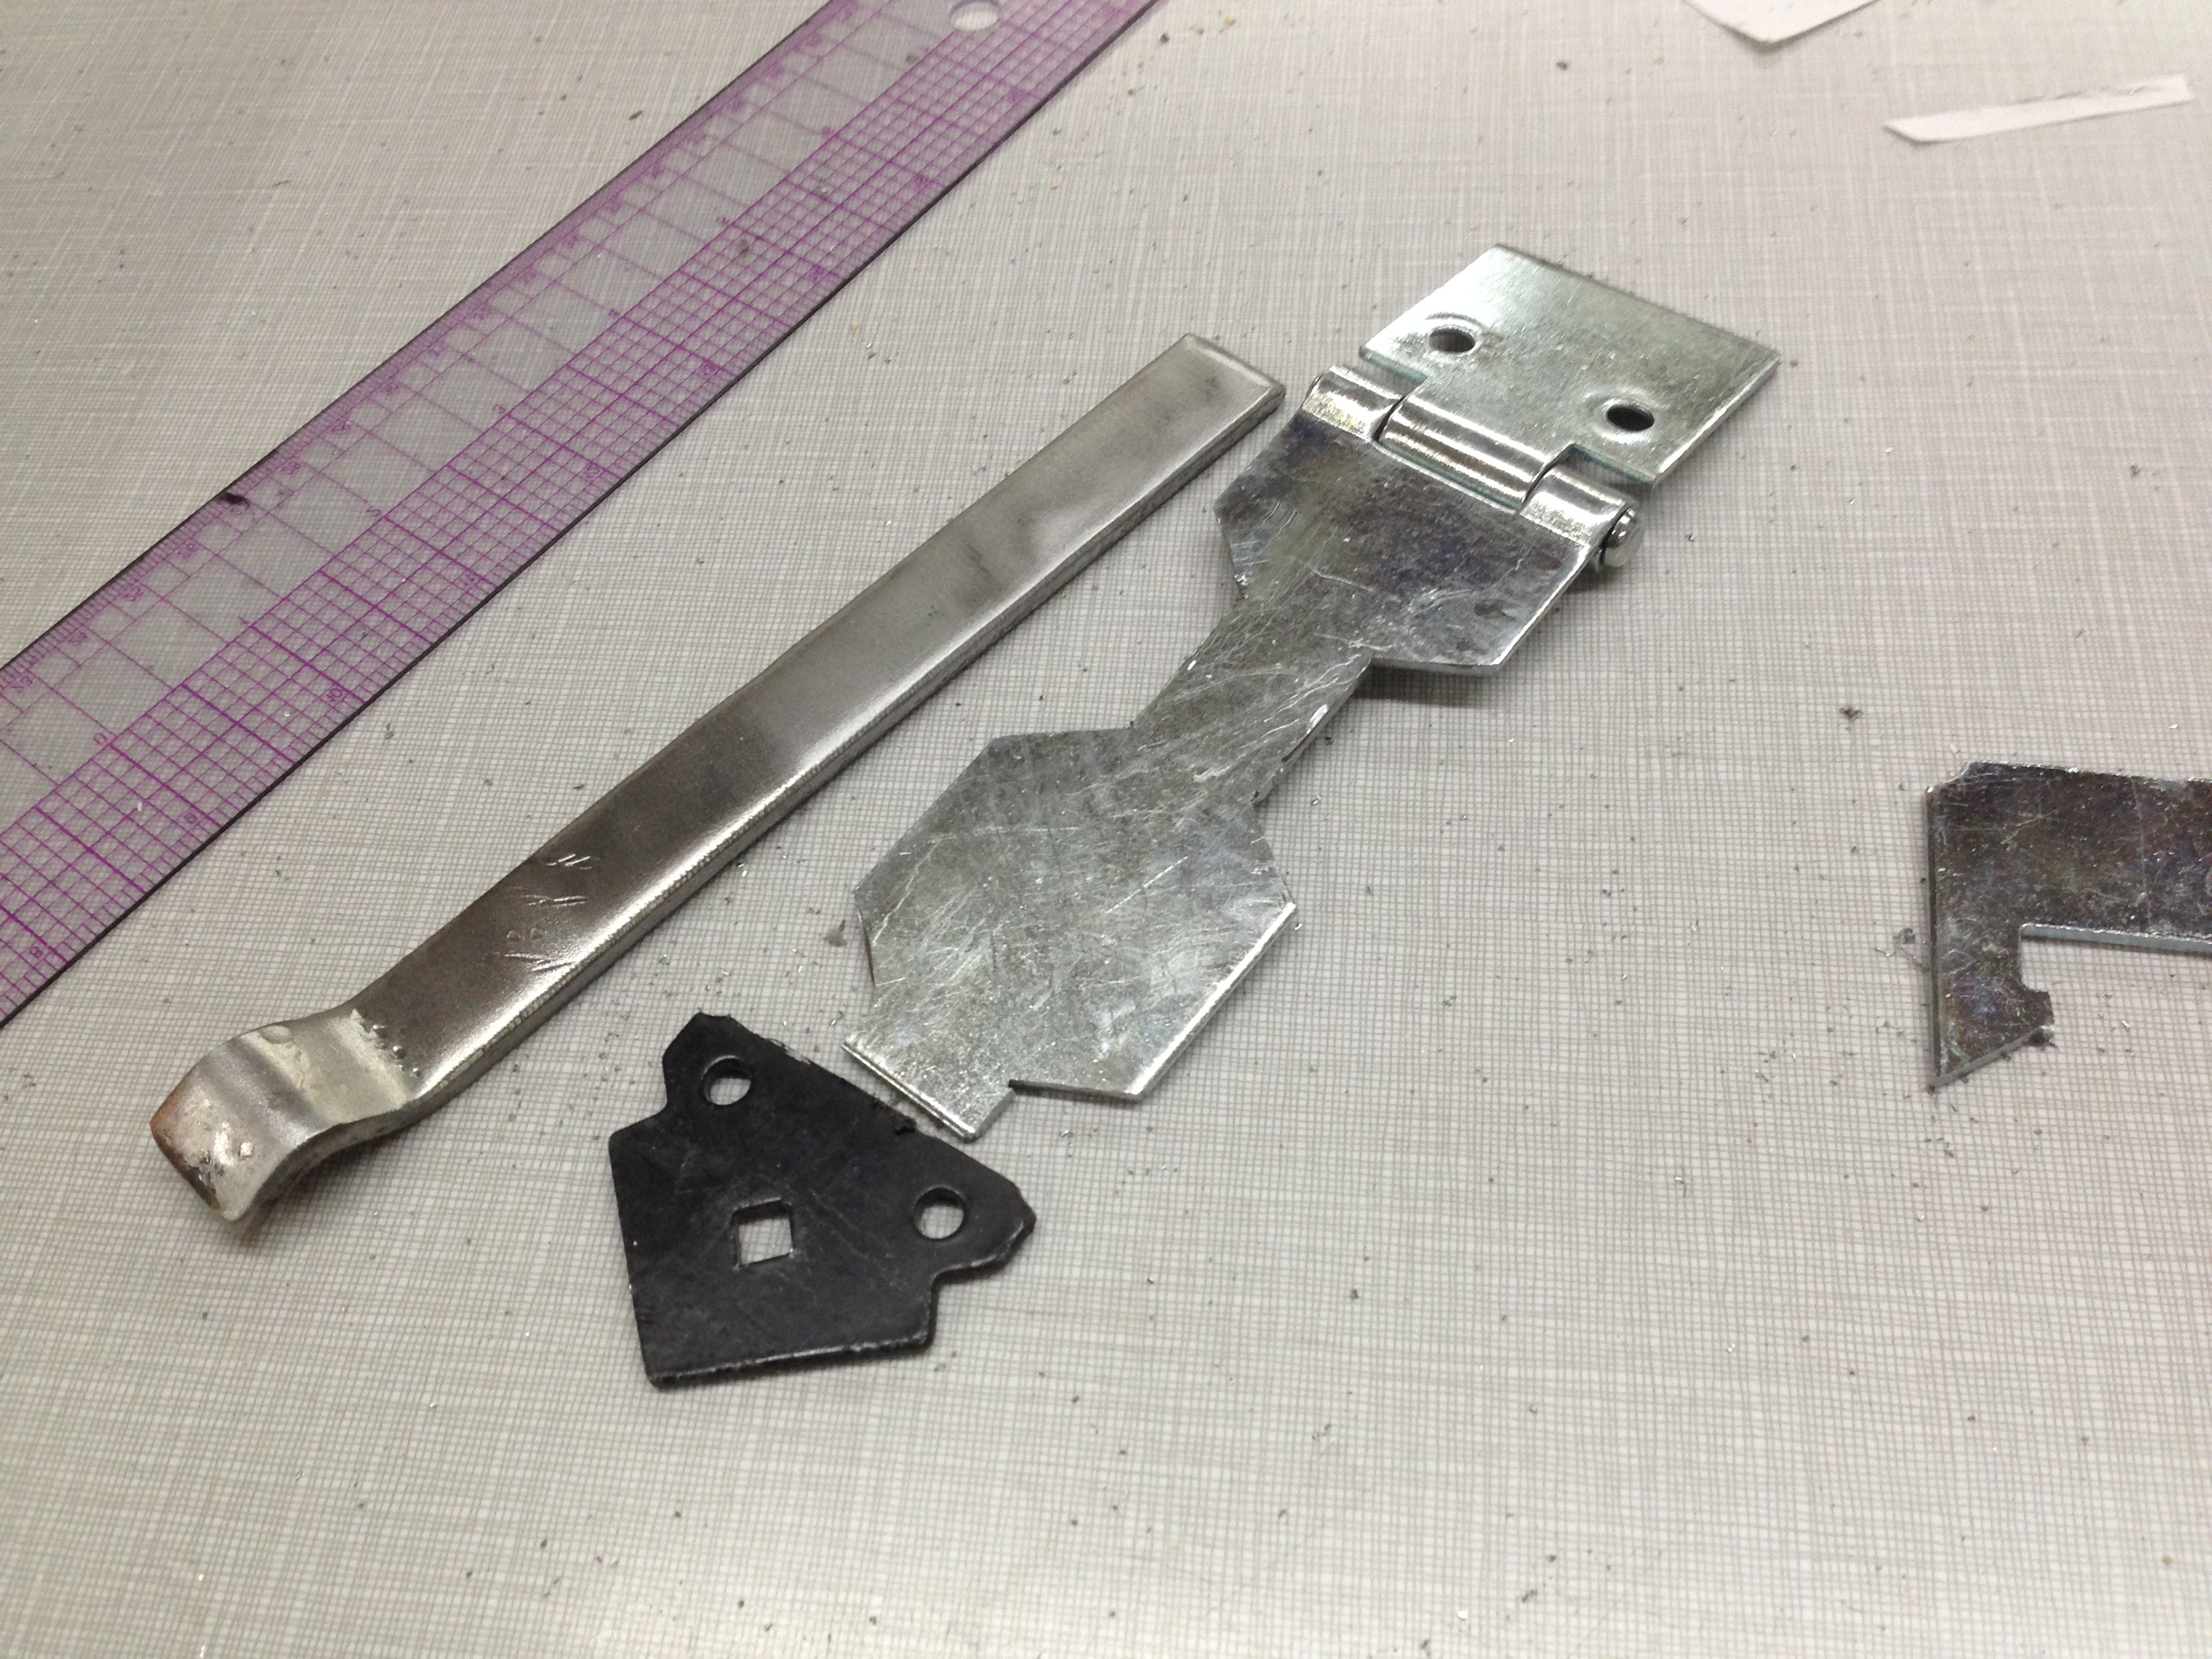
I found hinges online that were so close to the ones on the real chest that I wouldn’t be surprised if the prop makers bought theirs from the same supplier. I could not source the hasp though, so I had to fabricate it from scratch. I started with a basic hardware store hasp and cut notches in the edges. The tip was cut from another decorative gate hinge. I cut a bar of steel to length and bent a curl in the edge, than plug welded the whole thing together from behind and ground the welds flush to the surface.
Pieces for the hasp
With all the pieces in place, all that was left was some painting and sealing. The top layers of all the decoration were sponged with a lighter brass color to set them off, and the whole chest was washed down with some dark browns and blacks to age and weather it. Finally, everything was coated in a clear satin Polycryclic.
This post is a few years old, but interesting nonetheless. Art Direction, Props and Authenticity talks about the importance of realism in prop making, specifically the realism of a prop’s weight. A prop that appears too light can take the audience out of the moment.
Game of Thrones has a new video out showing some of the work that goes into their props. It features prop master Gordon Fitzgerald, some drawings of props, and a look at how the smallest details are taken care of.
The Make Magazine blog featured a cool tip for using polycaprolactone plastic to make sanding blocks (they use Shapelock, though Friendly Plastic is another familiar brand name). If you need your sanding block to have a different shape for fitting around a curve or other odd surface, just heat it up in boiling water and reshape it to what you need.
Make Magazine has a great slideshow on “Ten Tips for Drilling Better Holes“. It is a good reminder that even seemingly simple tasks can have a lot of considerations in achieving a good result. While I would not take anything off the list they present, I would add one: be sure the drill bit will not hit your hand as it exits the other side of the material (or if it slips off).
I saw this over at La Bricoleuse and had to share: it’s a Rit Dye color chart. Choose the color you want, and it will tell you which Rit dye or combination of dyes will give you that color. Now, a lot of other factors go into achieving certain colors on particular fabrics, and Rit is not the best dye for all types of fabrics, but it is readily available at most local stores and easy to work with in a pinch, and this chart is a good starting point for many colors.
I just stumbled on a cool blog called the “Creaturiste’s Labatory”. He has a post on oil clay vs water clay in terms of sculpting, though many of the other posts are useful and interesting as well.
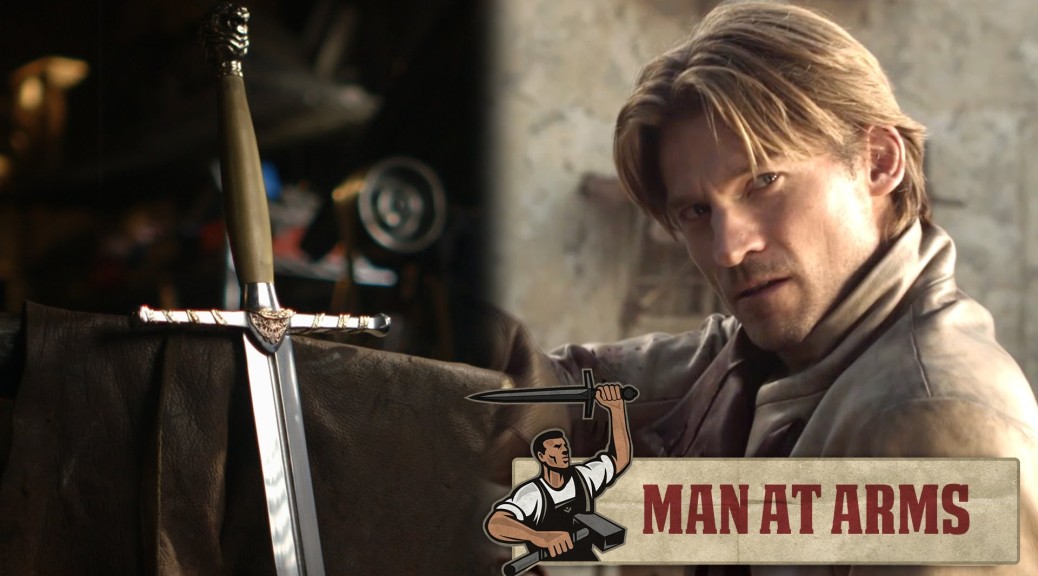
Finally, here is a very cool video of Tony Swatton forging one of the swords from the series Game of Thrones. He has a number of videos showing the making of other weapons as well. It’s amazing to see the mix of tools and techniques he uses for hand-forging custom weapons at the pace which the entertainment industry requires. Though he mainly does film, TV and theme parks, I’ve heard his name mentioned in theatrical circles as well.
Making and finding props for theatre, film, and hobbies