
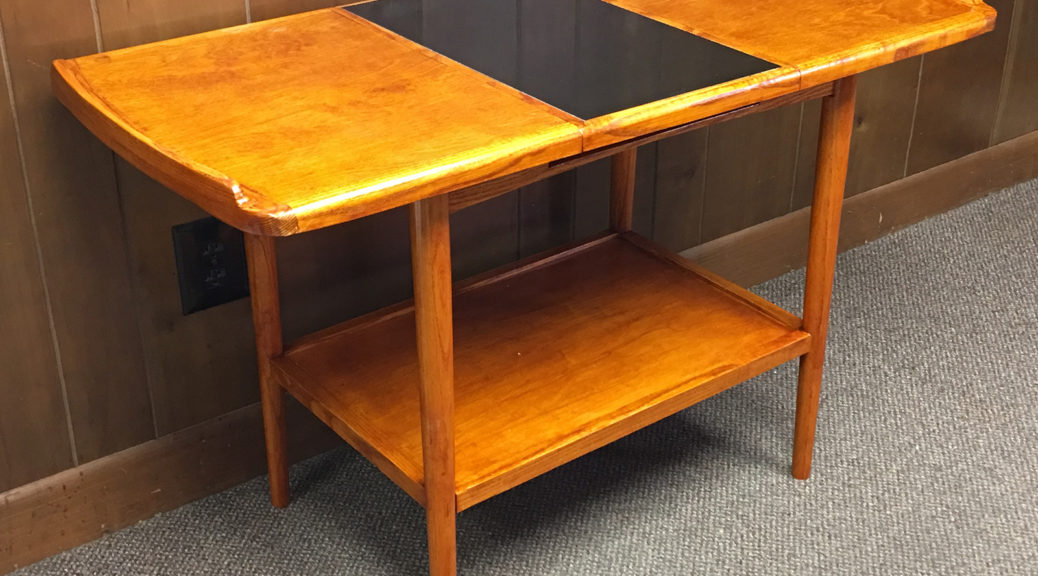
For Triad Stage’s production of Who’s Afraid of Virginia Woolf a few months ago, I needed to find a very specific bar cart. The scenic designer, Anya Klepikov, provided me with a research image of a stunning midcentury piece that was uncomfortably out of our price range. It had some challenging aspects to it, but I knew I could build it myself for a fraction of the cost.

I built the table out of a mix of oak boards and oak plywood. For the thicker pieces of oak, I laminated several pieces together.
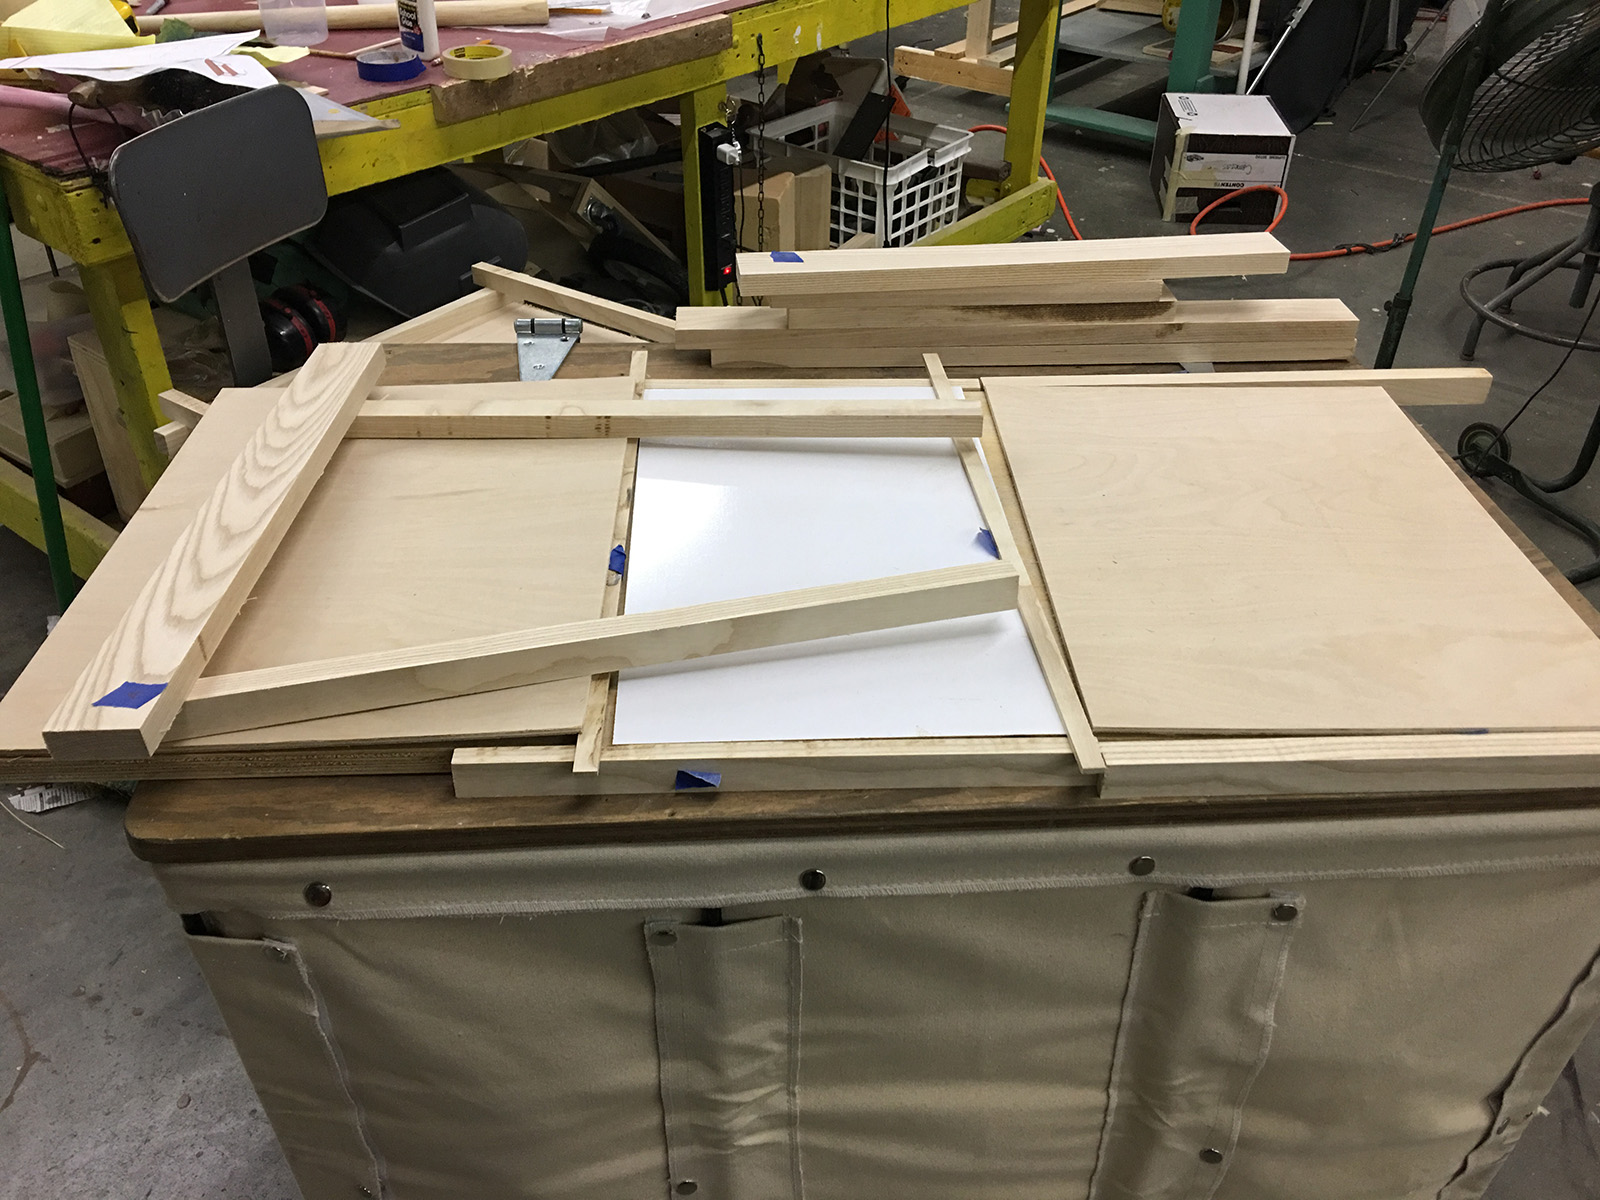
In the research image, the table of the cart splits in the middle, and a black melamine leaf is added to make it longer. Ours didn’t need to do that, so I just built the top as a single piece. It was a single sheet of plywood covered in two thin pieces of nice plywood, with a piece of melamine in the middle. The edges were strips of hardwood to cover the plywood edges. I couldn’t find black melamine, so I used white that I spray painted black.
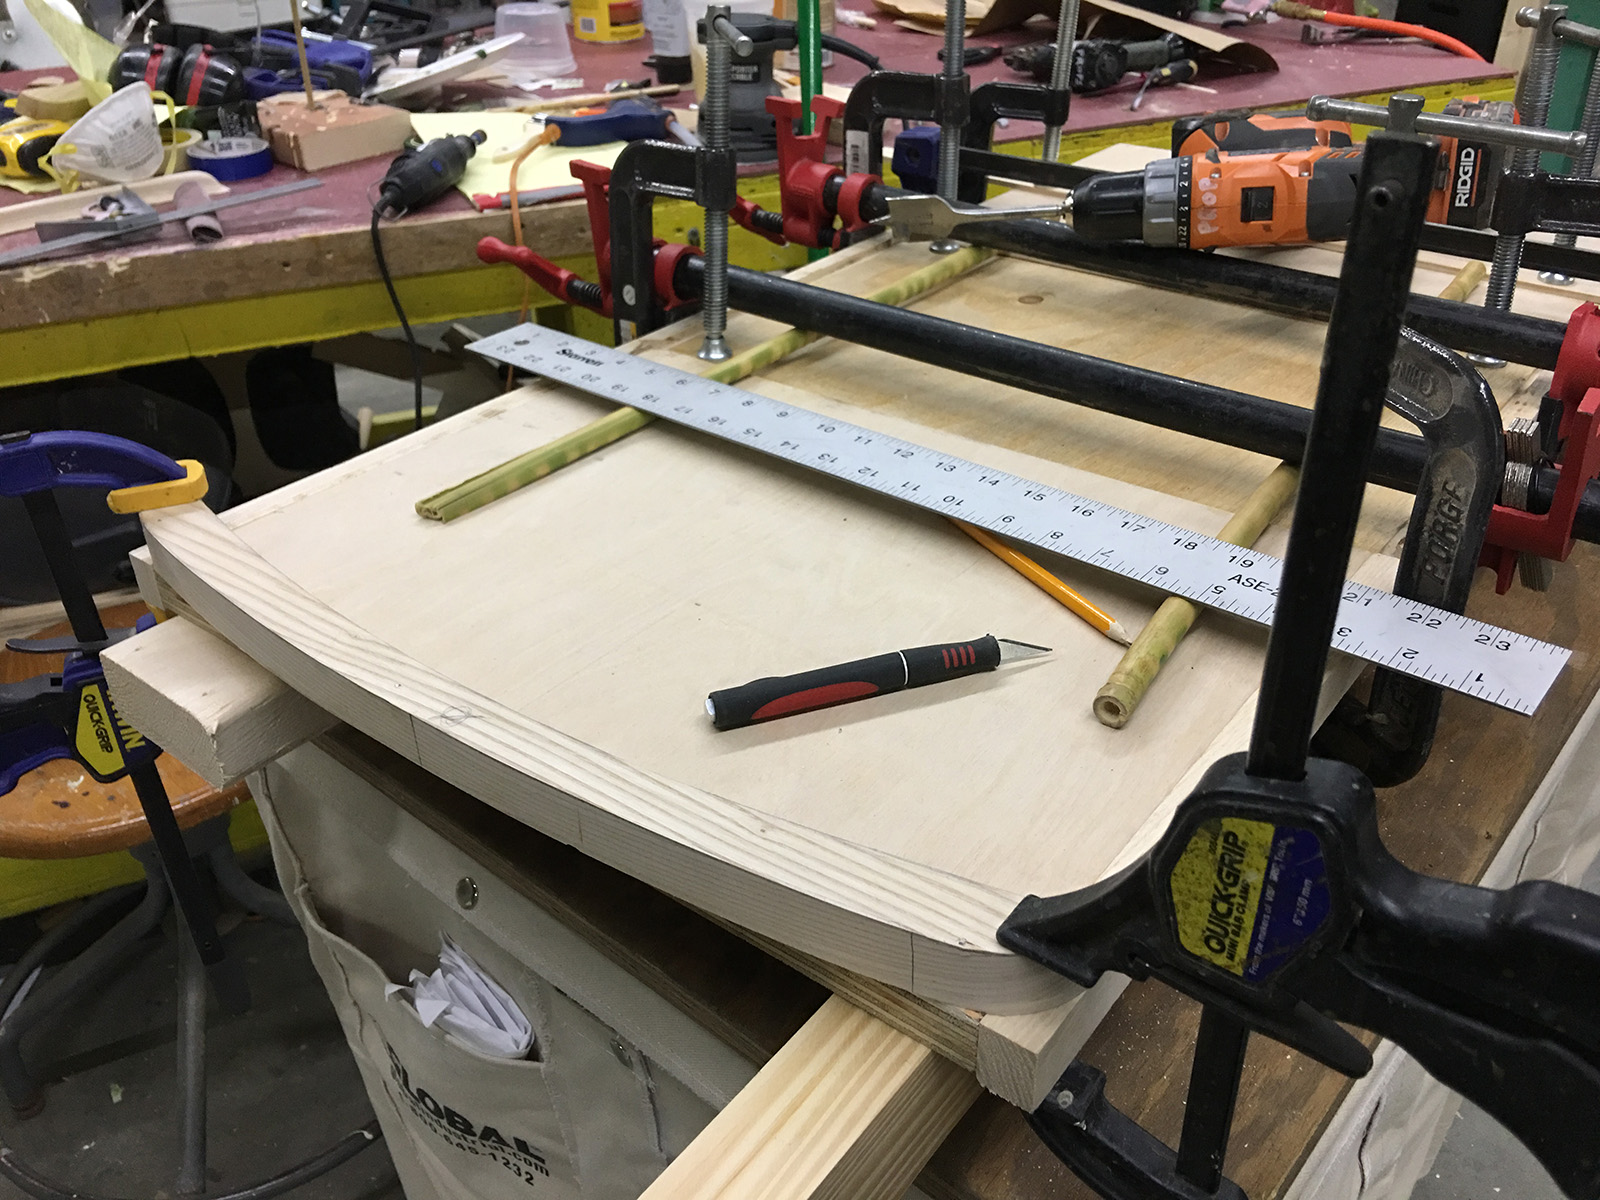
Each end had a curved breadboard with a raised lip. It took a bit of finessing to cut the end of the plywood and the breadboard so they fit together perfectly.
I cut and shaped the raised lip as a separate piece before attaching it. I routed all the edges, and I was worried that I wouldn’t be able to fit the router on if the lip was attached. Once it was glued on, I did some hefty belt sanding on the end to smooth everything and make it appear to be one solid piece of wood.
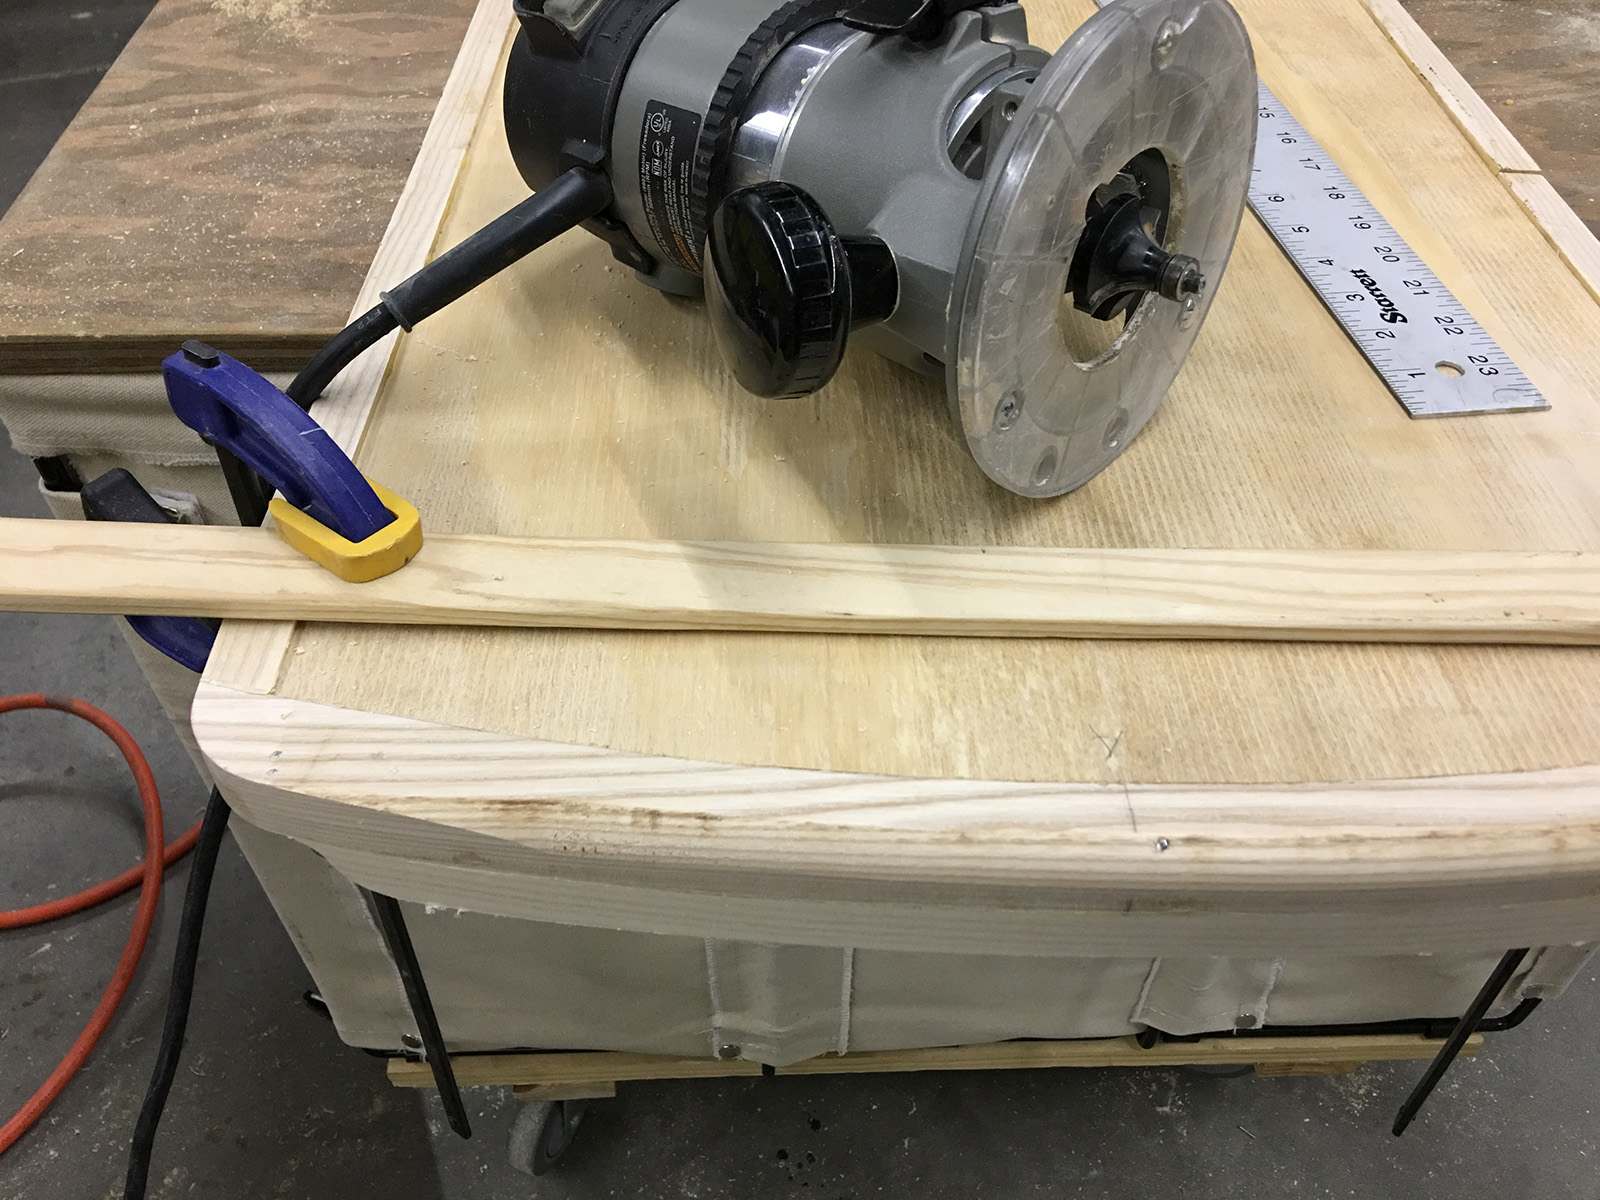
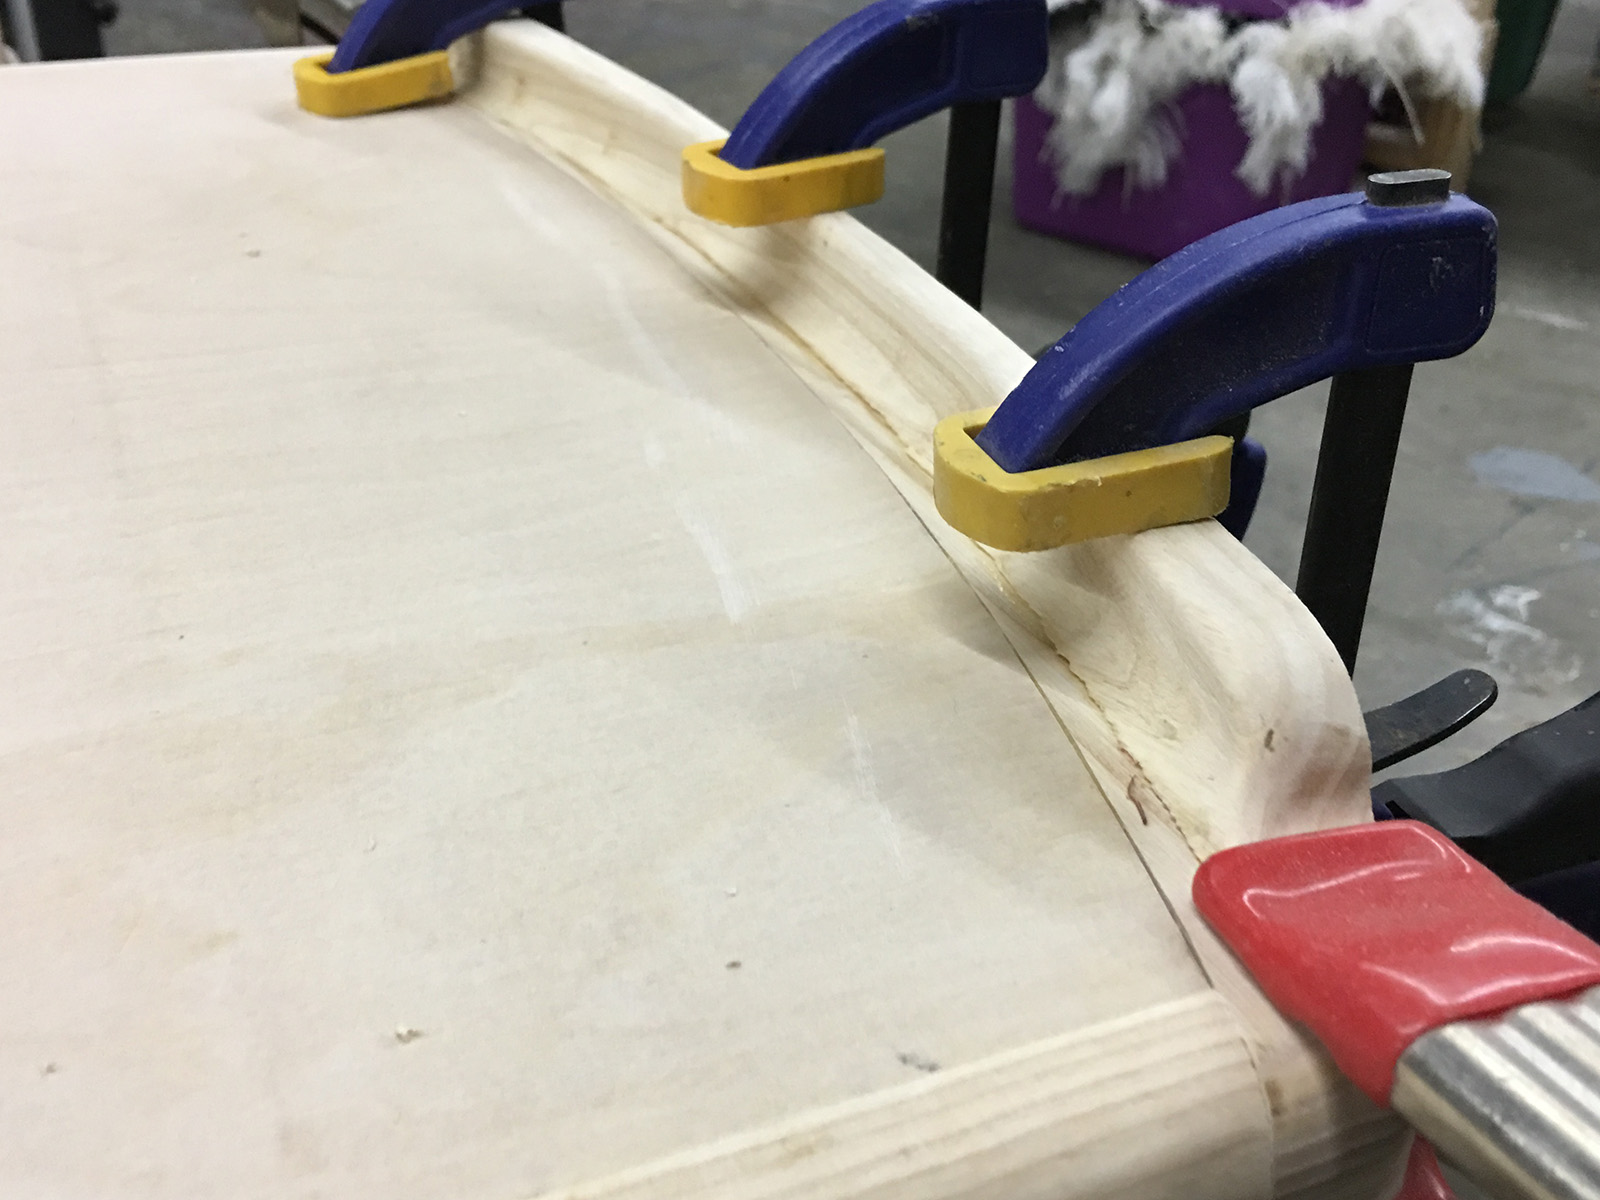
I clamped a rail on the bottom so I could round over that edge as well, with the rounded edge fading out gradually.
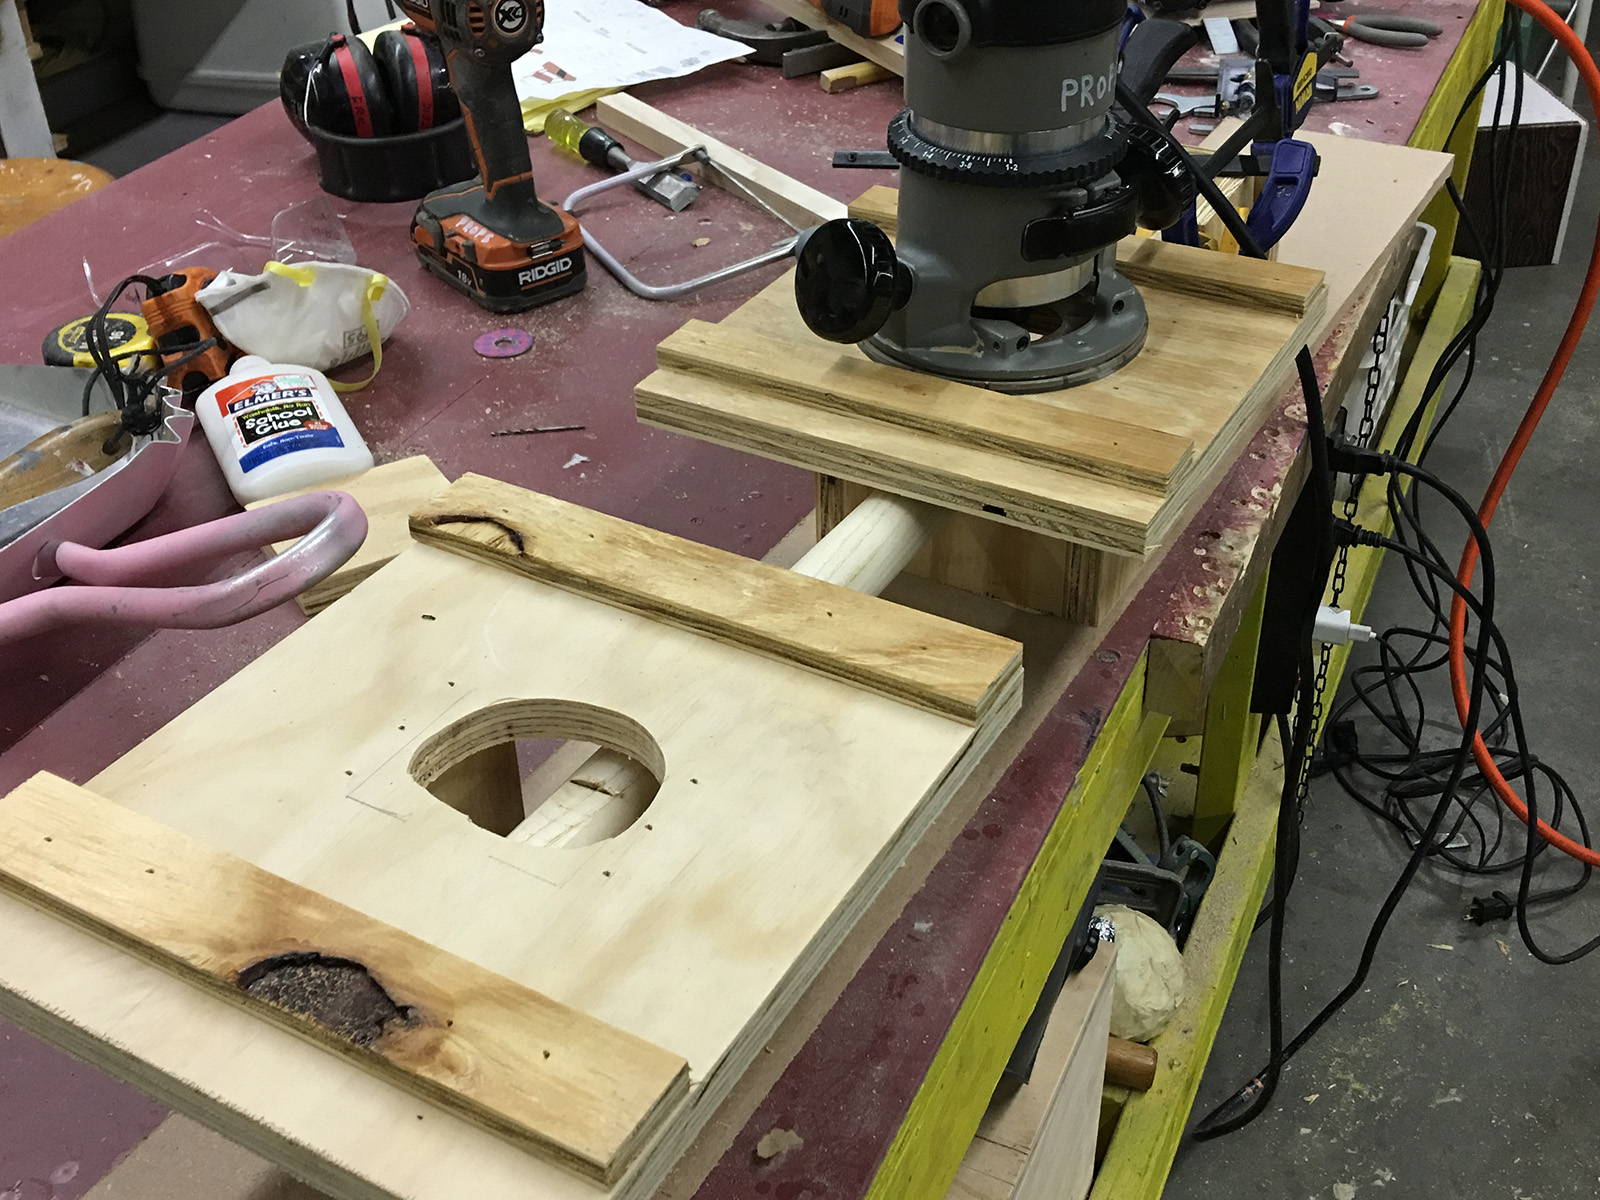
Because the legs were both round and tapered, they needed a flat surface to attach the apron and shelf to. I built a jig for the router to mill a flat area perpendicular to the ground. The apron pieces could then be doweled securely to the legs.
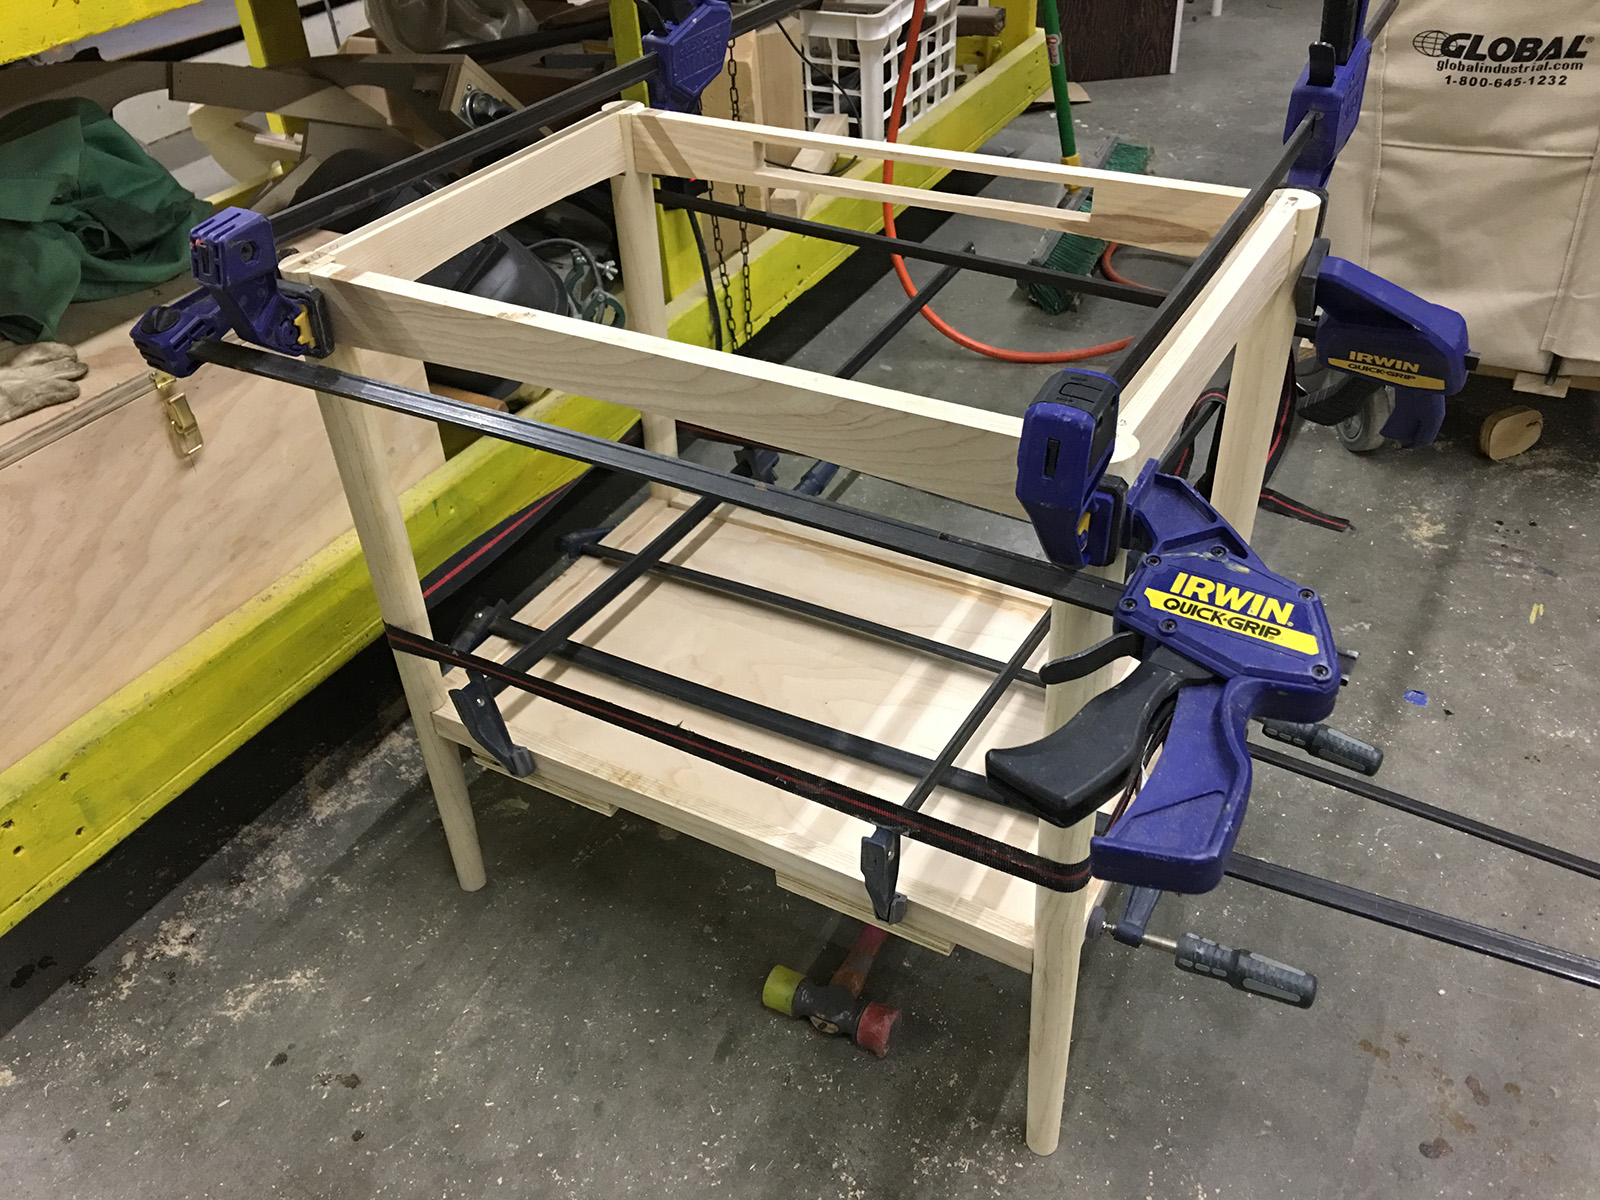
Before gluing, I fit everything together dry to make sure my measurements were all correct. When you have round tapered legs, it is very easy to make a mistake between the length of the top apron pieces and the shelf apron pieces; everything needs to be exact to keep the whole piece square and sturdy. Once everything was fit properly, I disassembled it, added glue to all the joints, and clamped it all back together.
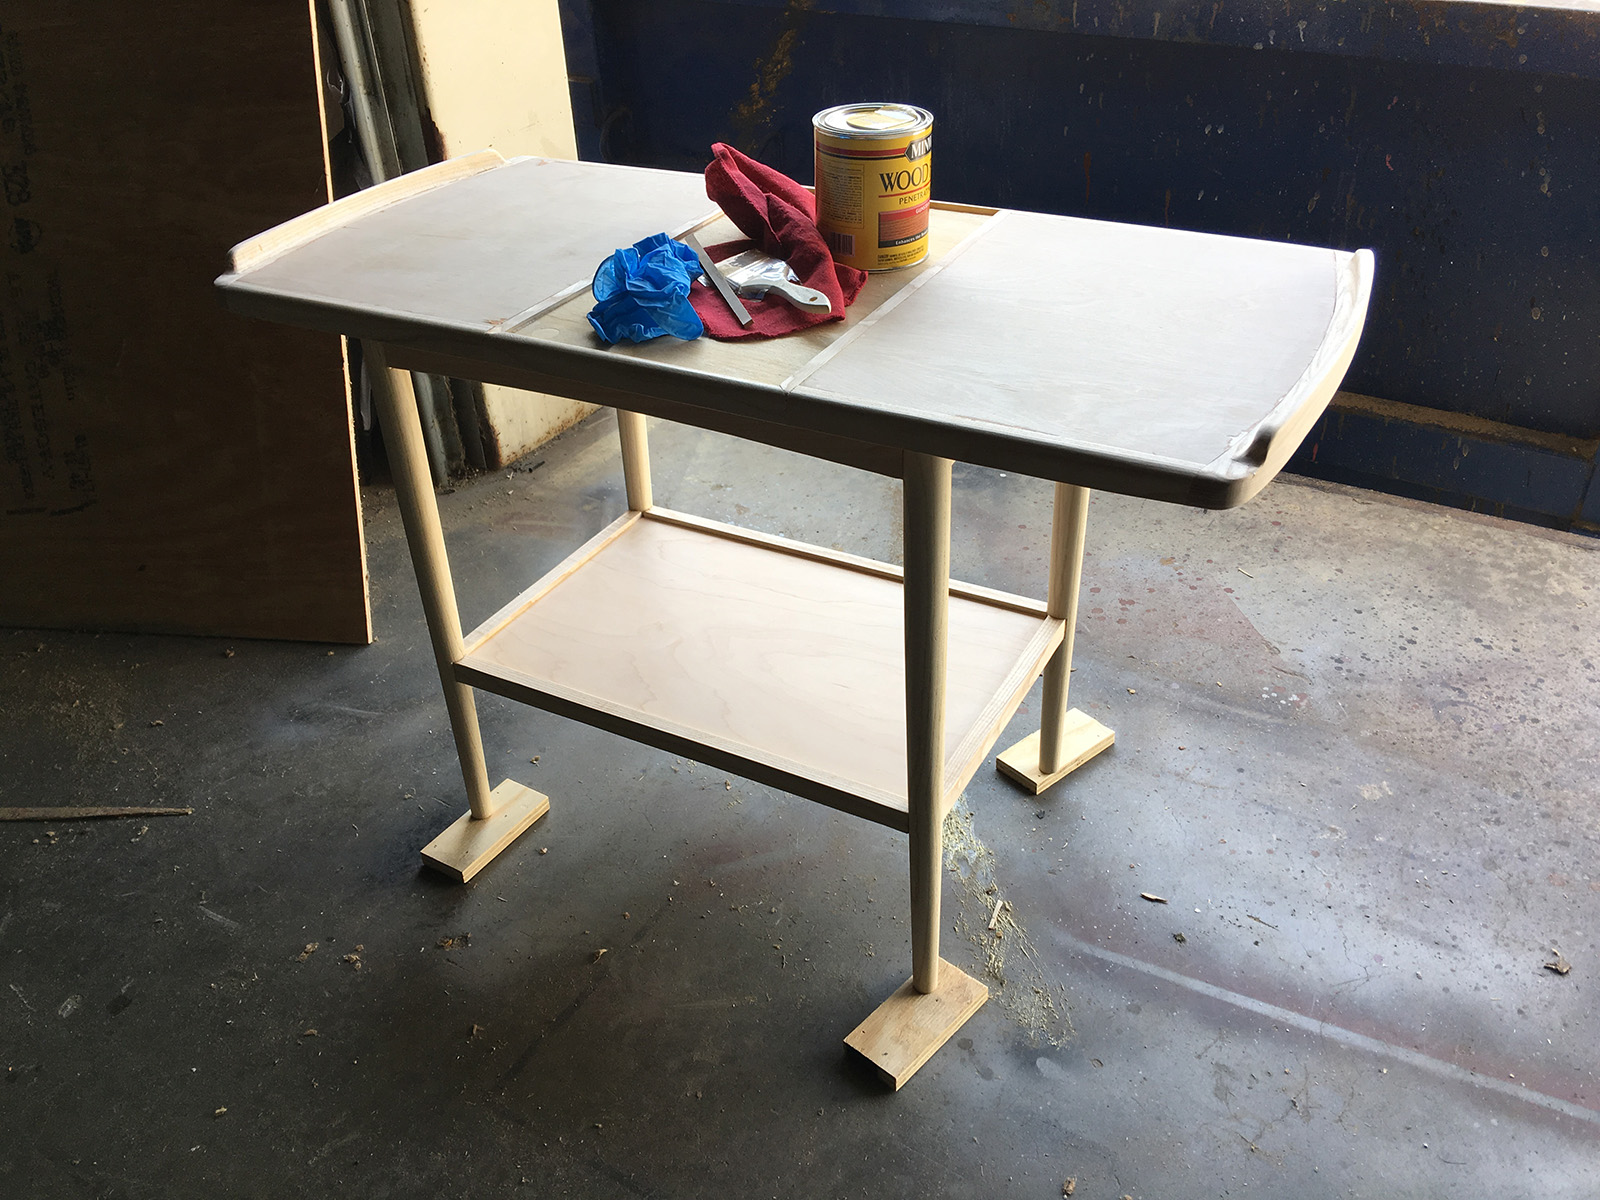
After one final sanding over the whole table, it was ready for staining. I used a tint from Minwax called “Gunstock.” I sealed it with a coat of amber shellac. When it dried, I rubbed it down with #000 steel wool, then added a second coat of amber shellac, which was also sanded with steel wool. The whole table was then wiped down with Pledge Furniture Polish. This not only removes the finest dust particles, but it imparts a thin layer of wax that helps give the surface a bit more shine.
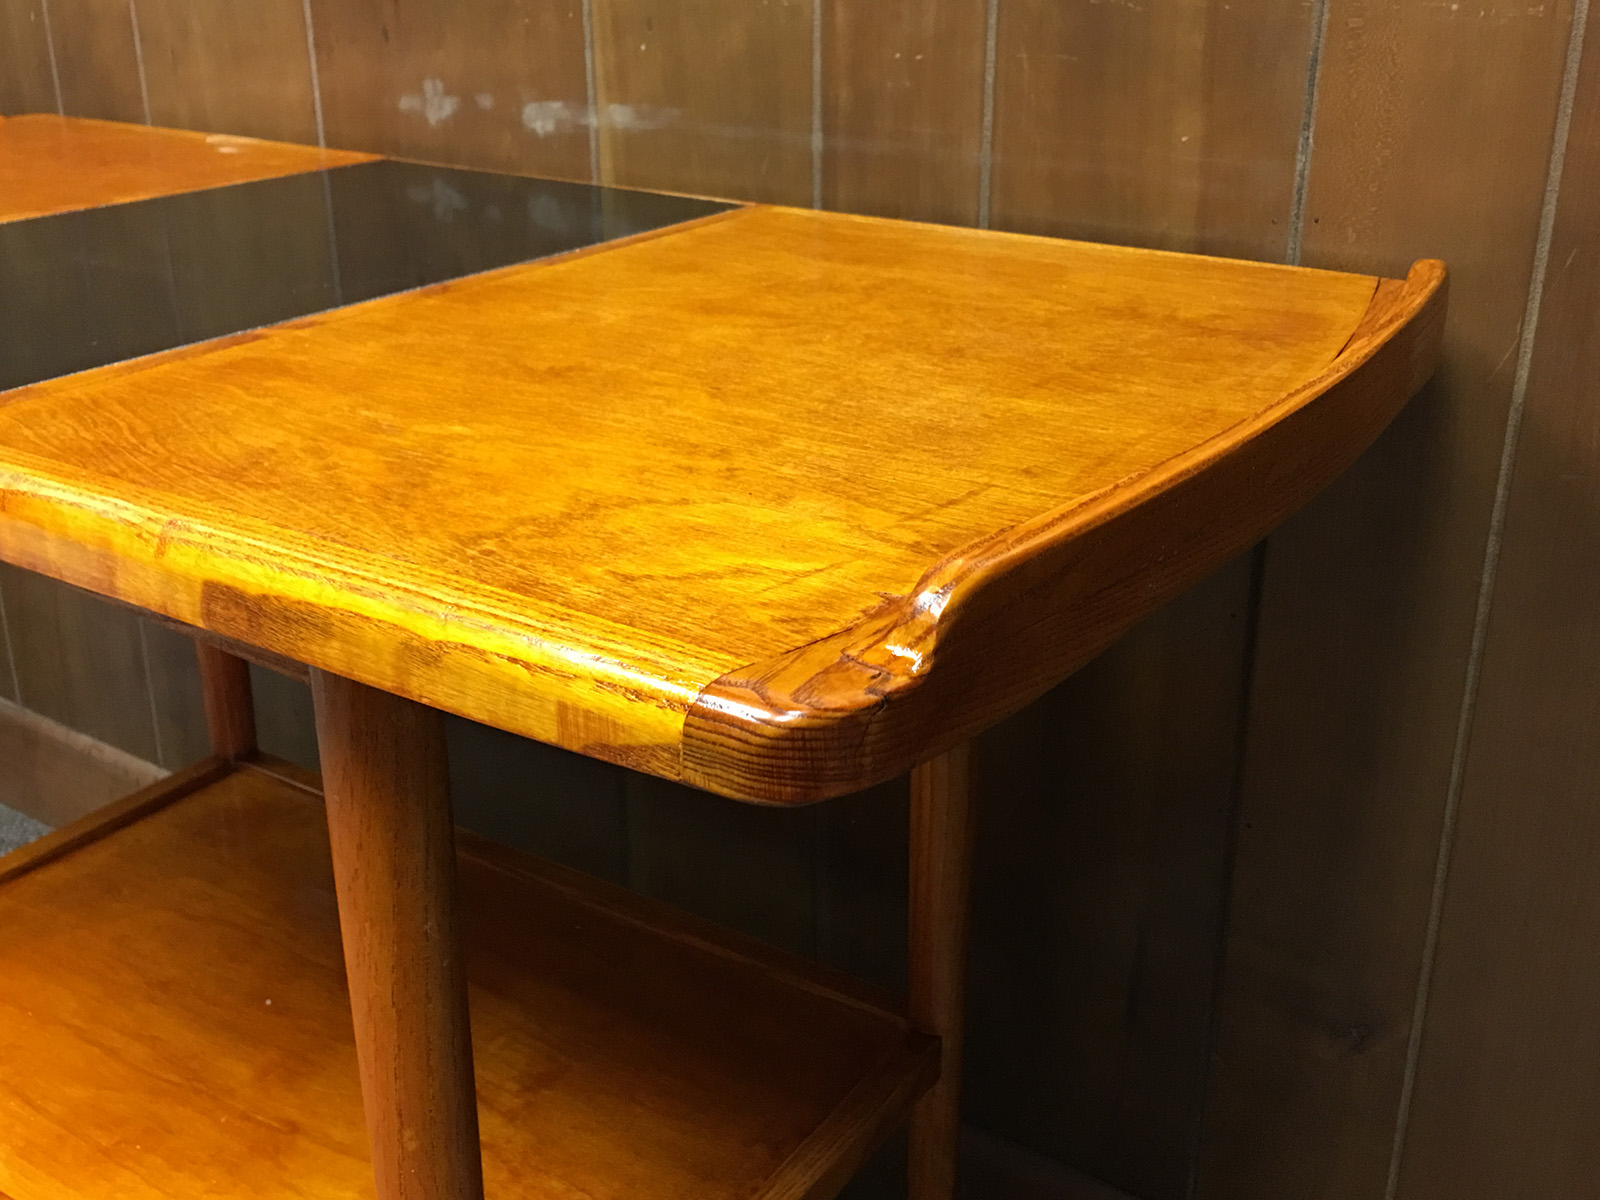
The photo above shows off the sweet curves which the piece has.
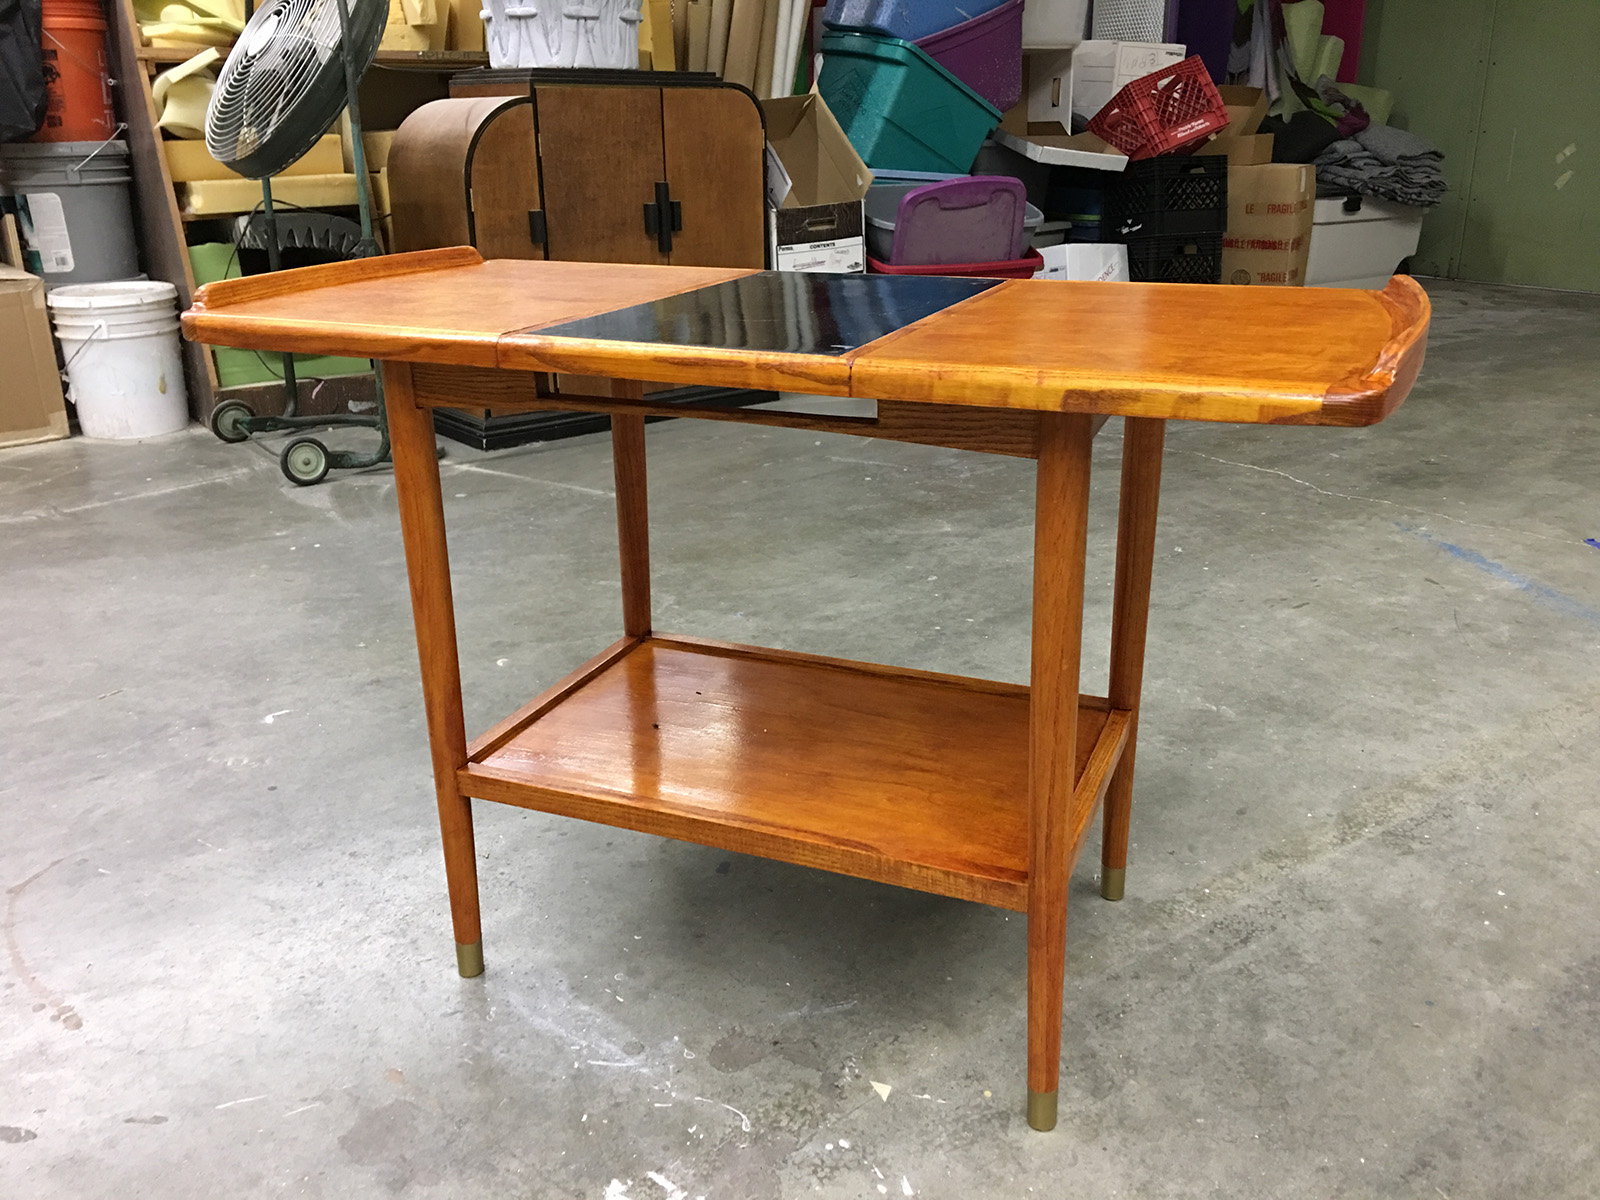
When I shared images of the completed bar cart with Anya the designer, she realized she wanted brass leg caps added to the bottom. I wasn’t able to find an exact cap to fit the legs, so I coated them with a thin layer of epoxy and painted it with brass spray paint. It gave the same effect as brass caps, but with far less work.
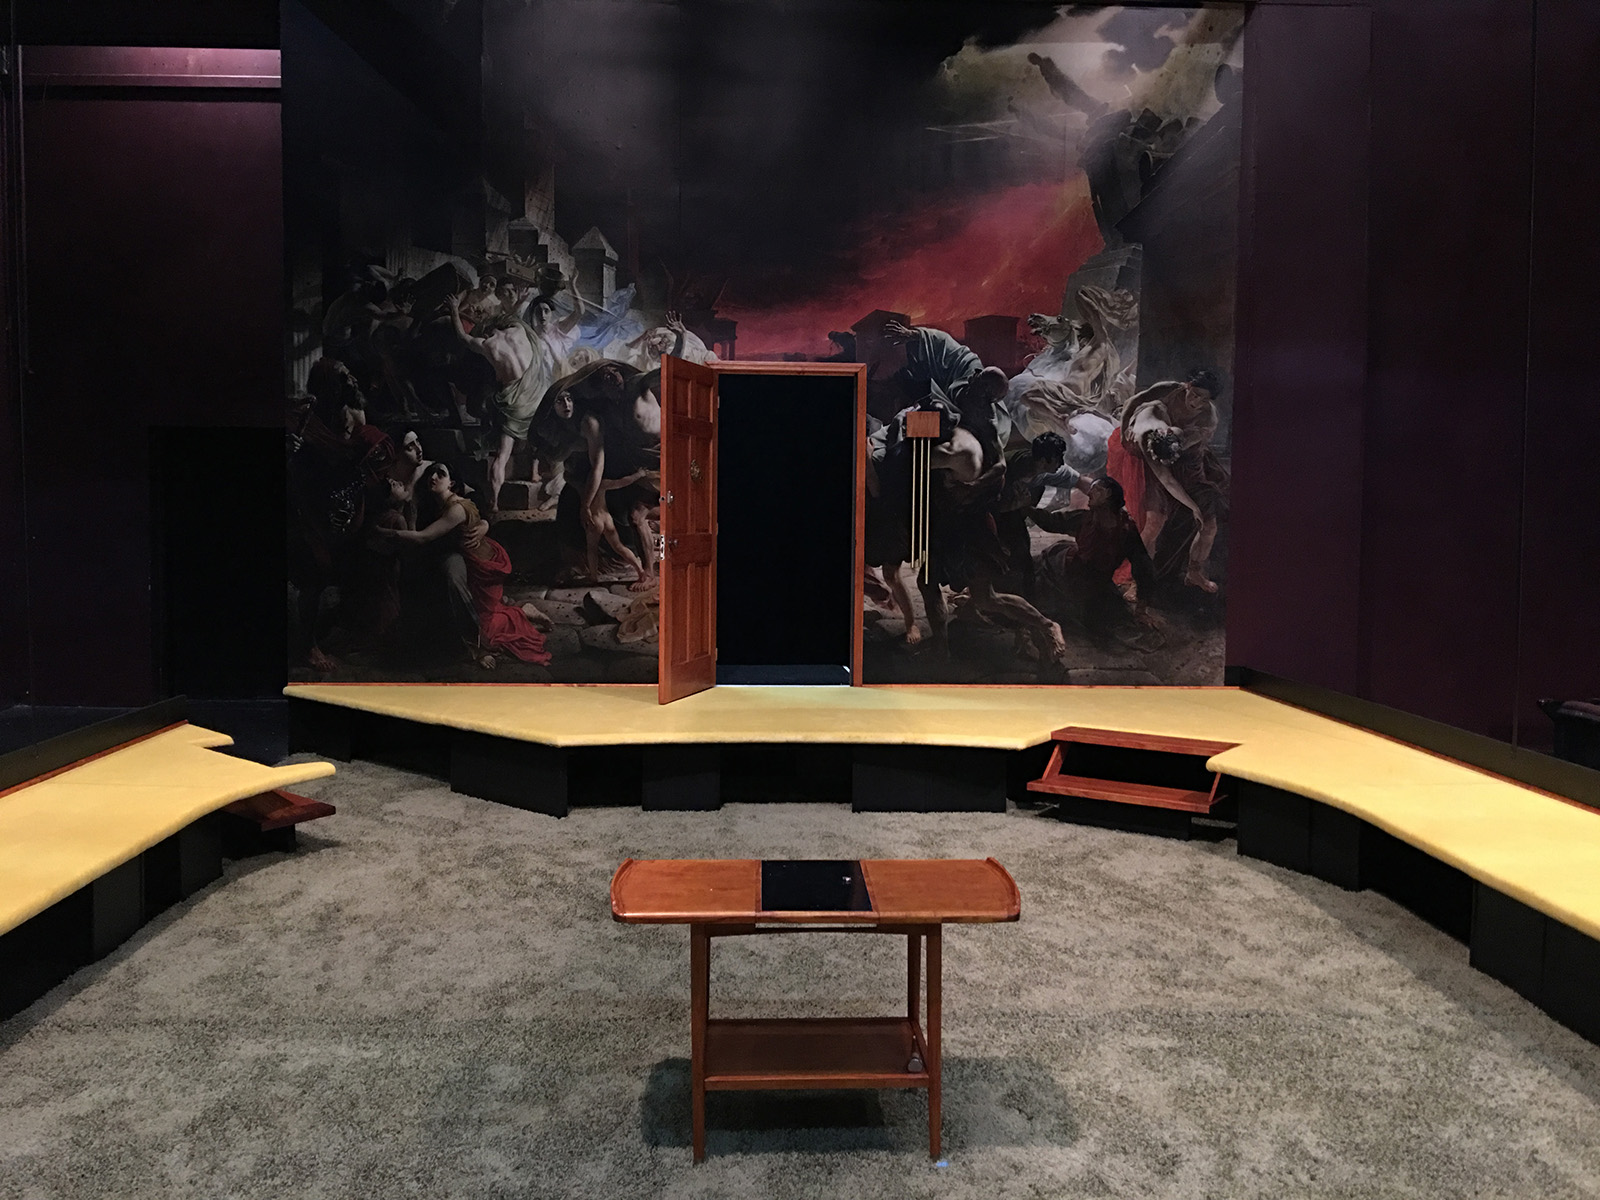
The bar cart was the only piece of furniture on the whole stage, so the extra work to make it perfect was justified. It was a nice piece to build for my last show as the full-time props master at Triad Stage.