In part one of “making a body for Bacchae“, we developed a series of samples and prototypes of dead body parts out of spray foam, Foam Coat, and Dragon Skin. Since then, we’ve been able to show the pieces to the whole production team; John Conklin, the scenic designer, and JoAnne Akalaitis, the director, gave us the go-ahead to continue on with the actual body pieces.
We started with a skeleton. We were originally going to get a skeleton from a medical supply store, but I found a corpsing tutorial at “Skull and Bones.com” which shows that you can get a “4th quality” skeleton from certain companies for a lot cheaper. It may be missing some hardware and fasteners, and the overall quality will be less, but all the pieces are there, and for our purposes, it was perfect.
The full skeleton laid out on a table
We broke the skeleton apart into several pieces. In the play, King Pentheus is killed through sparagmos, and we had to make the end result. The legs and skull were three separate pieces. We left one shoulder blade and upper arm on the torso, which left us with one complete arm, and one forearm.
The first steps in adding muscle to the bones
Like the sample pieces, we built the muscle up by spraying expanding foam onto the bones, carving it into muscles, and coating everything with Rosco Foam Coat.
For the upcoming production of The Bacchae at Shakespeare in the Park, we have to make a ‘meat suit’. In the play, King Pentheus is dismembered and has pieces of his flesh torn off by the Bacchants (the party-goers). This happens off-stage, but his torn-apart body is wheeled onstage, where his mother, Agavë, attempts to reassemble him.
The director envisioned a corpse covered in meat. We in the props shop needed to find a way to mimic that look. It also needed to hold up under the weather, as the Delacorte is an outdoor theatre.
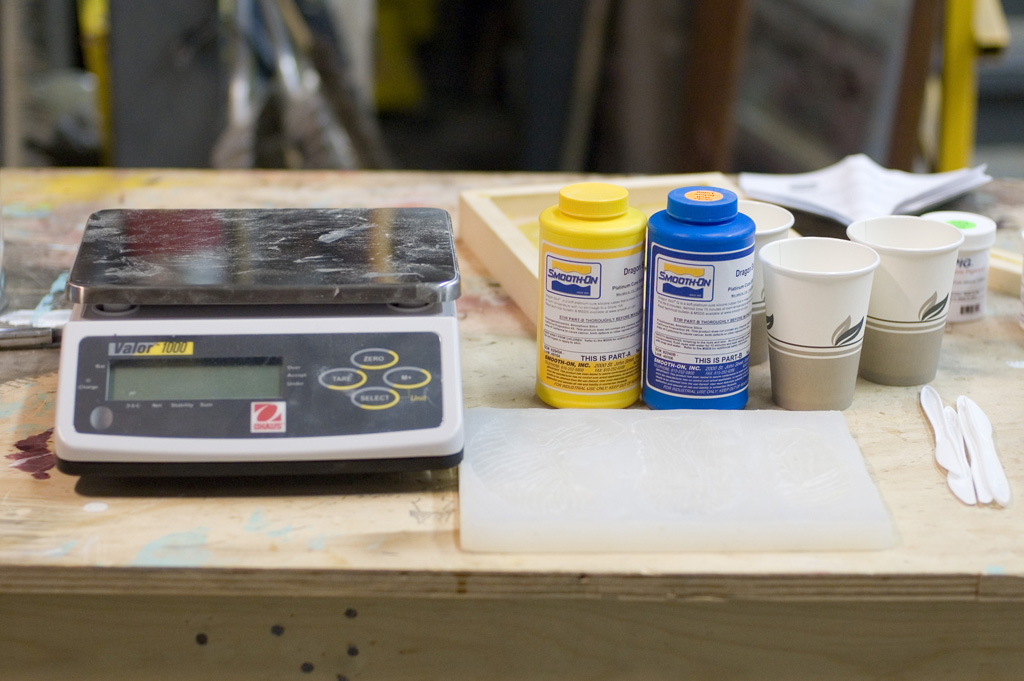
Jay Duckworth, the properties director at the Public Theatre, decided to use Dragon Skin, a silicone rubber product from Smooth-On, Inc. It comes in liquid form in two parts. You mix an equal amount of each part together, and you get a viscous liquid which can be cast or brushed on. After a little over an hour, it becomes a rubbery solid.
Getting ready to use Dragon Skin
We began experimenting with casting these up into meat-shaped pieces. Dragon Skin can be colored with “Silc Pig”, a silcone pigment which comes in a number of colors. I found good results by mixing two batches up simultaneously with different levels of pigmentation. By pouring them into the mold at the same time, we could achieve random differences in color throughout the piece, which gave more realisic results.
Jay pours Dragon Skin into a mold
Jay found good results from painting the Dragon Skin directly onto the skeleton pieces.
Painting the Dragon Skin directly onto the skull
I suggested using spray-foam to build up chunks of muscle on the bones, and then painting the Dragon Skin onto that. Along with Michael Krikorian, we prototyped up a number of bones with a variety of techniques to compare them. We decided that overemphasizing the depth of the ridges and covering the foam with Rosco FoamCoat led to our favorite results.
Layering Dragon Skin on top of foam
“Silc Pig” comes in a number of different colors, so we mixed various batches of Dragon Skin to simulate fat, muscle, skin, and various other bits of chunky ooze on the bones.
There are a number of important things to keep in mind. First, silicone rubber reacts with certain chemicals, which keep it from curing. Most importantly is latex, so if you use latex gloves when working and touch the mixture, it will remain in liquid form. Use vinyl or nitrile gloves. We also found that hot glue will keep the Dragon Skin from curing. Also, use an accurate scale. The measurements need to be precise, and you cannot do it by sight alone.
Most importantly, as always, good research is the key to a realistic product. Everybody knows what muscle looks like until it comes time to actually carve it. Needless to say, doing research for this project was particularly vomit-inducting.
Now that we’ve come up with a repertoire of techniques to use, we can begin work on the actual prop. Keep watching this blog for more photographs of our progress.
The final skull prototype. All photos by Eric Hart
Making and finding props for theatre, film, and hobbies