How I Became a Prop Maker

Put ten prop makers in a room and you’ll get ten different stories of how they became a prop maker (you’d also get one hell of a party). I thought I would share my own convoluted path of how I have gotten here.

My parents are both artists: potters by trade. They fed my brother and I a steady diet of art supplies growing up. We would transform all sorts of boxes and other random objects into vehicles and machines for our stuffed animals to use. One of our favorite toys was He-Man. I remember desperately wanting the Castle Grayskull playset when it first came out. Of course, a toy that large was far too expensive; nonetheless, we kept pleading. Finally, my dad started building his own version of Castle Grayskull for us. I think he used chicken wire over a wooden base, coated with a mix of papier-mâché and plaster.

They often gave us bits of clay to sculpt and shape on our own. When I got old enough and wanted a job, my dad put me to work making production molds for his cast pieces, and then casting the pieces.

In junior high school, we still had this class called “Industrial Arts”, in which twelve-year-old children are allowed to cut wood on a bandsaw and squirt hot plastic into injection molds. I remember the feeling that was awakened in me when I cut a fancy letter “E” out of a piece of pine in that class. It was a two-part revelation; first, I discovered how these wooden objects were created, and second, that I possessed the ability to create them. I also cast a piece of iron in green sand, doing every part of it except the actual pouring of the molten metal. It gives a kid a lot of confidence to have a cast iron object and be able to say “I made that.”

In my first year of high school, after choosing all the necessary classes for my preparation to be a college student, I found one free period. A buddy and I convinced each other to take wood shop. During the first half of the year we studied and practiced drafting. The second half, we built a bookcase. From scratch. We had to draft the piece out and make a cut-list, select and buy our lumber, plane the surfaces, join the edges, cut the pieces to size, make the joinery, assemble it, and apply the finish. It was all pine wood, with no plywood or MDF; the back was made with a whole bunch of boards tongue-and-grooved together. I still have that bookcase.

I began my undergraduate career as an engineer, but grew bored with the lack of hands-on work I thought it would entail. I was living and working with a lot of the theatre and film kids. We had a film club, which consisted of a bunch of us running around filming goofy things with a camera. I thought some theatre classes would help me make better films. Along the way, I grew to appreciate theatre more than film, and ended up graduating with a degree in theatre and an emphasis in scenic design.

After a few years of working as a stagehand, carpenter and electrician, I went back to graduate school for scenic design. After the first year, I got a summer job at the Santa Fe Opera as a props carpenter, building furniture and other large items. That was when it kind of clicked in my head that making props was what I really loved. It was the combination of technical skills and creative thinking in the context of a collaborative art form that really drew me in. The variety of daily tasks kept me engaged in a way that a job where I built the same thing over and over again would leave me bored.

Friday Link Letters

Busy week here at the Opera! Luckily there is always time to find interesting things to read and watch on the Internet:

This looks like a great method for making papier mâché clay. You mix up a bunch of pulp from egg cartons and magazines, then form it into balls which you can store until needed.

Hat tip to Seán McArdle for pointing me to this wonderfully illustrated guide to Louis-style chairs.

Check out this one-day build where Adam Savage builds Han Solo’s blaster. It’s well over 16 minutes long, so fire up some popcorn and settle in.

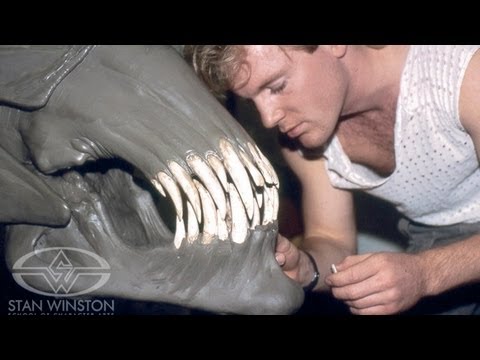
Finally, here is a very vintage video from the Stan Winston archives showing an Alien Queen head sculpture in progress:

What is a Props Coordinator?

You sometimes find the title “props coordinator” listed in the back of a Playbill. Sometimes it might be “production props coordinator” or “props supervisor”. You know what a props master is; why is this other term sometimes used instead?

In every Broadway house (and many of the larger union houses across the country), you have a “house props” position. This is a union job in charge of the preset of all the props, running the show, and clearing at the end of the night. Basically, any time a prop needs to be touched or moved outside of the performance, it must be done by the house props or a member of his crew.

This position is distinct from the production props master, who acquires all the props during preproduction through opening. On smaller shows or transfers, a production props person may not be needed, either because the props arrive complete as a “package”, or because the particular house props person is a props master in his own right. But most shows go through their own period of rehearsals, and so a production props master is needed.

Some union props people have both jobs. They work as a production props master on one show during the day, then run a show as the house props at a different theater at night. This is true in other departments as well; many of the union shops around New York City are open from 7am to 3pm to allow workers time to run shows at night.

The production props master position does not need to be union. Many rehearsal spaces around New York City are not union spaces, and the production props master or her assistants can carry the props around, make modifications or repairs, or otherwise work in the space.

However, once the props arrive at the theater space, they can only be handled by the union. This means that a non-union props master can literally carry the props to the front door, then drop them and wait for a member of the house props crew to come and carry it to the stage. Once inside, they can ask the crew to repair or modify props, but cannot physically touch anything themselves. This can lead to potential frustrations, but many non-union props masters have found ways to make this work.

When it comes time to print the Playbill, the union only allows its own members to use the title “props master” or “production props master”. So for shows with a non-union props master, the term “props coordinator” (or one of its variations) is used instead.

Homemade Coatings

I found a couple of recipes for a coating in some old props forums (circa 2002). They refer to the coating as “homemade Sculpt-or-Coat”, though it is very similar to recipes for scenic dope and monster mud. I have not tried any of these recipes, but I am posting them here for my own future reference and for yours.

This coating is useful for coating foam, to “paper mache” burlap, cheesecloth or muslin to wood and steel, or for use as a general texture. For texturing, you can mix in sawdust, sand, vermiculite, etc., for various results.

For a 5 gallon recipe:

  • Fill 2/3 of a 5 gallon bucket with a 50/50 mix of acrylic caulk and joint compound.
  • Add 1/2 to 3/4 gallon white latex paint.
  • Add 1/2 gal. Rhoplex.
  • Mix well with a drill and paddle mixer.
  • Add about 1/3 gal. of white glue. Mix thoroughly.

You can tint it using latex or acrylic paint, or universal colorant. You can thin it with more white paint or Rhoplex. You have about 20-30 minutes of working time, and it dries fully in 12-24 hours. It should not go on thicker than 1/4″ or it will be prone to cracking. You can alter the recipe to suit your needs; adding more joint compound gives a harder and more rigid finish, while more acrylic caulk gives a more flexible finish.

Rhoplex is an acrylic binder made by Dow Chemical Company. It can be tricky to find, particularly in bulk. There are many other acrylic binders you can find at hardware and paint stores, though I am not sure whether these will also work. Other posters in the thread say they use PVA in lieu of Rhoplex (the PVA paint binder, not PVA glue or PVA mold release).

In another thread, Wulf points out that Rhoplex is pricey and hard to find, and that it may be easier and cheaper just to buy Sculpt-or-Coat for small batches. His own recipe involves PVA white glue, powdered clay and latex paint. Simply combine equal parts, stir very thoroughly and allow it to stand for about a day for the clay to absorb.

Making and finding props for theatre, film, and hobbies