I guess Harbor Freight finally realized that they are a top destination for cosplayers and prop makers here in the US. They posted their top 10 must-have cosplay tools/accessories.
Chris Schwartz has some good thoughts and advice on how to store your hand tools (be sure to check out parts two and three as well). Of course, props get a little more complicated because we have tools from many disciplines, and never build the same thing twice, but the basic principles here are still worth exploring for your own hand tool storage area.
Happy August, everyone. While the “regulars” still have some summer left, those of us in theatre are already gearing up to work on all the new shows for the fall season, not to mention those of us in the academic world getting ready for the new school year. But there’s still time to read about props stuff on the internet, so enjoy the following:
Priceonomics has a short history of fake money in the movies. It delves into some of the more high-profile cases of fake movie money making it into the real world, and the resultant crack-downs by the Secret Service. It goes into detail of some of the rules of using money on film and how the top prop houses modify their fake money to follow those rules.
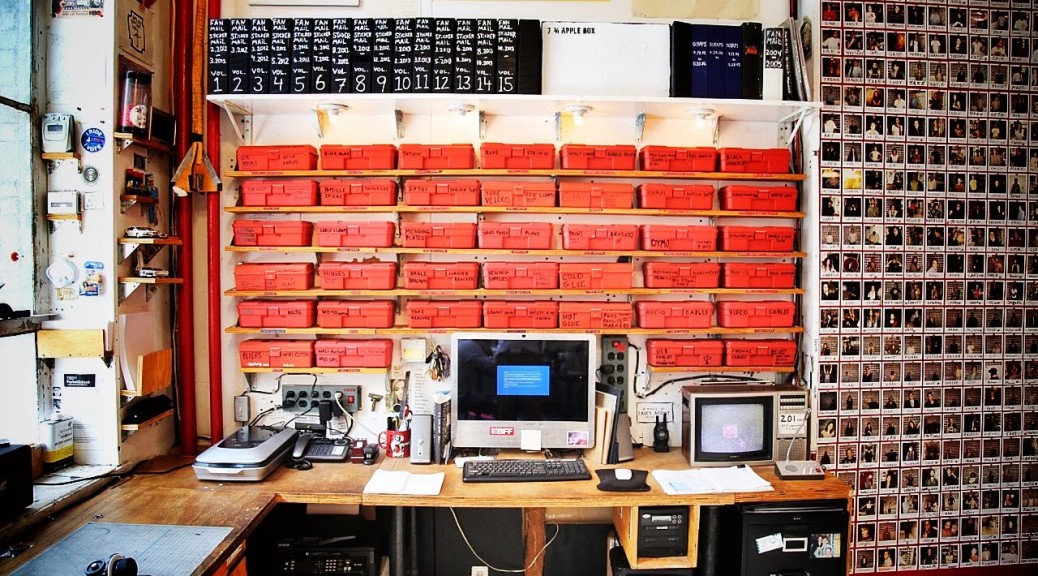
Casey Neistat has a new video series on his studio, and his first video shows his red box system of organization. Â He’s an independent film maker, but his system solves the same problems that prop shops have: how to save a little bit of everything, but be able to find it quickly.
Finally, Credits has a great piece on building The Guardians of the Galaxy. Though it only briefly touches on the props for the film, it does delve into a lot of the physical and design work that went on in a number of the departments. Plus, it looks like a really exciting film.
BBC Culture shares a viewpoint that filmmakers are returning to old-school special effects and real miniatures. While CGI can accomplish things that are impossible in reality, real sets, props and models still give more authenticity to a film, and in some cases, can be cheaper and easier to incorporate. So keep on proppin’!
The previous article stems from the announcement that Disney will be incorporating more practical effects and less CGI in their upcoming round of Star Wars films. Esquire also had an interview with Roger Christian, the set decorator on the original trilogy. He talks about how he took scrap metal from airplanes to make the halls of the Millennium Falcon, and other interesting tidbits.
Sticking with the Star Wars theme of today, Tested has the tale of how obsessive fans built a better Han Solo blaster. Several fans spent countless hours reverse-engineering the prop weapon used in the original film to come up with a replica that was as screen-accurate as possible. It’s like a detective story and a prop-making story all wrapped into one.
You may have noticed a distinct lack of posts this week. Between tech, a minor flood at the theatre, and personal challenges, I did not have any time to write this week. But have no fear, the Internet is here, with stories about props of all shapes and sizes:
First off, the Chicago theatre community has an annual props, sets and costume give-away amongst all the professional theatre companies. The Sun-Times Media has a nice write-up, including video and photographs of some of the theatre’s storage spaces. It is also a great exploration on how local theatre communities share resources with each other.
Dave Lowe, the props master at Hallmark Channel’s “Home and Family”, makes custom trophies for the winner of a game segment on the show. When Florence Henderson guest-starred, he set out to create a replica of the cursed tiki from when the Brady Bunch went to Hawaii.
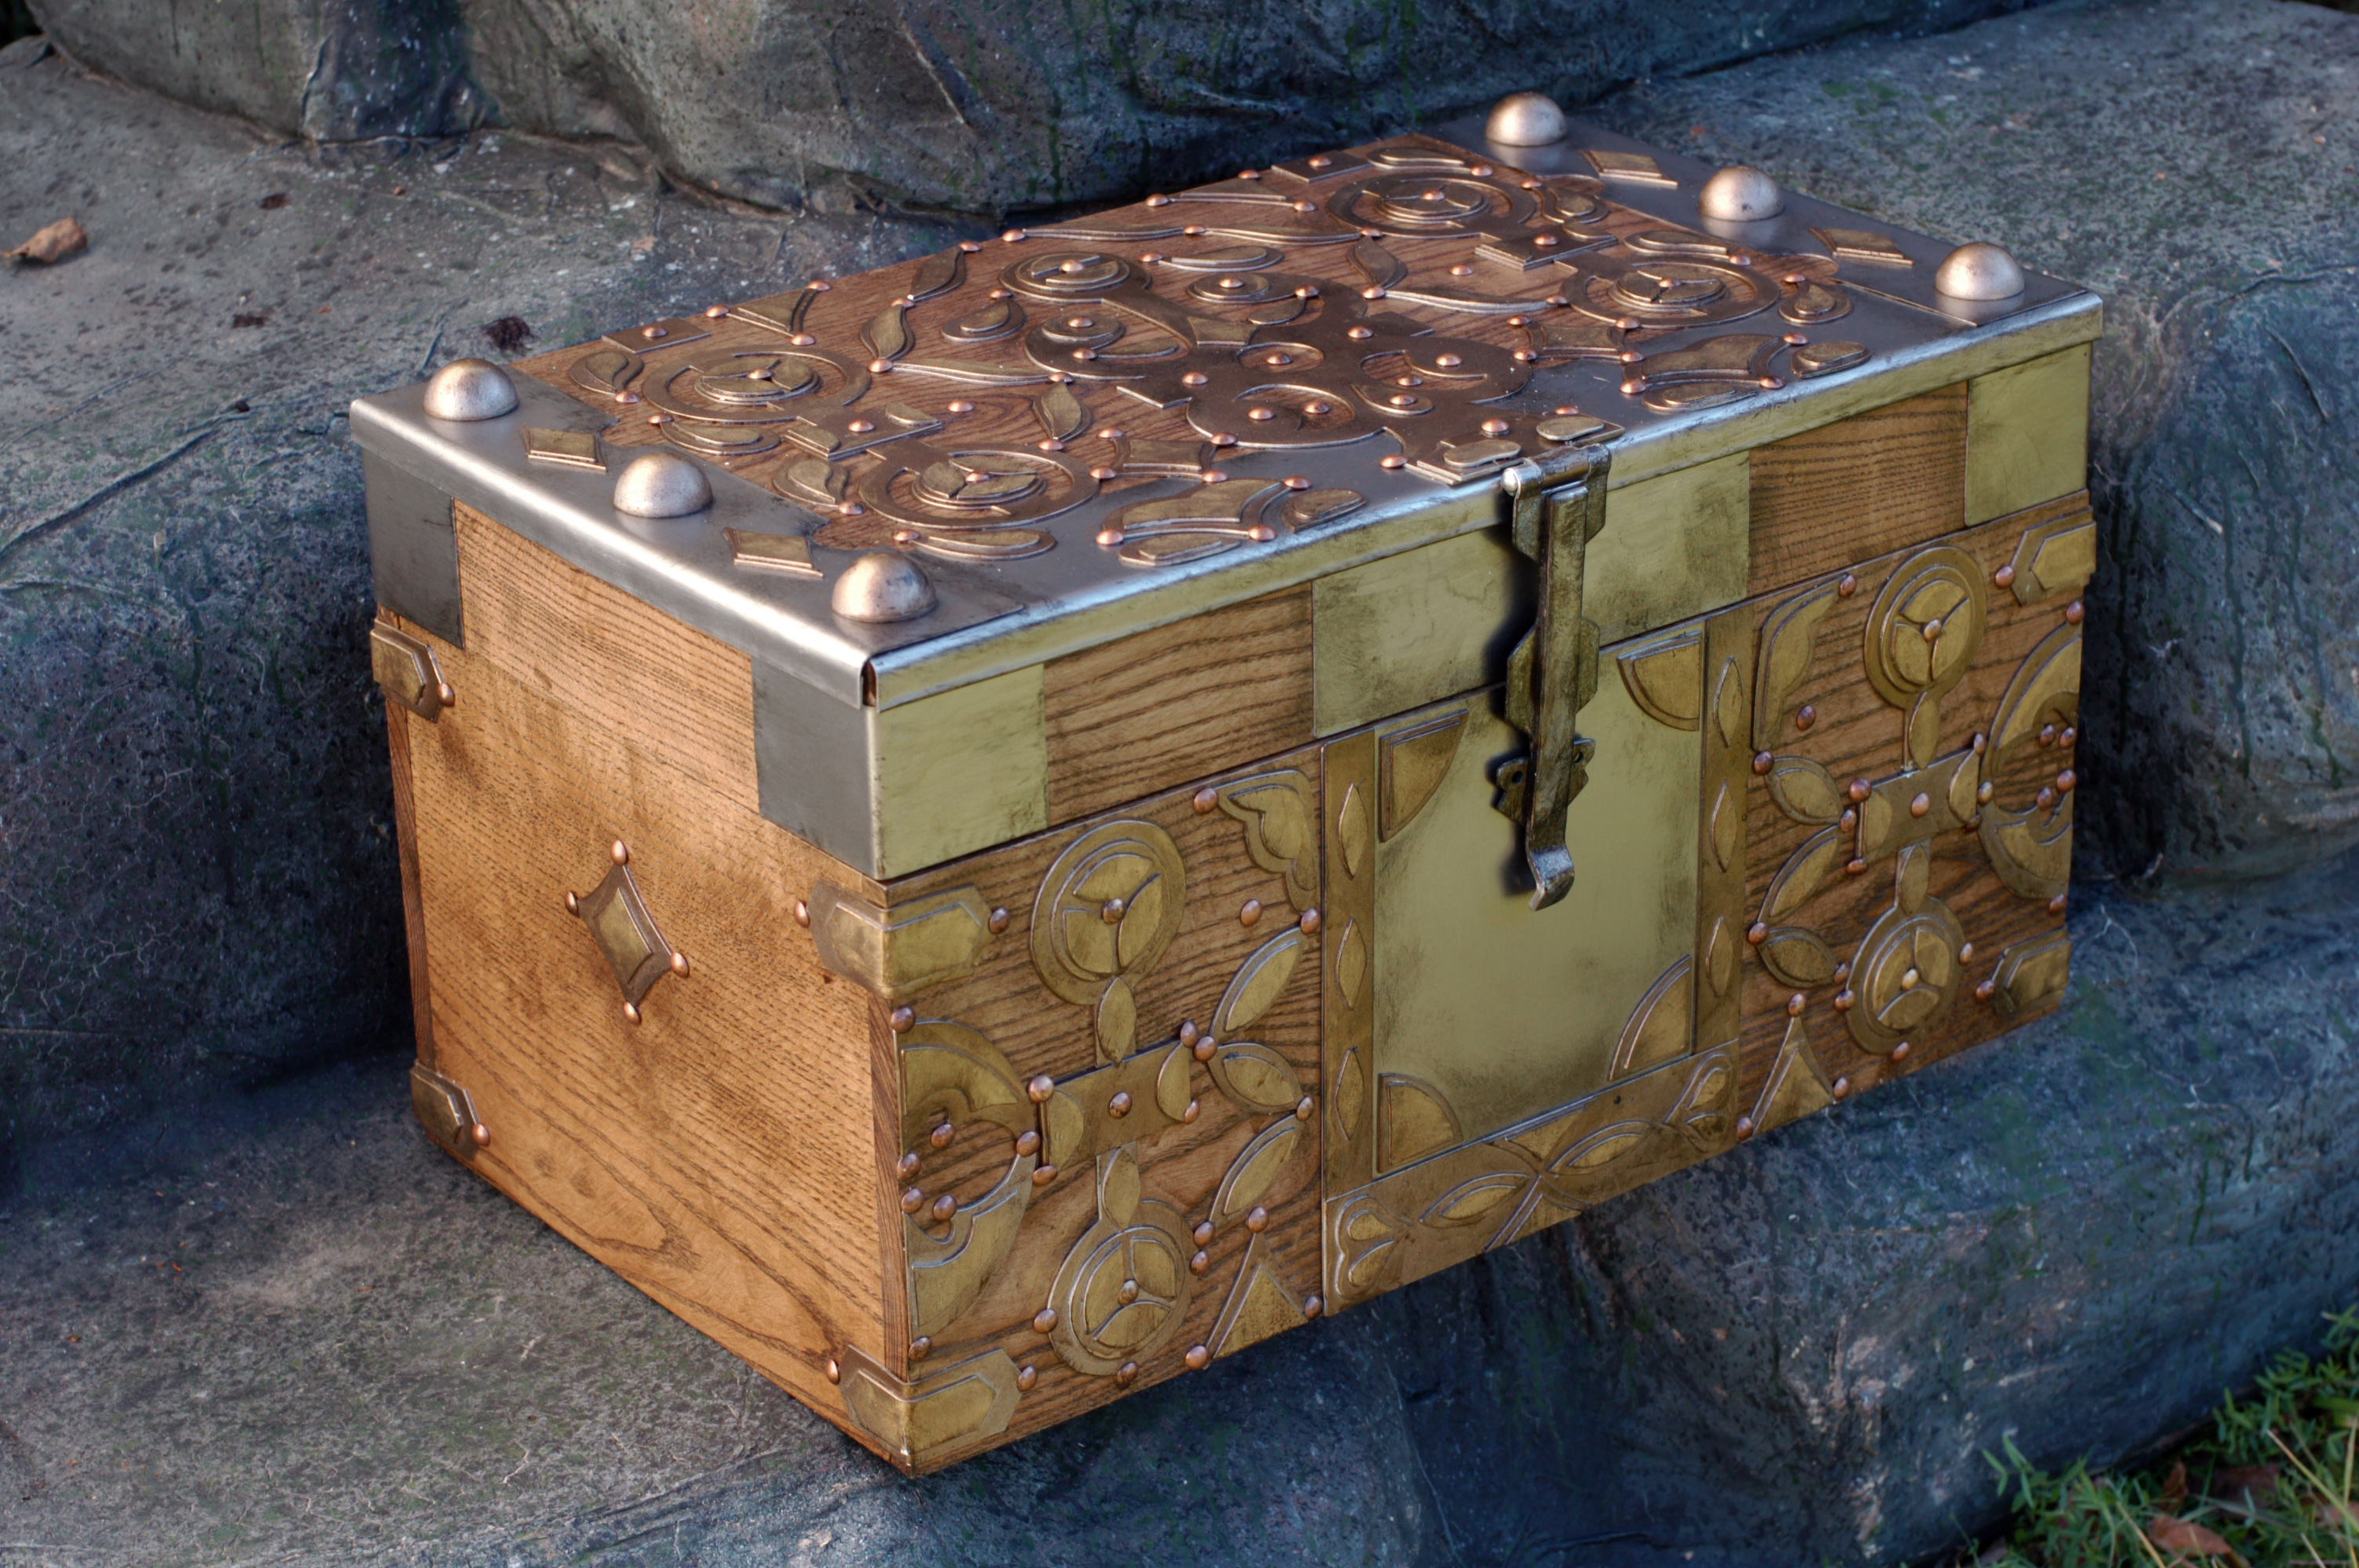
Usually, I am building props for a show or production I am working on. I rarely have time to work on my own projects. However, someone was interested to see if I could replicate a chest from the television show Game of Thrones. Now, I have nothing to do with the show itself, but it sounded like an interesting challenge to see if I could match something I could only see on screen. There wasn’t anything particularly tricky about this chest; it just had a lot of pieces and parts made of an assortment of materials, and some very time-consuming detail. For those who watch the show, this is the chest given to Daenerys in season one, which held her petrified dragon eggs.
I shot video of most of the build along the way and somehow edited several months of work into seven and a half minutes of video, giving an overview of the process.
If you are interested in more detail and photographs, read on!
Daenerys’ chest of dragon eggs
The first part was the box itself. I worked out a quick mock-up of the whole piece in SketchUp to figure out the sizes and proportions of all the parts. I decided to use ash on this because it is hard and strong like oak, but I really hate working with oak. The grain pattern of ash was also a better match to the real chest than oak. We have a great local hardwood store that I visited, and I was able to find boards wide enough that I could build every side (except the top) from a single width of wood. The bottom was a piece of oak plywood.
Wooden box
The chest has a number of areas covered in metal. I bought a sheet of 22 gauge steel and cut it up by hand with my airplane snips. I used my sheet metal bending brake on the corner pieces, while the rolled-over edges of the top pieces were bent by hand with sheet metal tools and pliers. Although I could have saved time by making these out of plastic and painting them to look like metal, the “roll over” parts would have ended up too fragile; on the very corners, you can see how thin the metal is, and any plastic that thin would flex whenever you touch it. The hasp on this chest also rests against a metal section, so it gives that solid metal-to-metal sound every time you open and close the lid.
Sheet metal layers
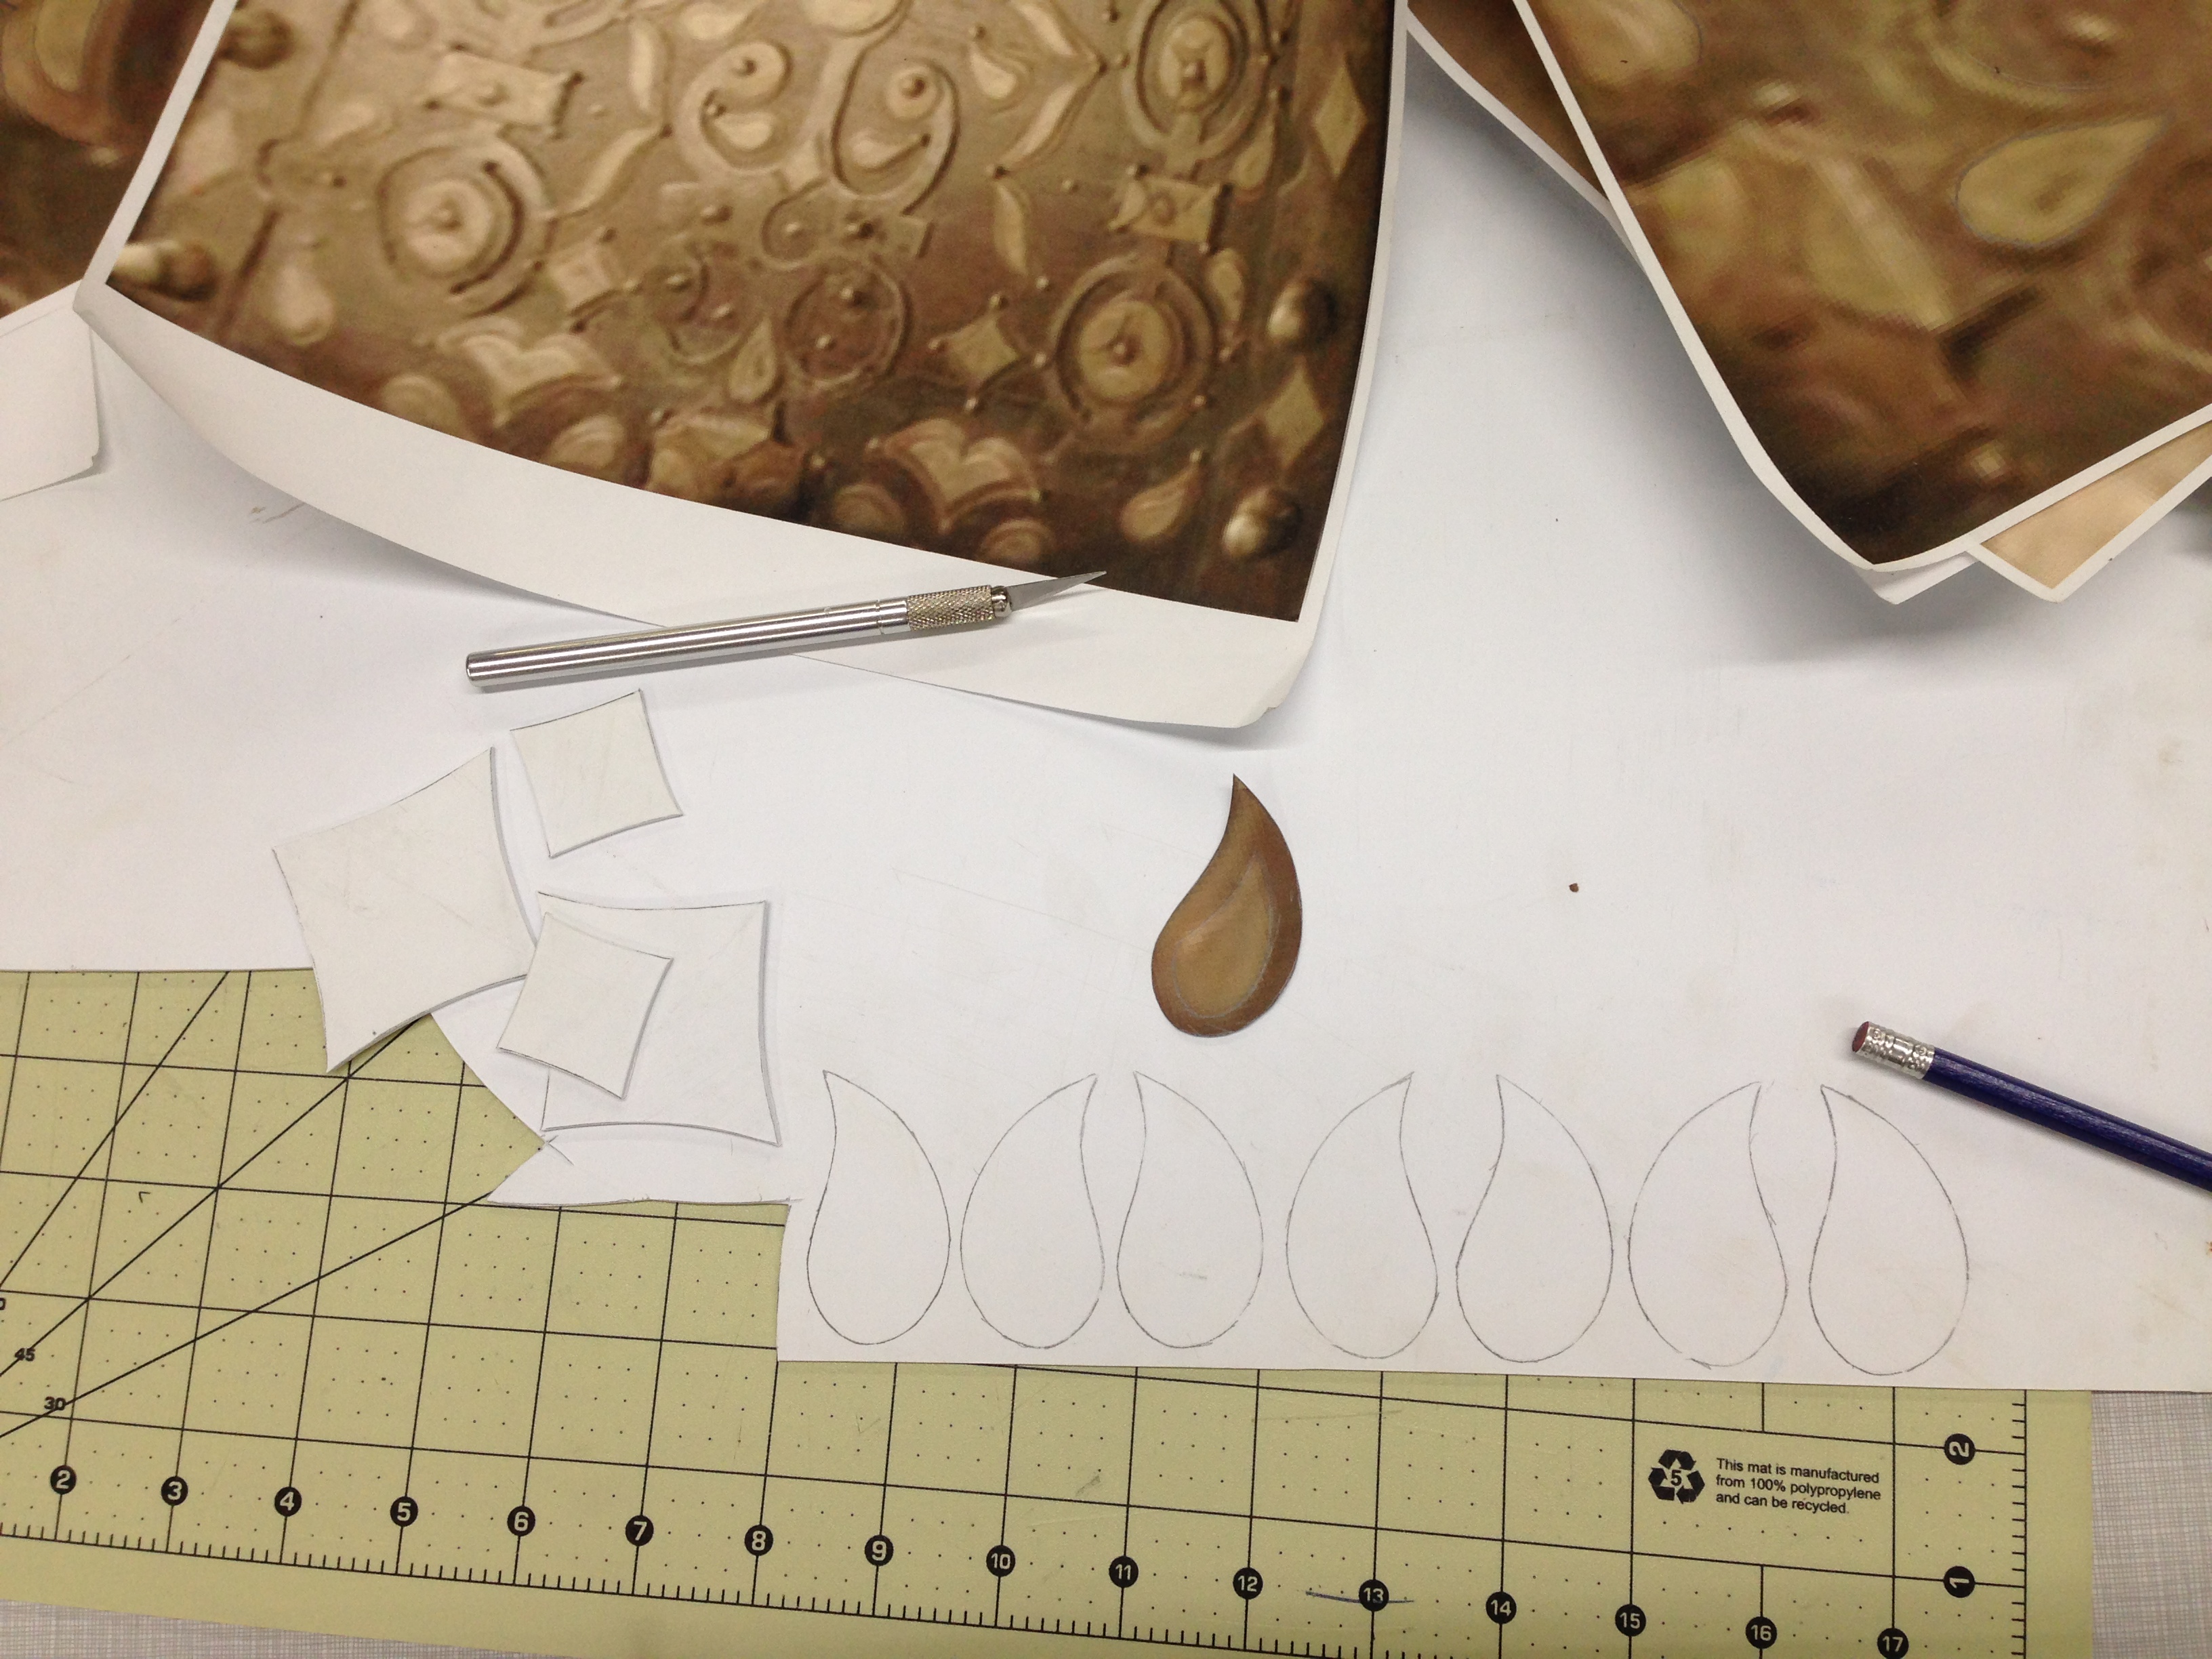
The most time-intensive part was the applied decoration. I used styrene plastic for this because using actual brass would have been prohibitively expensive and time-consuming, and a cheaper metal would have required just as much paint to match the appearance that the added labor was not worth it. I began by going through all the scenes in the TV show where the chest appeared and pulling out as many clear screen shots as I could, and then manipulating them in Photoshop to get a straight-on view. I scaled them up to full-size, printed them out and cut the pieces into patterns to trace on the styrene. Some parts of the design needed to be extrapolated slightly because I never got a clear view, but because it was symmetrical, repetitive and followed a certain logic, I was pretty confidant with how well my version matched the original.
Patterns and reference
Nearly every element was made of at least two layers of styrene, so after cutting the several hundred pieces out, I began gluing them together using model airplane glue. I did not attach them to the box just yet, but I did lay them out to test fit everything.
Unpainted decoration
With all the pieces ready, I began painting. They received a base coat of hammered silver spray paint, followed by a heavy dusting of hammered bronze spray paint. They would receive more paint later on, but at this point I began attaching them. Working on one side at a time, I first laid every piece out and used careful measurements to make sure everything was symmetrical and evenly-spaced. I then traced every single piece in place and labeled them by number before taking them off. I did some tests and found contact cement gave the strongest bond, though that meant I had to apply it to both the plastic piece and the box, and I could not apply it to the parts of the box where the wood was visible, so I had to carefully paint it within the traced outlines I had made. Luckily, the contact cement bonds almost instantly, so I could begin working on another side after one was completed.
Spray painted pieces
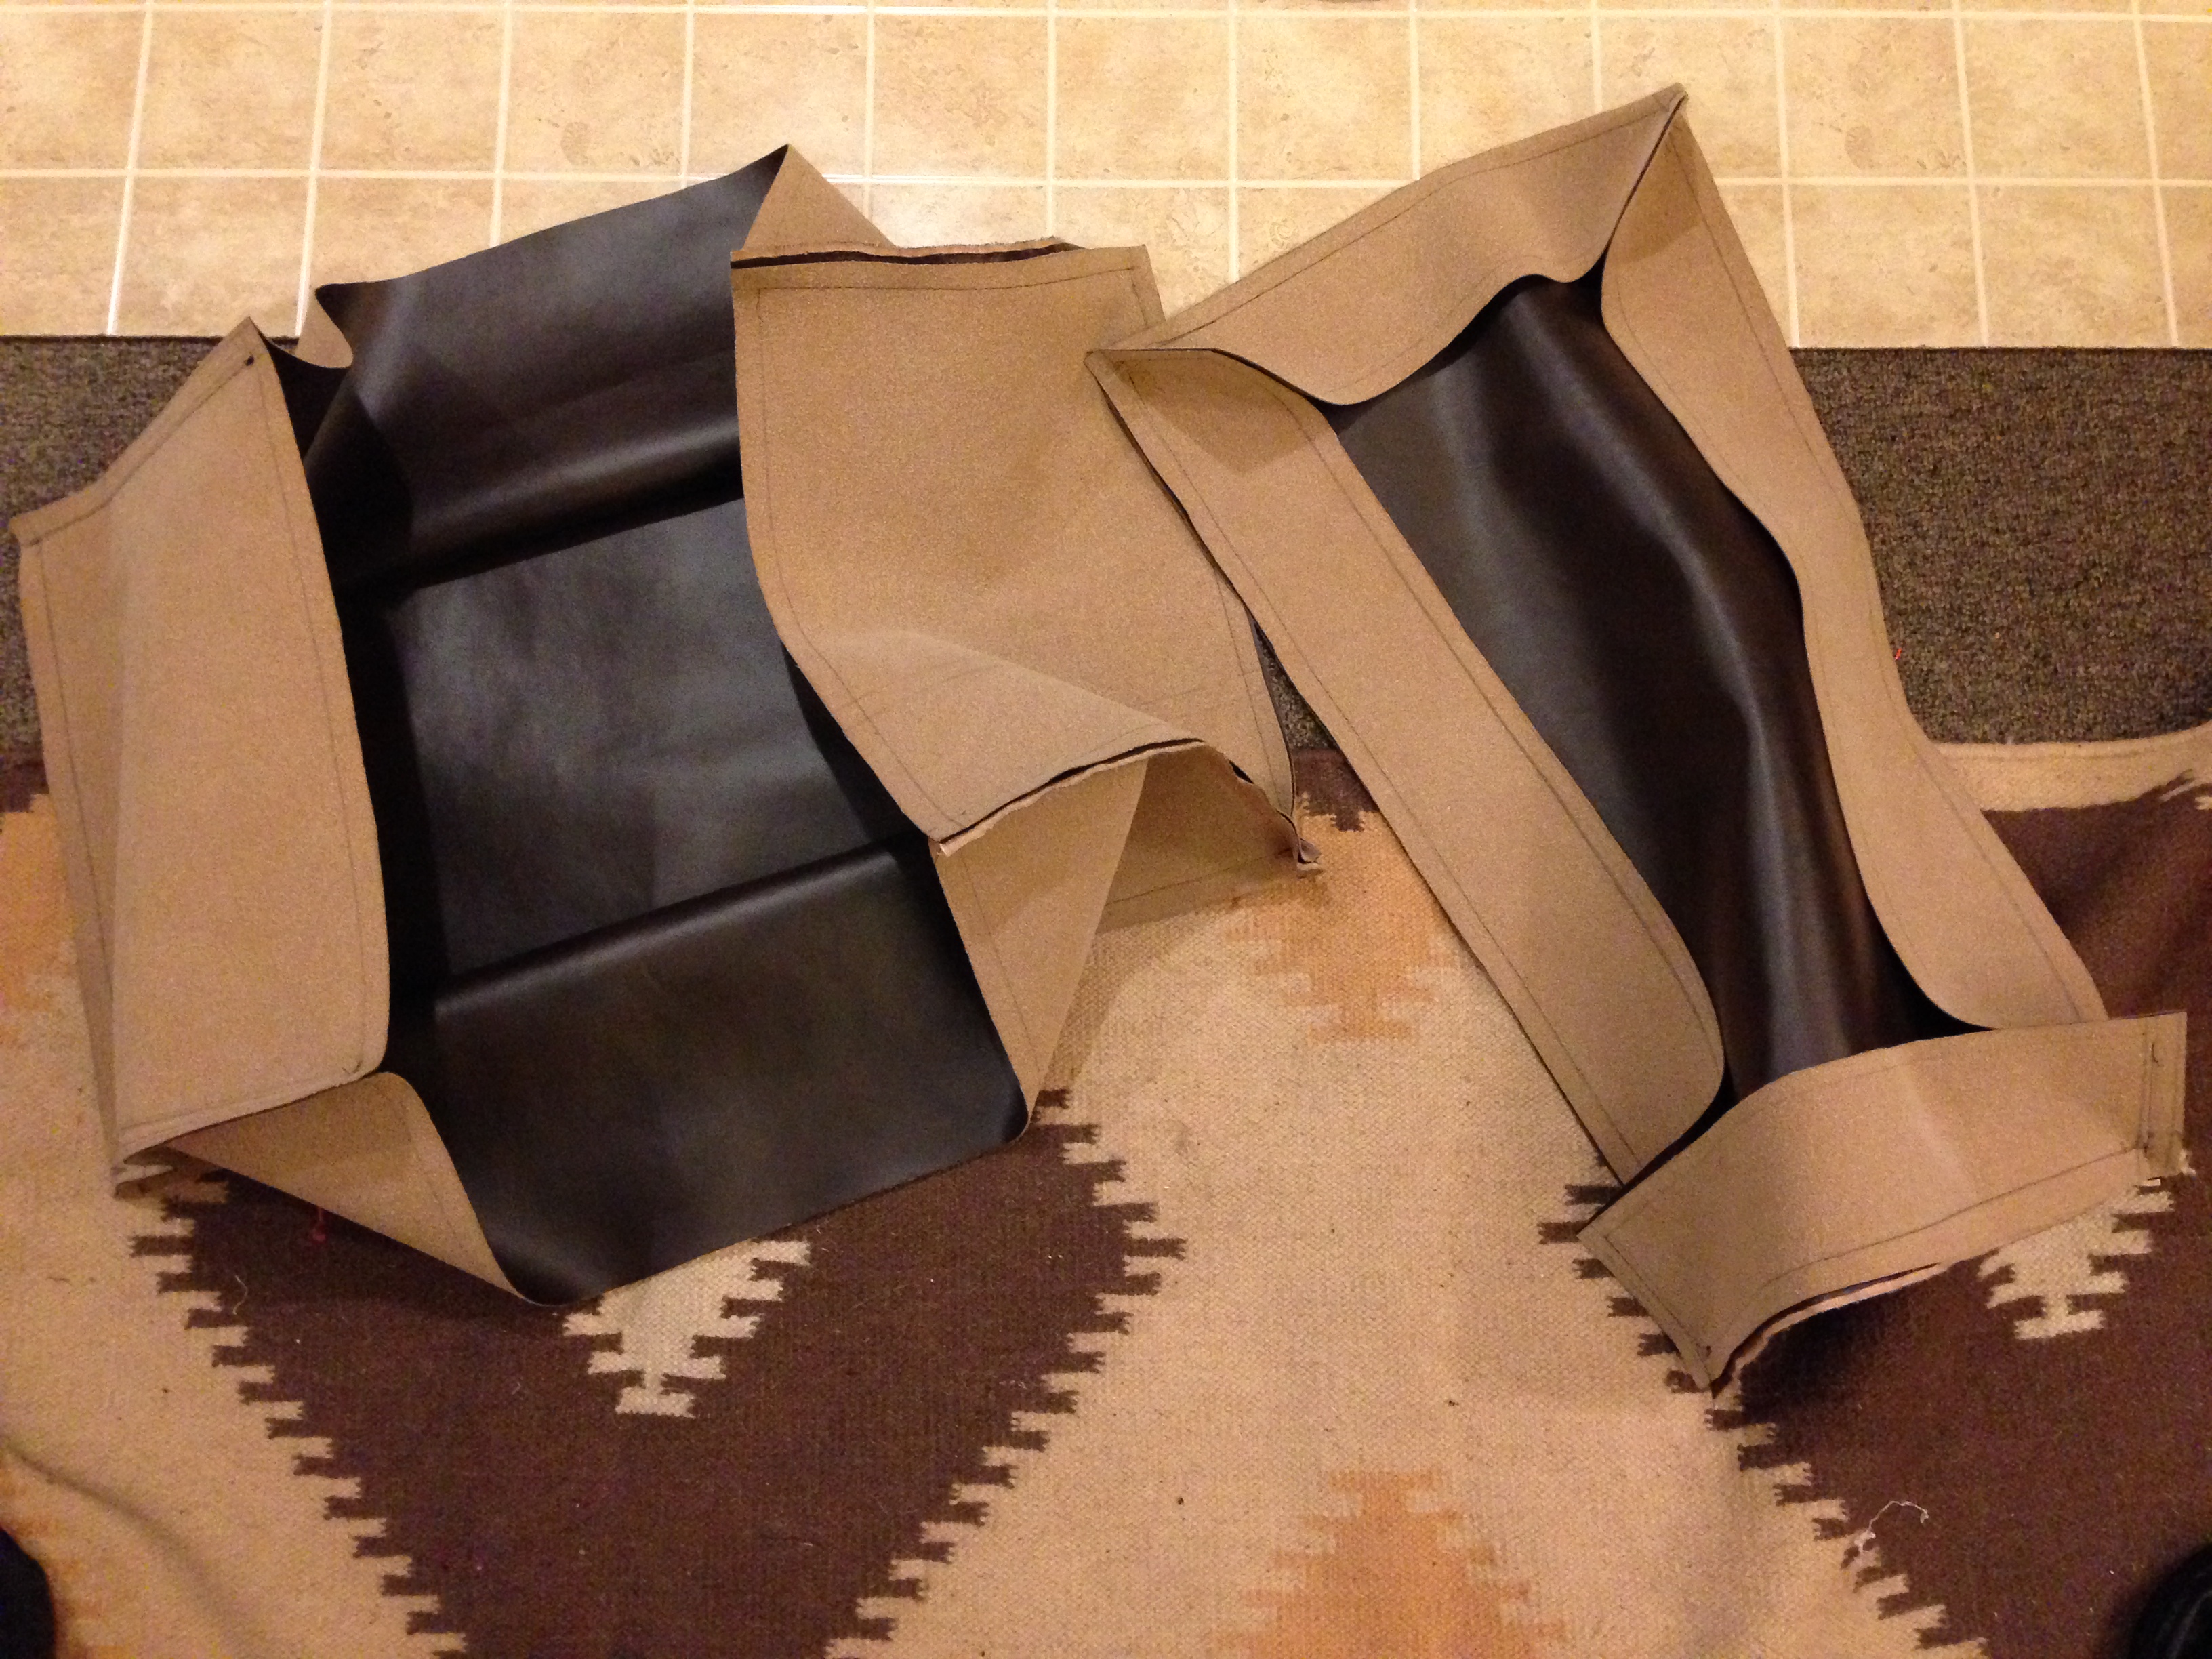
The inside of the chest was leather, though I went with a slightly-more processed version which was already finished and could fit through my sewing machine. I stitched all the pieces together first, and then attached them in as a single unit. I used a bit of spray adhesive to keep them from shifting around, but they are mostly held in place with the visible upholstery tacks. I pre-drilled holes for the tacks so I could make sure the spacing was even, and also because the ash was too hard to just hammer the tacks straight in.
Leather interior
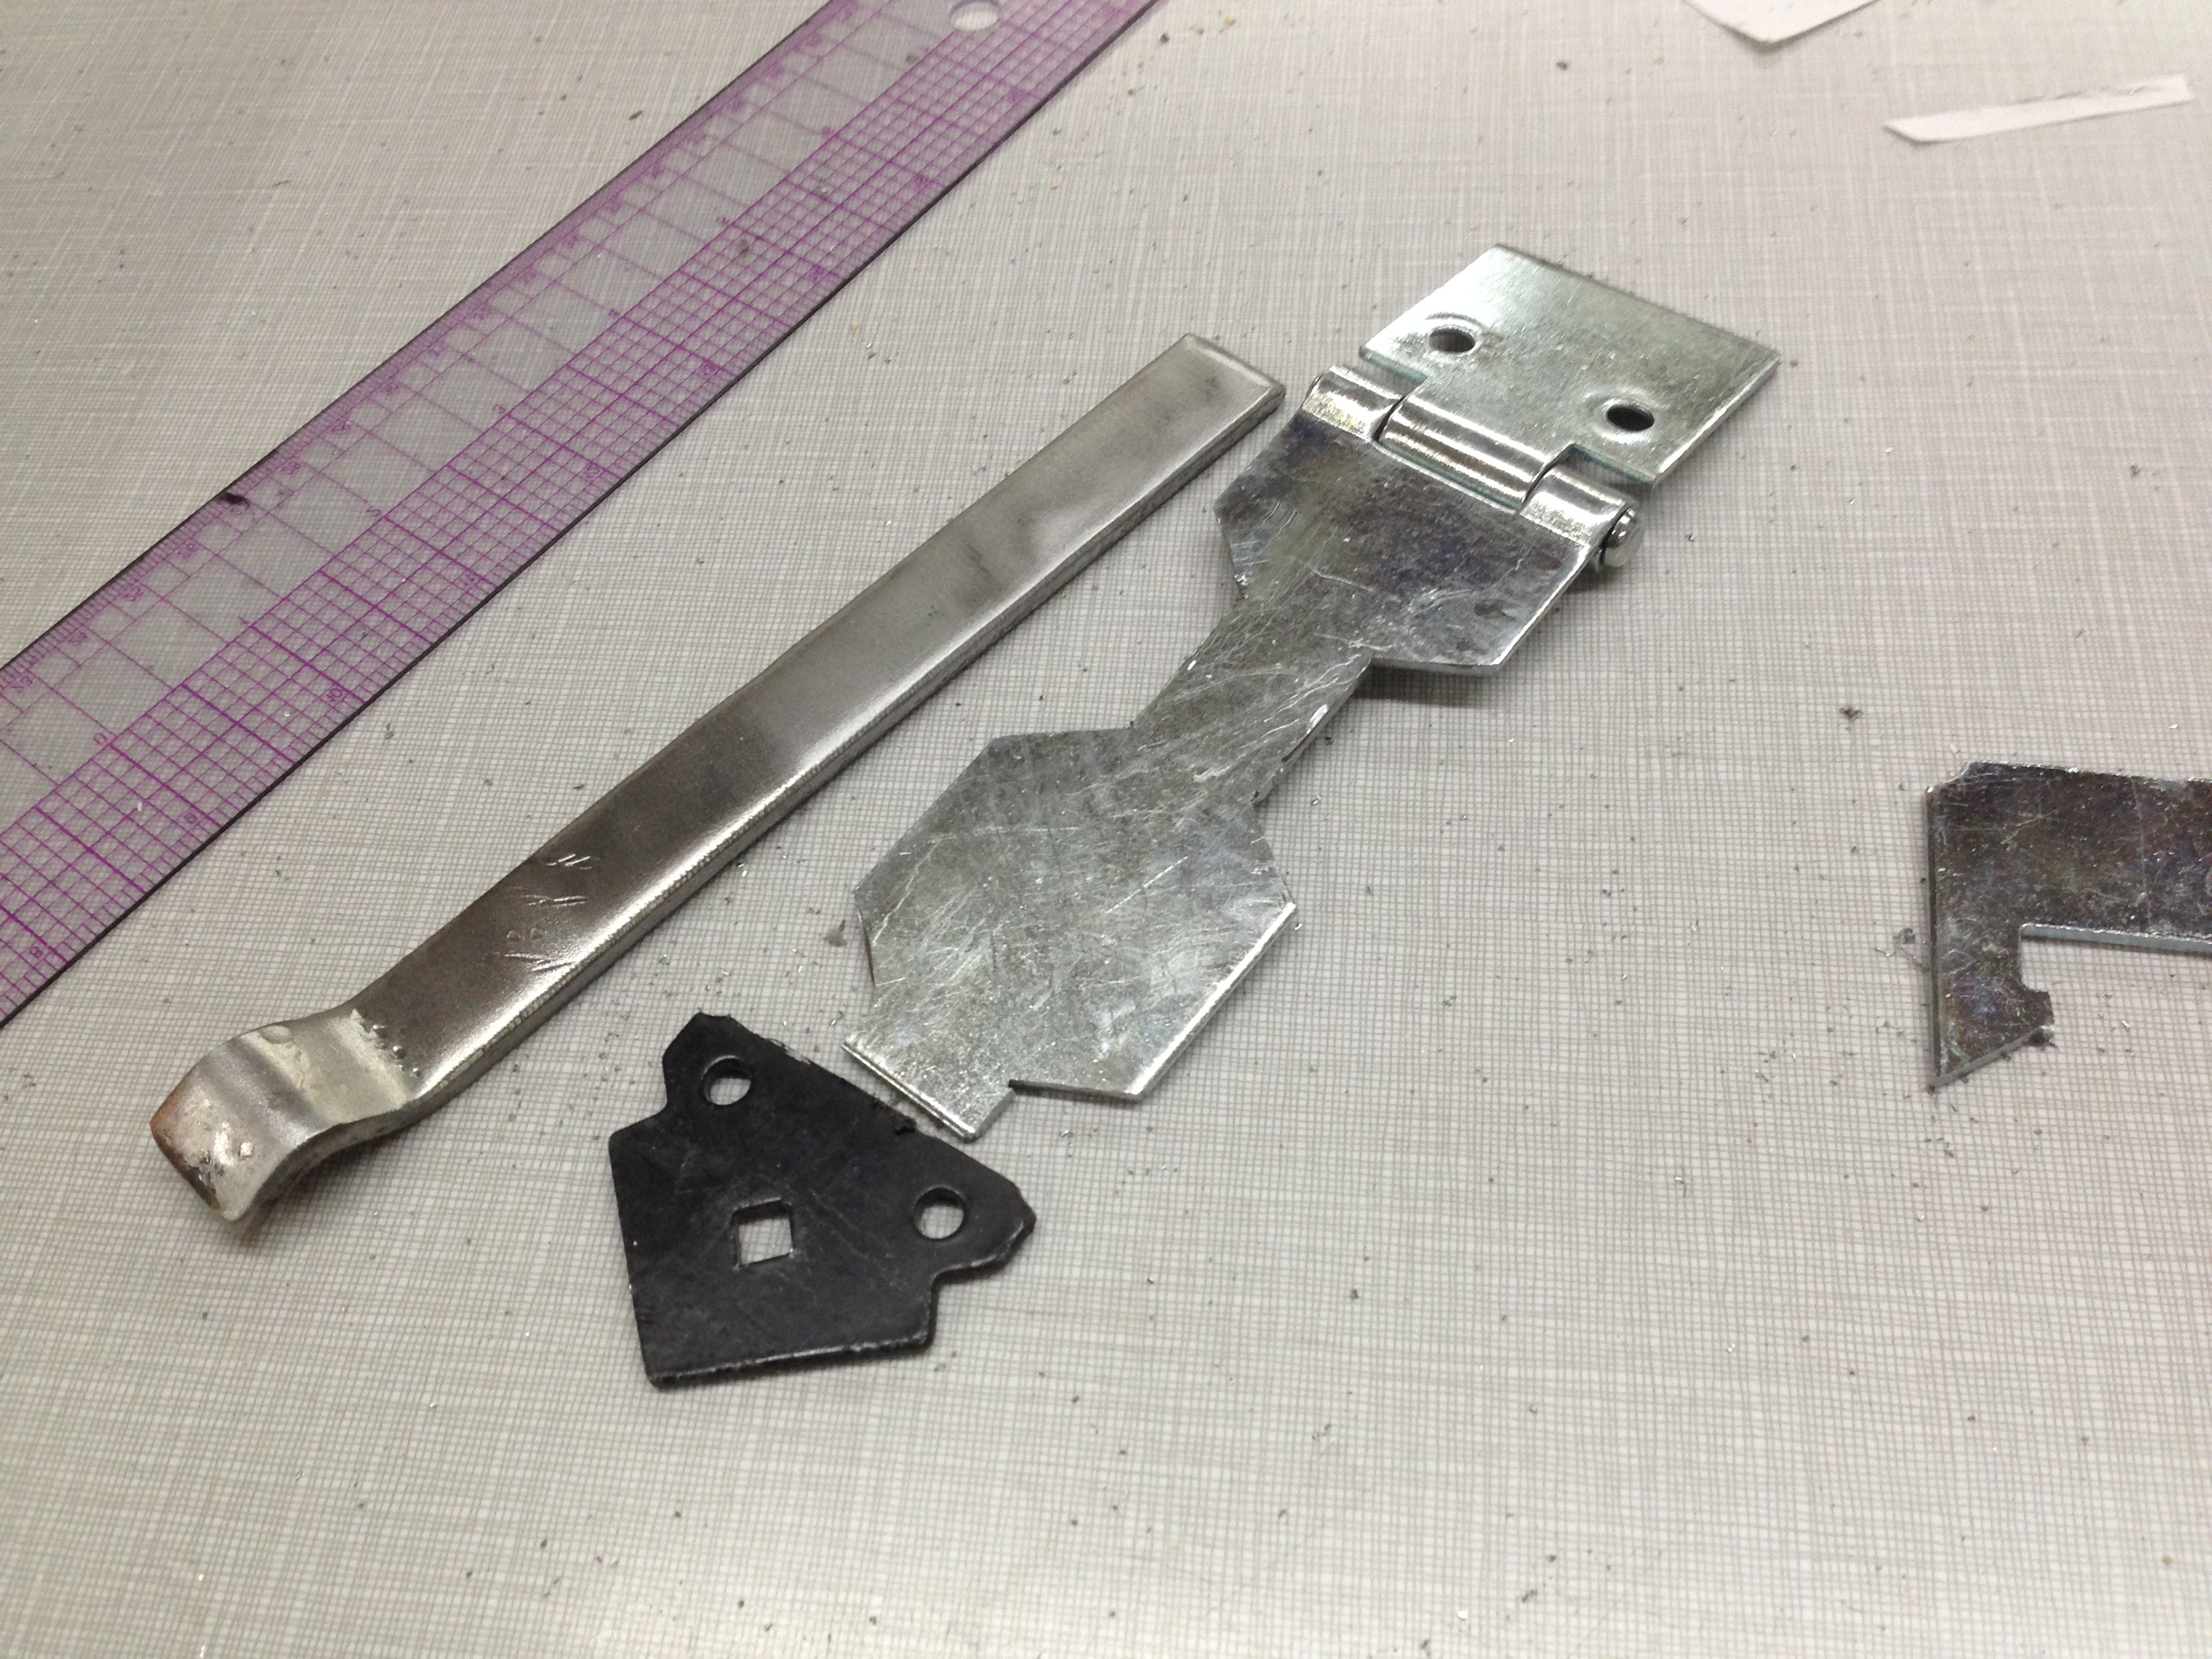
I found hinges online that were so close to the ones on the real chest that I wouldn’t be surprised if the prop makers bought theirs from the same supplier. I could not source the hasp though, so I had to fabricate it from scratch. I started with a basic hardware store hasp and cut notches in the edges. The tip was cut from another decorative gate hinge. I cut a bar of steel to length and bent a curl in the edge, than plug welded the whole thing together from behind and ground the welds flush to the surface.
Pieces for the hasp
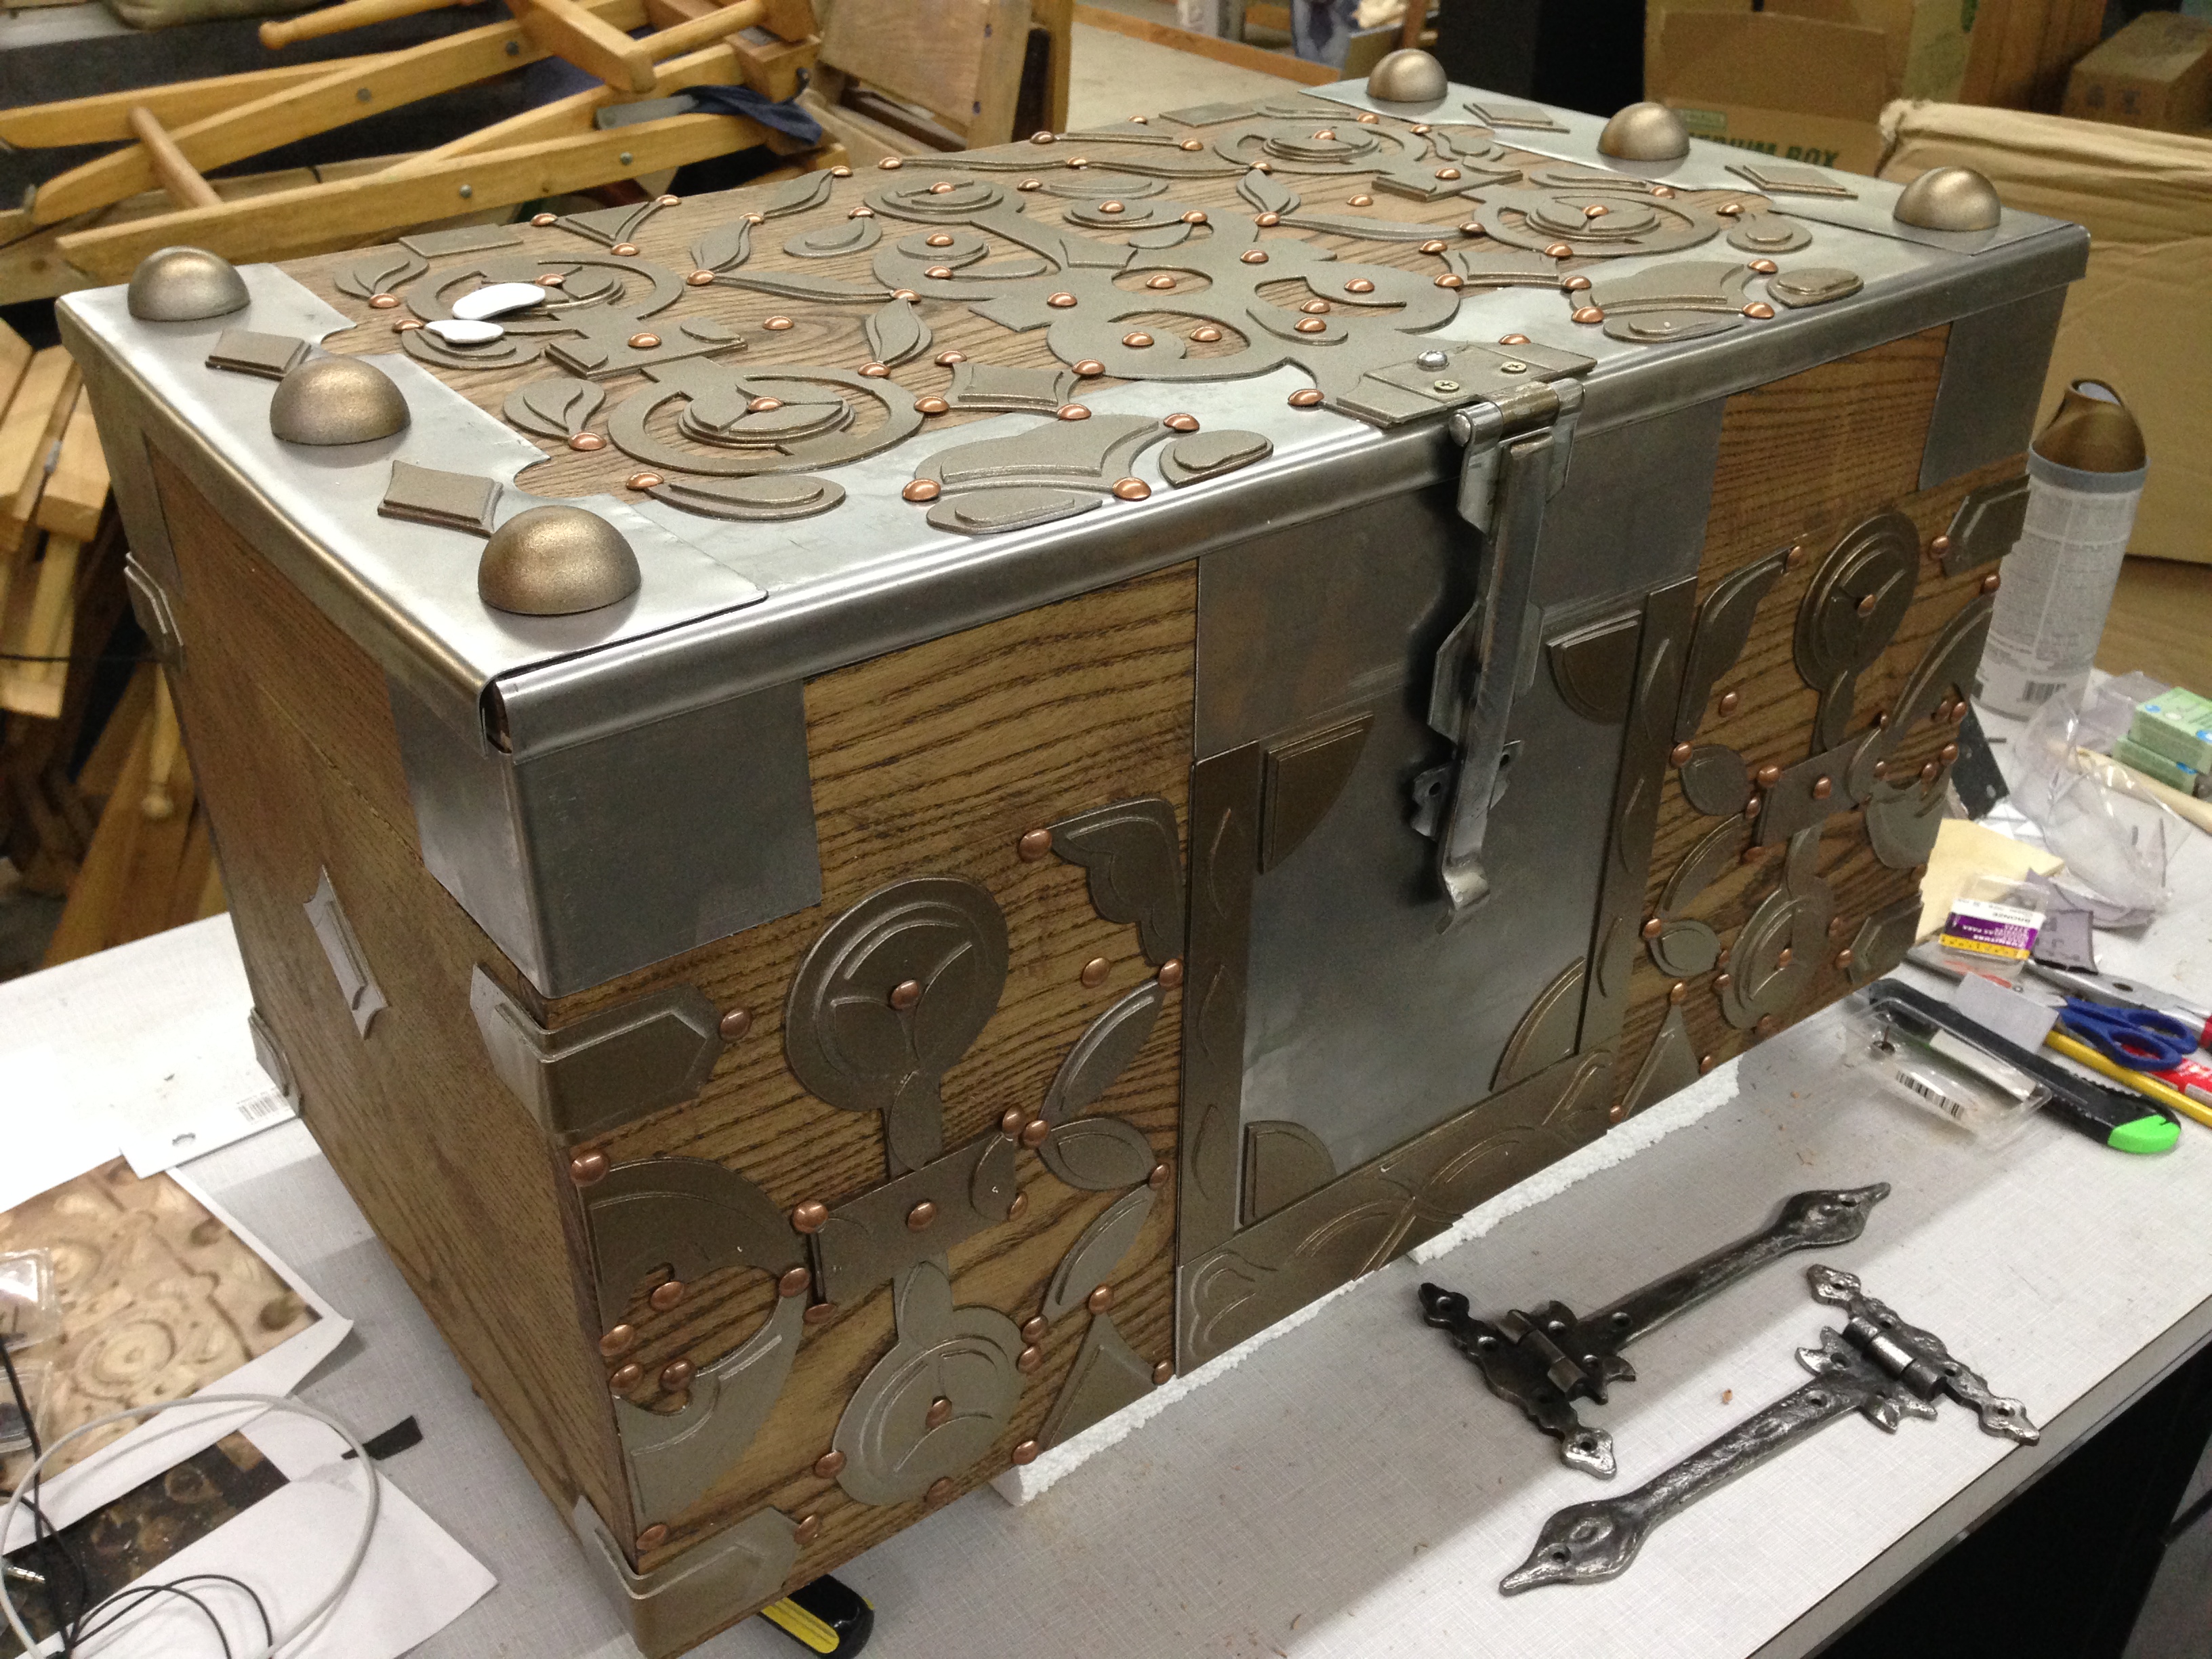
With all the pieces in place, all that was left was some painting and sealing. The top layers of all the decoration were sponged with a lighter brass color to set them off, and the whole chest was washed down with some dark browns and blacks to age and weather it. Finally, everything was coated in a clear satin Polycryclic.
Pristine and unsealed chest
I hope you enjoyed this as much as I did!
Making and finding props for theatre, film, and hobbies