All posts by Eric Hart

Summer Jobs Already?

For those of you in school for theatre, it is not too early to start thinking about summer employment. Even though snow is still on the ground and it gets dark at 4 pm, this is the time of year that many summer festivals, theatres and operas begin recruiting for their production positions and internships. To my international readers, I am sorry this post only deals with US jobs and internships.

Whether looking for summer work or for immediate work, Backstage Jobs should be one of the sites you check daily. By now, most of the major and legitimate theatres have learned to post any and all technical and production-related jobs to this site. It is completely free to view every job posting. The site admin also does a bang-up job of keeping spam and unrelated postings from appearing.

Speaking of spam, the Society of Properties Artisan Managers maintains a list of which of their member theatres offer props internships. This is a comprehensive list of all internships, not just summer ones, so be sure to check the commitment dates for the theatres you are interested in.

Artsearch is another big mainstay of technical theatre job postings. Though you should avoid job posting sites which require you to pay to view listings, this is the one exception. If you are currently in school, your school will probably have login information you can use (this is often true if you are an alumni as well).

In addition to job listings online, you may wish to think about applying and interviewing for jobs during one of the two big conferences. Though these are held in March, now is the time that you should be registering for the conferences, booking your hotel and making your travel arrangements. The two major conferences for theatre technicians are USITT and SETC.

This year, USITT is held March 20-23 in Milwaukee. The conference is meant for technicians and designers for all aspects of live performance. Part of the conference includes a massive stage expo, where companies and employers have booths to show off what they do. This is where you can meet and greet with the people in charge of these companies; many of them use USITT to do some of their recruiting for summer internships and apprenticeships.

The SETC conference will be held March 6-10 in Louisville, KY. SETC is meant for all aspects of theatre, including acting and directing, so it is not focused on just the production side. While the exposition hall is much smaller than USITT’s, it does have a job fair you can sign up for. Companies have small tables where they list the job openings they have, and you sign up for times to interview. You then spend the rest of your time meeting with employers all over the convention center to interview for these jobs. You can interview for as many or as few jobs as you have time for. I actually got hired at the Santa Fe Opera for the first time at the SETC job fair.

These websites and conferences have jobs at all skill and pay levels; even the internships can vary widely in how much you are paid. While it may seem your acting friends are constantly taking low-to-no paid internships, as a technical theatre person, you should always be paid for your work. Plenty of paid opportunities exist at all skill levels if you look for them.

Companion Videos for my Book

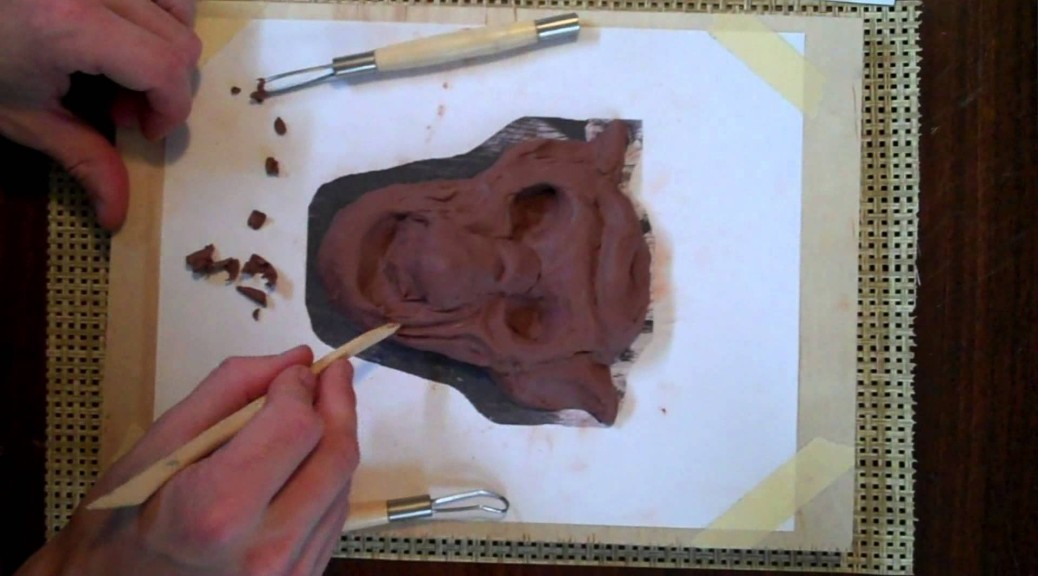
With less than seven weeks before the release of The Prop Building Guidebook: for Theatre, Film, and TV, I have begun adding videos to that website. These videos are meant to augment the content of the book, since some things are just easier to show in motion, rather than describe with text and pictures. I will be adding new videos every week until the book launches on February 13th.

So without further ado, I am proud to announce the brand-new Prop Building Guidebook companion video page. Only two videos are up at present; the first is on the vacuum former I built, which you probably remember from last autumn. The second has just been added today and shows you how to sculpt in oil-based clay. You can check it out below:

Keep on propping!

Monday Morning Links

Fon Davis runs a company called FONCO Creative, which makes miniatures and models for film and television. He’s worked on some lesser-known films such as Matrix, Star Wars Episodes I-III, and The Nightmare Before Christmas. Make: Believe visits his studio and posts some photographs and this video below. It is great to see a fairly young and high-tech company still embracing the use of models and miniatures.

You should see this “Death Row” router table; so-named because it was found in a prison woodworking shop where tools often need to be, um, improvised.

New York Magazine has this snarky look at how terrible the newspaper was in Back to the Future. Slate Magazine than has a rebuttal, calling the critique very funny, but very wrong. Both articles are highly entertaining; you might remember them the next time you need to make a fake newspaper prop.

Here is an interesting Instructable for making your own machinable wax. Machinable wax is a wax which will not melt or deform from the friction of a high-speed rotary cutter; it is useful for trying out a part on a CNC machine before you waste your real material (and it can be machined faster and without wearing down your tools).


Exploding Cuckoo Clock

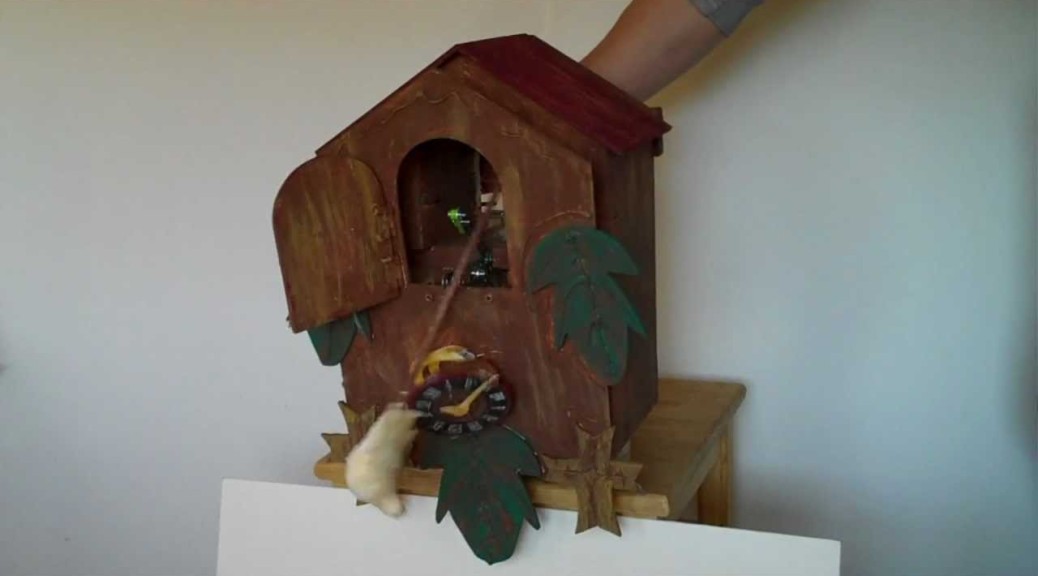
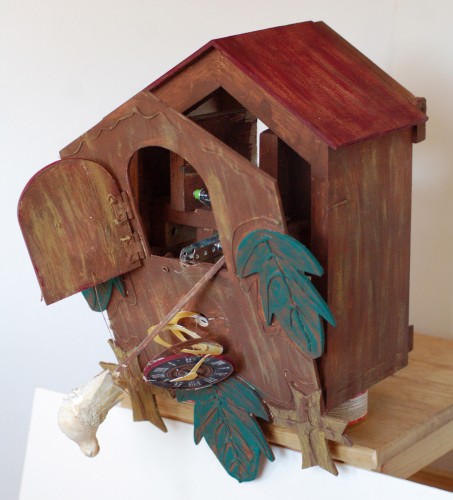
Last fall, I did the props on Crazy for You. For those unfamiliar with the show, there is a scene were a cowboy shoots his gun off in the saloon. The bullets hit various objects in the room for comedic effect, including a cuckoo clock that explodes.

Cuckoo Clock, exploded

I have not shared any photographs or information on the clock yet because I was actually writing an article on it. The full details and pictures are now up in the latest issue of Stage Directions magazine in an article called “Don’t Go Cuckoo.”

I also shot a short video showing the action of how the clock cuckoos, explodes, and how long it takes to reset it for the next performance.

Box Elder Boxes

Welcome back, everybody! I hope the holidays went well. There is a lot of great stuff on the way for this blog as we count down to the release of The Prop Building Guidebook, one of the first guides to building props to be published in a decade, and one of the most complete ever.

Today, I wanted to show off some boxes I made as Christmas gifts. These were done awhile ago, but I did not post them because the recipients read this blog. It was interesting working with “nice” wood and building an item the “real” way, because it makes you realize how many shortcuts you can take in prop making, and how much you can get away with when an object is only viewed at a distance from the audience.

Not that the props I and others make aren’t well-made; frequently, they are sturdier and more polished than many items you can find in the store. But there is a difference when the item you are making will be held up close, and any joints that are a bit proud can actually be felt, or an errant glue drip on the inside will be studied closely.

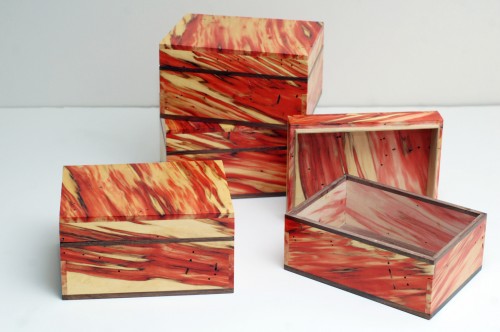
Four boxes made from box elder.

I used an exceptional piece of box elder for these boxes. You can see in the open box above, the inside is completely unfinished. The polyurethane coating adds a bit of contrast and depth to the surface, but otherwise, that is the natural color of the wood. The red streaks comes from a fungal growth. Box elder is rarely harvested commercially, because it grows in flood plains. Many people do not realize it can look like that on the inside, so they just burn it as firewood or turn it to mulch when they need to get rid of a box elder tree that has fallen down or died.

I found my pieces at a local sawmill that specializes in salvage lumber. The sawyer had rescued a bunch of box elder trees when the park services cleared a riverfront. My wife and I saw this wood at a wood show awhile back and were asking questions about it. The next day, we returned to the show and the sawyer had set aside some particularly bold pieces of the box elder for us.

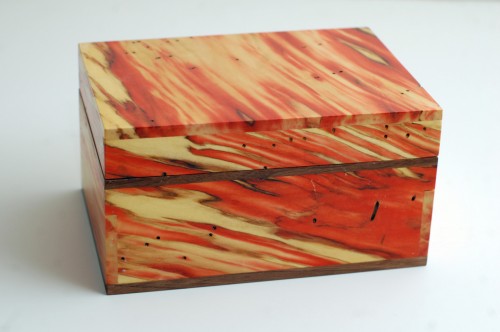
A box made from box elder.

I used a piece of walnut for the bottom and as an accent around the lid opening. The boxes were cut entirely on my table saw. As I mentioned above, I finished them with a few coats of polyurethane; specifically, I used spar varnish because it imparts a lot of UV protection. The red coloring will actually fade away when left in direct sunlight, which would be a shame.