Sorry for missing the last two updates. I’ve been excessively busy getting ready for back-to-back techs for Merchant of Venice and A Winter’s Tale for this year’s Shakespeare in the Park, and this past weekend was also a wedding for two of my good friends in Nebraska.
Rest assured, tomorrow will see a return to regularly scheduled posts!
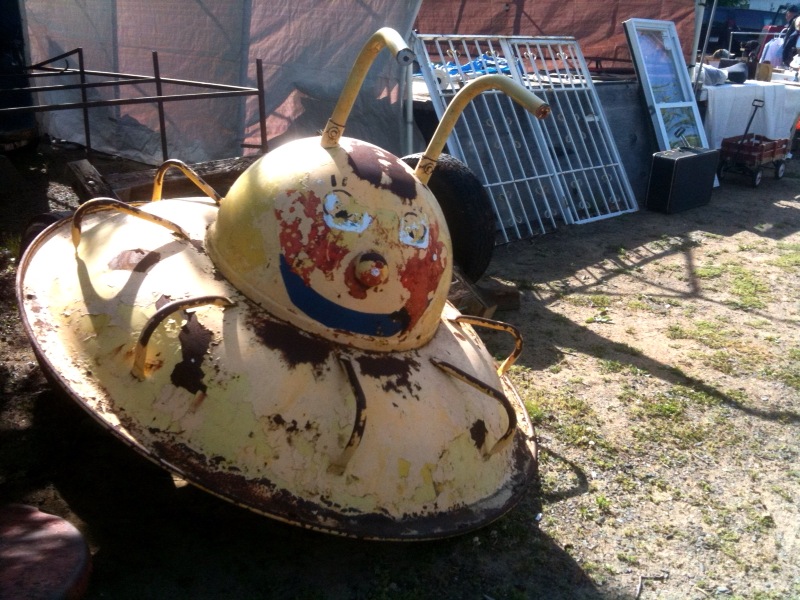
Playground equipment at the entrance of Elephant's Trunk
Faye Armon and I headed up to Elephant’s Trunk this past weekend. It’s one of the largest flea markets in New England, and only about 2 hours north of New York City.
It runs only on Sundays from April until November, 7am-2pm. They claim it takes up 55 acres; maybe that’s true if you count the parking lot. Regardless, it took us all day to walk past every single booth at least once.
I saw Americana, ephemera, steampunk treasures, baubles, furniture from around the world, and more than a few things where I had to stop because I didn’t know such a thing had existed. The prices ranged from thousands of dollars for pristine antique furniture, to tables filled with sundry items for a dollar each.
We brought a van along which we filled with potential props for both Merchant of Venice and Winter’s Tale. Next time I think I’ll bring a rolling cart as well, as the carts that are available for borrowing there are so rusted they’re nearly immovable.
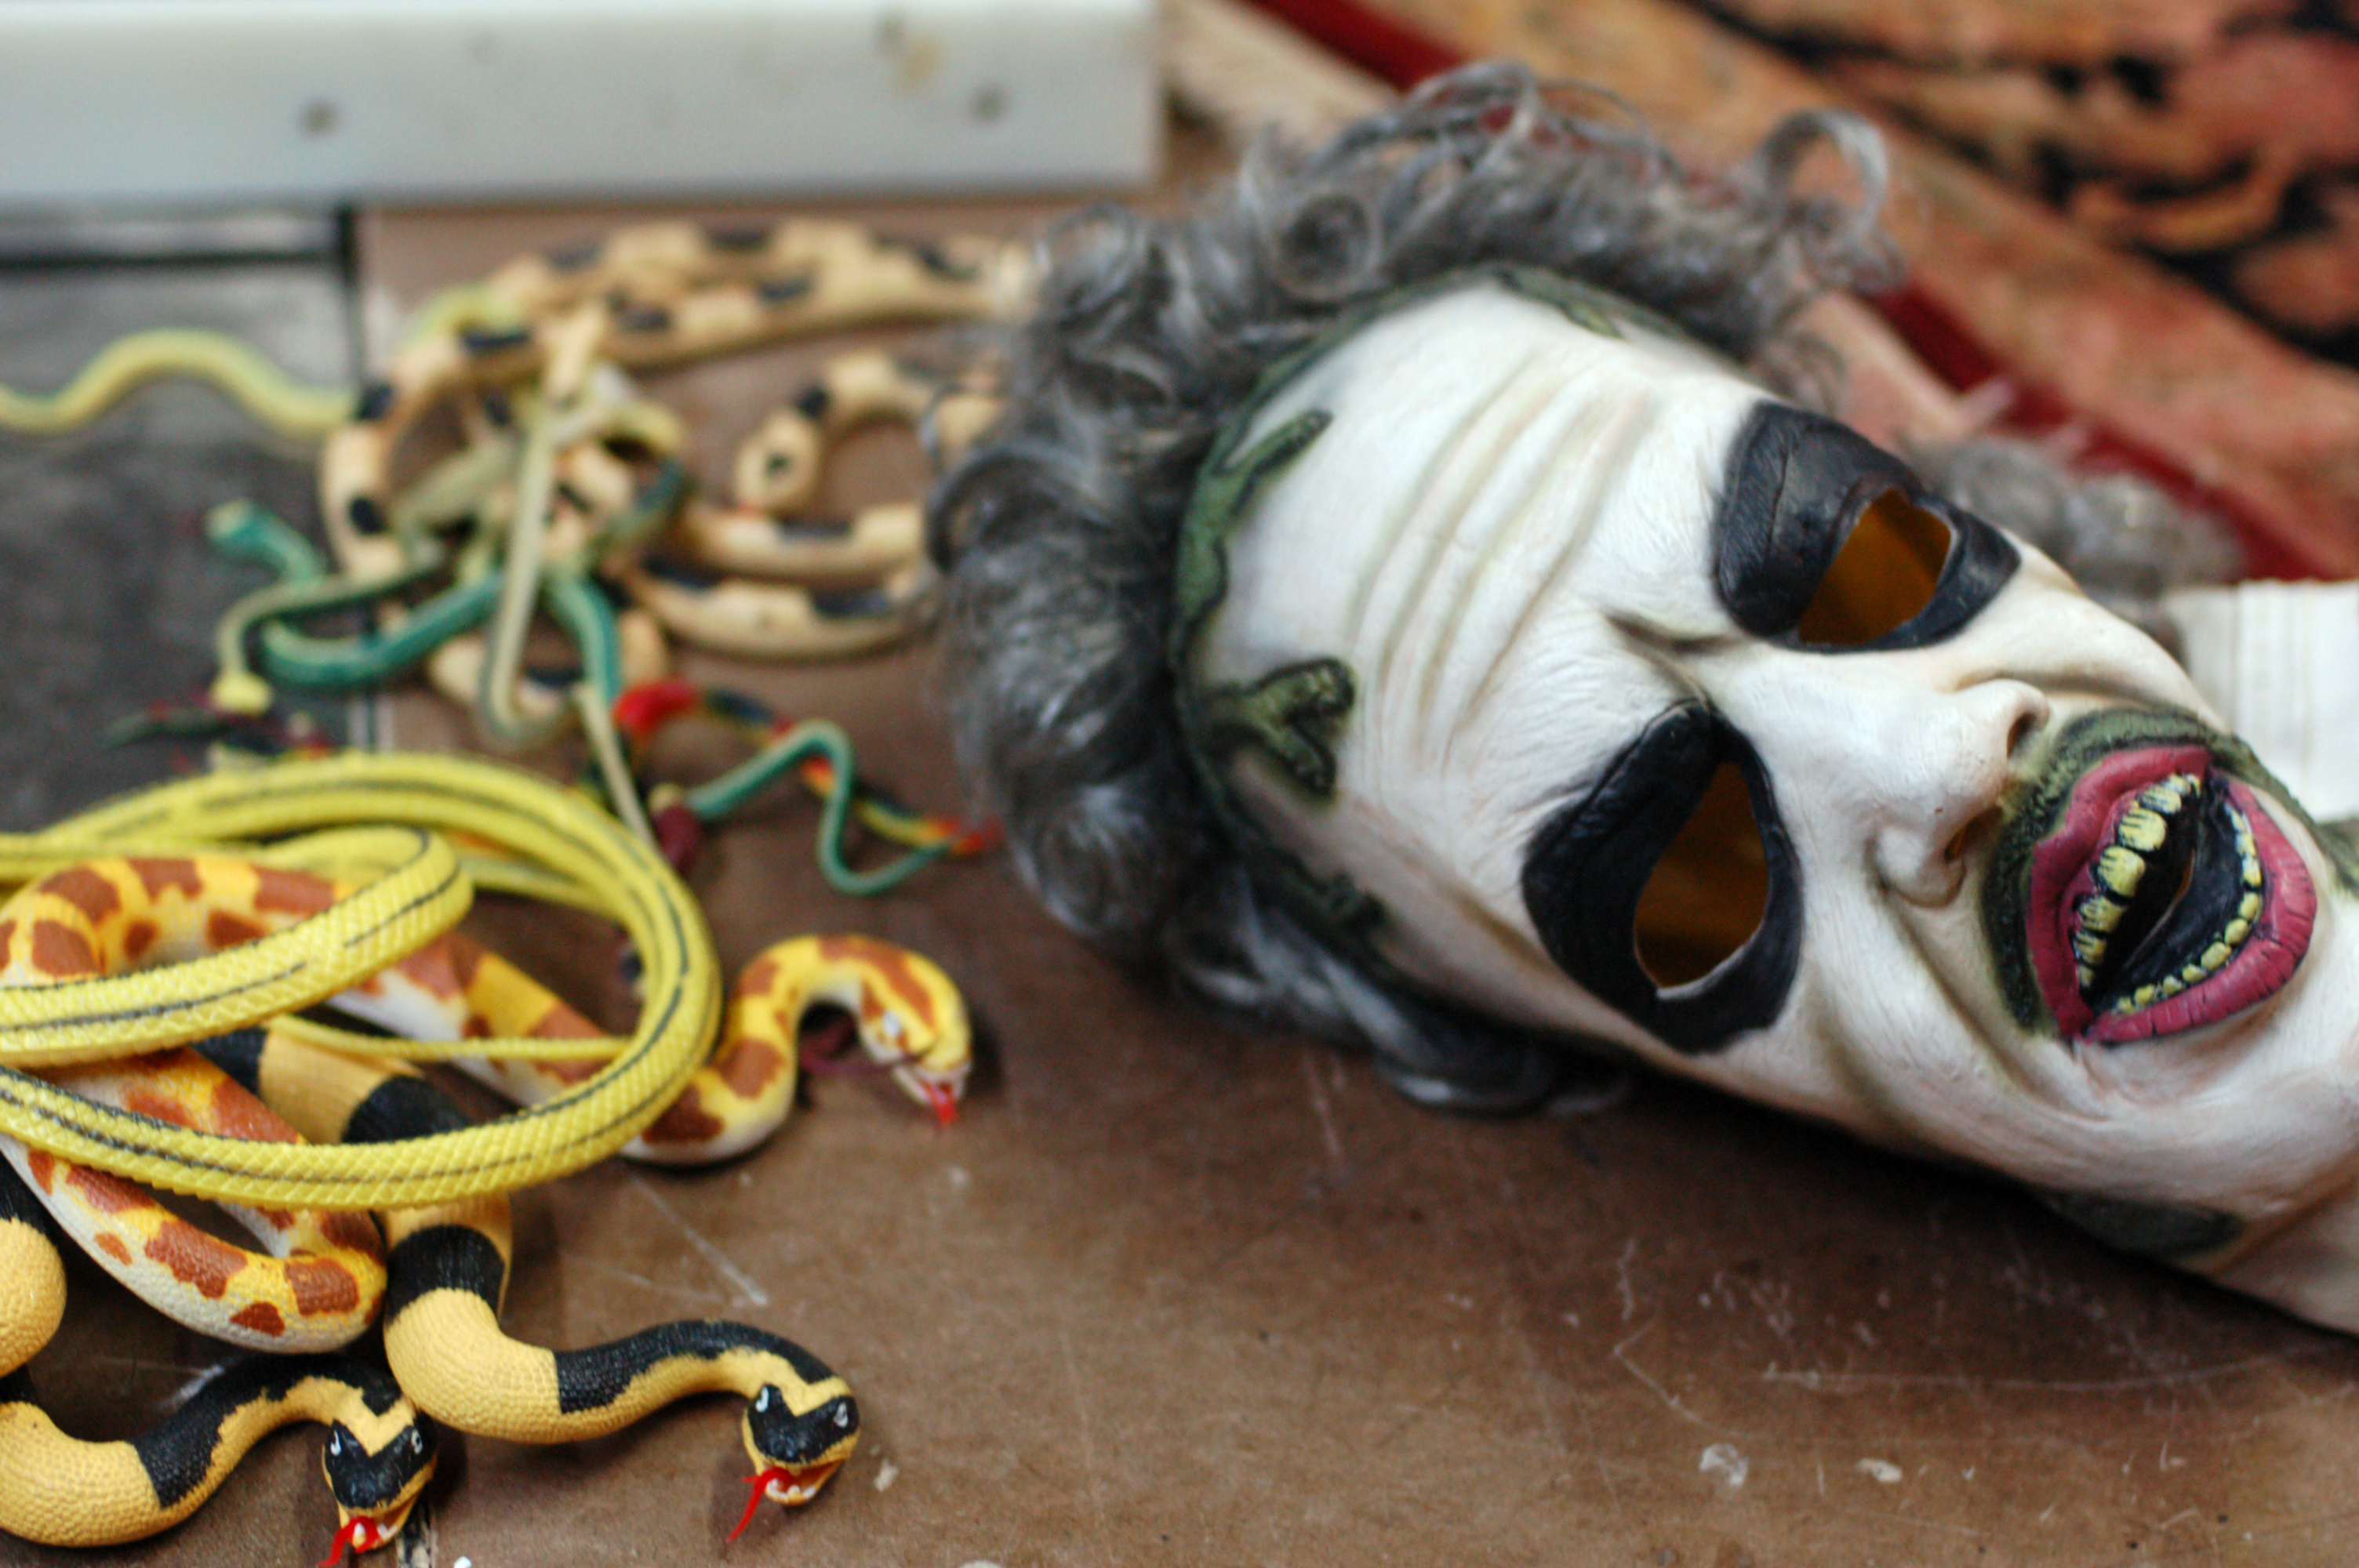
I was contacted to make the head of Medusa for a show. An actor would pull it out of a bag, but it did not have to stand up on its own. The face did not need to match any of the actresses in the cast, so that freed me up in my options. It needed to be inexpensive too, so I used as many store-bought items as I could.
Supplies for the Medusa head
I bought a Beetlejuice mask and some rubber snakes from Halloween Adventure, a year-round costume store in the East Village. His hair turned out to be a wig which pulled right off.
Filling the face with foam
I filled the inside of the mask with a layer of expanding foam insulation. In order to keep the foam from distorting the shape of the face as it expanded, I buried the face in a tray of sand. Expanding foam gives off harmful vapors when curing, so use in a well-ventilated area, preferably in a spray-booth or near some kind of system that can pull the air away from you. Expanding foam does not cure properly when you put it on too thick, so fill the mask one layer at a time. I ended up rotating the mask after each coat and putting only a single layer on each side. The mask remained hollow but the sides were strong enough to hold the shape.
Snakes
I used wire to hold the snakes on the head. I arranged it so it would be easy to grasp Medusa from the top. I had printed out some pictures of various depictions of Medusa in art through history, and that gave me a good reference on how to arrange the snakes so they would look the most “Medusa-like”.
Basecoated mask
I made eyes out of epoxy putty. Epoxy putty comes in tubes, and you simply break a piece off and mix it around in your hands until it is a uniform color. It has the consistency of a clay like Sculpey, and hardens over time (depending on which kind you get, that can be anywhere from five minutes to an hour). Epoxy can be absorbed through the skin and you can become sensitized to it over time, so where disposable gloves when working with it. I had set the eyes in place before filling the mask with the expanding foam, which held them in place when it dried. I sprayed a coat of paint over the entire mask (I actually did this before putting on the snakes).
Cutting the eyes out of paper
I found a picture of an iris and pupil and printed it out to the appropriate size. I cut two of them out and used five-minute epoxy to attach them; I coated the entire eyeball with the epoxy to make it glossy, and lay the paper iris on top of that. After the first coat dried, I covered the entire eyeball with another coat of epoxy. This made it appear like the iris and pupil were behind the cornea.
Don't look into her eyes
At this point, I also cut off some of the nose and upper lip and carved it down to look less like Michael Keaton and more like Medusa. Once happy with the new shape, I re-coated the foam with automotive filler (Bondo). This is also toxic and requires a well-ventilated area. The advantage is that it dries very quickly; if you have more time, you can use something far more innocuous, such as Foam Coat.
Face painting
The next several steps involved painting the face with acrylics and spray paints.
Filling in the necknole
I filled in the bottom of the neck with a chunk of blue foam carved to fit. I spray painted it with red, and then blasted it with a hot air gun to create the above effect. Again, you need a well-ventilated area for this, preferably a spray booth.
Covering the head with blood
I thought the head needed some splattered blood. I mixed up some more five-minute epoxy, and then stirred in some paint. I had some red paint and some black paint. I did not mix it to a uniform color, but rather swirled it so the parts had differences in both translucency and tint. I filled the rest of the neck hole, smeared a lot around the bottom of the neck, and then splattered and flung some upwards so it would look like her head was sliced off in one swipe.
The head of Medusa
Now that you know how to make your own head of Medusa, get Kraken!
CNC routing is amazing if you’ve ever seen it in action. You can watch perfect circles and intricate shapes appear in plywood or other sheet goods, right before your eyes. Exact duplicates of precisely measured pieces can be made over and over again. But CNC machines are expensive. They take up a lot of room in already crowded prop shops. And they require a set of technical skills that may not be inherent in a typical prop shop staff.
That’s why 100K Garages is such an intriguing concept. Basically it is a loose network of shops around the world with CNC routers of various capabilities. You submit the guidelines of what you need built, and the shops bid on it. You pick a bid you like, the shop makes your pieces, and mails it to you. Prop done!
I have not had an opportunity to give this site a test run yet. If anyone out there has, let us know. We’d love to hear about it.
If you’re new to this site, or if you follow it in a blog reader, you should check out the Blogroll links in the sidebar. These are other sites and blogs of prop-makers and prop-masters and general crafty people. Here’s a sampling of some of the recent posts from these sites to entice you to check them out:
Via Propnomicon, I’ve found this collection of 11 old and grungy film textures. I’m going to use these to make some aged daguerreotype for our upcoming Merchant of Venice.
Anna Warren continues to impress with her documentation of all the fake food props she makes at Fake ‘n Bake. One of my favorite recent posts is how to make Roast Beast in gravy.
Instructables is an incredible resource to find information on techniques you want to learn or materials you’ve never used before. Two tutorials I’ve enjoyed are:
Casting a Pear – Probably the quickest and grittiest way to cast something I’ve ever seen.
Sci-Fi Handgun – There are a lot of Instructables on making or remaking weaponry from science fiction movies. These are a good way of showing how a uniquely shaped prop can be broken down into simpler parts, and how found objects and tiny details can transform a prop from simple parts into a homogoneous object.
Keep readin!
Making and finding props for theatre, film, and hobbies