Tag Archives: carpentry

A wooden table

The last show for the calendar year at the Public Theatre is Mike Daisey‘s “The Last Cargo Cult”. We needed to construct a new table to match the design of the world. The design called for a solid, fairly sturdy-looking wooden table, which showed some character and a lot of age.
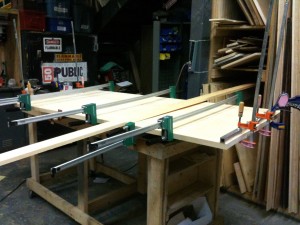
The boards for the table top are clamped together

The table top was made of four planks of equal length. I connected them using a biscuit joiner. I was able to borrow the scene shop’s new Woodcraft bar clamps for this. You alternate whether the clamps go over top or underneath the surface to keep it from bowing. I also clamped a metal bar on either end as an additional way to keep the planks level with each other. You can ignore the random one by four in the photograph; I’m not sure why that was there.
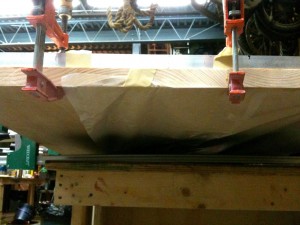
Wax paper to catch excess glue

I used wax paper to keep the glue from squeezing out and adhering the wood to the work table, or worse, dripping onto the clamps. If you wipe the excess glue away, you will smear it into the wood. It may look like it’s gone, but when you go to stain the piece, it will not accept the stain and you will be left with light-colored spots. Wait until the glue dries and then scrape it off. If you are painting the table, or the glue is in a hidden place, then by all means, wipe away while wet.
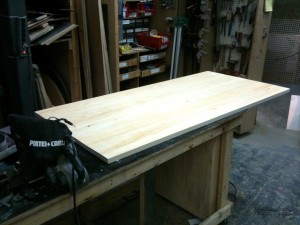
Finished table top
Finished table top

Here is the final table top. I used a belt sander, starting with a 50 grit belt, then skipping straight ahead to 12o grit, and finishing with 320 grit. I then hit it with a random orbital sander at 400 grit. Peter Ksander, the set designer, wanted to bring out the grain and accentuate the pattern. I wiped the surface with a wet rag. This causes the dark grain to raise up from the lighter grain; if you were aiming for a smooth surface, you can then sand the higher grain down, but in this case, I left it alone.
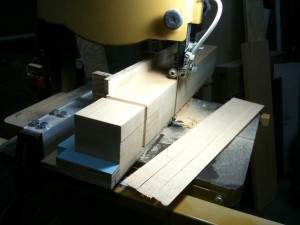
Taper jig on the bandsaw

Karen Cahill, the properties manager at George Street Playhouse, was on hand for a bit to help out. She glued the boards together to make the blocks for the legs. I made a taper jig to quickly replicate a taper onto all four legs. I used the band saw as the table saw could not raise high enough to cut it in one pass.
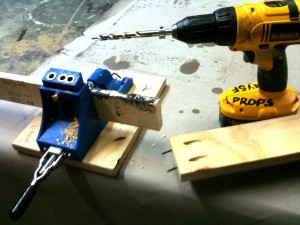
Kreg Pocket Hole Jig

Easily one of my favorite new tools of the year is the Kreg Pocket Hole Jig. You can see in the photograph above how it allows you to drill holes so the screws exit the center of the end grain. For prop carpentry, the speed and strength of the joints it creates have replaced many of the joints I use regularly. For tables, I use them to attach the apron to the legs, followed by the apron to the top. This allows me to keep the top of the table free from screw or nail holes.
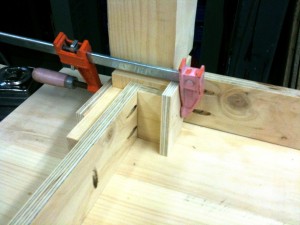
Lining up apron and leg for attachment

You need to clamp the pieces well to keep them from drifting; the pocket hole jig creates a hole at a slight angle, so the screw will want to push the wood back as it drives in. Above, you can see the various pieces of wood we used to not only hold the apron in place while we attached it to the leg, but also to space it consistently on all the legs. Jay Duckworth was on hand for much of this part as well. He also routed the groove you see in the legs below and stained the table at the end of the day.
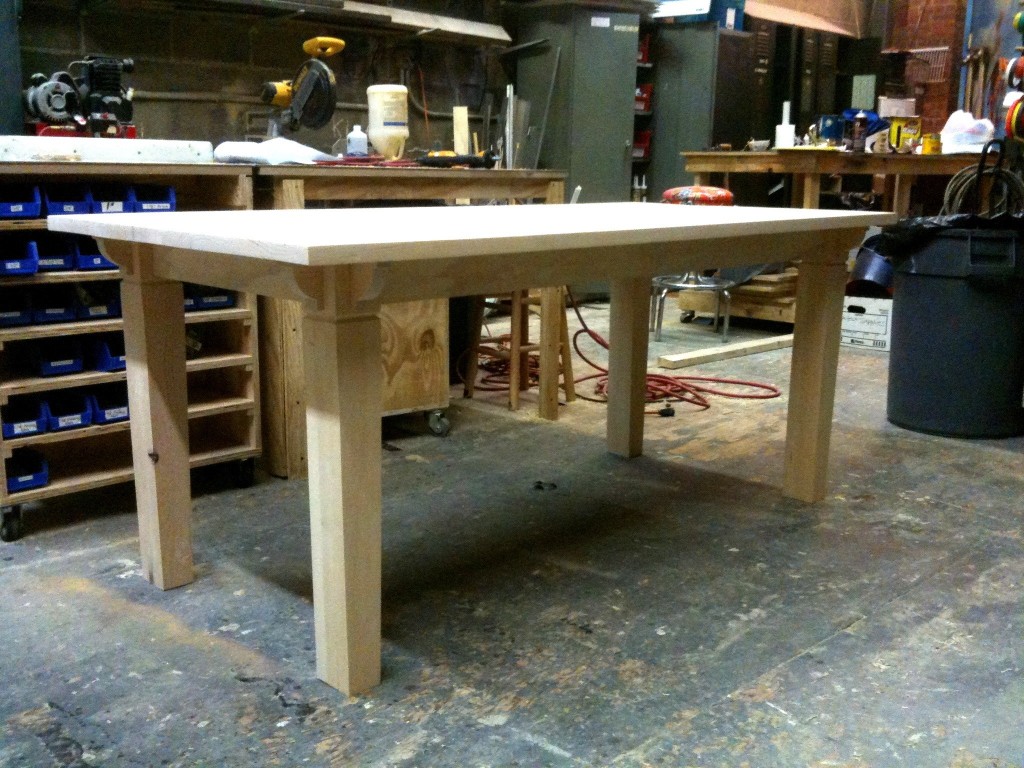
Final table before staining

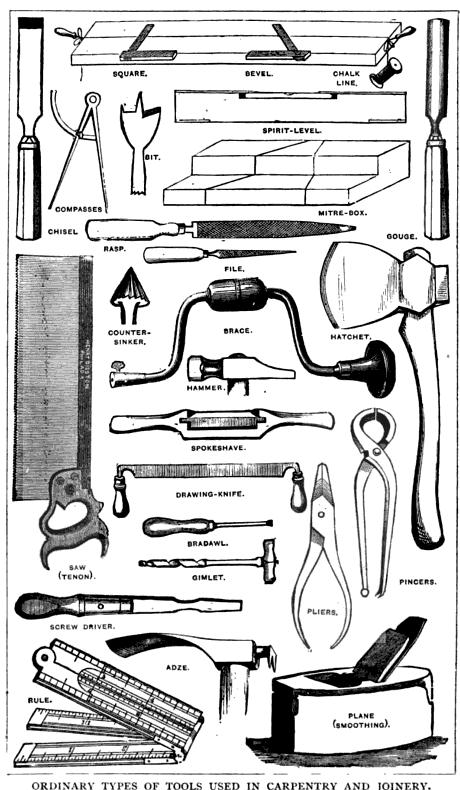
Carpentry quick links

My computer is still broke, so I’m having trouble keeping up with this blog. Until then, enjoy some websites on carpentry from elsewhere around the web!

  • The American Woods by Romeyn B. Hough, contains photographs of some 350 North American lumber types. You can browse by common or scientific name as well.
  • Lumberjocks has a number of great resources. In addition to projects and a blog, they also review woodworking tools and feature a heavily-visited forum.
  • I’ve been following the weekly tips at Woodsmith for awhile. They feature some good tricks for your shop and tools.
  • New Woodworker, like Lumberjocks, also has articles, reviews, tips and tricks. Their tips and tricks are organized by topic, making it easy to browse.
  • How to draw a hexagon with just a compass. Also, draw a pentagon with just a compass and a ruler.

Shakespeare for Community Players: Furniture

The following is taken from a chapter concerning prop-making in “Shakespeare for Community Players”, by Roy Mitchell. It was originally published in 1919. The information suffers from being both 90 years old, as well as being written for amateurs. Still, it is useful for some tips and tricks, as well as its historical value. I will be presenting sections of the chapter intermittently over the next several weeks.

Furniture

The making of properties is the most fascinating of all the crafts connected with the art of the theatre. Seeing that the intent is primarily to suggest a given object, there is no attempt at imitation in detail. Only the salient facts regarding the object are to be seized and translated into a suitable medium. The finding of the particular medium in each case, and the discovery of common, inexpensive objects which can easily be converted to use, gives unfailing interest to property-making. Every play, with its wide variety of accessories, is in itself a great adventure.

Under the heading of “properties” comes everything movable on stage except scenery, rostra and clothes. Even clothes, if they are not worn but merely carried on and passed from one person to another, are ” props,” although they are made by the costumier.

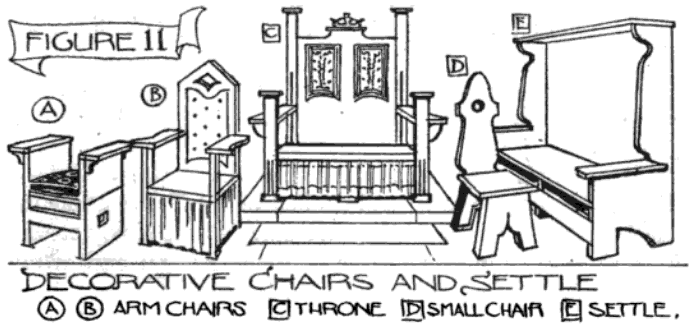
Figure 11: Decorative chairs and settle

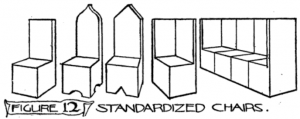
Furniture is the most considerable item among stage accessories. This should be made on the simplest and most massive lines. Whenever possible, it is best to make up furniture on the unit system, where a few pieces used in combination can be made to serve many purposes. Figure 11 shows a variety of chairs and a settle. Figure 12 shows a standardised set of chairs which will be universally useful. In this set there are three plain chairs and two corner chairs which make up into a throne, a settle, or a garden seat.

Figure 12: Standardized chairs

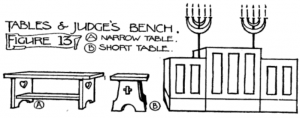
Figure 13 shows two tables and a judge’s bench. The first (a) is most generally useful. It is quite narrow (two feet wide), and, placed across the stage in any desired position, will occupy a minimum of space, on even the shallowest of stages. The table shown in (b) is shorter, and may be used up and down the stage. The judge’s bench should be high and quite shallow; sixteen inches is enough. Any of these tables may be converted into a desk by placing on the centre of it a simple inclined bookrest.

Figure 13: Tables and Judge's bench

Buffets, cupboards, wardrobes and chests should be of the most elementary design, made up out of pine and stained or painted.

Very satisfactory stains may be made of dye in powder form, dissolved in boiling water and applied with a dish-washing mop. Black, green, brown, red or orange may be used singly or mixed in desired combinations to give all the natural and artificial tones of wood with sufficient fidelity for stage purposes.

Reprinted from Shakespeare for Community Players, by Roy Mitchell, J.M. Dent & Sons ltd., 1919 (pp 60-62)