If you’ve ever wandered over to Dave Lowe’s blog, you may have noticed he’s a bit into Halloween. He has already began building props and decorations for his house this year. I got a kick out of this ghostly gravestone made of foam core and spray foam. Be sure to check his blog regularly for many more projects leading up to the big day.
Lewis Baumstark, Jr. made a fake crowbar out of a piece of PVC pipe and wrote an Instructable showing how he did it. It looks so devilishly simple and quick, especially if you don’t have the time or money to mold and cast one.
Chris Schwartz has scanned some drawings of English furniture styles throughout history and posted them on his blog. It’s a great aid for recognizing the style of pieces you find in the antique store, or for choosing furniture based on the period of the play you are doing. It’s also fun just to see how furniture has evolved in the last 800 years or so; a chest of drawers used to literally be just a chest.
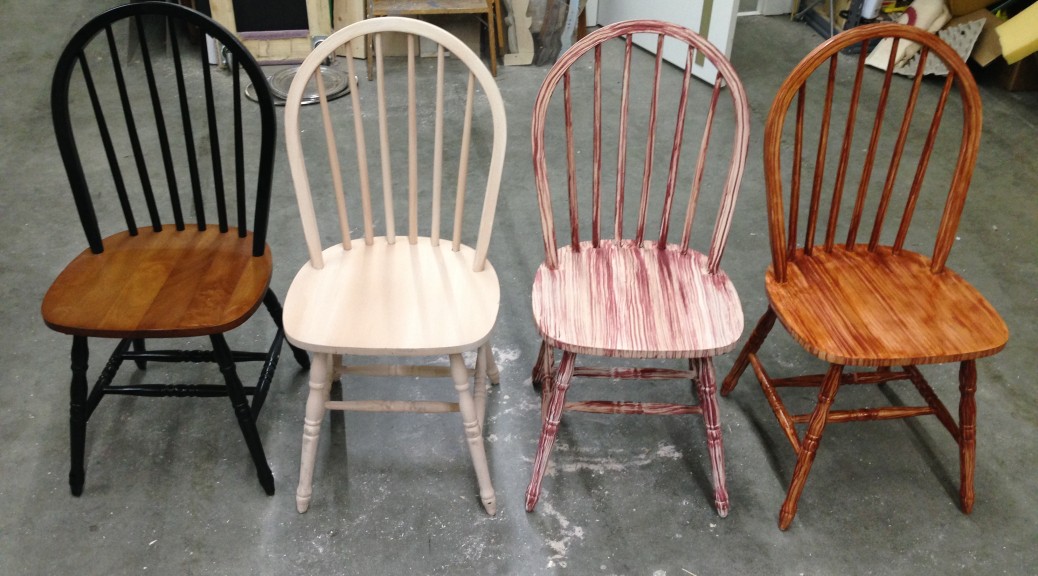
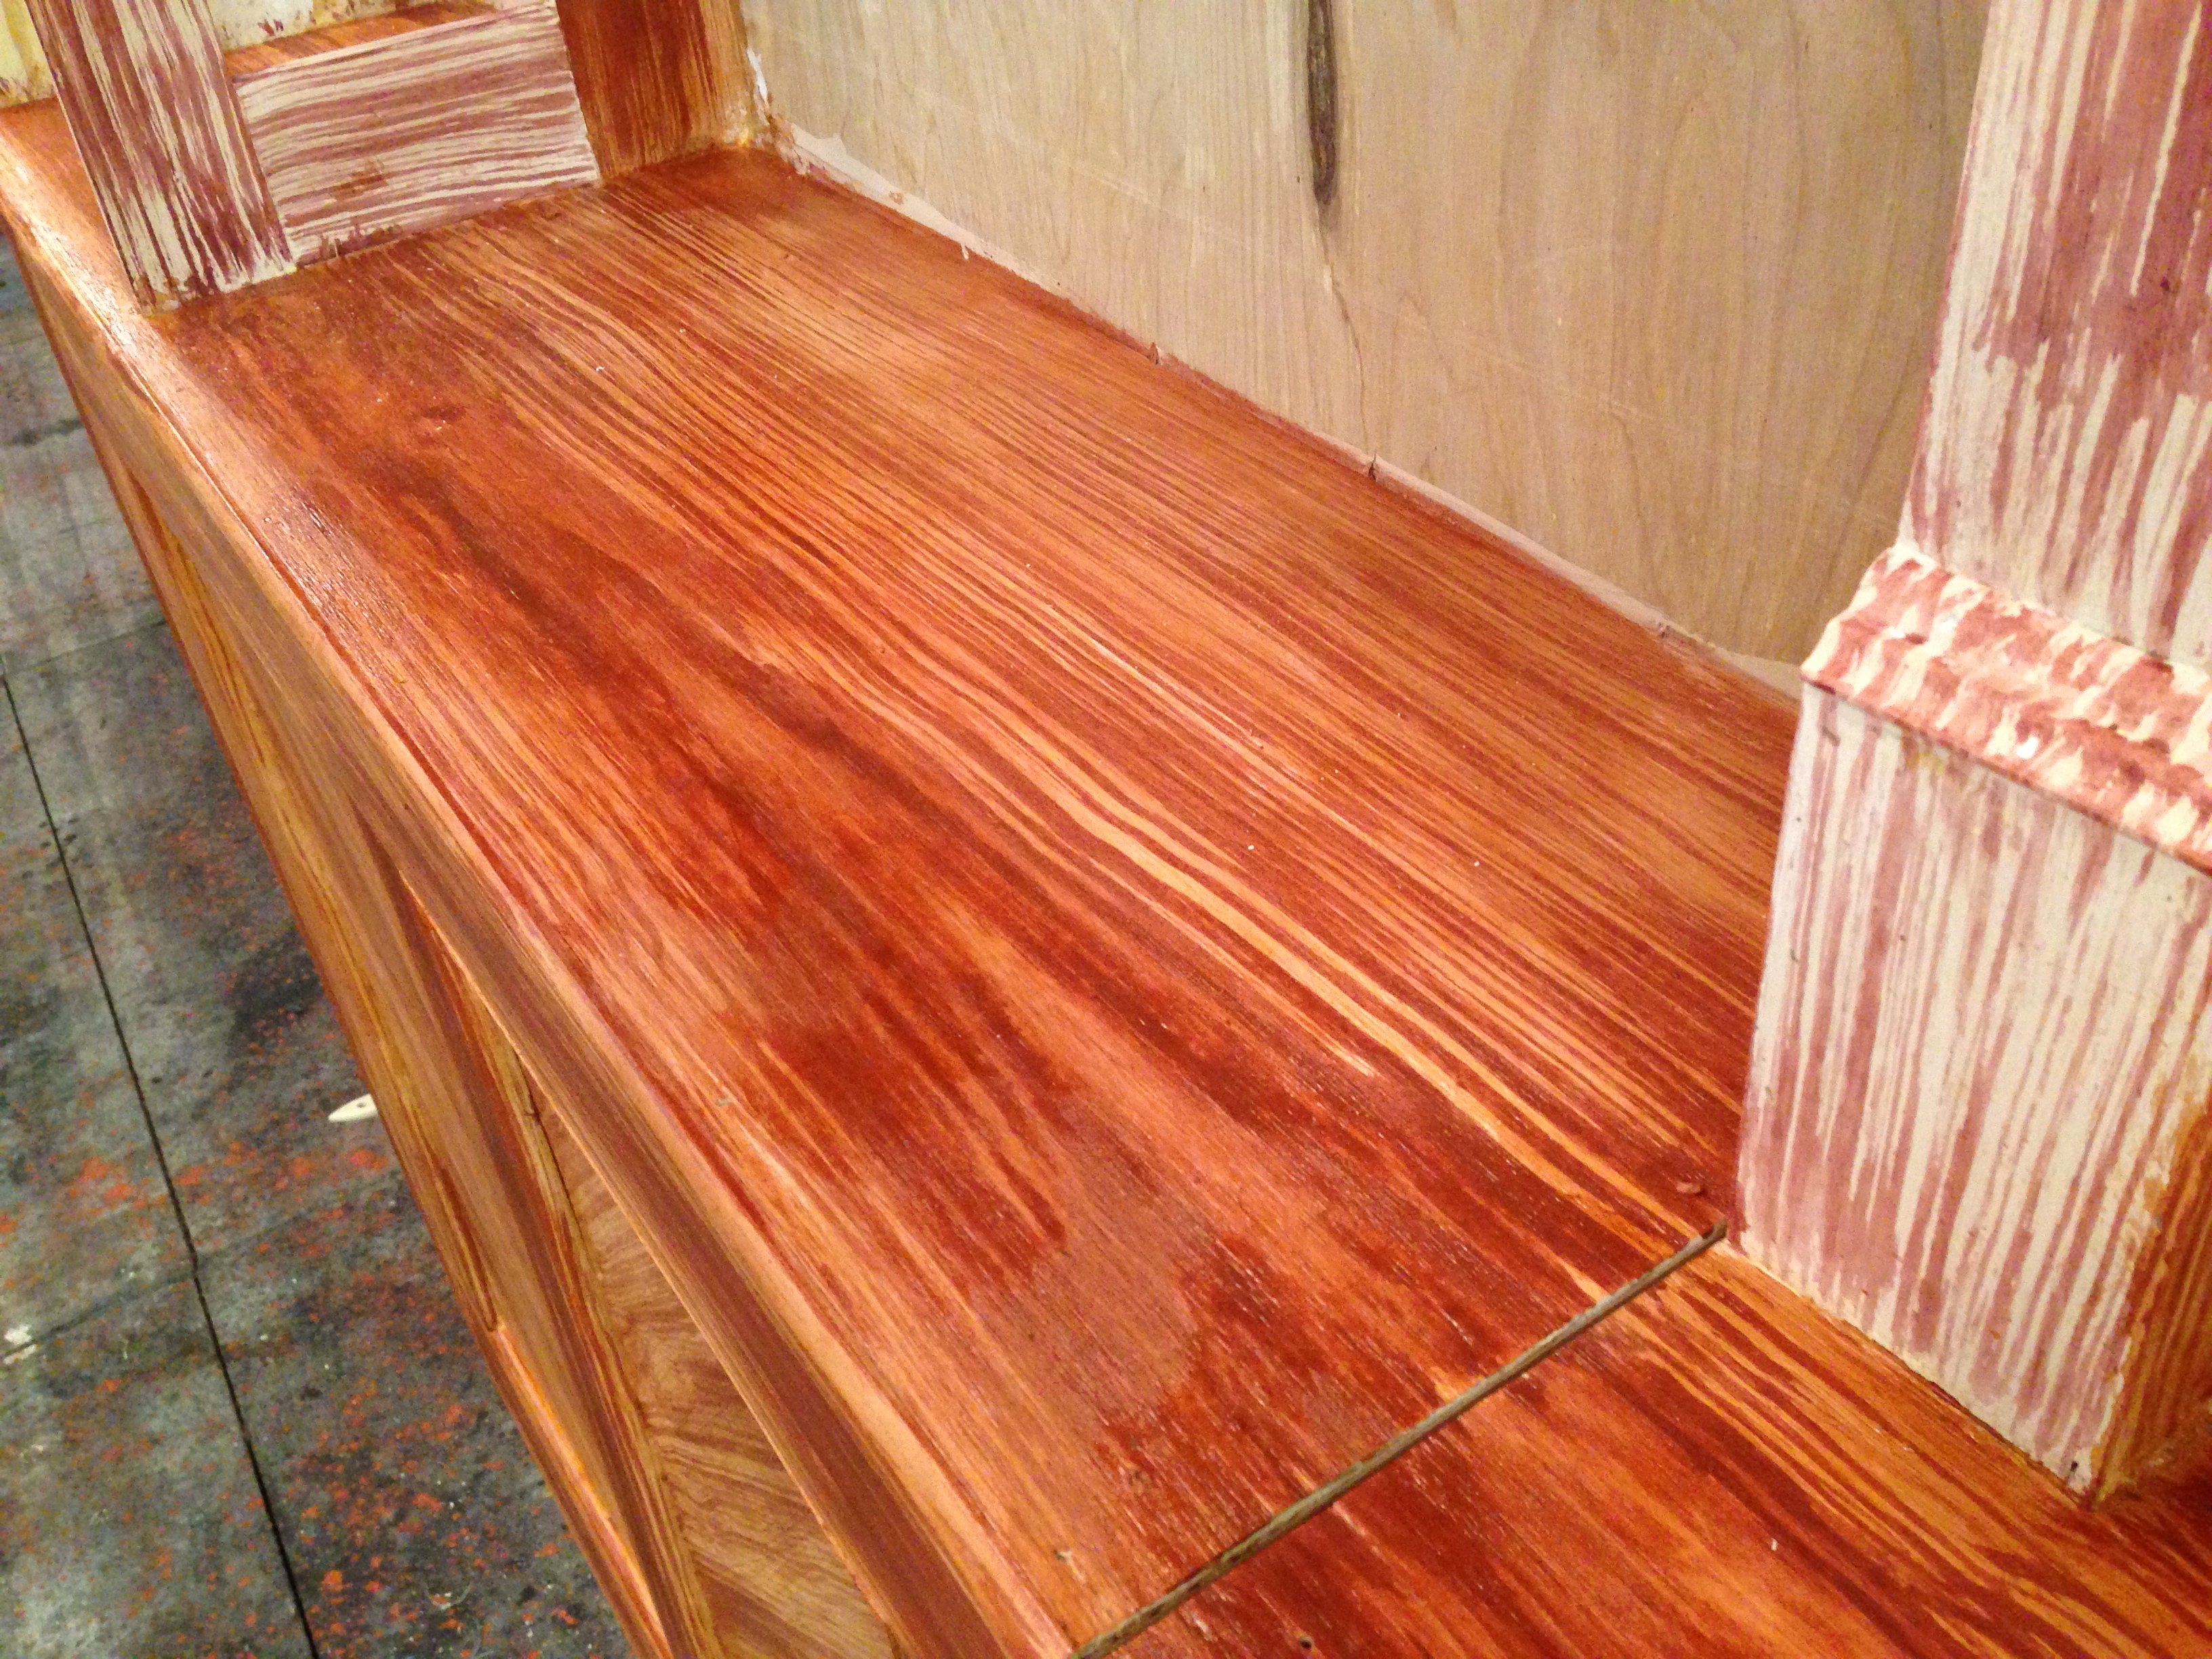
Our production of Anna Christie closed last night at Triad Stage. The first act takes place in a bar, filled with wooden furniture. The bar, tables and chairs all needed to match, and since they were constructed from a variety of wood and other materials, the best way to do that was by painting all of them.
Our scenic charge artist, Jessica Holcombe, helped us develop a process to match the wood sample that our designer picked out. The base coat was a wet blend of two colors: a light tan, and a slightly darker beige. We blended them in the direction that the fake grain would go.
Base coat
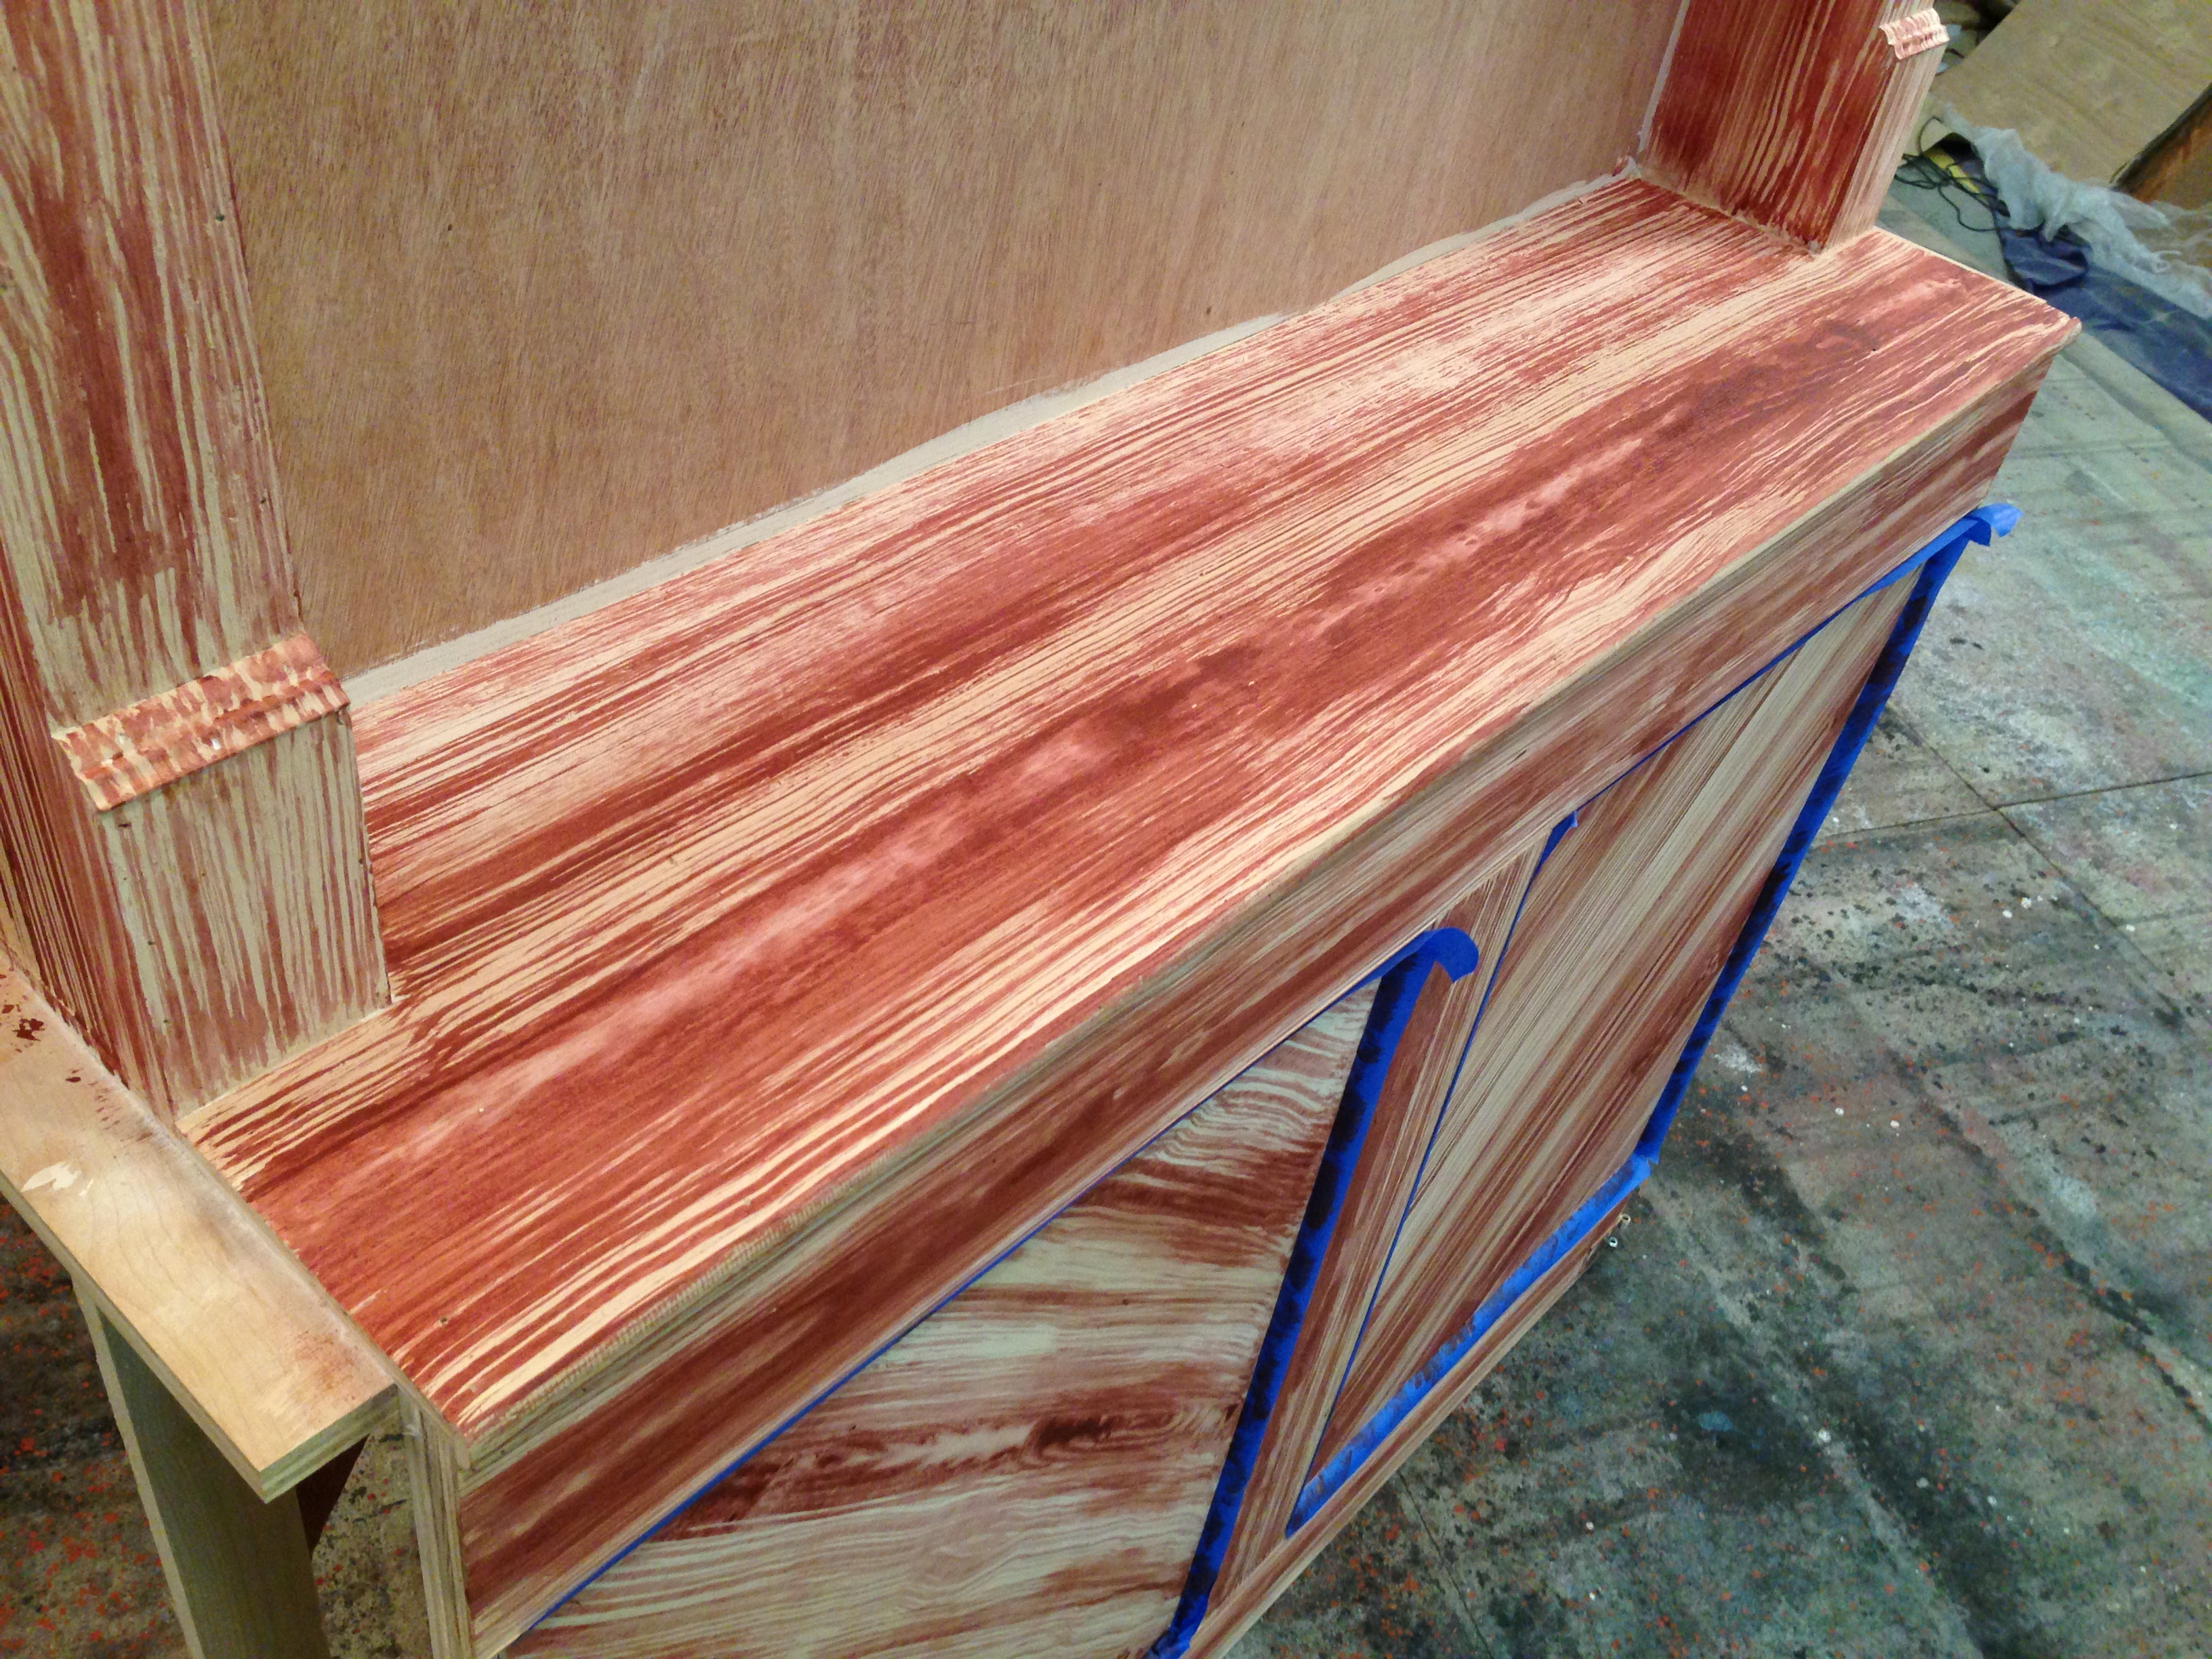
The next layer was a maroon/pink graining layer. A lot of the graining was done simply with a chip brush lightly dragged along the surface to make stripes. For some of the larger surfaces, we broke out the grain rocker to make some knots and other grain characteristics.
Graining
For the third layer, we made a glaze from some amber shellac and a bit of brown tint, and painted that over the whole thing.
Glaze coat
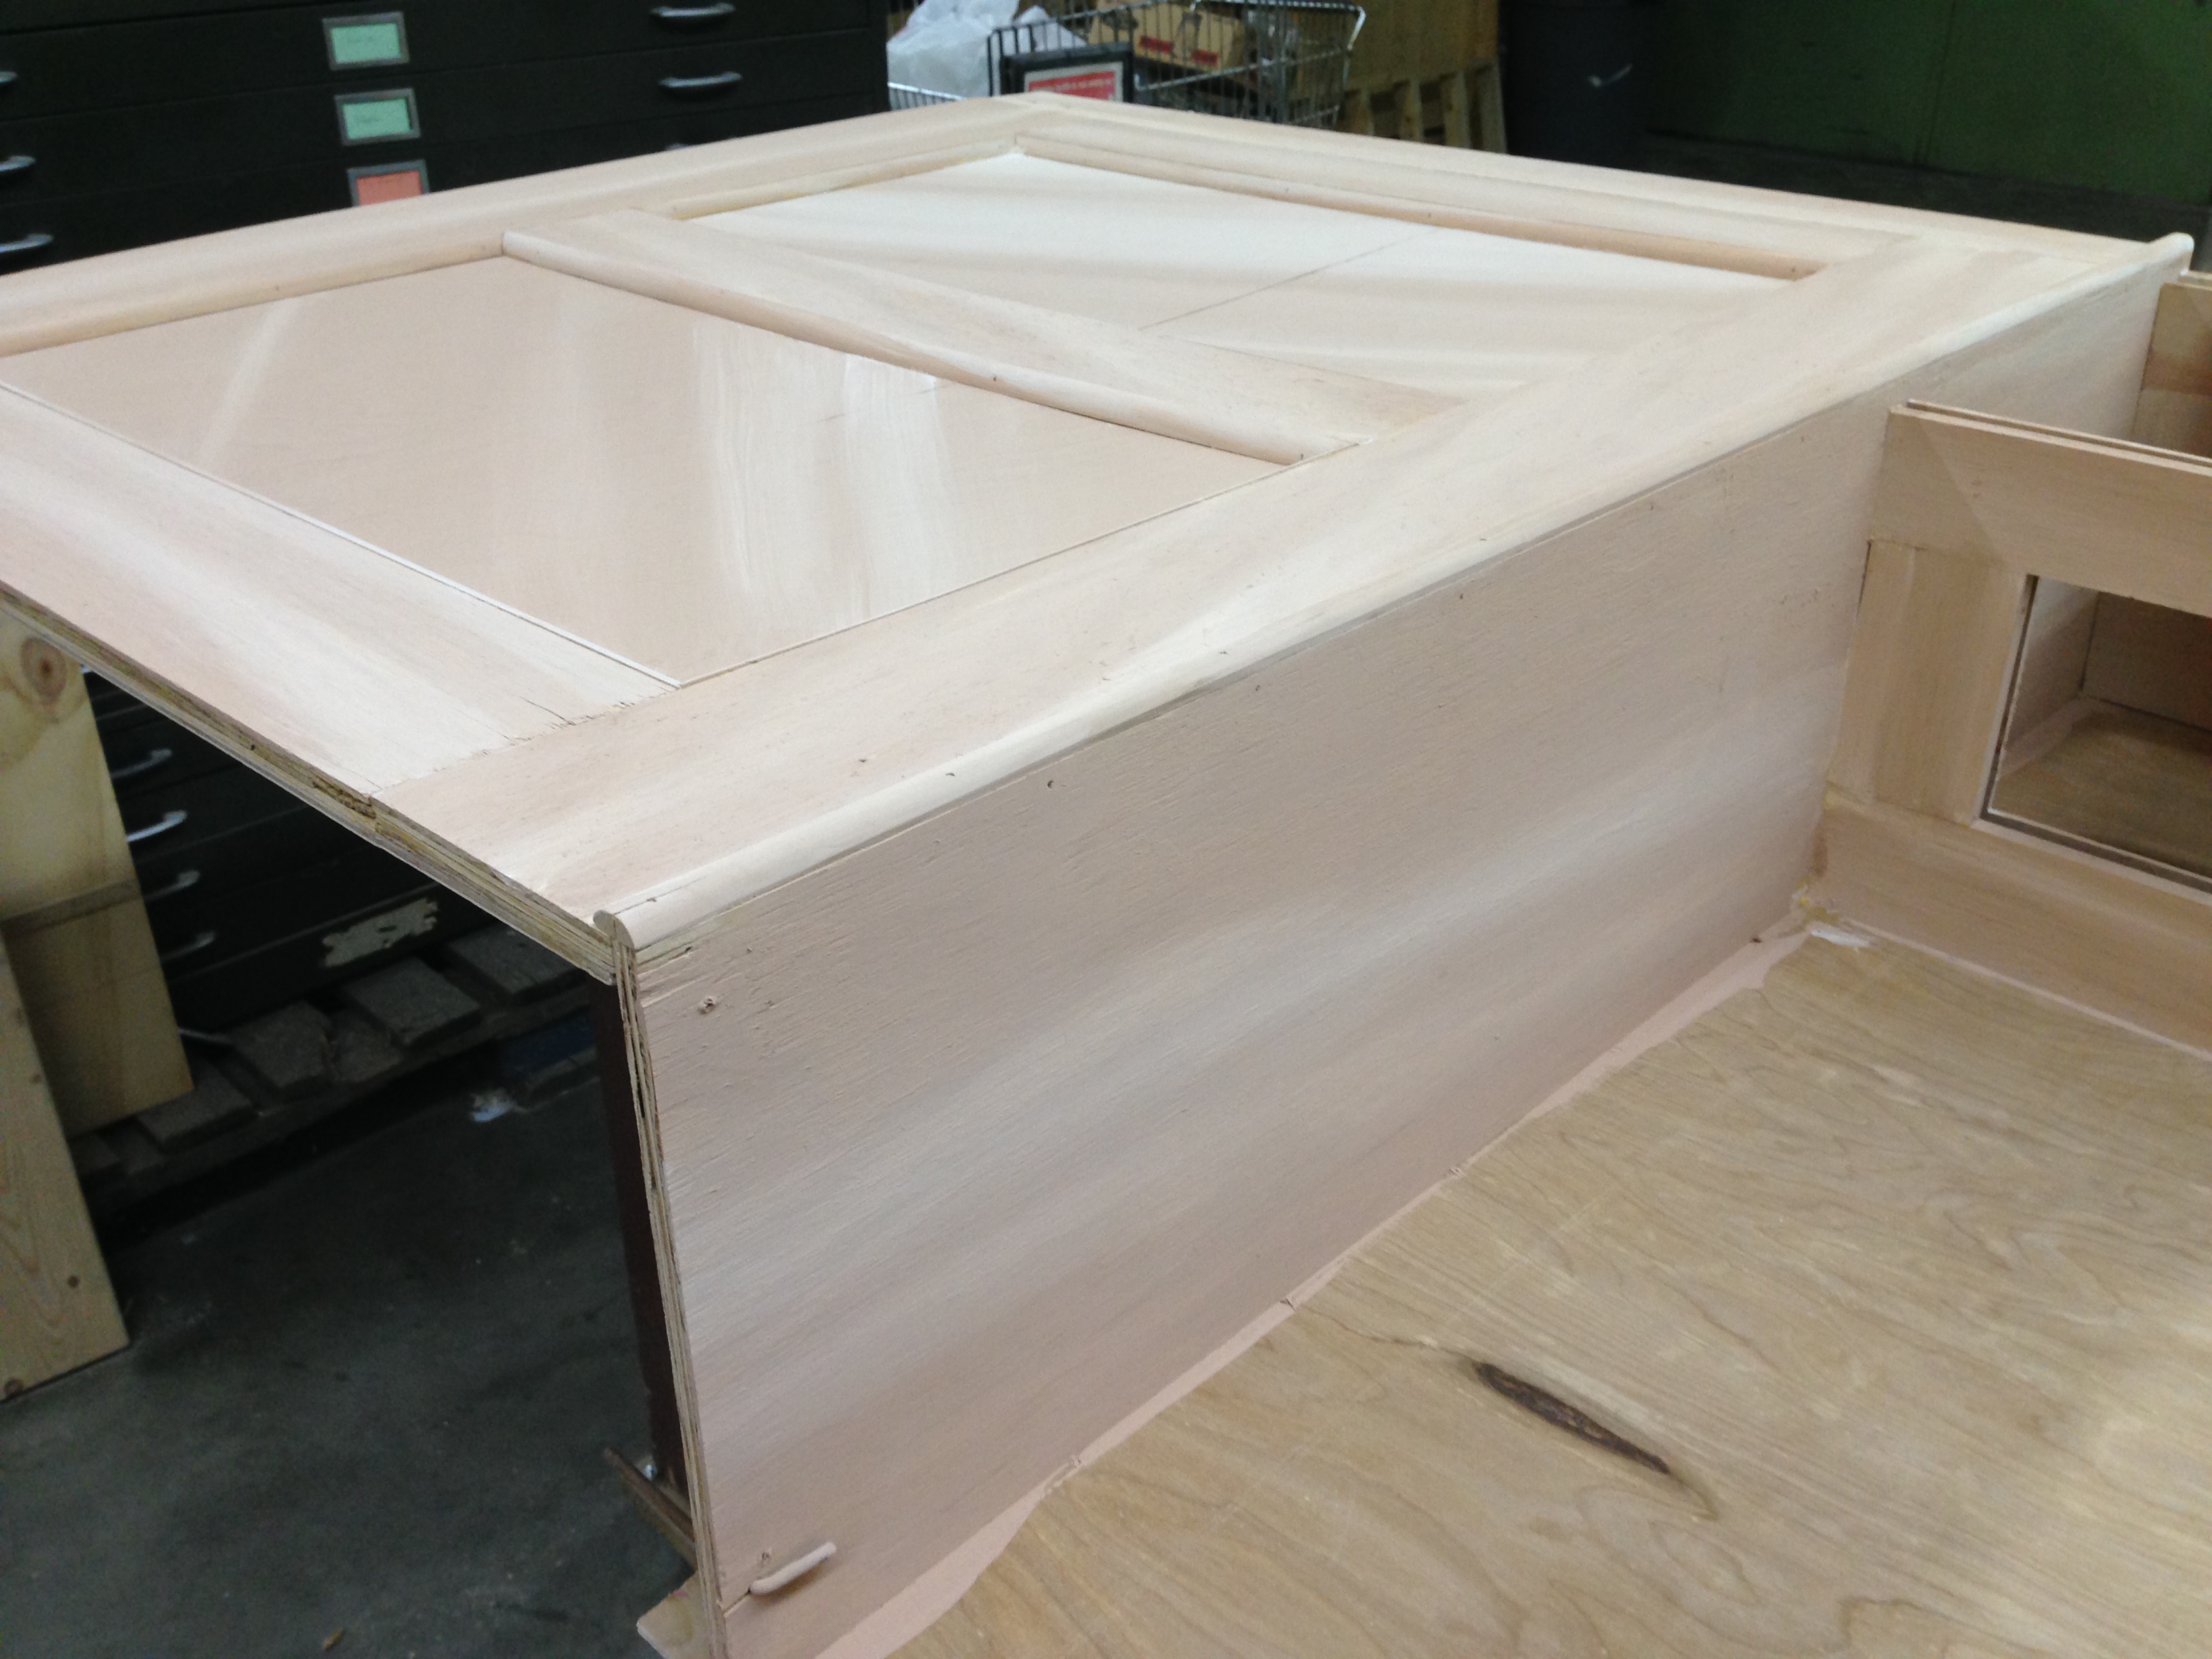
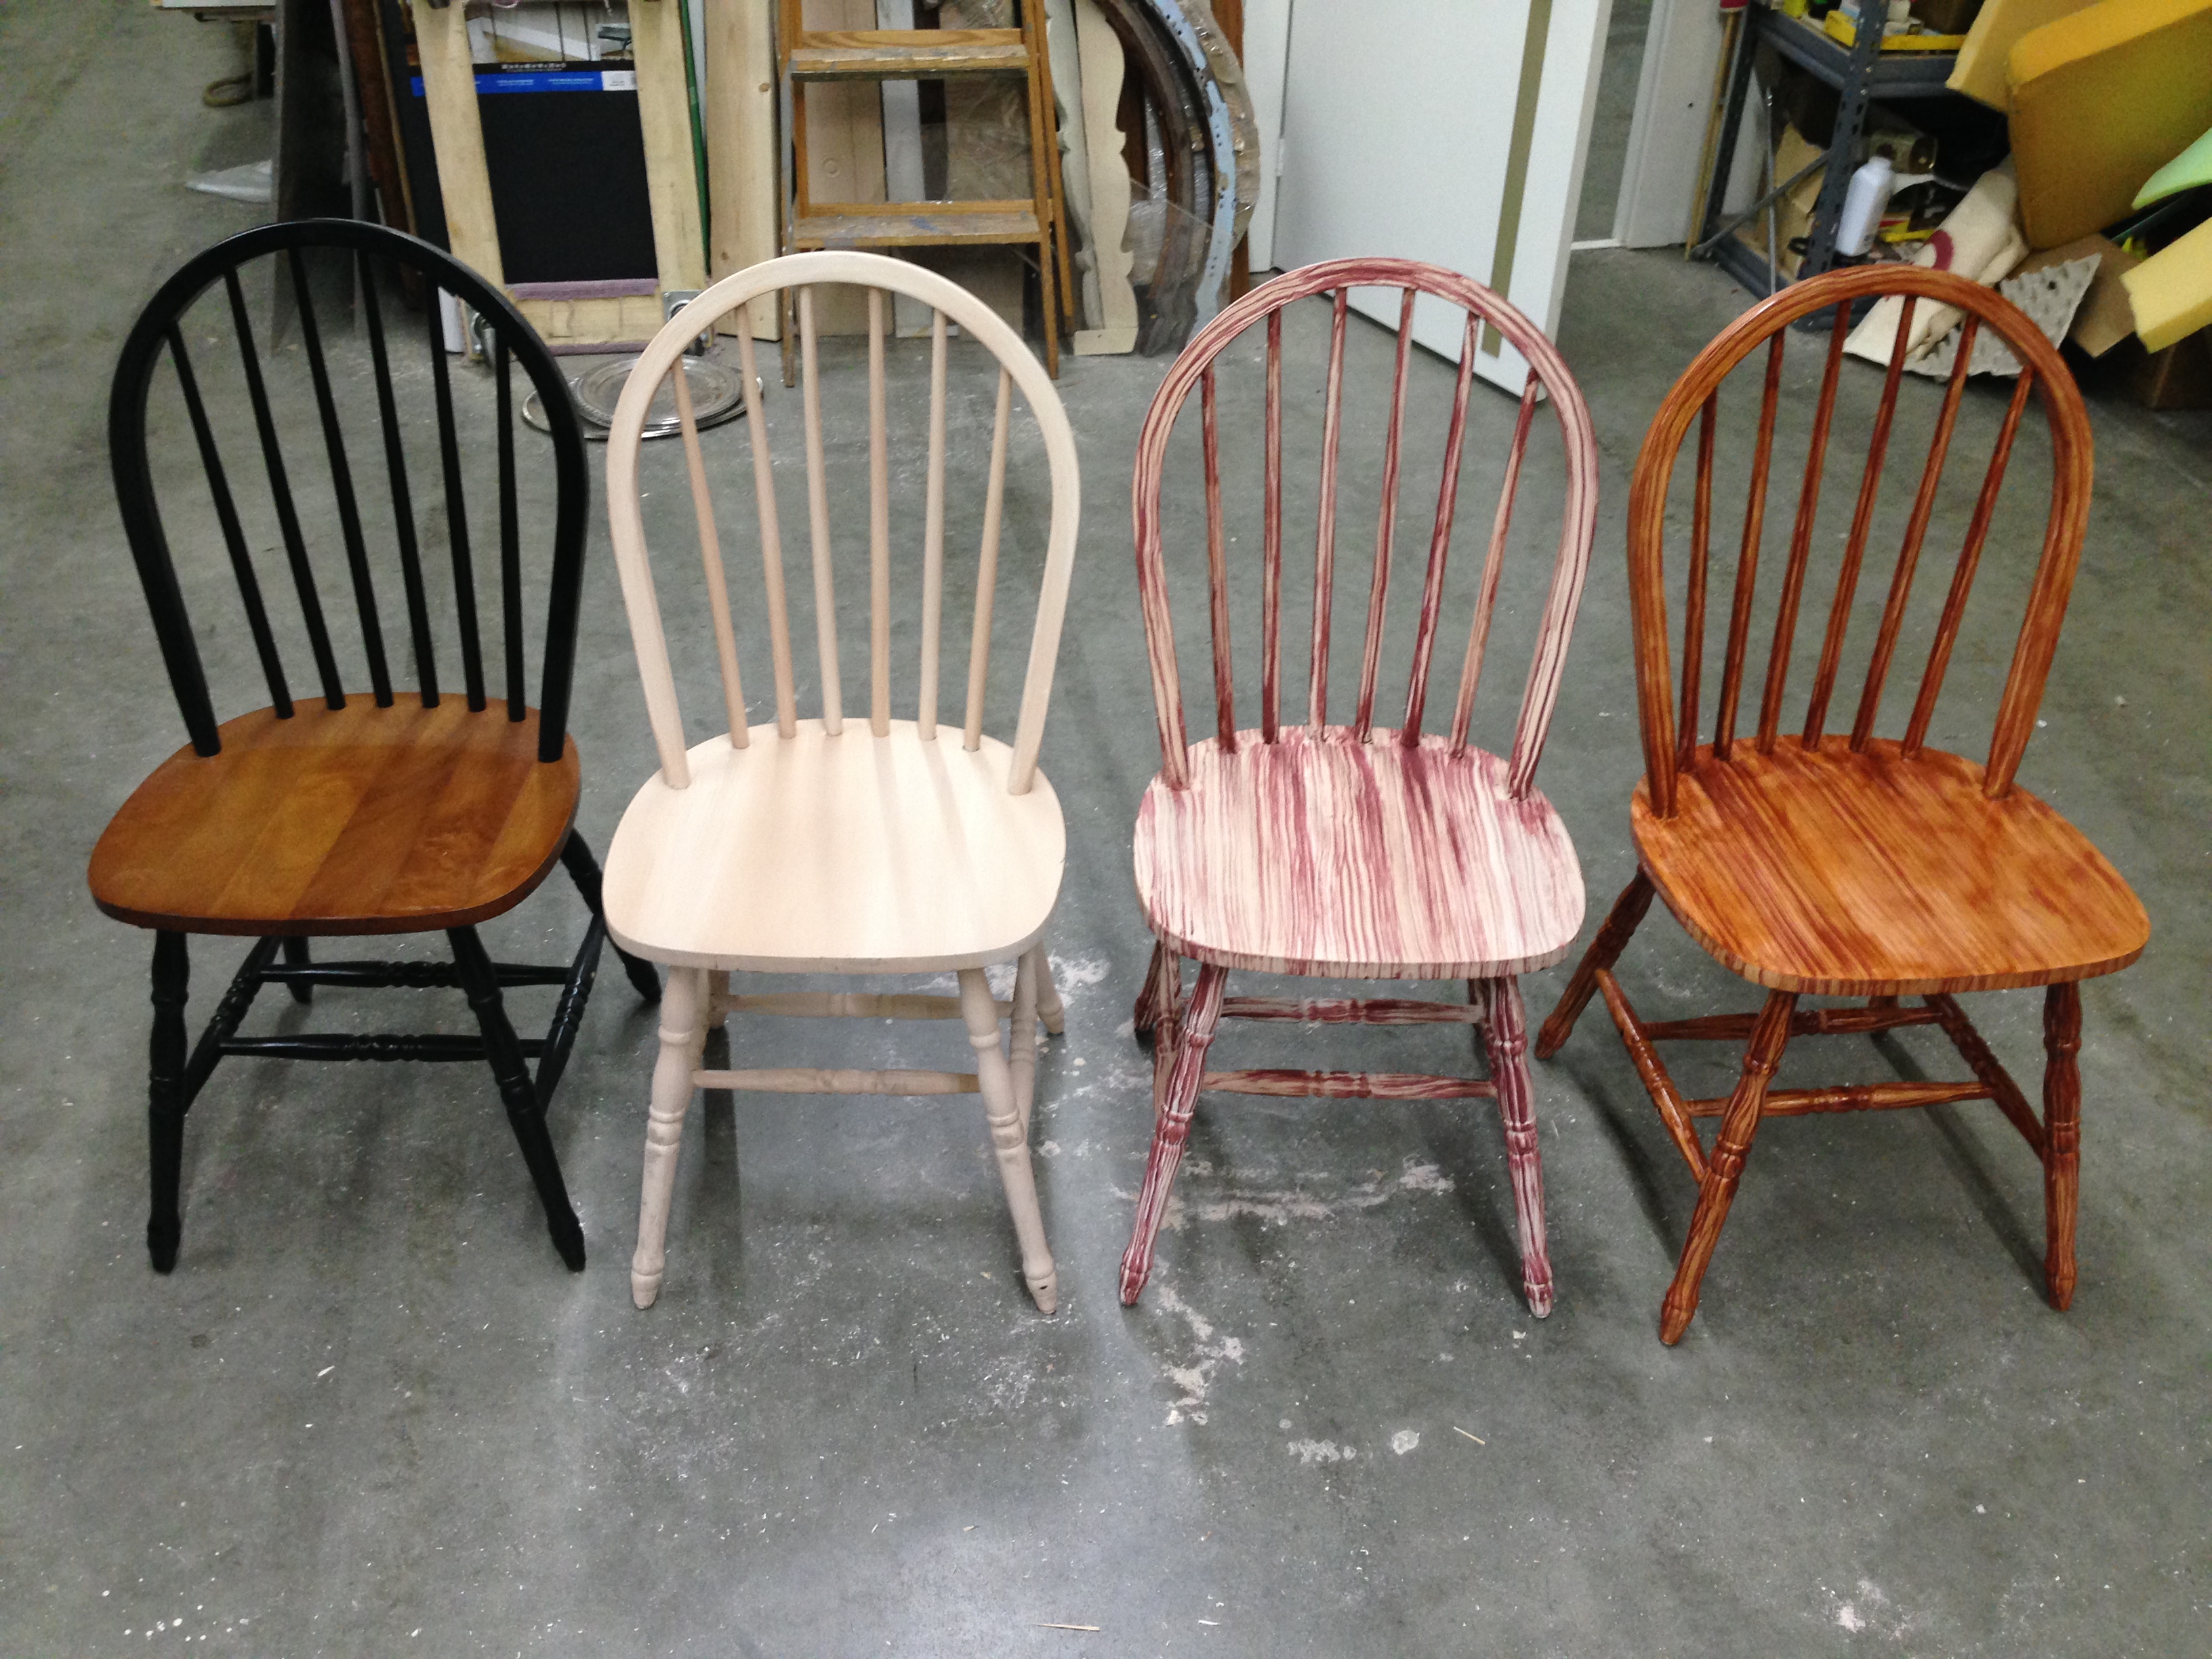
The picture below shows the progression of this graining process, starting with an unpainted chair I bought.
Step-by-step wood graining process
When the furniture got on stage under the lights, it was too bright and the grain had too much contrast. We added another glaze coat of tinted shellac, this time using a darker brown to tint it. Jessica also showed us how to flock (edit: I mean “flog”) this layer, giving it a bit of the subtle pores and perpendicular stripes you can see below.
Final glaze
When doing a wood grain, the more layers you can add, the richer and more realistic your final result will be. There are many other techniques and tricks you can utilize depending on the specific type of wood you are trying to replicate; it is important to have a clear reference photo or physical sample of what you want your wood to look like.
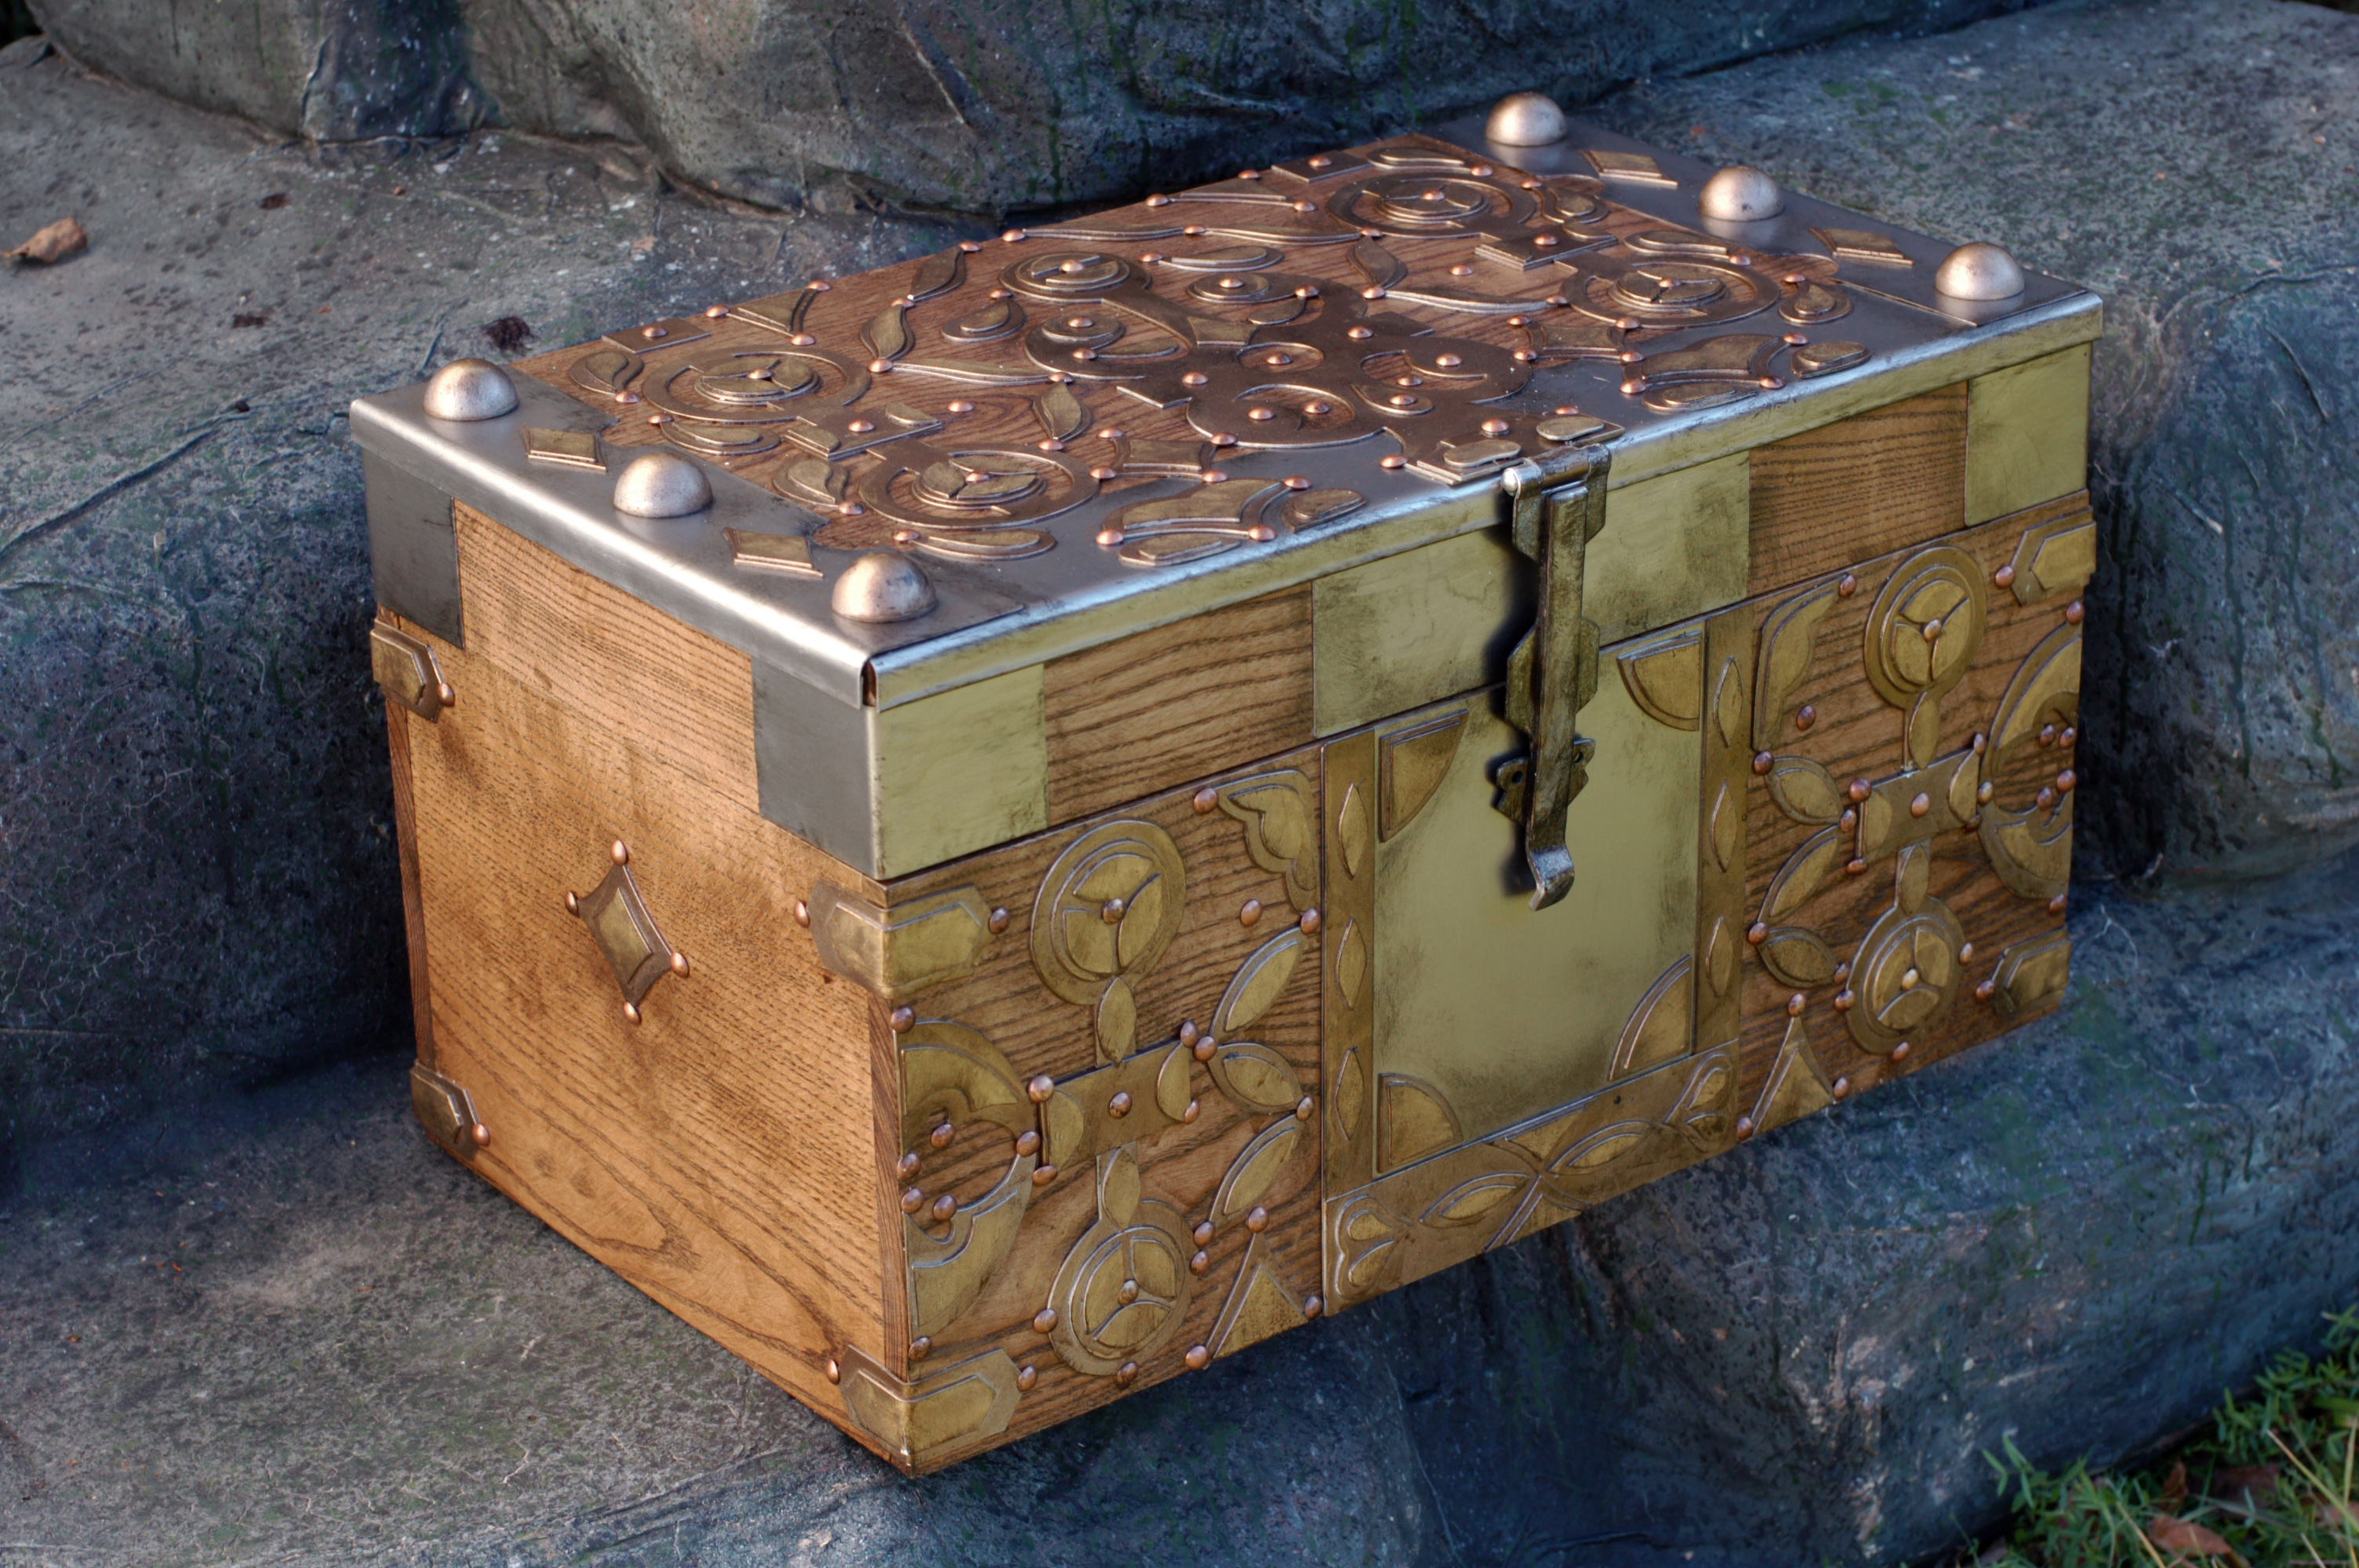
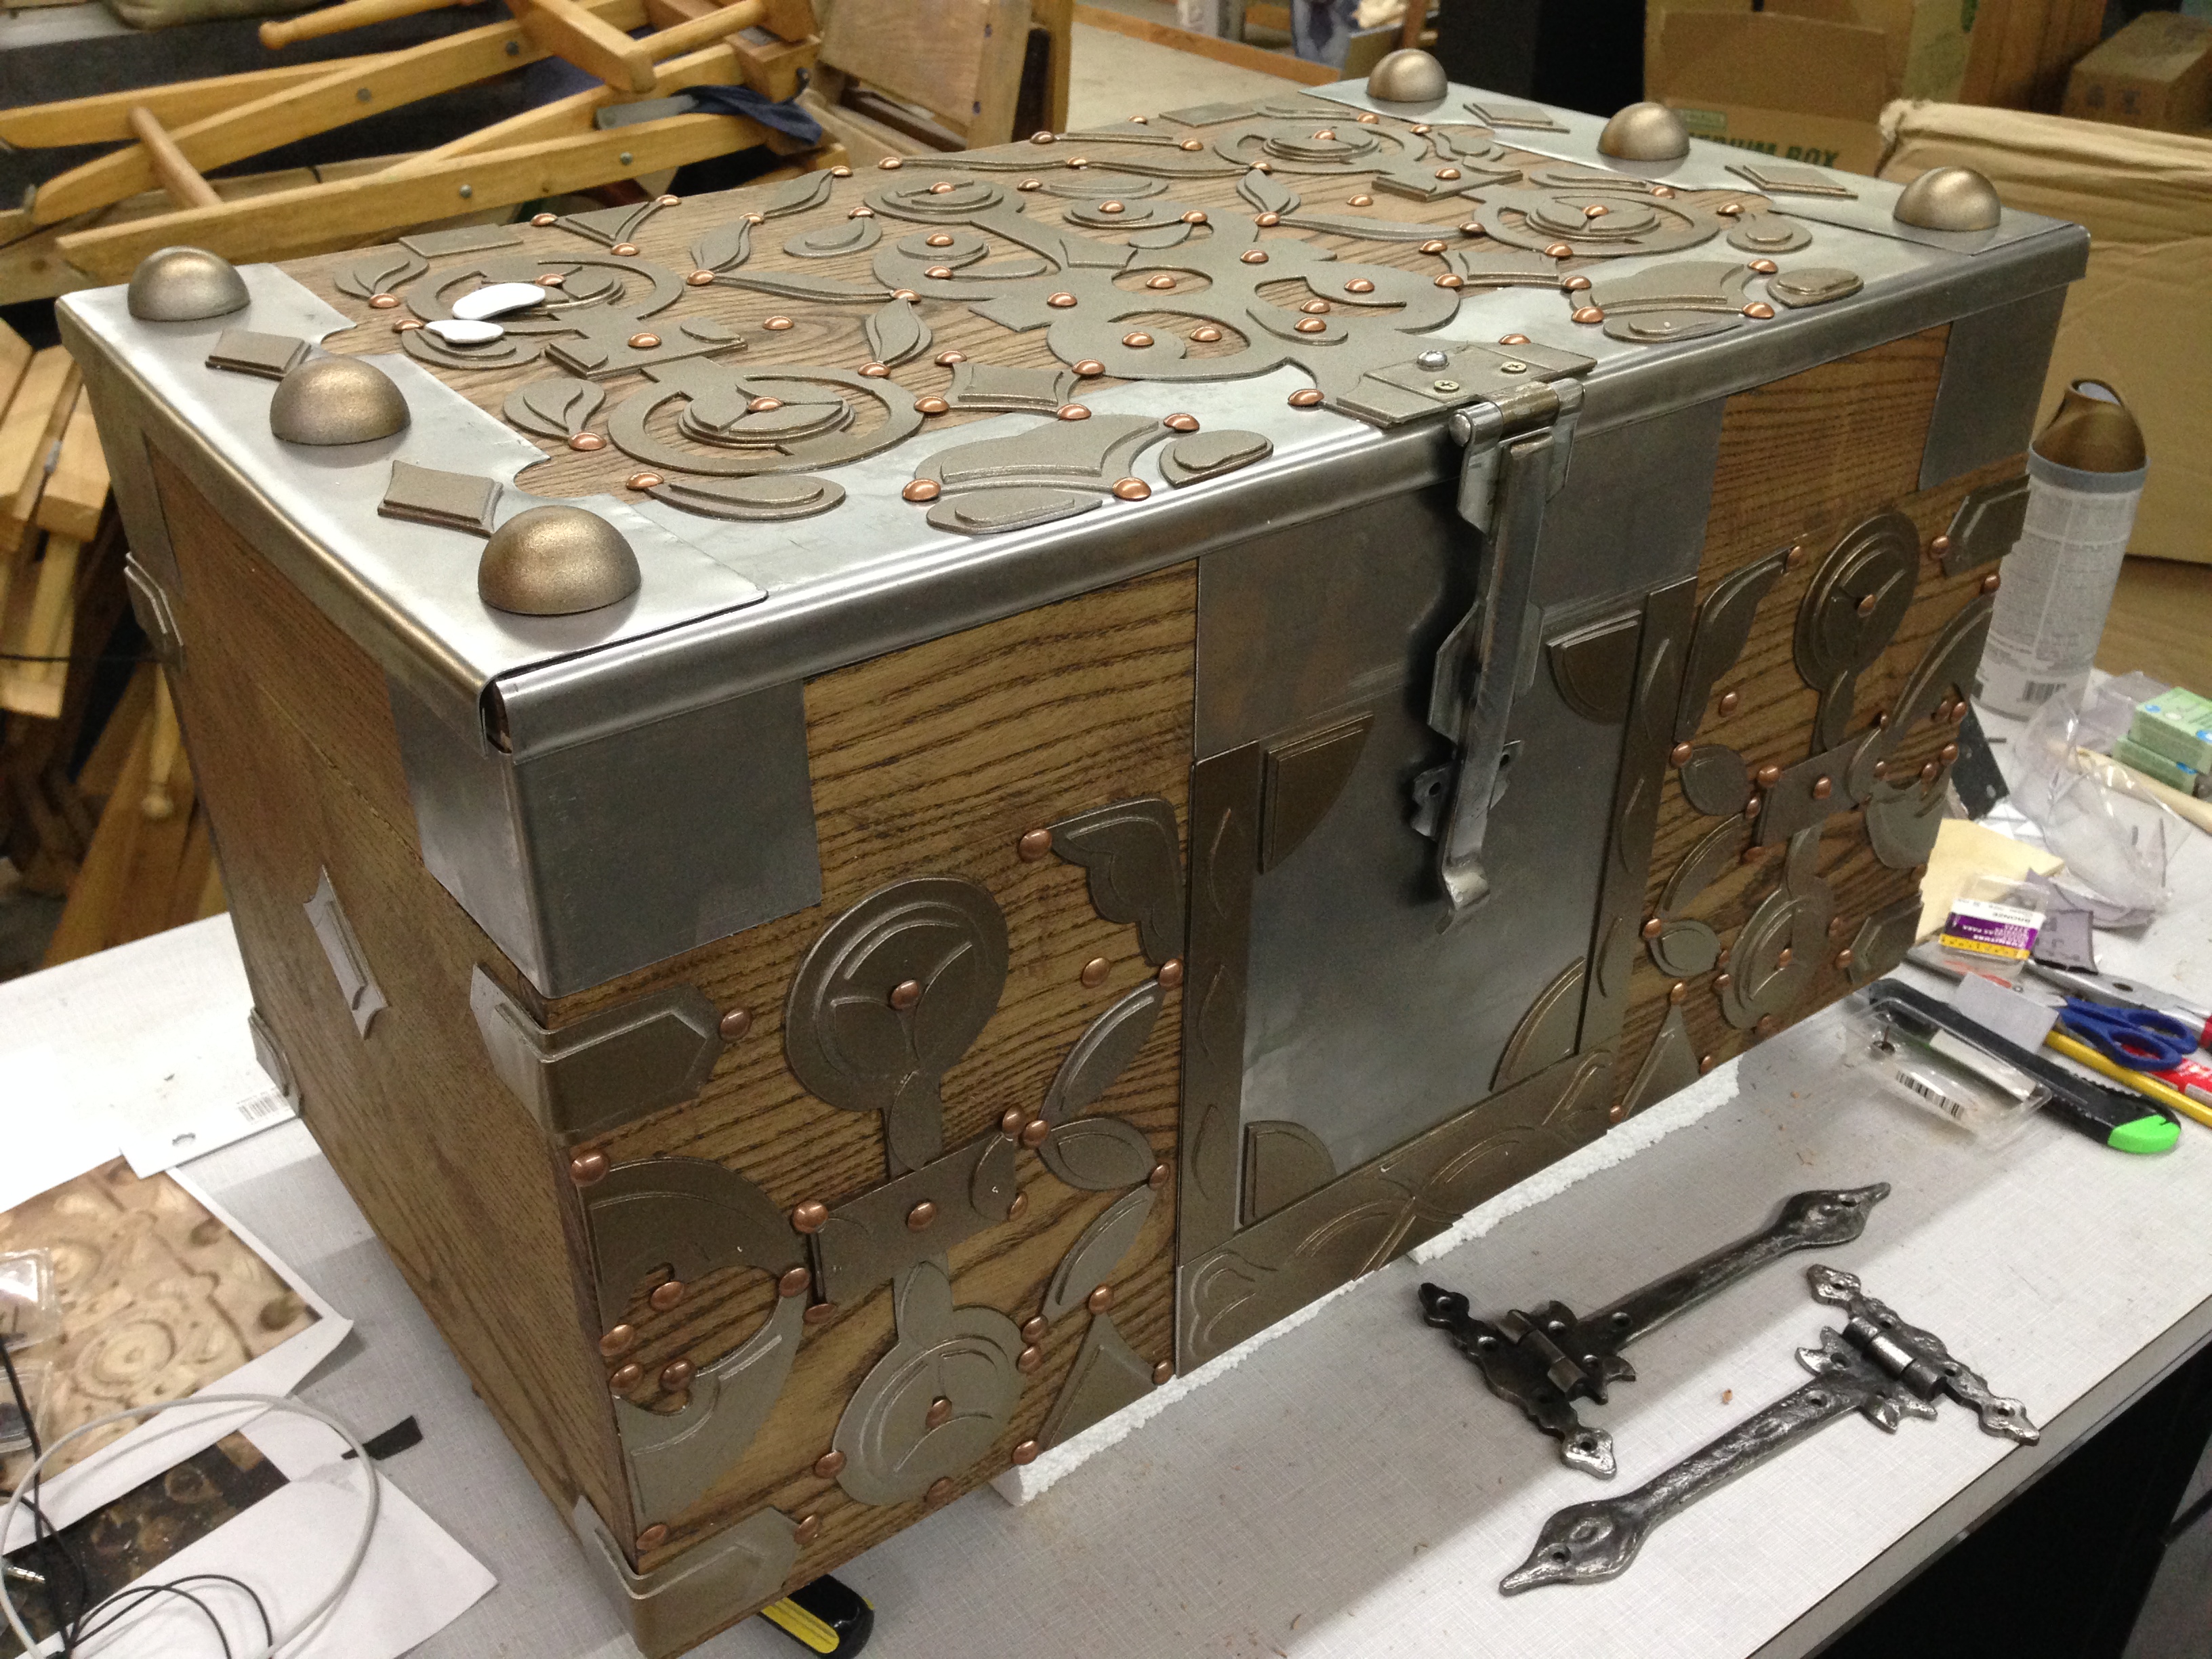
Usually, I am building props for a show or production I am working on. I rarely have time to work on my own projects. However, someone was interested to see if I could replicate a chest from the television show Game of Thrones. Now, I have nothing to do with the show itself, but it sounded like an interesting challenge to see if I could match something I could only see on screen. There wasn’t anything particularly tricky about this chest; it just had a lot of pieces and parts made of an assortment of materials, and some very time-consuming detail. For those who watch the show, this is the chest given to Daenerys in season one, which held her petrified dragon eggs.
I shot video of most of the build along the way and somehow edited several months of work into seven and a half minutes of video, giving an overview of the process.
If you are interested in more detail and photographs, read on!
Daenerys’ chest of dragon eggs
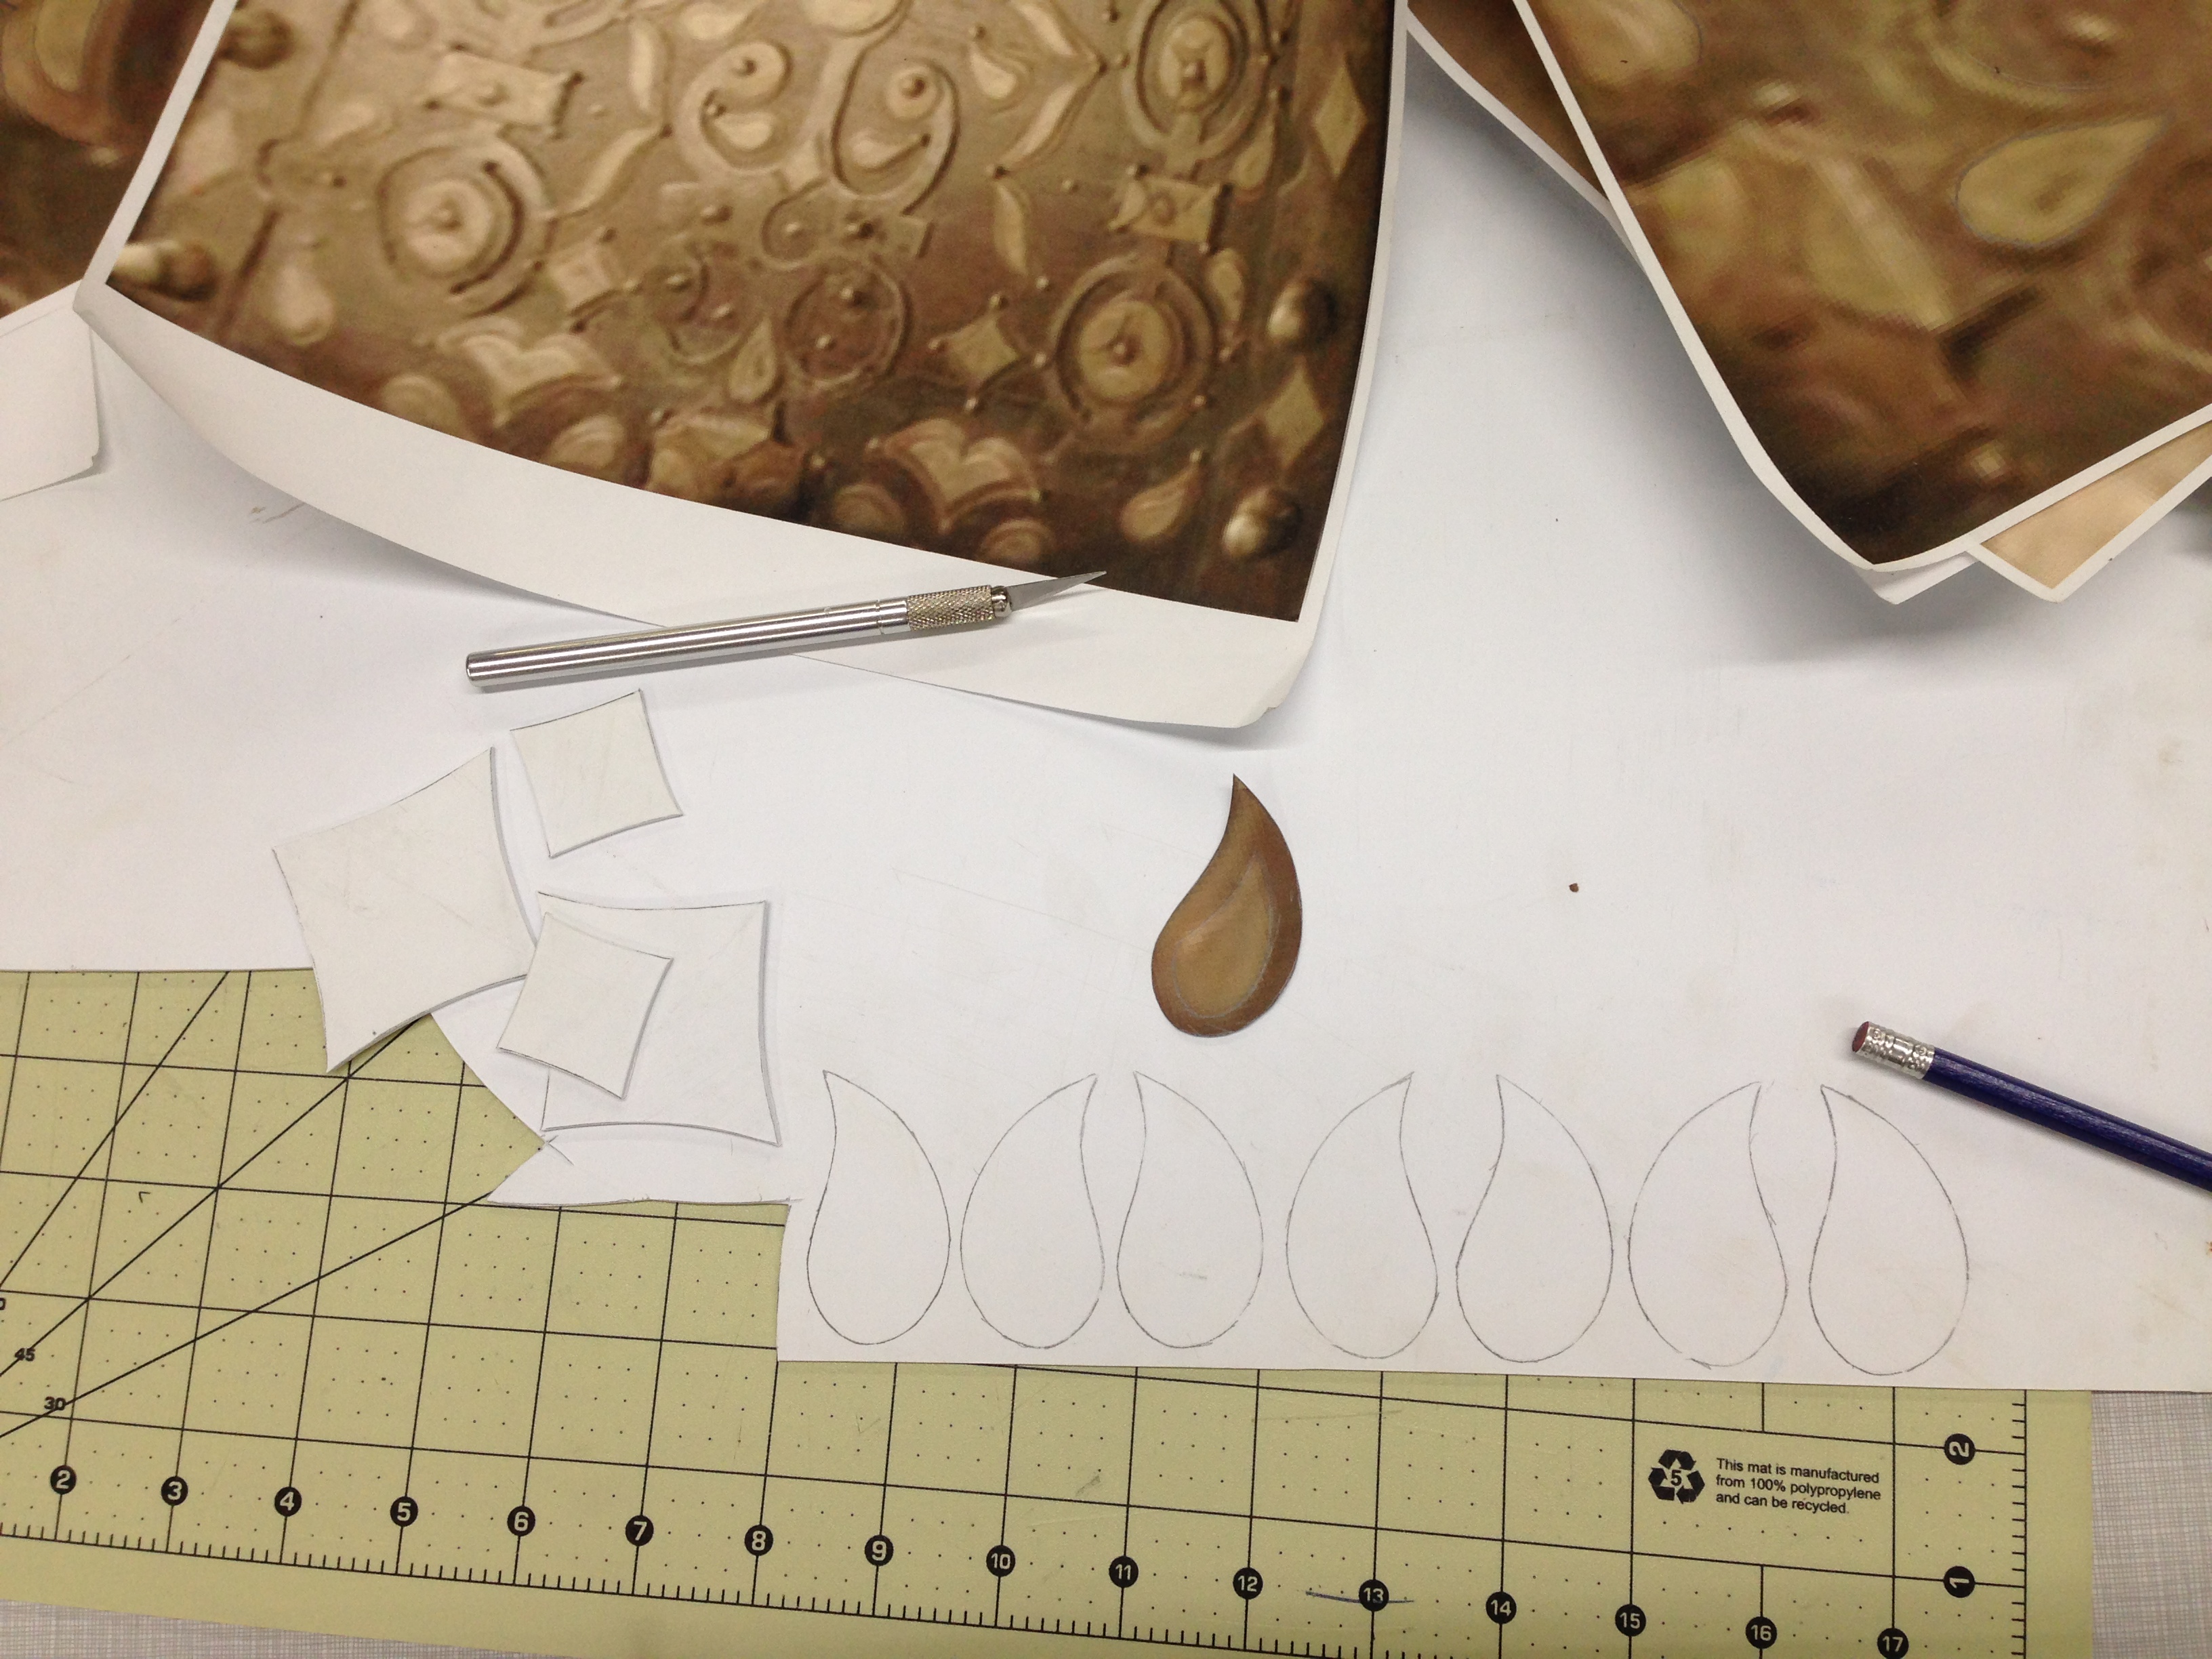
The first part was the box itself. I worked out a quick mock-up of the whole piece in SketchUp to figure out the sizes and proportions of all the parts. I decided to use ash on this because it is hard and strong like oak, but I really hate working with oak. The grain pattern of ash was also a better match to the real chest than oak. We have a great local hardwood store that I visited, and I was able to find boards wide enough that I could build every side (except the top) from a single width of wood. The bottom was a piece of oak plywood.
Wooden box
The chest has a number of areas covered in metal. I bought a sheet of 22 gauge steel and cut it up by hand with my airplane snips. I used my sheet metal bending brake on the corner pieces, while the rolled-over edges of the top pieces were bent by hand with sheet metal tools and pliers. Although I could have saved time by making these out of plastic and painting them to look like metal, the “roll over” parts would have ended up too fragile; on the very corners, you can see how thin the metal is, and any plastic that thin would flex whenever you touch it. The hasp on this chest also rests against a metal section, so it gives that solid metal-to-metal sound every time you open and close the lid.
Sheet metal layers
The most time-intensive part was the applied decoration. I used styrene plastic for this because using actual brass would have been prohibitively expensive and time-consuming, and a cheaper metal would have required just as much paint to match the appearance that the added labor was not worth it. I began by going through all the scenes in the TV show where the chest appeared and pulling out as many clear screen shots as I could, and then manipulating them in Photoshop to get a straight-on view. I scaled them up to full-size, printed them out and cut the pieces into patterns to trace on the styrene. Some parts of the design needed to be extrapolated slightly because I never got a clear view, but because it was symmetrical, repetitive and followed a certain logic, I was pretty confidant with how well my version matched the original.
Patterns and reference
Nearly every element was made of at least two layers of styrene, so after cutting the several hundred pieces out, I began gluing them together using model airplane glue. I did not attach them to the box just yet, but I did lay them out to test fit everything.
Unpainted decoration
With all the pieces ready, I began painting. They received a base coat of hammered silver spray paint, followed by a heavy dusting of hammered bronze spray paint. They would receive more paint later on, but at this point I began attaching them. Working on one side at a time, I first laid every piece out and used careful measurements to make sure everything was symmetrical and evenly-spaced. I then traced every single piece in place and labeled them by number before taking them off. I did some tests and found contact cement gave the strongest bond, though that meant I had to apply it to both the plastic piece and the box, and I could not apply it to the parts of the box where the wood was visible, so I had to carefully paint it within the traced outlines I had made. Luckily, the contact cement bonds almost instantly, so I could begin working on another side after one was completed.
Spray painted pieces
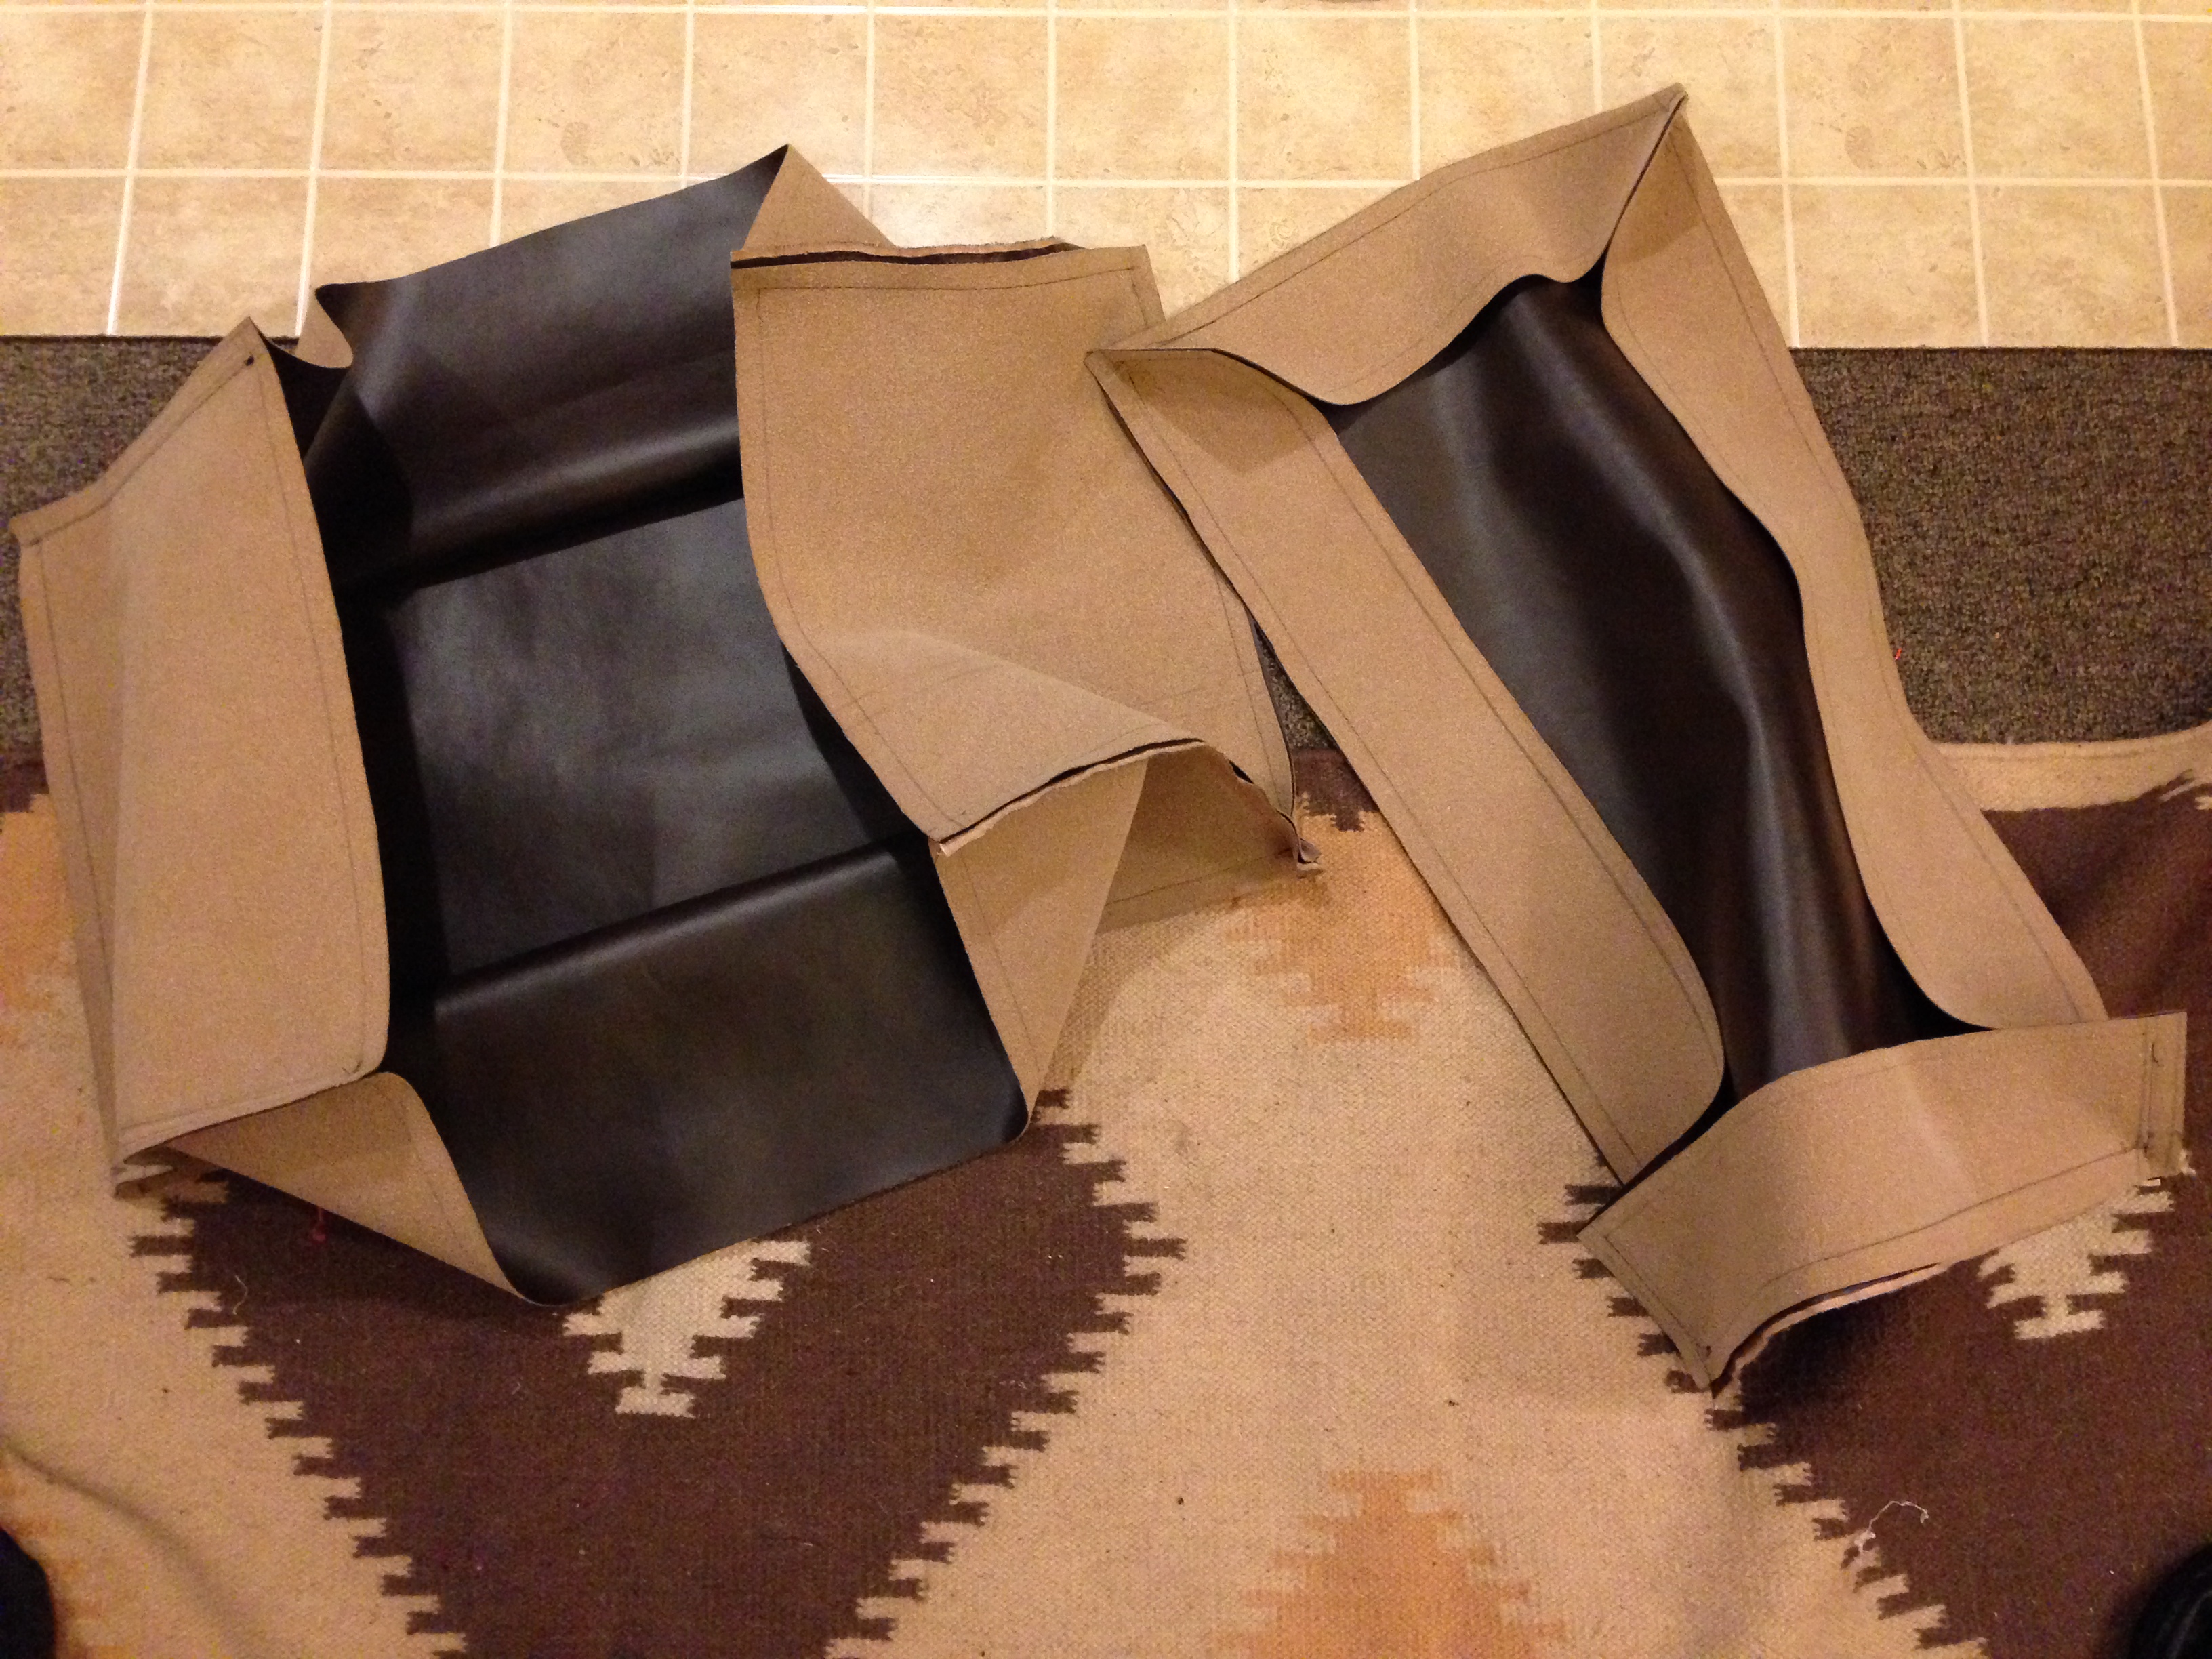
The inside of the chest was leather, though I went with a slightly-more processed version which was already finished and could fit through my sewing machine. I stitched all the pieces together first, and then attached them in as a single unit. I used a bit of spray adhesive to keep them from shifting around, but they are mostly held in place with the visible upholstery tacks. I pre-drilled holes for the tacks so I could make sure the spacing was even, and also because the ash was too hard to just hammer the tacks straight in.
Leather interior
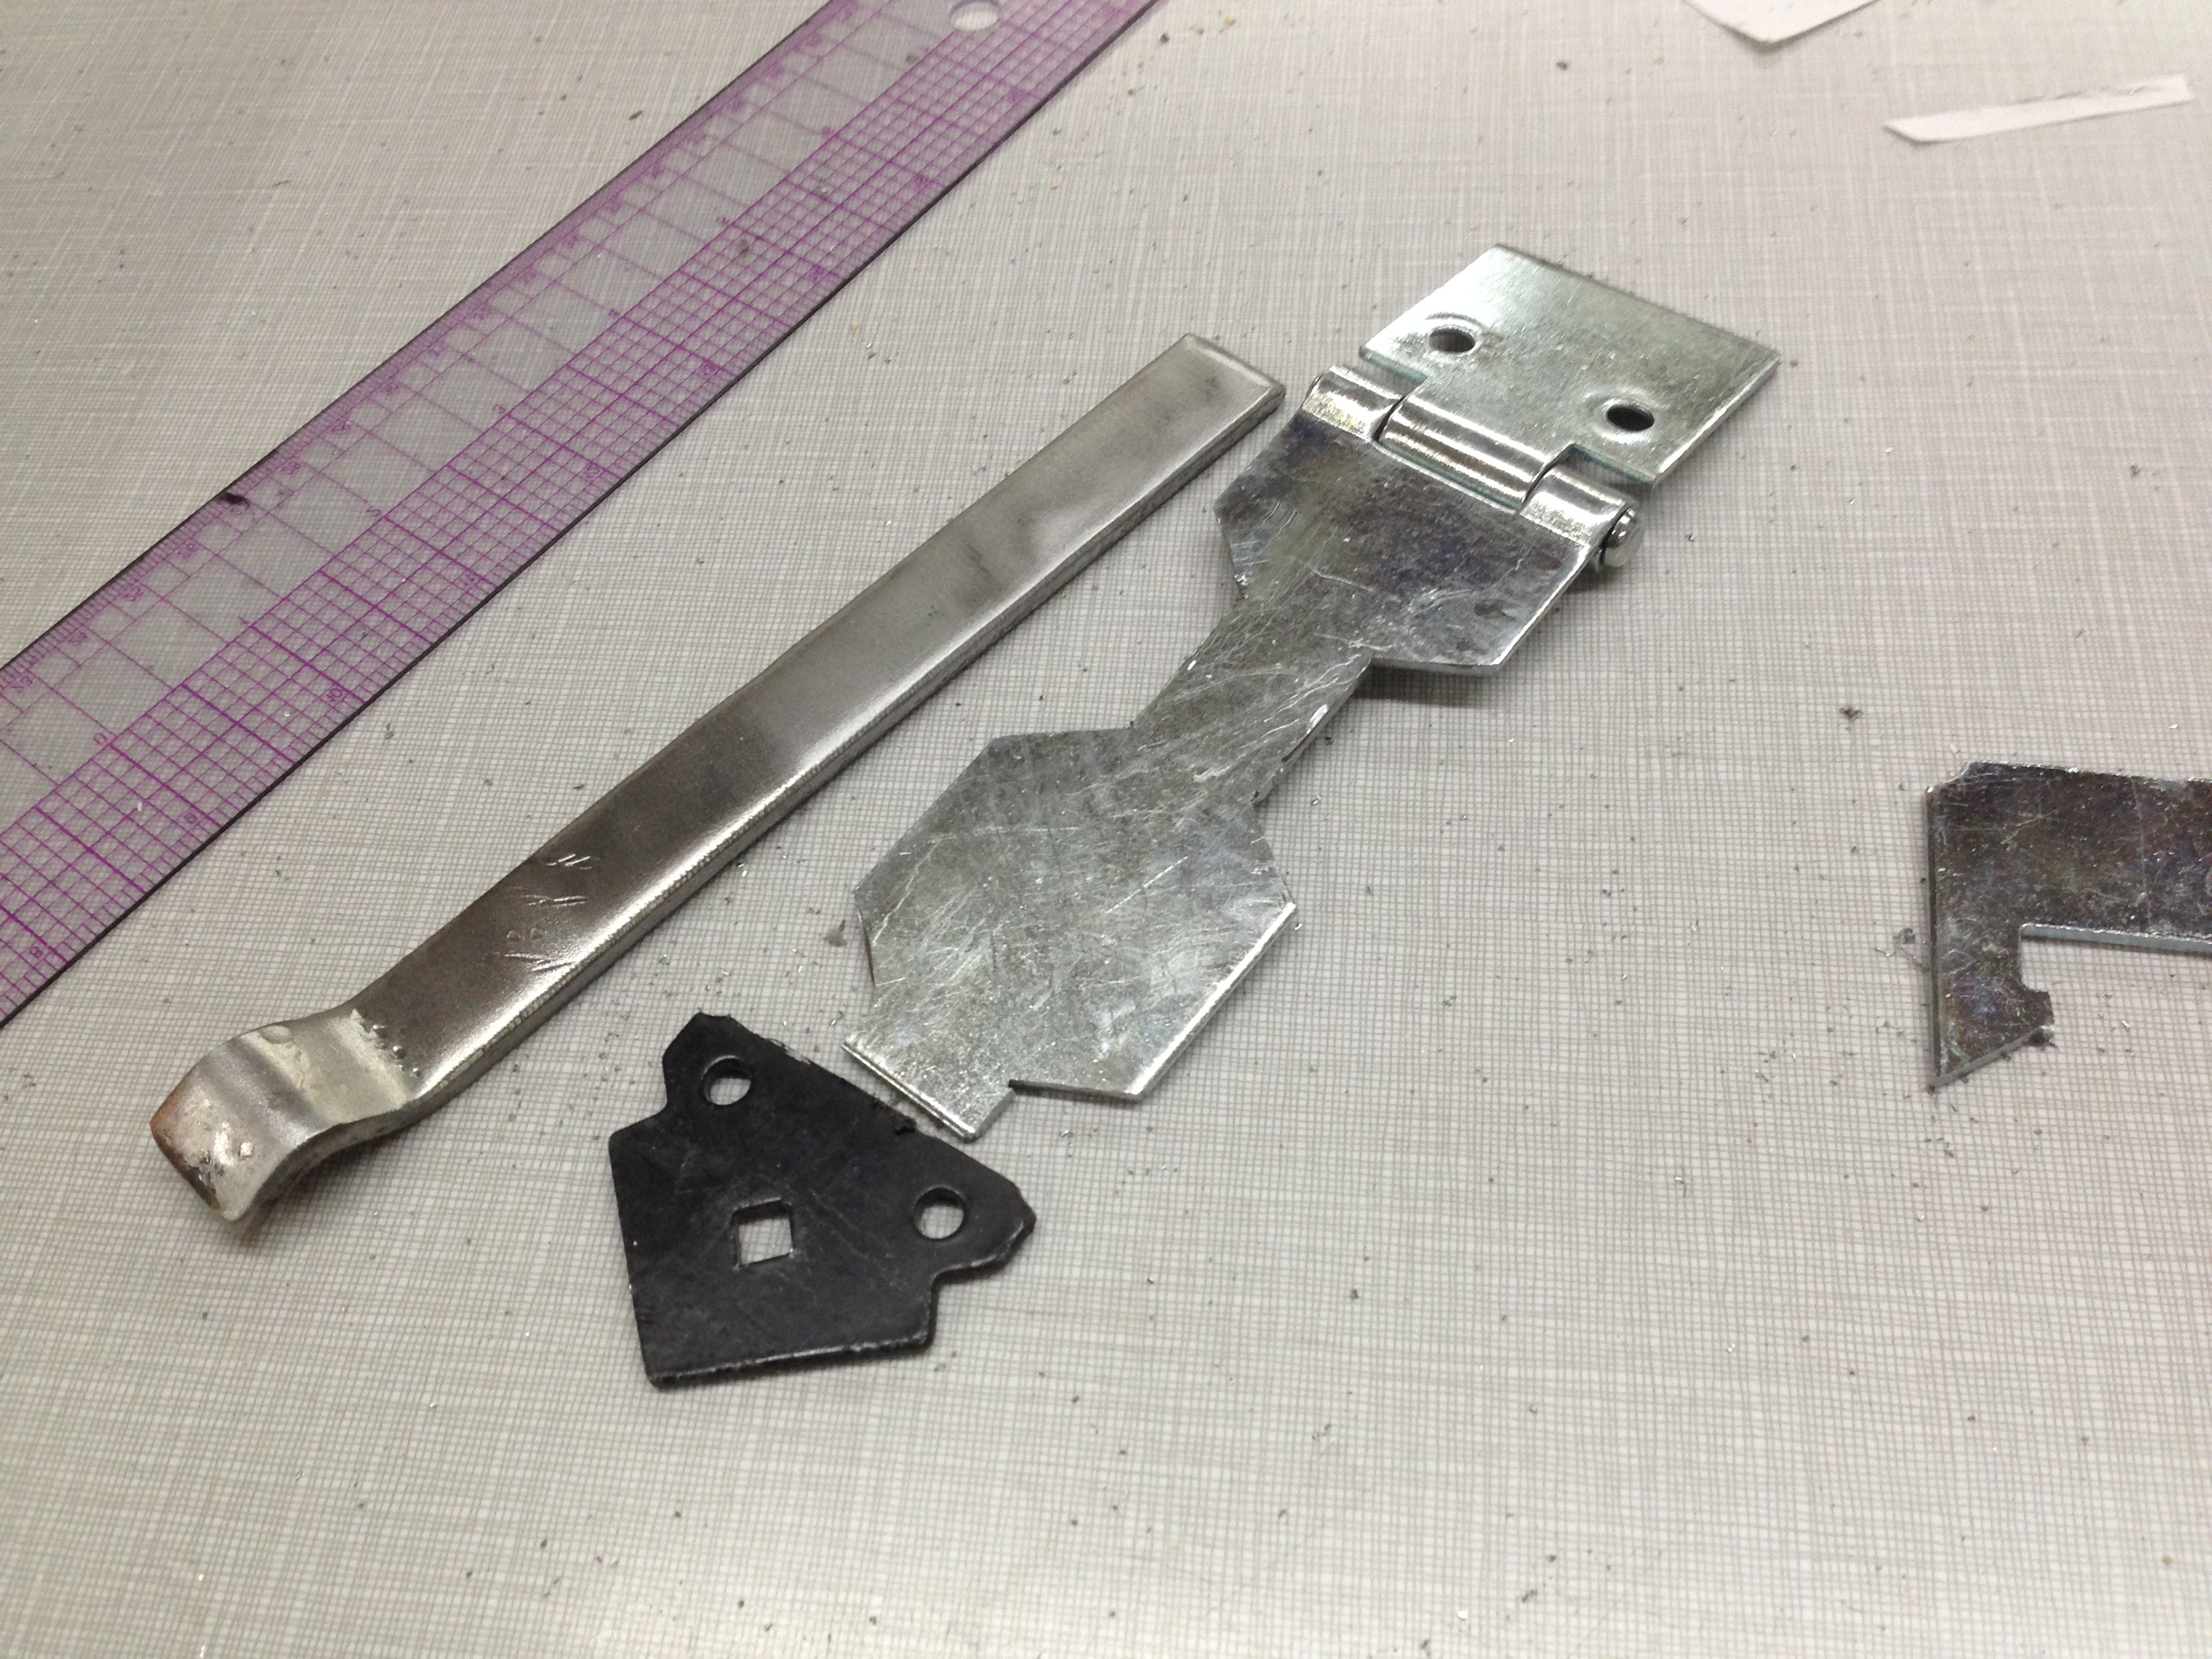
I found hinges online that were so close to the ones on the real chest that I wouldn’t be surprised if the prop makers bought theirs from the same supplier. I could not source the hasp though, so I had to fabricate it from scratch. I started with a basic hardware store hasp and cut notches in the edges. The tip was cut from another decorative gate hinge. I cut a bar of steel to length and bent a curl in the edge, than plug welded the whole thing together from behind and ground the welds flush to the surface.
Pieces for the hasp
With all the pieces in place, all that was left was some painting and sealing. The top layers of all the decoration were sponged with a lighter brass color to set them off, and the whole chest was washed down with some dark browns and blacks to age and weather it. Finally, everything was coated in a clear satin Polycryclic.
The National Theatre in London has this great video on how to create fake wood graining with paint. They have many more videos on scenic art techniques, and a number of videos about props as well.
Making and finding props for theatre, film, and hobbies