Tag Archives: tool

A Union Propmaker’s Tool Kit

IATSE Local 44 has a great list of the various department which fall under “props”. Their descriptions of the different crafts also include the expected set of tools one should show up to work with. Their website used to list the tools required for a propmaker, which I have listed below:

  • 16 oz. Claw Hammer
  • 25′ or 30′ Measuring Tape
  • 100′ Measuring Tape
  • 12″ Combination Square
  • Framing Square
  • Bevel Square
  • 8 pt. Hand Saw
  • 12 pt. Hand Saw
  • Back Saw
  • Key Hole Saw
  • 1/4″ – 1/2″ – 3/4″ – 1″ Wood Chisels
  • Cold Chisel
  • Box Plane
  • Hand Axe
  • Two Chalk Boxes
  • Dry Line
  • Line Level
  • 24″ or 30″ Level
  • Compass
  • Angle Dividers
  • 24″ or 30″ Wrecking Bar
  • 10″ Vise Grip Pliers
  • Pliers
  • Diagonal Cutters
  • Straight-head and Phillips-head Screwdrivers
  • 10″ Crescent Wrench
  • Nail Sets – Various Sizes
  • Wood Files – Various Types and Sizes
  • Sharpening Stone
  • Tool Belt
  • Assorted Pencils and Marking Crayons
  • Plumb Bob
  • Utility Knife and Blades
  • Gloves
  • Cordless Drill
  • Large Ratcheting Screwdriver (Yankee)
  • Tool Box

IATSE Local 44 is also known as the Affiliated Property Craftspersons Local 44; it covers workers in film, TV and independent shops in Los Angeles (though members work throughout the world). As such, the above list is specific to those employees. Still, it is a good starting point for propmakers in other situations, locations and fields. My own traveling prop kit includes some tools I can’t live without, and does not include some of the tools listed above. What does yours look like?

As a postscript, you will notice the list contains no tools for soft goods, sewing or upholstering. This is not an oversight; rather, these crafts are separate departments in the local, and thus have their own list of expected tools detailed on the website, which I may write about in the future.

Hammer Time

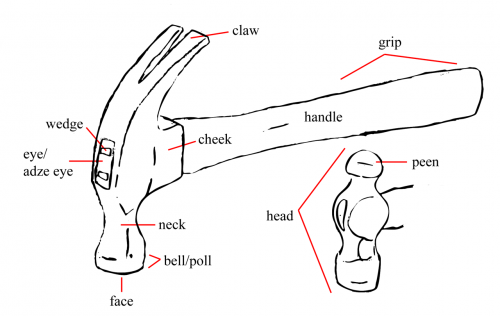
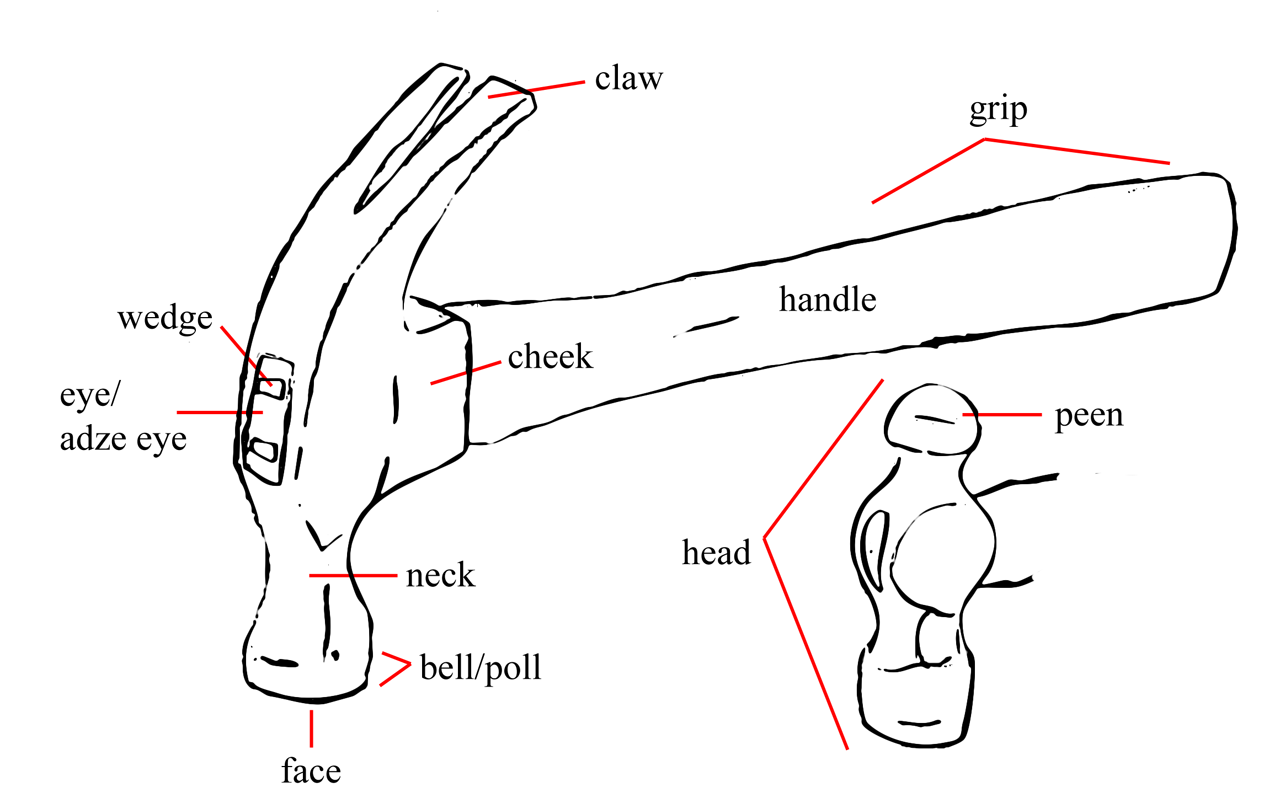
Parts of a hammer
Parts of a hammer

Your basic hammer is made of two parts: the handle and the head. The handle fits through a hole in the head known as the eye (or adze eye), and is held in place with a wedge. On newer hammers, the grip may be wrapped in rubber for greater comfort. The face is what strikes the nail or other surface you are hammering. Hammers used for peening, or shaping metal come in a number of varieties. A ball peen hammer has a peen with a hemisphere shape. A claw hammer has a claw used for removing nails or separating two pieces of wood.

Types of hammers
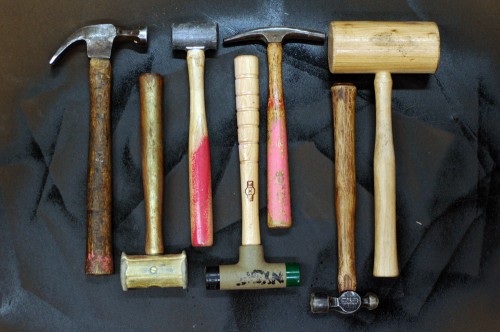
Types of hammers

I gathered some of the hammers we have in our shop, which represent some of the more common types which are useful to the props artisan. From left to right, we have:

Claw hammer: Your basic carpentry hammer is useful for driving and removing nails into wood. It’s also the go-to-hammer for basic “hitting stuff”; I kind of cringe every time I see someone grab a ball peen hammer to knock something loose.

Rawhide mallet: Useful for non-marring blows, especially when working with leather, jewelery or other softer and delicate metals.

Lead mallet: These are used to hit steel without the risk of creating sparks. You can also get copper mallets for the same purpose.

Soft-faced hammer: The faces are made of soft materials, such as rubber or plastic, and are often removable and replaceable. These are used when you are hammering on or around decorative or finished wood to keep from marring the surface.

Tack hammer: Used in upholstery to drive tacks. One end is split and often magnetic to help hold the tiny tacks while driving them in.

Ball peen hammer: Peen hammers are used for shaping metal. Besides the ball peen, you may also find straight peen, cross peen, and point peen, among others.

Wooden mallet: Or carpenter’s mallet, used for furniture assembly or driving in dowels when non-marring blows are needed.

You can of course find any number of other types of hammers and mallets, with many variations in between. Prop shops will often carry rubber mallets, rip hammers and sledge hammers. Other types of hammers, such as bricklayer hammers or drywall hammers may also find their way into shops. Check out the Science and Engineering Encyclopedia for a comprehensive list of hammers.

Sheet Metal Bending Brake

As I mentioned in my last post, I had to (or rather, wanted to) make a sheet metal bending brake for one of my latest projects. A brake is basically a tool (or jig) in which you can insert a piece of sheet metal, and then make a clean fold or bend in a straight line.

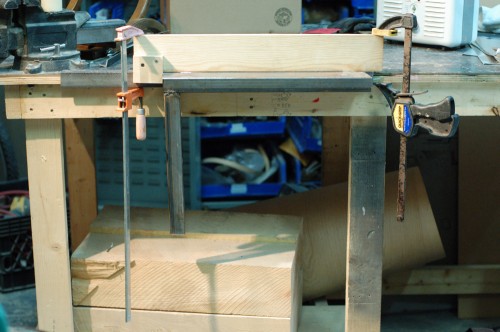
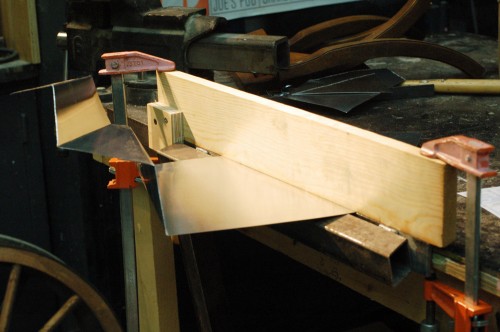
Front view of the brake

Again, I have to credit this post on Dave’s Sheet Metal Bending Brake for getting me up to speed on the best way to design a brake.

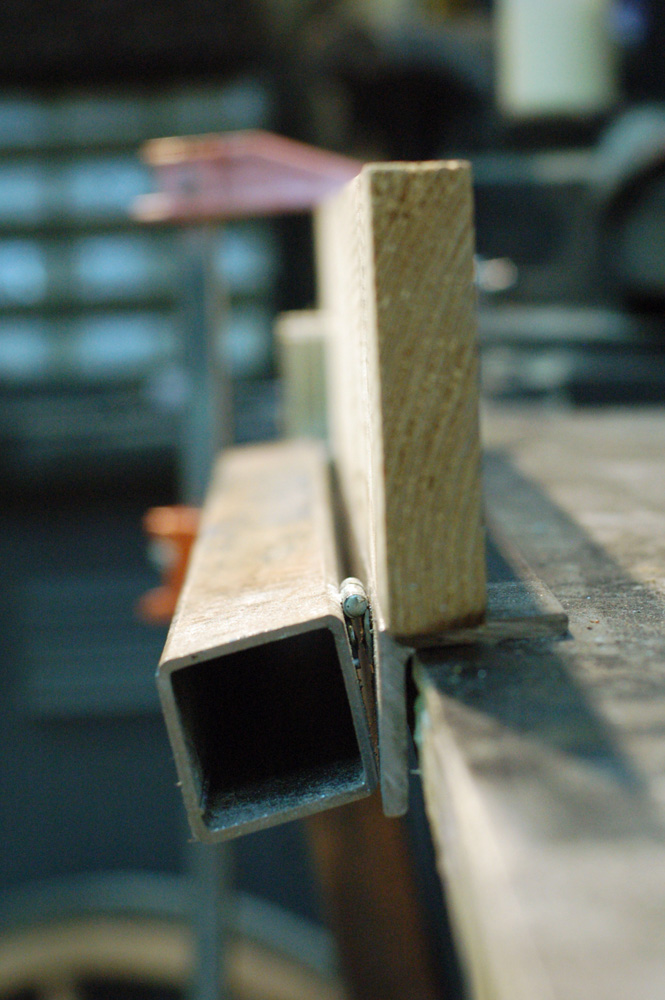
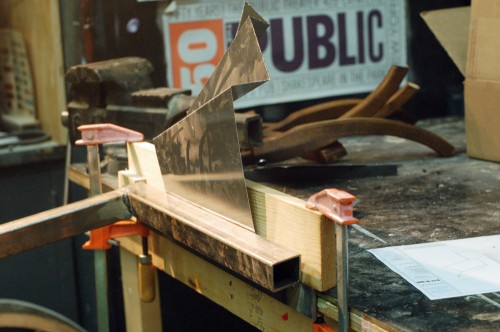
Side view of the brake

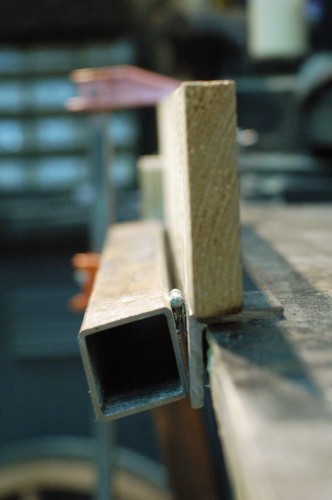
The piece of angle-iron is screwed to the worktable. The square tube is attached to the angle-iron by two small hinges, which are welded on. The tops of the bar stock, hinges and angle-iron are all in line with each other. Finally, I have a piece of wood which can be clamped down to the brake; the front face of the wood is lined up with the front face of the angle iron.

Sequence showing a fold being made

The metal is laid on the box tube and angle iron. The wood is clamped down. The fold will happen at the edge of the wood, so we mark the metal where we want the fold, and line that mark up with the edge of the wood. When you lift the handle, the metal bends with a nice sharp crease.

Here is a brief video of the brake in action making all the folds on one of the footlights.

Art Deco Footlights

A footlight
A footlight

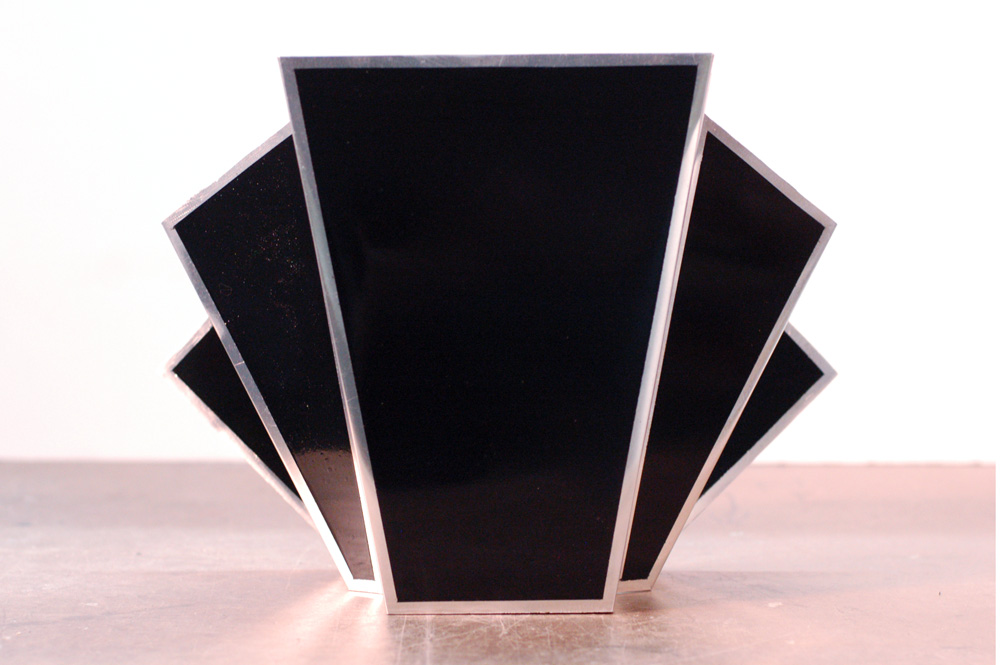
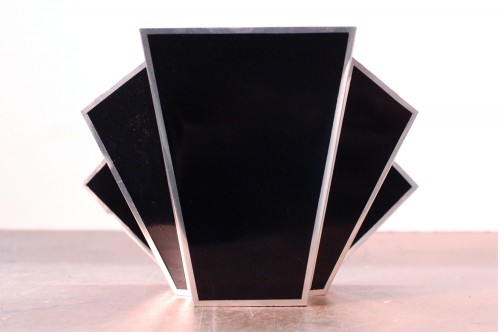
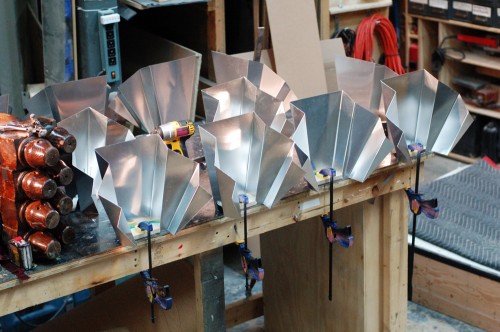
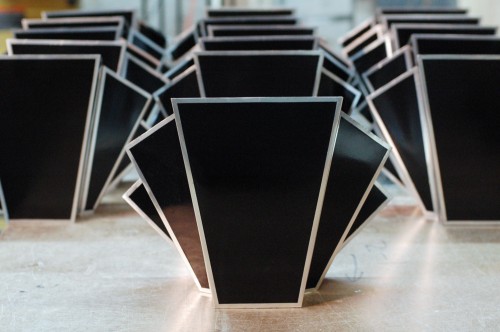
I recently finished up a number of footlights for a company called Punchdrunk for their upcoming New York production of Sleep No More. Their Boston production used traditional shell-shaped footlights; for this update, the stage had a giant art deco backdrop whose shape would be mirrored in the footlights.

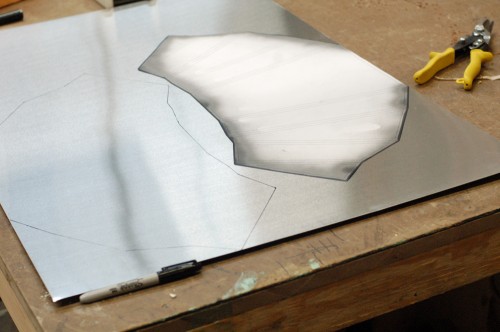
They provided me with a full-scale drawing of the piece with all the angles already figured out. I traced the patterns onto sheets of aluminum. I kept the top edge along the factory edge of the aluminum sheets; with that edge being front and center, I wanted it to be the straightest and cleanest part of the footlight. The first light I cut out using my pair of tin snips. It gave me a clean edge but took forever. I cut the next one out on the bandsaw. It was a lot faster but was harder to keep nice-looking. I ended up using both of the tools to cut, with the bandsaw cutting out the rough shape and making the easy cuts, and the tin snips cleaning up the edges and cutting the trickier parts.

Once cut, the edges needed a lot of sanding and deburring to get them nice and straight and not razor-sharp. I polished them to get them a little shinier as well.

Tracing the template

I was now ready to begin making the bends. I’ve bent sheet metal before using a hammer and some clamps, but I needed a much cleaner and more precise way to make these bends, especially since I was producing sixteen identical footlights. I needed a sheet metal brake. Not having one, I decided to make my own. I looked at a number of tutorials and plans online, and found Dave’s Sheet Metal Bending Brake to be the clearest and most useful description; he’s just a working-class guy trying to build an airplane.

The next two photos show the brake making a fold. First, I had made a mark on a piece of scrap metal and lined it up in the brake to make a bend; this showed me where to line up the marks on the brake in order to place the fold where I needed it to go. Once I was confident with the workings of the brake, it was just a matter of making all 128 folds, one at a time.

Metal in the brake
Metal in the brake
Making the fold
Making the fold

I cut and attached MDF bases to the lights to give them a way to attach to the stage, and for the birdie lights to attach to them as well.

Attaching the bases
Attaching the bases

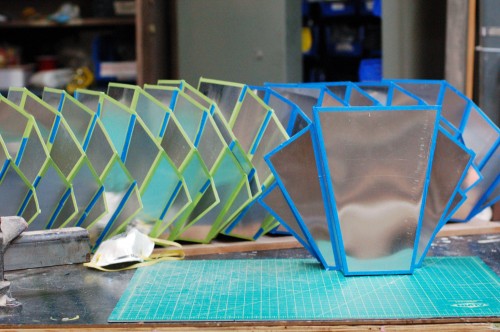
I then put masking tape along the borders of each panel. This quarter-inch area was to remain metallic while the rest was painted gloss black.

Taping the paintlines

With the masking in place, all that was left to do was a couple of light coats of gloss black spray paint to build up a nice shiny and even surface.

16 footlights
16 footlights

Carpentry Then and Now

Carpentry is one of the oldest artisan skills co-opted by the props artisan. Every culture that exists near trees utilizes wood as a construction material in some way. It was inevitable that they would also build their various theatre articles out of wood. Masks, used in early rituals, were often wooden. In medieval Europe, various guilds sponsored plays which were related to their specific trade. For example, the ship builders’ guild would put on a play about Noah’s Ark, and the Bakers’ Guild would provide the accouterments for The Last Supper. Furniture, then, was most likely built by actual craftsmen as needed.

Likewise, France in the time of Moliere saw craftsmen building props. The theatre was controlled by the monarchy, which also controlled the various guilds, who enjoyed monopolies in their industries. Thus, if a play called for a chair or table which could not be borrowed, the specific furniture guild could be called upon to construct what was needed.

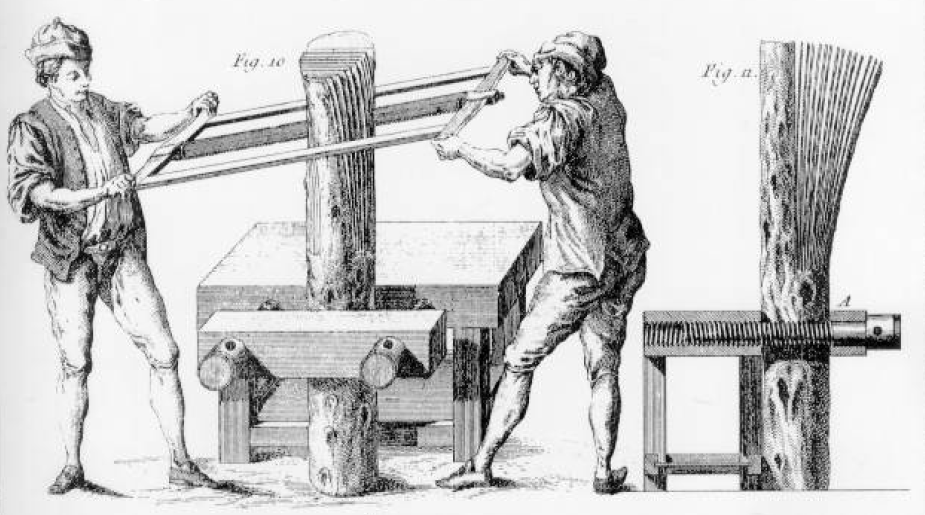
From a plate in Andre Roubo’s book on woodworking

Several societal innovations occurred which brought carpentry out of the guilds and more accessible to the average prop master. The industrial revolution brought standardized parts and mass production. This greatly improved the quality and amount of carpentry tools which were available to the general public. Tools such as highly accurate marking devices, truer saws, and mechanically-advantaged drills increased the speed and efficiency of carpentry to the point where a more generally-trained property master could now construct custom props out of wood for a show.

The second innovation, which is really an extension of the first, is the introduction of electrical power tools. Tools which relied on power were certainly available long before electricity; animal, water and steam power could drive a shaft in a large shop, which in turn, drove any number of large power tools. Electricity made it possible to escape the line and bring the tool anywhere. A prop master could now use a table saw or band saw in a basement of a theatre as long as they had an electrical outlet down there. If they needed to bring a tool to another part of the theatre, they could. The great leap forward came not just in the greater speed and efficiency of these tools, but also the ability to set up a shop in nearly any location. This innovation continued with the introduction and improvement of battery-operated power tools. These days, you can perform just about anything on a cordless tool as you can with a corded one.

These innovations should not be overlooked. If you’ve ever ripped multiple pieces from a full-length piece of plywood, imagine having to do the same thing with a handsaw. The sheer amount of carpentry which a props artisan can accomplish in one day is far greater by magnitudes than what was possible in the days before Vaudeville.