
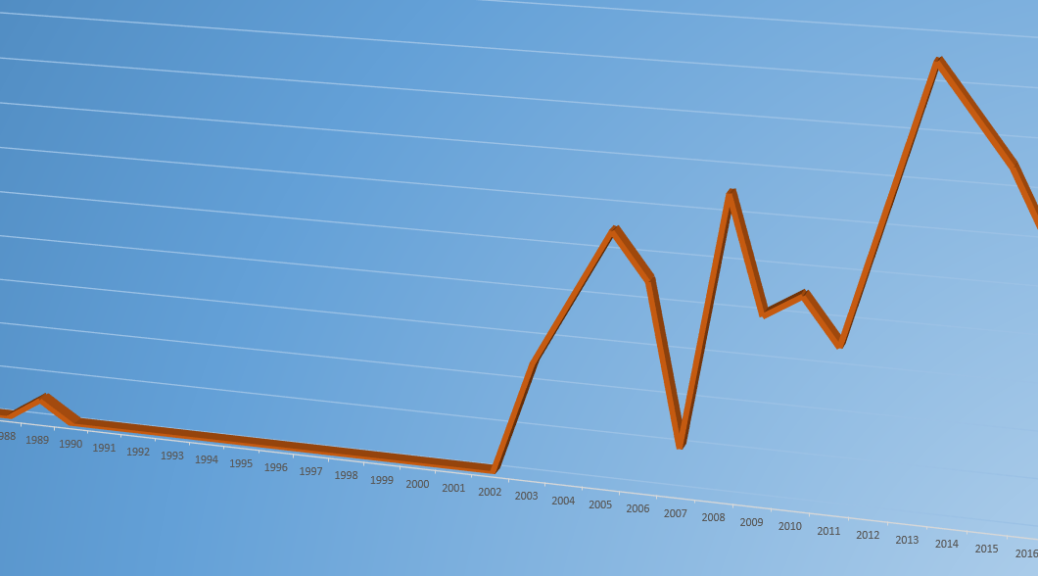
The title of “prop designer” seems to appear more now than in the past. More experienced prop masters have made note that younger props people are being credited as prop designer on their shows, or self-identifying as one on their resumes. Is this just a trick of perception, or are prop designers actually growing in number? Continue reading The Rise of the Prop Designer
Category Archives: Features
In-depth articles written specifically for this blog.
From Prop Making to Authoring
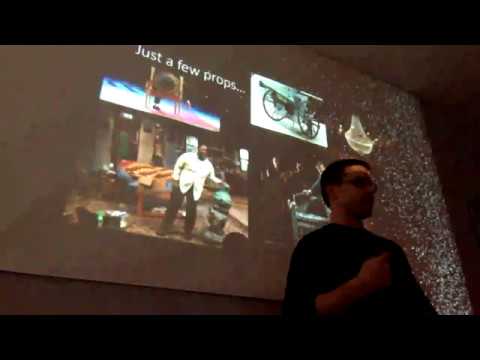
Last Thursday, I gave a talk to the Alamance Makers Guild at STEAM Junction in Burlington, NC. I’ve been a member of the AMG since 2012, and it was great to finally give a featured presentation. STEAM Junction is the new Maker Space started by the same people.
My talk was called “From Prop Making to Authoring.” I started off discussing my career as a prop builder and what that entails, before moving onto the blog and how that ultimately led to writing The Prop Building Guidebook: For Theater, Film, and TV.
My wife broadcast the entire talk over Facebook Live, and now the video is up on YouTube. It is a little over an hour long, so only the most diehard fans will make it through the whole thing.
The audience really enjoyed it. I was able to explain how my work informed the blog and how that built an audience for the book. I talked about why I blog, and how I use social media to promote it. Much of what I discussed was relevant to makers of all kinds, not just those who build props. It is all about teaching and sharing knowledge, and how to get people interested in what you do.
Rehearsal Notes: Chair
© Michelle Dias
Day 1
May we please have a stool?
Day 2
Thanks for the stool. May we please have a taller stool?
Day 3
Thanks for the taller stool. The director has requested a bench instead.
Day 4
Regarding the bench, would it be possible to put arms and a back on it?
Day 5
Thanks for the sofa. Although the designer would prefer it, the director feels strongly about having the bench back, and altered as requested.
Day 6
After meeting last night with the designer, the director has reconsidered the altered bench and would like to see the sofa again. We appreciate the overtime you put into the bench and apologize for the change.
Day 7
Can we please see all the chaise lounges you have in stock?
Day 8
Thanks for bringing up the chaises. The director has decided to stay with the sofa. Would it be possible to shorten it? To about loveseat size?
Day 9
The director doesn’t care for the style of the loveseat you brought in. We will ask him to discuss it with the designer. Meanwhile, can we pursue our request to have the sofa shortened?
Day 10
Thanks for shortening the sofa. Unfortunately we’ve now found the arms are too low on this one and would like to see all the other sofas and loveseats you have in stock.
Day 11
Can we please have all the sofas and loveseats removed from the rehearsal hall before 10am? The director and designer have met and have decided to try an armchair.
Day 12
Thanks for the armchair. Do you have one with a taller back?
Day 13
Although very nice, the wingback is too tall. Is there an armchair in stock with a back that’s shorter than the wingback but taller than the first armchair?
Day 14
Thanks for the Barcalounger. Wrong style unfortunately, but fun. May we keep it in the Stage Management office? Can we please try again with another armchair?
Day 15
The director loves the new armchair. Thank you.
Day 16
Regarding your note about the designer requesting new fabric for the armchair: we can free up the chair after rehearsal today. It would be great to have it back tomorrow. Is one night enough time for the re-upholstery?
Day 17
After rehearsing with a dining room chair today, the director feels he would like to use that instead of the armchair. Sorry! Hope you didn’t stay too late last night!
Day 18
Do you have another dining room chair that closely matches the one we have, but without arms and with a different fabric? And perhaps a slightly taller back?
Day 19
Thanks for the selection of dining room chairs. If we wanted to use a full set of six, would it be possible to recover the seats before tomorrow’s dry run?
Day 20
We have some news that will make you laugh. The director has decided that one of the plain black orchestra chairs will be perfect. We had one in the rehearsal hall. Thanks and have a great day.
Day 21
Re: the table…
The above was written by Michelle Dias, who passed in 2011. There is a scholarship given in her name if you are interested in knowing more. Thanks to Cindi Zuby for sending this to me and Michelle’s family for allowing me to post it.
Practical Lighting: Props or Electrics?
I started a survey a few weeks back to gather some information for my upcoming book, The Prop Effects Guidebook. While most of the answers were only relevant to me, I thought I would share the results of one of the questions.
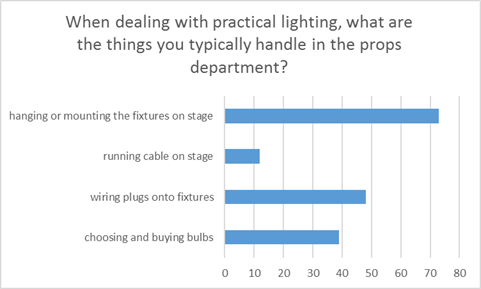
Ninety-eight people answered the above question, which is a good chunk of props people. I also had a short text box so people can clarify their answers, and that received forty-eight responses.
A number of respondents stipulated that while they will often mount fixtures on the set, such as sconces, any hanging fixtures will be handed over to the rigger or carpenter.
A small few stated they were responsible for the whole practical; everything from choosing the decorative fixture to getting a bulb in and wiring the thing. Basically, when they hand it off to the electrics department, it just needs to be plugged in. On the other hand, at least a dozen people stated they were responsible solely for sourcing or building the fixture itself; adding a bulb and wiring it is all done by electrics, while mounting or hanging are the purview of scenery.
For another small percentage, this was the typical practice at their theatre, but the props department was ready to help out with the wiring of practicals if the electrics department got swamped.
For the prop departments responsible for bulbs, most people clarified that they based their bulb choice off what the lighting designer wanted or what the electrics department suggested. Others elucidated that they were responsible for bulbs which were a visible element, such as period incandescents.
A similar response happened with plugs; if the lamp has an Edison plug which was a visible part of the world, it is more likely to be props’ responsibility. If the fixture had a cord that ran offstage, the stage pin connector is probably put on by Electrics.
This survey was a fascinating glimpse into how various other theatres work. Even something as simple as sticking a lamp on a table can be handled in a variety of ways. One respondent works at a theatre that does not even have an electrics department! If I were to take a guess, I would bet that many theatres operate the way they do based on the traditions of who has worked there in the past. If the props department never had anyone able to wire a lamp, then over time, the electrics department would just take that job over.
That being said, being able to make a lighting fixture function is a skill which new props people should be learning. If you end up working at a theatre where the electricians do all that, great, but you may end up at a job where it is your responsibility.
Also, in my own opinion, you can find so many interesting and fun things in the world of lighting today, from EL wire to LED tape and more. Many electricians live in the world of Source 4s and giant PAR lamps, and may not be aware of all the cheap, tiny lighting stuff that exists outside of the theatrical world. A props person can bring that knowledge to the table and help open up more possibilities to the production.
New Cover for The Prop Building Guidebook
We are still about a year away from the release, but I just turned in my last chapters for the second edition of The Prop Building Guidebook: For Theatre, Film, and TV. I am very excited about this book. The first edition filled a void in the props world, and continues to be a great success. Now that it has been out for a few years, I can take everything I learned from it and incorporate that into a new edition.
But let’s skip all that for now; I really want to talk about the cover. I always wanted to do a custom setup showing a prop being built, but did not have time during the first edition.
Coming up with a cover idea for prop building is tricky. Most finished props just look like a regular object. If you have a picture of a chair, people will think it’s a book about chairs. A picture of a treasure chest will make it look like a book about treasures. I needed a process shot. I did not want a collage or series of images for the cover, so I realized I would need to build some weird hybrid prop where half of it was finished, and the other half was still raw materials.
I wanted to incorporate the “most proppy” kinds of materials and techniques into the cover. I knew I wanted foam carving, molding and casting, paper mache, and a cool paint job. I would have loved to get some metal and thermoplastics in too, but I only had a weekend to plan, build, and photograph this. I did manage to get some plywood and found-object decorating in though.
Figuring out the prop itself took some thinking. It would have to be something that could conceivably come from a show; something you would not just buy or adapt from existing items. With the different materials I wanted to show off, I realized it would need to be quite fanciful. It would be the proppiest prop that ever propped.
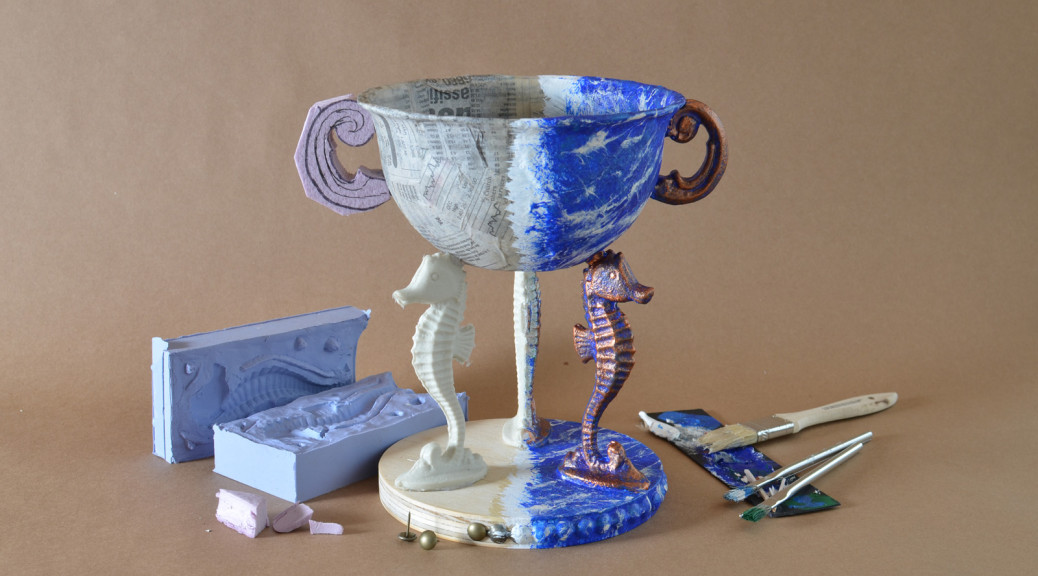
I also needed it to fill the square cover. I could not make anything long, like a staff or wand. I did not want to stick a gun or other weapons on the cover either. I dug back into my opera roots and decided some kind of chalice or vase would be best; a bowl with carved handles, held by three sculpted figures.
First I had to find the sculpted figure that I would mold and cast. I had nothing in stock and I did not have the time to sculpt something. I headed out to the stores and looked high and low. I needed something that would be easy to mold and cast, but that looked cool enough to warrant molding and casting. I finally found a little seahorse figurine. My prop would now have an underwater theme.
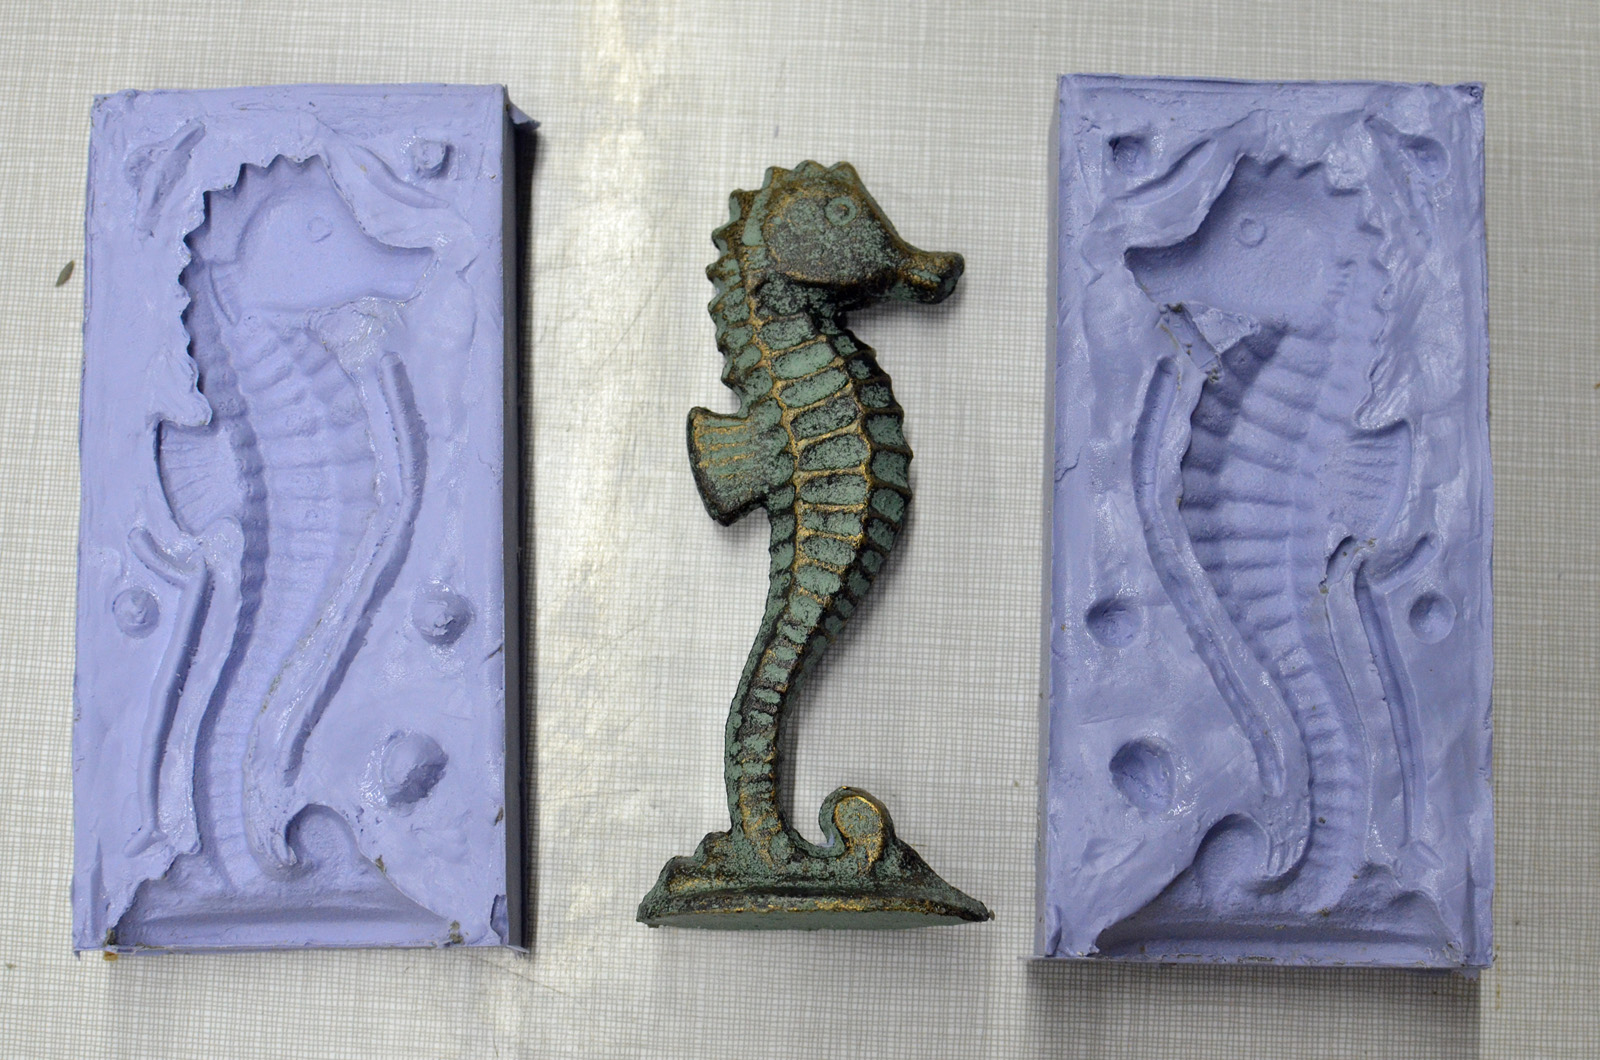
I made a two-part mold using Smooth-On Oomoo 30. I realized using $20 in materials to make three copies of a $3 figure was silly, but hey, he’s going to be a star.
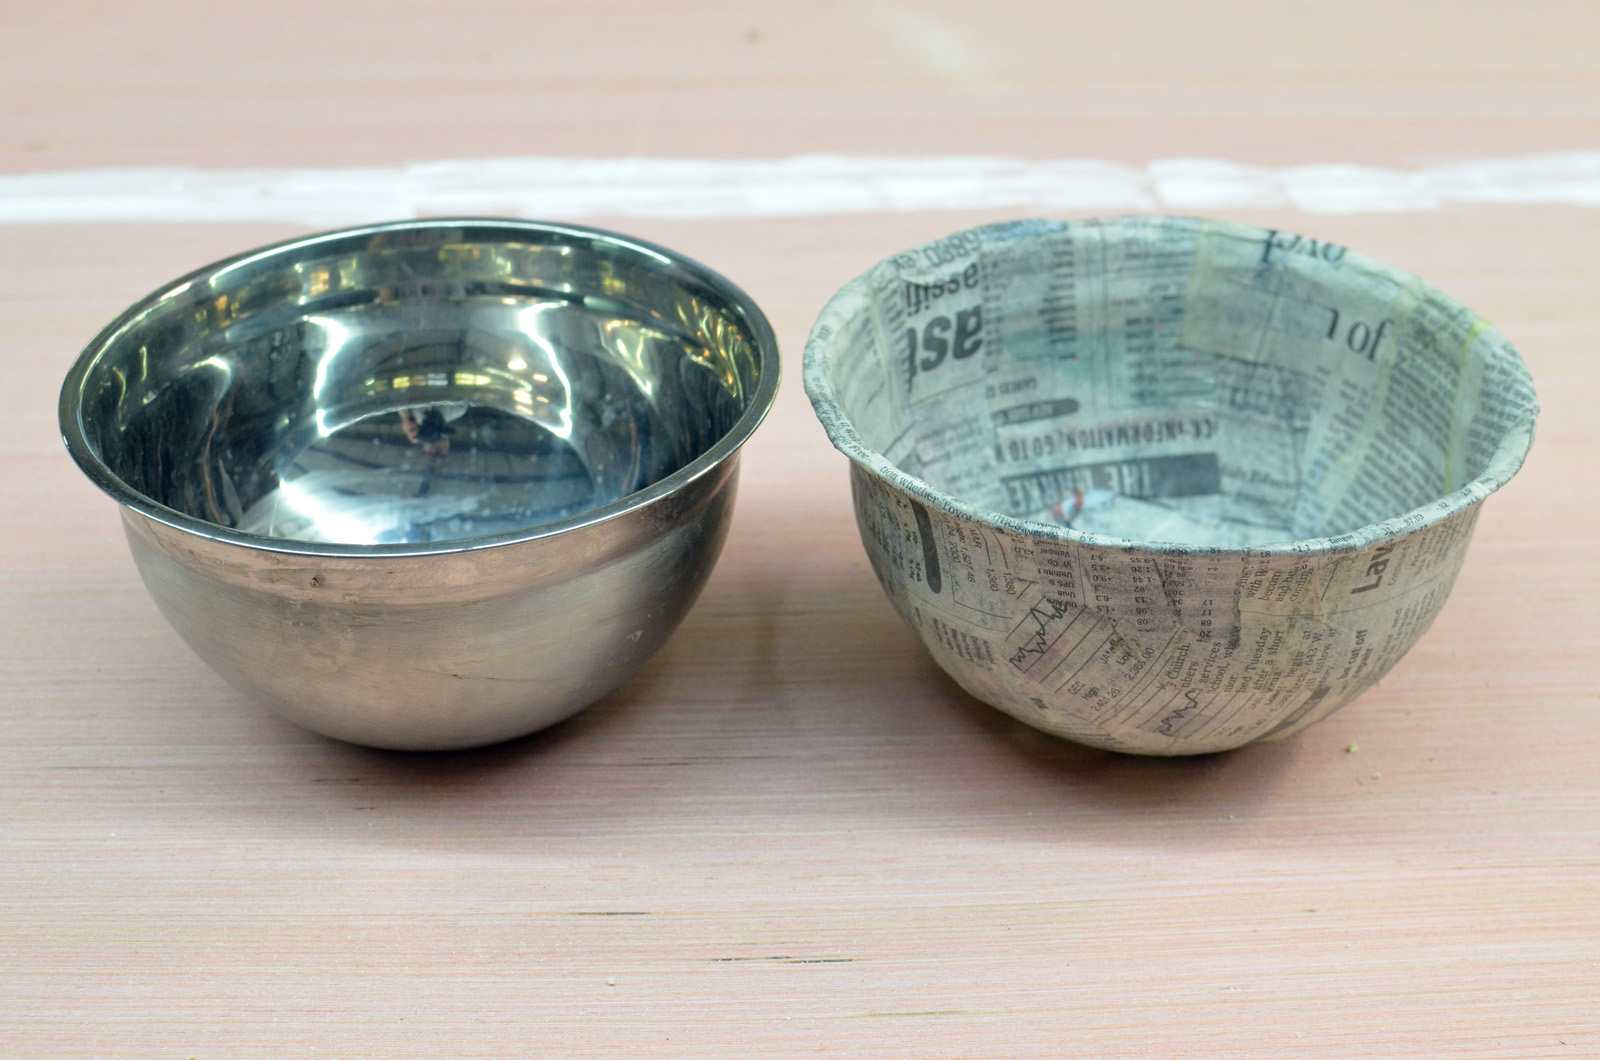
With the seahorse in place, I searched for a bowl that would look good on top. A stainless steel mixing bowl in stock fit the bill perfectly; it was also a good shape to use as a form for the paper mache. I cheated a bit here; I did not have time to actually paper mache a bowl and wait for it to dry. I molded a piece of Wonderflex over the bowl first, then added a single layer of paper mache to the inside and outside of that. So now my prop was actually a prop version of a prop.
With these in place, all that remained were the handles and the base. I carved a piece of foam into a handle, and cut another one out so it looked like it was about to be carved. I cut a circle of plywood and nailed some upholstery tacks along the edge for decoration.
I painted half of the prop with a faux marble treatment and a drybrushed brass. All that was left now was to pop it onto some butcher paper in my “photo studio” and artfully arrange the various materials, tools, and molds around the prop.
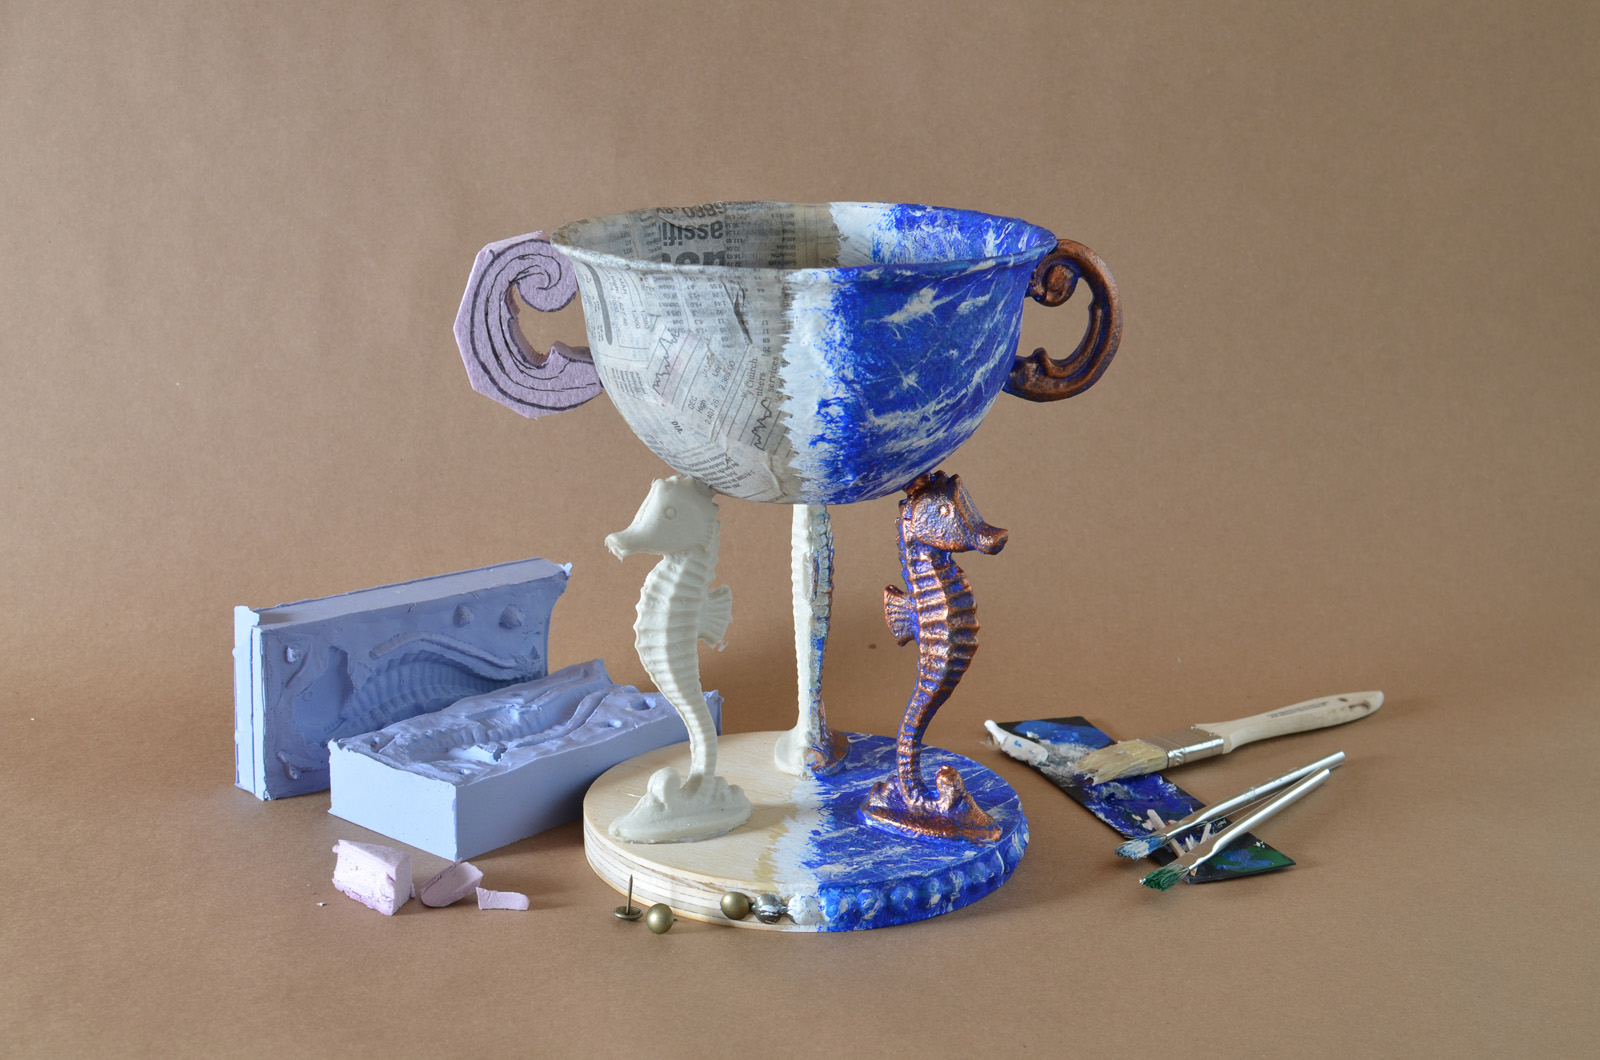
Ta da! I feel like I have an image that better captures what the book is about. And now I have a weird half-finished seahorse trophy I can carry around with me.