Good news, everyone! I’ve been talking with Focal Press for the past several months, and yesterday, I found out that my book was approved. It is tentatively titled The Prop Building Guidebook: For Theatre, Film and TV. What’s it going to be about? I am going to lay out all the “whys” of prop building I’ve developed over the years to help you build your own props. Don’t worry; it’s going to be heavy on the “hows” as well. Everything from carpentry and metalwork, to fabric and upholstery, molding and casting, and painting too. It will be the first guide to building props that will feature color pictures. We’re living in the future now!
The Prop Building Guidebook will hit the bookshelves in February, 2013. I know, it feels like a long way off. I will also be developing a companion website and some short videos to complement the book which may debut slightly ahead of then. Until then, you’ll have to continue getting your prop fix from this blog.
So don’t worry about this blog. The world of props is a vast world indeed, and I will continue covering all the news and information here that won’t fit in my book. Some exciting things are on the horizon; the third annual NYC Props Summit is scheduled for August 26th (drop me a line if you are interested in attending). I’ve recently begun interviewing props people, and will post those in a few weeks when I get through transcribing them (transcribing video takes a long time, apparently).
So keep on reading! There’s a world of prop-portunities out there!
I don’t have the author of the following piece, nor could I locate the original source. In fact, it doesn’t seem to appear anywhere on the internet. So if anyone knows the originator of the following essay, I would love to hear about it. And for the rest of you, it’s too entertaining not to share.
How to be a Great, Not Just Good, Set Decorator
Set decorator is a euphemism for set dresser. Often effeminate stagehands, dressers are really outside prop men, and all they do for a living is shop. Occasionally, a few great set decorators will go down in the anals of this business, but most set decorators just shop and steal.
Stealing is required in set decorating, and if you aspire to this vocation you must learn several forms of stealing. The most common forms of stealing are lying, kickbacks and false billing. Lying is simple; put in for cabs and, in reality, walk everywhere you go. Bill six hours for looking for just-the-right wicker basket, when you really took five minutes to order it blind by telephone. Kickbacks are almost automatic; do your shopping at the most over-priced prop house in your area, and make sure you get yours regularly. For false billing, either get your own forms and bills, or walk into a store and say, “See that $25 item? I’ll give you 50 bucks for it if you’ll give me a receipt for $100.”
Let us say you follow my advice so far, and you land yourself a job as an outside prop man. So big deal, you are shopping, stealing and swishing—that does not make you a great; no one is looking up to you. You have got to be better.
To be a great, not just good, set decorator you must develop your sources. See if you can go an entire year without buying or renting a single item from anyone you did not set up in business. Develop companies of your relatives and friends. Buy an item on Monday, use it on a one-time-only basis on a show on Tuesday, and return it for full credit early Wednesday. (If anyone asks where it went, say the star’s lover asked for it.)
Now start using terms like rococo, art deco and chiaroscuro. Use the word “period” constantly. “It just isn’t the right period. I won’t do it, period. I have my period.” As soon as anybody threatens your territory shout at him, saying he wouldn’t know the difference between Corinthian and Doric. Get close to the star of the show and use your best baloney. Tell her she would look great against an Etruscan escutcheon, and you will be the envy of the entire studio.
These are so cool: US bread wrappers of the 40s and 50s. Besides being tons of fun, the pictures are good enough to print out if you need to make period wrapped bread. Incidentally, the site this is from, How to be a Retronaut, is chock-full of the most wonderful vintage and historical pictures. You can waste hours of time on this site while rationalizing that you are “doing research.”
I’ve pointed to the Early Office Museum site before, but I just found this gallery of Really Big Stuff. It’s photographs of early office equipment, like typewriters and rubber stamps, constructed at large scales (think “parade float” size). It’s also a good opportunity to check out the site if you haven’t heard of it before.
The NIOSH Pocket Guide to Chemical Hazards is an extremely useful source of information for the hundreds of chemicals listed as “hazardous” by OSHA and found in the stuff we build props out of. Rather than serve as an exhaustive guide to all information, it lists key information about each chemical relevant to work. You can view it online or download the whole thing as a PDF; I’m also throwing the link up in the sidebar of this site so you can find it every time you visit.
The Historic Naval Ships Association has a 1949 training manual titled Engine Room Tools presented in full on their website. It illustrates and describes the tools one would find on a ship at the time, namely metal-working hand tools. They are surprisingly similar to the metal-working tools you would find in a props shop, and the illustrations demonstrating their use are very cool.
What does it mean to do a project “at cost”? Simply put, when a client orders a project, you deliver it and charge only enough to compensate what you spent. It differs from a project where you add a markup to the costs or add a profit margin. So the price is the cost plus the markup plus the profit. Sometimes you might not mark up the costs, and other times you do not add in a profit, but in either case, you are charging more than what you spent.
The confusion comes from the “costs”. There’s the cash you spend – materials, shipping, gas money to drive to the store, overhead and maintenance of your shop – and then there is your labor cost. Some may argue that you should not charge for your labor when you are doing a project “at cost”. This is not only erroneous, but it is damaging to our industry, as I shall explain in a bit.
I’ve even heard the suggestion that the cost of your labor should be considered “profit.” This is absolutely absurd! If you get overwhelmed with other jobs and have to hire someone to do the project, you do not get to keep that money; it becomes a labor cost. When a company sends out it’s weekly payroll checks, it does not get that cash back, nor can it count it as profit. Why then should you count your own labor as profit?
The cost of labor is already factored into all the materials and tools you use. The cost of a gallon of silicone rubber includes the cost of the scientists who invented it, the people who manufactured it, the people who packaged it, the drivers who transported it, and the salespeople who sold it. You can’t count any of their labor as a profit; it’s all part of the cost. Why would your labor not also be a cost?
If you make something “at cost” you include the price of your labor. If you don’t know how much that is, you should charge the same amount for your labor as it would take to hire someone else to do that work. You can charge an hourly, daily, or weekly rate, or just set a flat fee for the project as a whole. If you are trying to control the costs of the project, you certainly have some leeway in how much you charge for your labor, but you should never charge too little for it; if your price is still too high for a client and you are trying to do them a favor, you can always add a “discount” to your final price, so you maintain the integrity of your own labor costs.
Prop masters and artisans with experience know that labor is often the most expensive part of a prop. A foam sculpture may only use about $15 in materials, but it can take fifty hours to complete. Even at a very modest $15 an hour, that is still $750 in labor.
Imagine than, a market where some prop makers are saying $15 is “at cost” while others are saying $765 is “at cost”. That kind of disparity drives down the price of props and devalues the labor which goes into it. It is very skilled labor as well, the kind that is frequently at a shortage, even in a large market like New York City. It takes a lot of training, skill and practice to be able to make props. Clients who want the “costs” of a project kept to a minimum will point to the $15 examples, thinking that the $765 estimate is somehow inflating the price or using more expensive materials. Even if you are just an amateur prop maker, your pricing can have ripple effects throughout the industry.
If you want to charge someone just for the materials you use and throw your labor in for free (because it is for a friend, or because you really love the work and would never get paid for it otherwise), that is certainly your right. Everyone does it at some point. But make sure you are saying you are only charging “for materials”, not that you are doing the project “at cost”. It’s a world of difference.
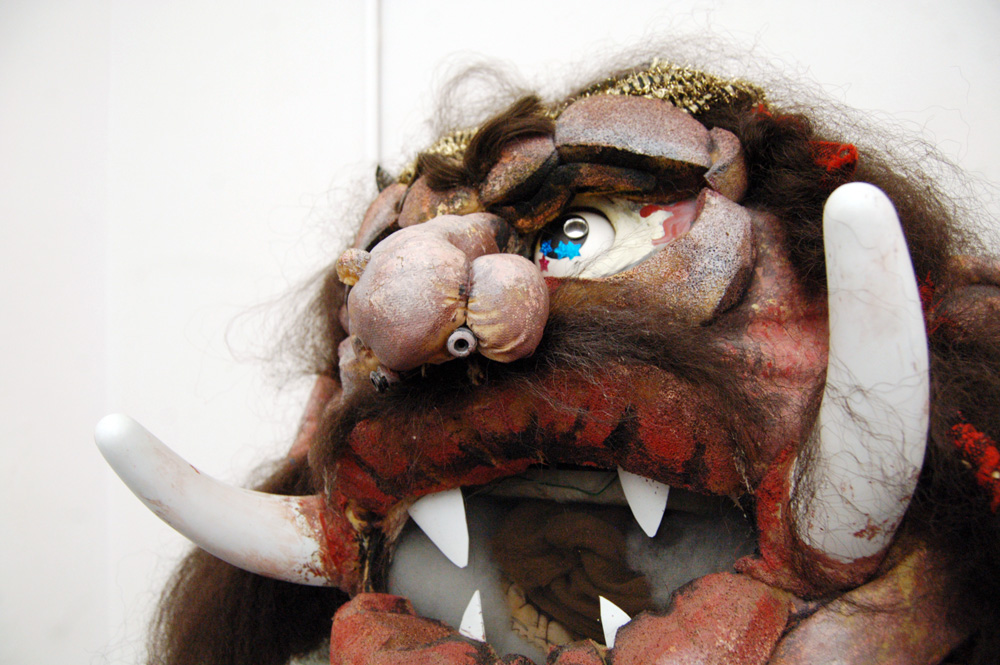
On the second full day of this year’s S*P*A*M conference, we watched a presentation by Rebecca Akins. Ms. Akins has designed costumes for Childsplay Theatre (our host in Arizona) for the past twenty-five years, and has been constructing costumes, puppets, costume props and masks for at least that long as well. She divided her presentation in two parts. The first was on materials and methods she’s used in the past which she now knows to be hazardous to your health. The second was on “new good things”, which are less-toxic replacements for these.
A puppet couple by Rebecca Akins
One of her earlier shows was a production of Devils in 1971. She created latex masks, Celastic armor, and sprayed the costumes with aniline dyes. Anyone who has worn latex knows it does not allow the skin to breathe, and the latex masks were very uncomfortable to the actors with the heat and build-up of sweat underneath. Aniline dyes are extremely toxic, and spraying them is a great way to fill your lungs with poison, especially with little ventilation and no respirator.
Ms. Akins used Celastic a lot in those days, starting with Celastic mitres, crowns and wigs for The Balcony in 1969, through at least 1981 with masks for a production of The Pied Piper. For those who are unfamiliar, Celastic is a fabric impregnated with plastic. When you soak it in a solvent, it becomes soft and flexible, hardening to a stiff but lightweight shell when the solvent evaporates. The toxic part is not the Celastic itself, but the solvent used to soften it; common choices include acetone and methyl ethyl ketone (MEK). All solvents are harmful to humans, and can enter the body through the skin, lungs, stomach or eyes. Not all gloves will protect against them, and not all respirators are designed to filter out their vapors.
She mentioned a material I had never heard of called “blue mud cement”. It is a powdery mixture of asbestos fibers and “spackle-y” binders; when mixed with water, the paste will dry hard and lightweight (it was originally developed for plumbing pipe insulation). For a 1974 production of A Midsummer Night’s Dream, she created forms in chicken wire, wrapped them in plaster bandages, and coated the whole thing with blue mud cement. It sounds like a mix between Bondo and chopped fiberglass, except that it’s, you know, asbestos.
Cutting and carving Styrofoam with a hot knife or wire is another technique she described; the fumes created when Styrofoam melts are fairly toxic.
In 1984, Ms. Akins worked with fiberglass for the first time to create a mascot head for a Phoenix sports team. Fiberglass creates strong and lightweight shells, but she found the individual particles got into her skin and clothes and irritated her immensely, and the resins used give off a lot of fumes while curing; it is also an inhalation hazard when sanding the hardened fiberglass. She used fiberglass again in 2002 with more adequate protection (ventilation, a respirator and thick sleeves), but decided it was too much of a hassle to continue working with it.
The second half of her presentation dealt with “new good things”, that is, newer materials which attempt similar results with less toxicity. Examples include Fosshape, Thermaflex (or Wonderflex), leather, fabric, paper and silicone casting gels.
Fabric is another less-toxic material. She uses soft sculpture a lot for puppets; fabric, thread, fiber fill (stuffing) and paint are the only materials needed to make three-dimensional shapes.
She showed us a number of examples of “found objects as materials”. An old leather handbag became a dog mask, a group of woven baskets transformed into a camel, and dryer hoses turned into snakes and an elephant’s trunk. Though using found objects has long been a staple of propmaking, Ms. Akins reminded us it remains a fairly non-toxic–and environmentally friendly–method, even today. Below is a photograph of a dog mask made out of wooden bowls.
In 2004, she began using Fosshape to make a head for a production of Big Friendly Giant. Like Themaflex and Wonderflex, Fosshape is a plastic-impregnated fabric which becomes soft and pliable when heated, and retains its shape when cooled. In many ways, it is similar to Celastic, except you use boiling water or a heat gun to soften it, rather than a bucket full of solvents.
Finally, she described her first forays into using silicone mold materials. She would make a model in clay, mold it in silicone, and then cast it in resin. In one case, she mixed resin and Bondo together to make a puppet head; this gave her a translucent pinkish head which looked a lot like skin.
At the end of her presentation, Ms. Akins reminded us that whatever materials and methods you choose, you should endeavor to make the prop with as much care as possible. She left us with these closing words: “The more gorgeous a thing is, the more respect it is treated with.”
Making and finding props for theatre, film, and hobbies