Tag Archives: polyurethane foam

Talisman from Faery Tale Adventure

I have a second project from The Faery Tale Adventure which I recently finished. Like the Magic Seashell from a few weeks back, this was a project I used to get photographs and videos for various techniques covered in the second edition of The Prop Building Guidebook, which will be out in early 2017.

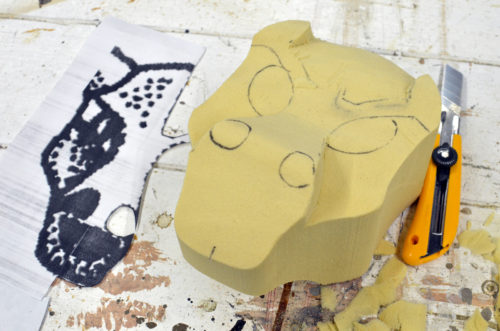
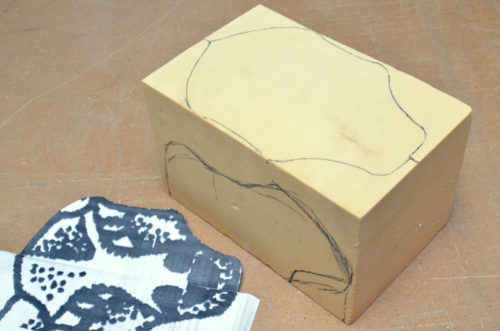
Polyurethane block
Polyurethane block

This was my first time carving into polyurethane foam, and the difference from polystyrene foam was remarkable. It does not have any of the sponginess of polystyrene. It cuts like butter but you can get really sharp, defined details.

Unfortunately, the dust may be reactive with your skin, so you need to wear gloves, sleeves, and a mask while working with it. The inertness of polystyrene dust has it beat there. But for a small piece like this, it was pretty fun.

Starting to carve
Starting to carve

The video game graphics were not helpful; the actual Talisman is only seven by nine pixels big. But the manual has some artwork which I enlarged and used as a guide.

I have some more photos and information about carving polyurethane which will be in the second edition of my book.

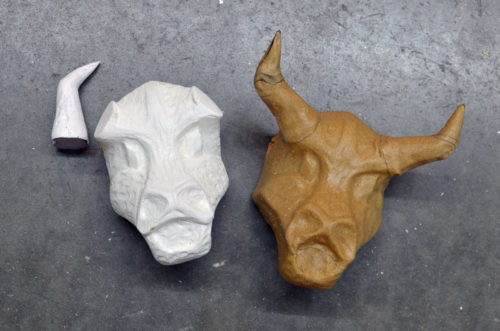
Form and Worbla
Form and Worbla

I tried out Worbla for the first time on this project. I have a video on Worbla coming out within the next few months, and the second edition will have a lot more information on it as well.

You can see in the photo above I coated the polyurethane with Flexcoat to give it more of a shell. I made the horns separate and attached them afterwards.

I’ve worked with Wonderflex before, so I noticed some differences between the two materials. First, Worbla smells like maple syrup when it’s heated. Really. Wonderflex seems to have much more of a transition between hard and soft. Worbla will become pliable very quickly with heat, then re-solidify quickly when cooled; Wonderflex becomes gradually more pliable as it is heated. That may be because the Worbla is thinner, or maybe because its formula is a bit different; I don’t know.

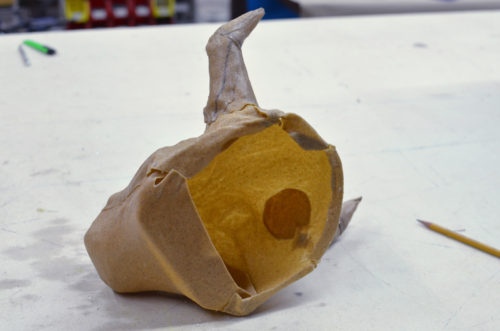
Back of Worbla
Back of Worbla

Like other thermoplastics, the benefit of Worbla is that you make a hollow shell of a prop rather than a solid chunk. My original plan was to fill the void with lights so the Talisman could glow, but I ended up putting so much paint on the outside that it became opaque.

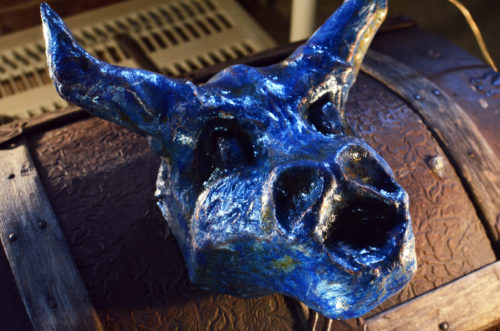
Isometric view of Talisman

For my first attempt at paint, I tried hydro-dipping. That did not work. So I covered that over with a traditional marbleing technique, which will also be in the book and in a future video.

Talisman from Faery Tale Adventure

I finished it off with a black wash for ageing and some copper metallic acrylic for highlighting, followed by a spray gloss clearcoat.

And now I have a Talisman that can keep my humble props shop safe from evil spirits and undead creatures.

The Luck of the Links

Happy Friday the 13th! While the rest of the day may be unlucky, at least with this blog, you’re lucky to get a great list of things to read today.

Kamui Cosplay has a great tutorial on using expanding foam for prop making. You can find this stuff in a can at home improvement stores, with names like “Great Stuff” (it’s used to seal and insulate cracks in houses). While it is certainly “great stuff” for some applications, it is a polyurethane foam, so you should only use it in a well-ventilated area and it should be allowed to cure in an area with separate ventilation from where you are working. If you work at home, you especially should not let this stuff cure in your house, where it will off-gas toxic and irritating fumes for 24 hours or more.

Over at Theatre Projects, Jesse Gaffney makes a half-eaten chicken carcass. With just bits of wood, some Model Magic, muslin, and a few coats of latex and Glossy Wood Tone, she comes up with a pretty convincing prop that looks like it came straight from someone’s fridge.

Here’s a great tutorial on turning clear glass into tinted glass. It is not useful for glass jars that need to be filled with water, but it uses nothing more than Mod Podge, food coloring and an oven.

Make Magazine reminds us that it is not only useful, but vital, that we document the process of building our props. Taking process shots is useful not only for your own portfolio, but it can help with the creative process itself. It is also helpful with sharing your work with others, since others can learn from your process, even when you think what you have done is simple or common knowledge.

A book called 507 Mechanical Movements has been around for awhile, and a number of reprints can be found at bookstores and online. Now, you can view all 507 mechanical movements online as well. The website is great because it has animated some of the movements, and has plans to animate more of them. These movements are useful when building moving or trick props, and you need to figure out, say, how to make a prop spin when you pull a string, or how to make a rod move in a straight line using a spinning motor.

The Nose Knows Not

I often see a lot of products advertise themselves as “low odor”. I also hear the occasional prop maker mention that one product is safer because it “smells better” than an alternative.

What is smell? Smell means you are detecting airborne particles, fumes, gases, vapors, dusts and mists. And if these tiny airborne things are reaching your nose, than you can be sure some of them are entering your lungs, and from there, your bloodstream. So smelling something is a warning that you may be breathing hazardous substances.

But the smell is not related to the toxicity of that substance. In fact, particularly odorous substances can, in some situations, be safer than their low-odor counterparts. Relying on your sense of smell is a poor method of determining the quality of the air you are breathing and whether you should be wearing a respirator or working in a spray booth. Let’s see why.

First, a brief foray into the world of measuring toxic exposure amounts, as well as how we measure “smell”. You need the MSDS to know what chemicals are in the products you are using and in what quantities.

OSHA measures the amount of a substance in the air using “parts per million”, or PPM. For example, if Chemical X is recorded at 1000 PPM, than for every million atoms of air in a room, one thousand of those are Chemical X. The other 999,000 are probably atoms of oxygen, nitrogen, carbon dioxide, water vapor and so forth.

To determine the safe level that certain chemicals can be worked at without causing harm, OSHA has a number of measurements related to the threshold limit value (TLV). The TLV gives a number in PPM; above that number is harmful, below is not. The TLV is indicated in a number of ways. There is the “ceiling value”, or TLV-C, which is the amount that should never be exceeded. The TLV-C is usually pretty high, because it takes a lot of any single chemical to harm you in one breath. More common is the time-weighted average (TLV-TWA). This gives you the average level of a chemical exposure over a period of time (usually eight hours unless otherwise indicated).[ref]You will also run across the PEL (Permissible Exposure Limit) of a chemical. This is the actual legal limit established by OSHA, above which an employer cannot expose its workers to. You have to check what the PEL is measure in; a TLV-TWA for eight hours is often used, but it may also a shorter exposure time or even a ceiling limit.[/ref] This number is far lower than the TLV-C, because you are being continuously exposed to a certain level over an extended time.[ref]Many other organizations have their own standards and measurements, and not every chemical has been measured in every way. So acetone has a TLV-TWA of 500 PPM, but the TLV-C has not been established by OSHA. It does, however have an IDLH (Immediately Dangerous to Life or Health) of 2500 PPM; this is typically a bit stronger than TLV-C, indicating you can probably die with a short exposure (under 30 minutes) at this level.[/ref]

Let’s look at acetone. Acetone has a TLV-TWA of 500 ppm. That means that over an eight hour day, your body has been harmed in some way if you have breathed, on average, 500 molecules of acetone with every million pieces of air. It may be higher at times—such as when you open a can of acetone—and lower at other times, such as when it has all evaporated and you are working on something else.

Getting back to smell, the other important measurement is the Odor Threshold (OT). This measurement, also in PPM, indicates at what concentration you can smell that particular chemical. Acetone has an OT of 62 PPM.

Let’s see what happens. You are in your shop working with acetone. It fills the air at 30 PPM. You keep working with it. It is now 62 PPM; you start to get a whiff of that distinctive acetone smell. “Uh oh.” you think. “Better open a window and set some fans up.” The increased ventilation brings the concentration of acetone back down to 50 PPM. You no longer smell it. During this whole time, your exposure to acetone never even gets close to 500 PPM because the smell alerts you to the fact that you are being exposed; you smell it in a concentration far below what is dangerous to breath.

Now let us look at another chemical common in the props shop. Hexane (or n-hexane) is used as a solvent, and is found in some cleaners and degreasers, as well as in adhesives, particularly fast-drying glues or cements intended for leather. Hexane has  a TLV-TWA of 50 PPM and an OT of 130 PPM.

Let’s step through another typical day. It’s the morning and you are gluing some leather together. Your exposure to hexane creeps up to 80 PPM for a few minutes. You clean something off with a hexane-containing cleaner and the concentration of hexane goes up to 100 PPM. You work on something else for a few hours and the level of hexane drops to 10 PPM as it evaporates. In the afternoon, you are using some rubber cement and white-out (both of which typically contain hexane) and your exposure goes back up to 60 PPM. In fact, by the end of the day, your average exposure (your TLV-TWA) has been around 55 PPM—above the limit of 50 PPM, meaning you inhaled a harmful amount. However, the level never even approached the OT of 130 PPM, so you never smelled it.

In other words, if you relied on your sense of smell to warn you of dangerous chemical exposure, it would have failed you in this case.

Any chemical with an OT above its TLV-TWA will not warn you with its scent before you are exposed to dangerous levels. Some chemicals lack any adequate warning signs for overexposure. The cyanates used in polyurethanes popularly used in molding and casting are particularly egregious. For instance, Methylene diphenyl diisocyanate (MDI) is commonly found in two-part rigid polyurethanes and polyurethane foam. Though one of the least toxic of the isocyanates, it still causes harm at low levels[ref]See this compilation of health hazards of MDI.[/ref]. Exposure can also create sensitization or allergies, which leads to violent or even fatal reactions in workers exposed to even a small amount. The TWA is only 0.005 PPM (the PEL is actually 0.02 PPM, but that is a ceiling limit). The OT has not even been established, but you can be expected to have some warning in the form of eye and nose irritation around 0.05 to 0.1 PPM. [ref]Occupational Health Guideline for Methylene Bisphenyl Isocyanate (MDI), US Dept of Health and Human Services, 1978.[/ref] In other words, you may not have any warning until you have been exposed to at least ten times over the amount that is safe to breathe over eight hours, or even five times the maximum amount you should breathe at any one time. Even then, you may not correlate your runny nose or watery eyes to the polyurethane; it has no distinctive smell, so you may just continue on, thinking “Hey, this is great. It doesn’t smell bad, so it must be safe to breathe.”

That’s wrong. Dead wrong.
Deer from Shakespeare in the Park

I spent the early part of the summer back in New York City working on the first show for Shakespeare in the Park. As You Like It, directed by Daniel Sullivan and designed by John Lee Beatty, required a dead deer corpse that could be carried around the stage.

Fabric hinges
Attaching the pieces with fabric hinges.

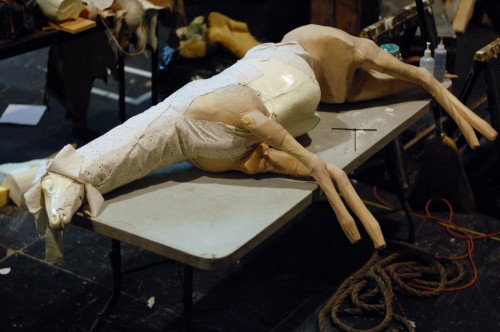
Jay and Sara had already purchased a urethane taxidermy deer form, which was waiting for me when I arrived. I proceeded to chop it apart at the joints and reattach them with fabric hinges (using left-over canvas from the tents we made for last year’s All’s Well That Ends Well).

Creating the spine
Creating the spine with rope and foam.

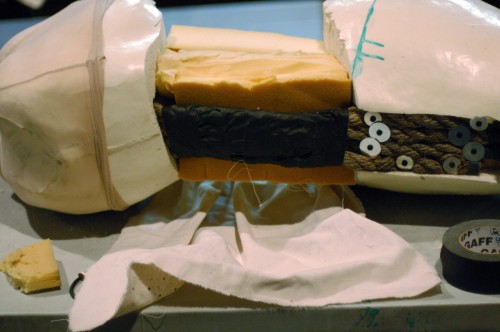
The spine needed a bit more flexibility. The deer was going to appear on stage as if it had just been shot, and then one actor was going to hoist it over his shoulders and carry it around fireman’s style. I used several pieces of rope to give a semi-flexible span between the front and back half of the deer, while a big piece of upholstery foam was added to help it maintain some shape and volume.

Eric Hart sewing
I am sew good at this.

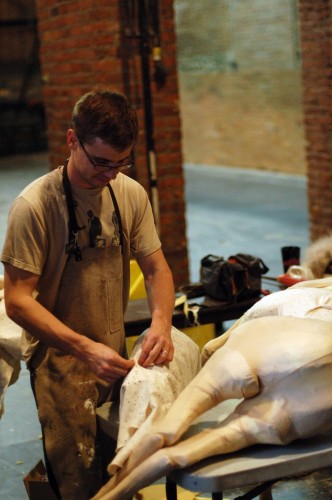
I also carved the neck out of upholstery foam. I wrapped the foam in fabric, sewed it shut and glued it to the rest of the body.

Attaching the pieces
Attaching and articulating the pieces.

The photograph above shows the deer all jointed and floppy and ready to be covered in fabric. Yes, that is pantyhose on the legs; I added them to give further support to the legs while maintaining full flexibility.

Gluing on the hide
Gluing on the hide.

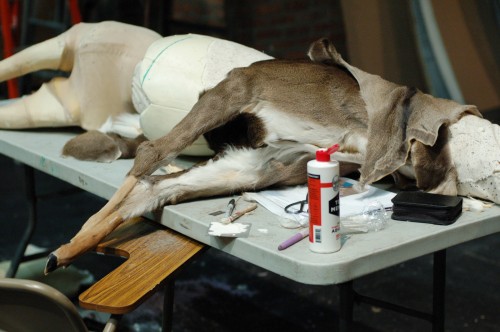
It took three separate deer hides to completely cover the whole body. I arranged them as best I could around the deer so the fur coloring, direction and length would match the hide of a real deer. Real fur has so many variations throughout, whereas fake fur would just make the whole thing look like a giant stuffed toy. Jay bought me a bottle of “Tear Mender”, which is a latex-based adhesive designed for fabric and leather. As the back of the hide is essentially leather and the body was covered in fabric, the glue made a really strong but flexible connection.

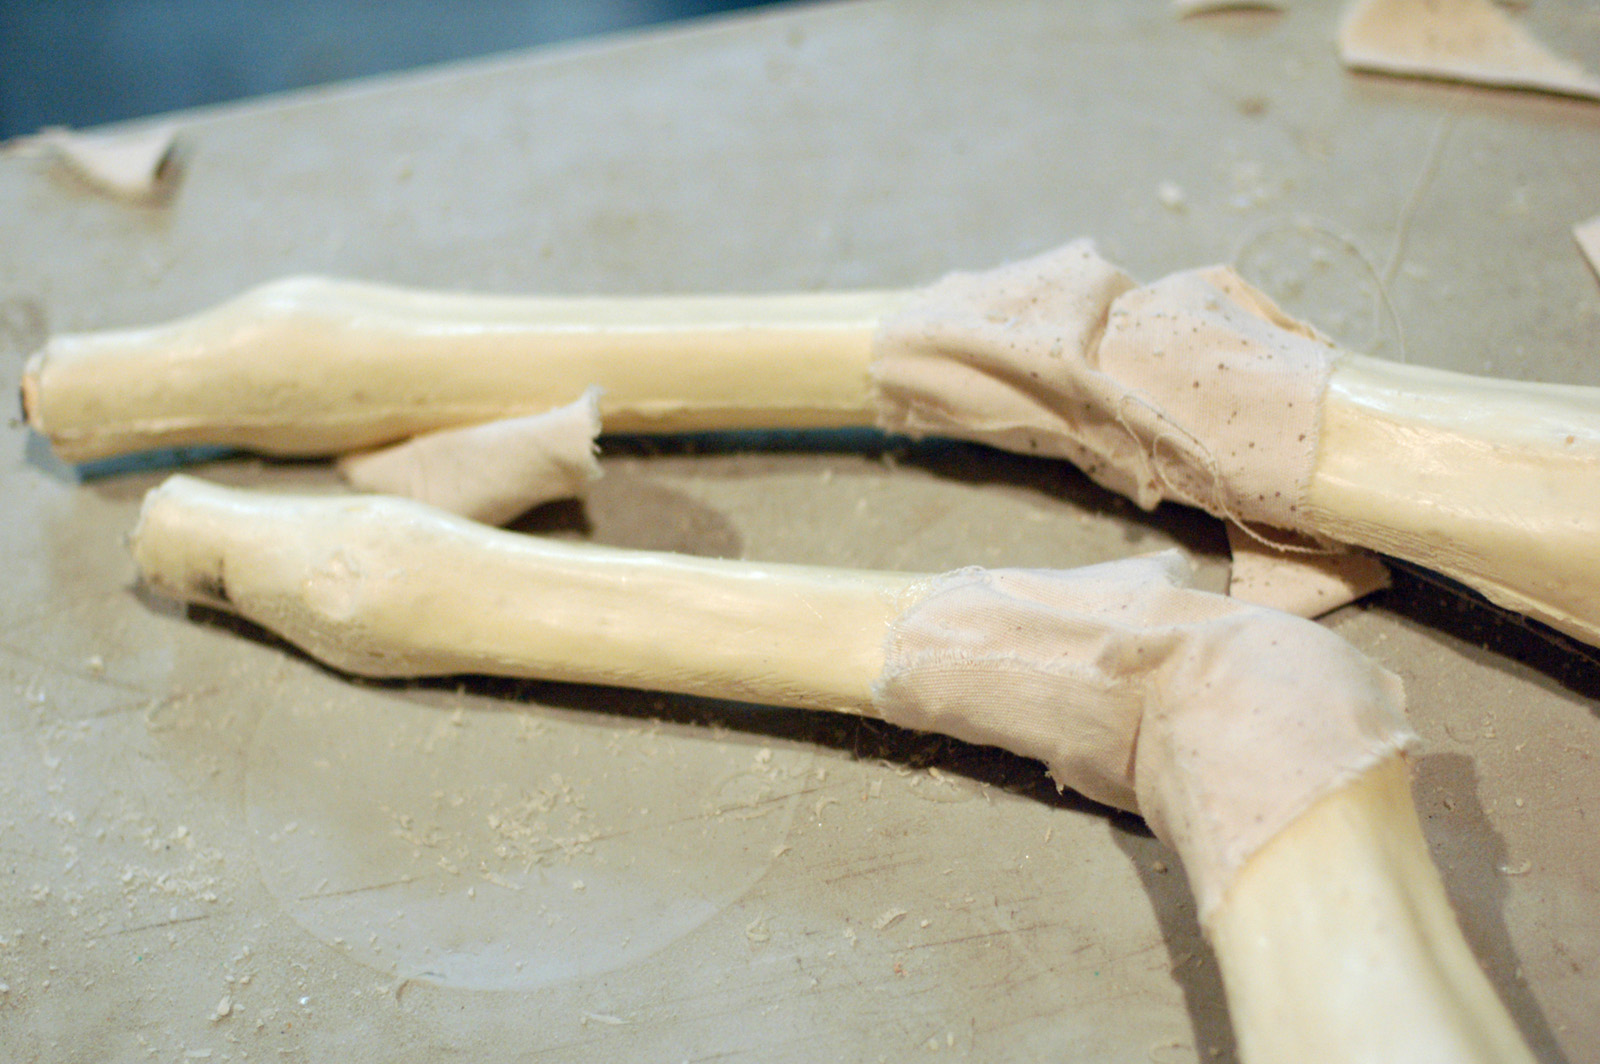
The hooves were also purchased from the taxidermy supplier. I had to drill out the bone a bit on top so I could slide them onto the threaded rod which ran through the urethane foam cast legs.

Head and face
The head and face.

We also had some glass eyes for the head as well as plastic ears from the taxidermy supplier. I patterned some fur over these ears, but they were deemed “too stiff” after the deer’s first rehearsal. Luckily, I just had to reopen the seams and pull the plastic parts out; the fur maintained the shape pretty well on its own.

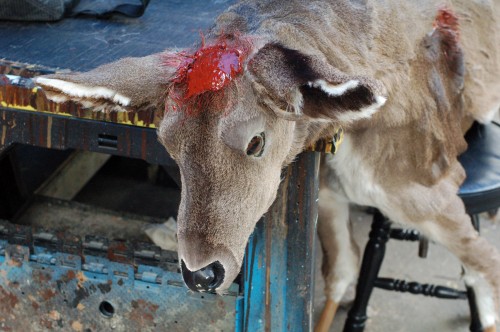
The deer also got a nice open head wound. We had a separate set of antlers that the actors danced around with, and the scene opened with the antlers already removed. I mixed various colors of acrylic mixed with epoxy to give it a permanent “wet” look.

Raphael and the Deer
Raphael and the Deer.

I had Raphael, one of the other prop artisans, pose while holding the deer. He moved fairly decently, though the joints between the legs and the body were a bit stiff-looking. Some of the transitions between the different hides I pieced together were a bit rough when viewed up close, but on stage under the lights, he looked amazing.