Tag Archives: lathe

Vacuum Formed Balustrades

One of the first projects I worked on when arriving in Santa Fe was actually for a scenic element. One of the shows has a number of decorative balustrades way upstage, and they wanted to vacuum form them. I was tasked with turning the wooden master.
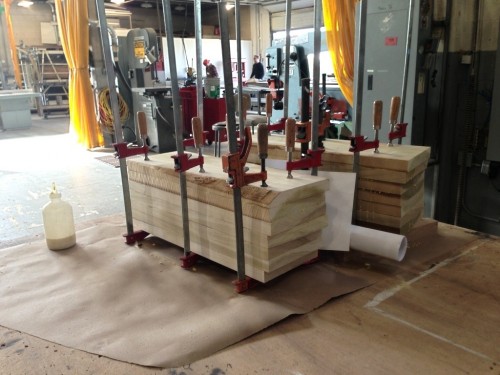
Clamping the boards
Clamping the boards

The first step was gluing up a number of poplar boards. This was going to be a fairly thick piece. I made two, so I could split them down the middle and give them four halves to vacuum form on a single sheet of plastic.
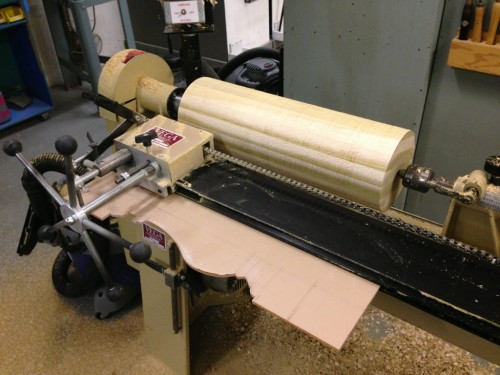
Turning the blank
Turning the blank

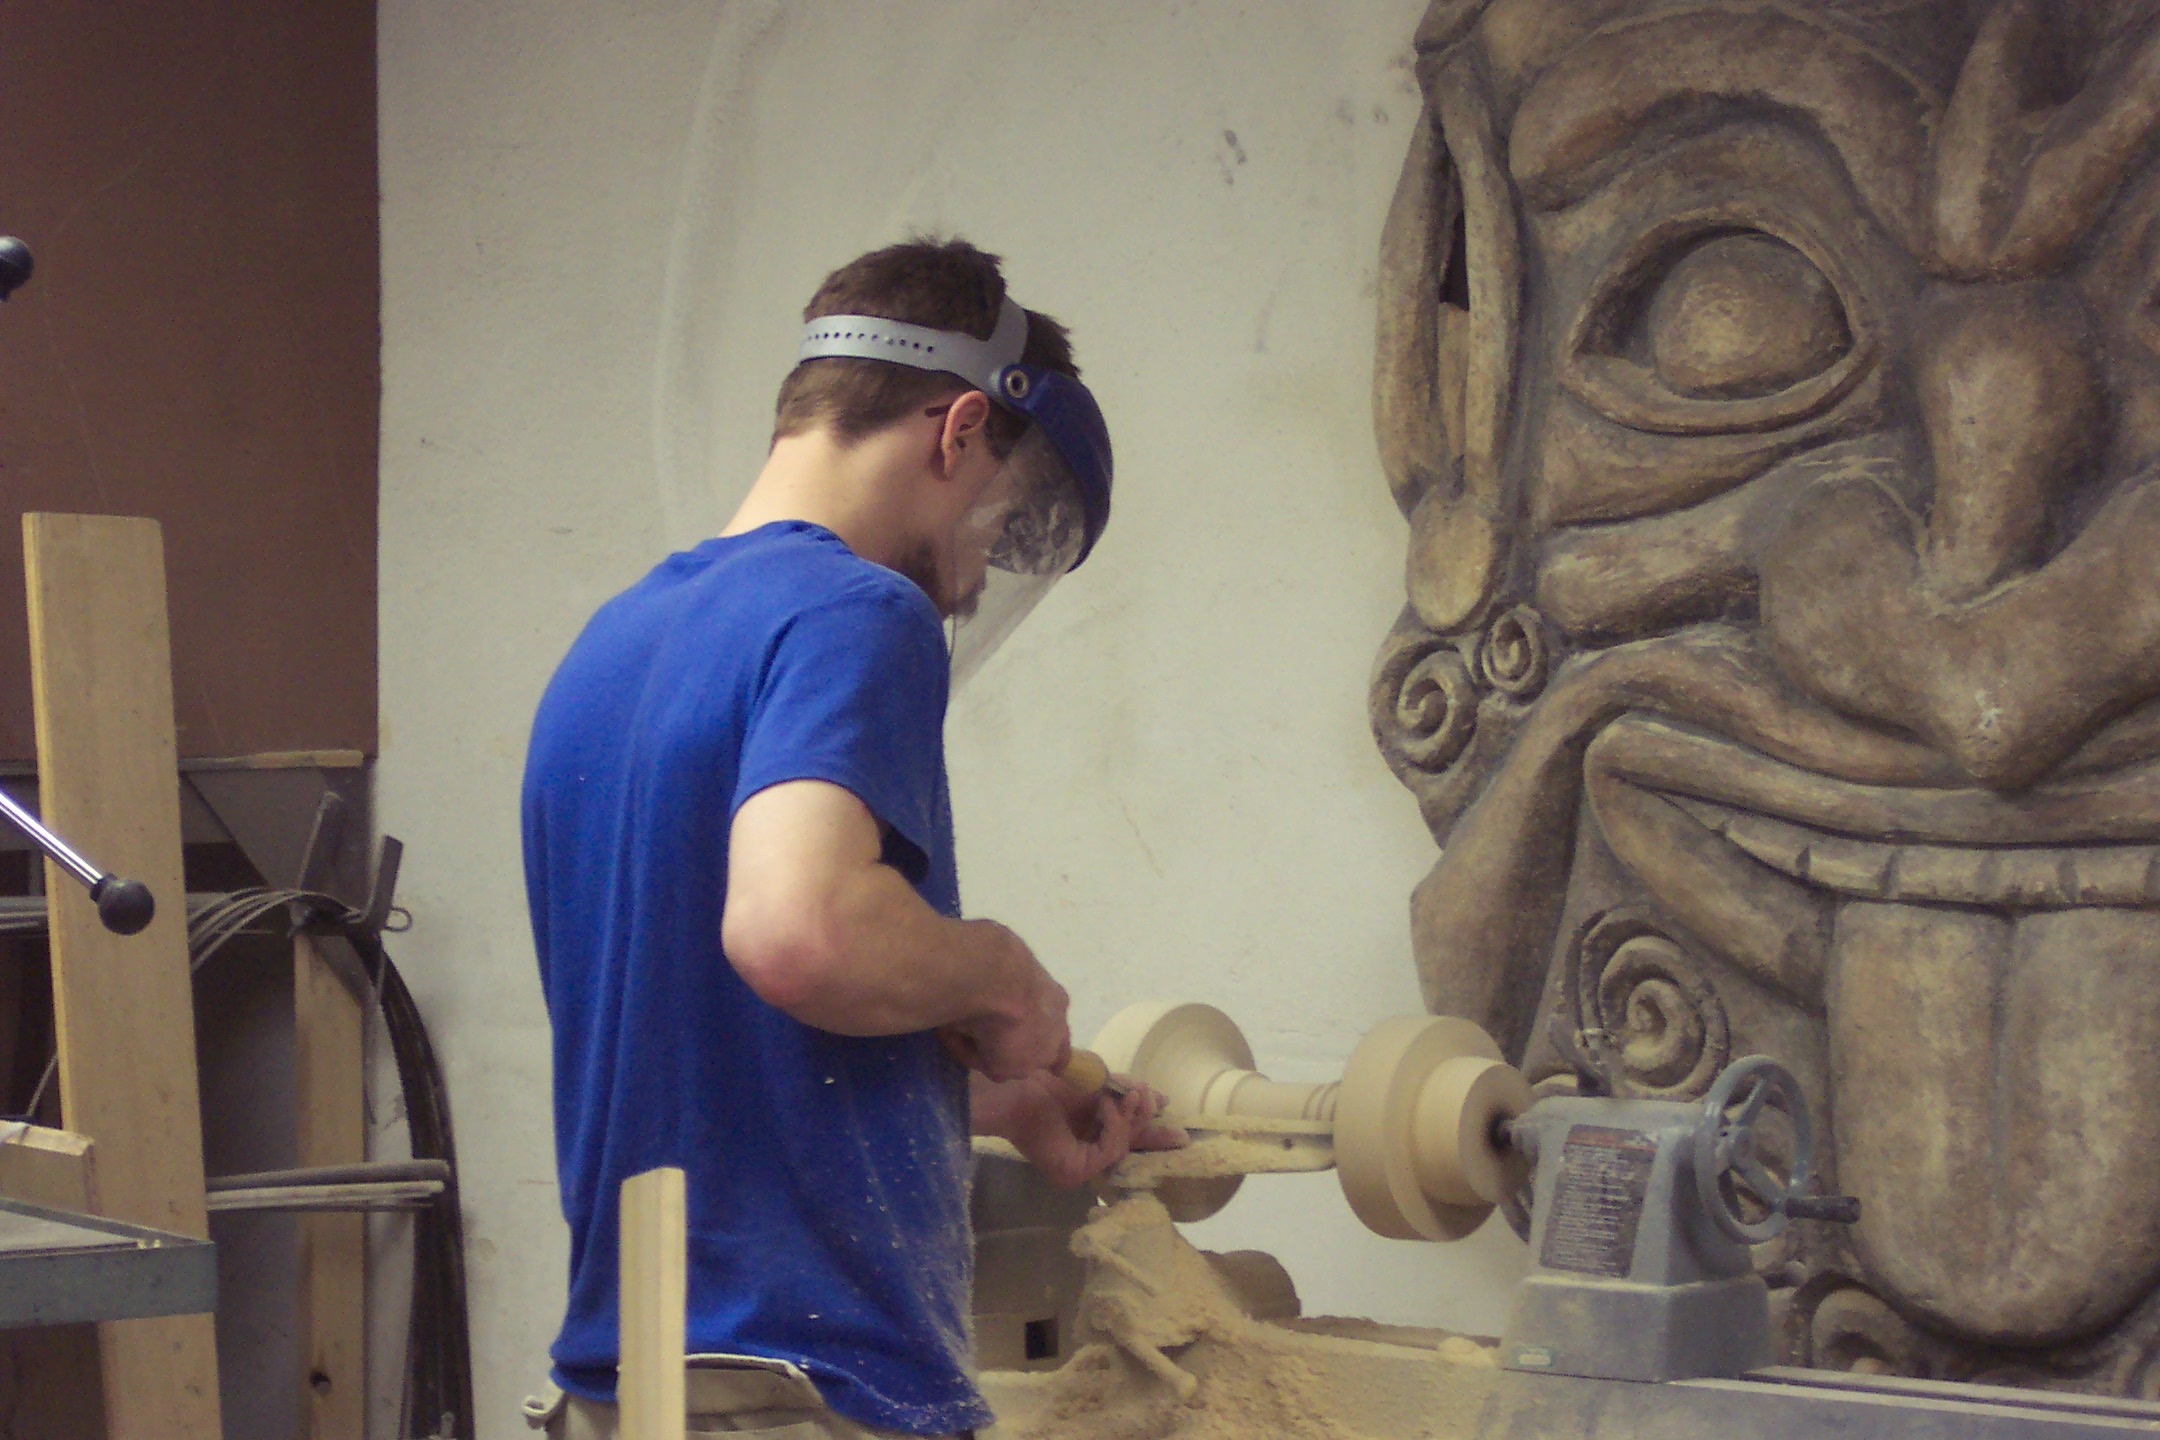
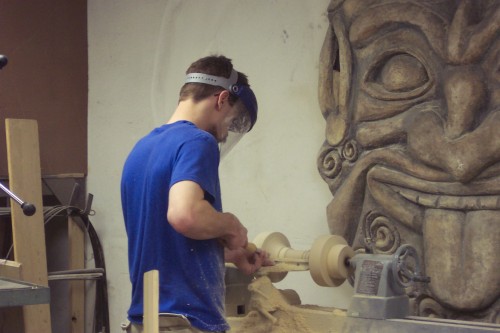
The lathe in our props shop has a duplicater set up. This allows you to cut out the profile of what you want to turn in a thin sheet of plexiglas, and the blade can follow that shape. You still need to finish it up by hand to make sharp corners and smooth it out, but it helps keep your shapes and sizes consistent across multiple pieces.
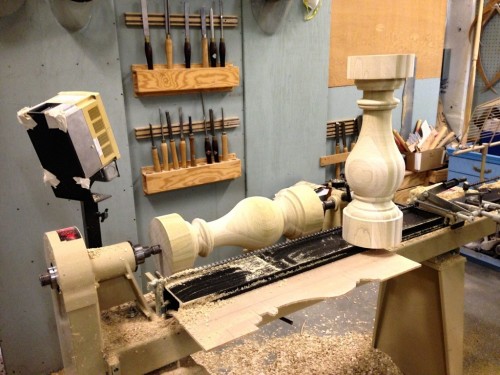
Completed balustrades

Above are the two balustrades, ready to go!
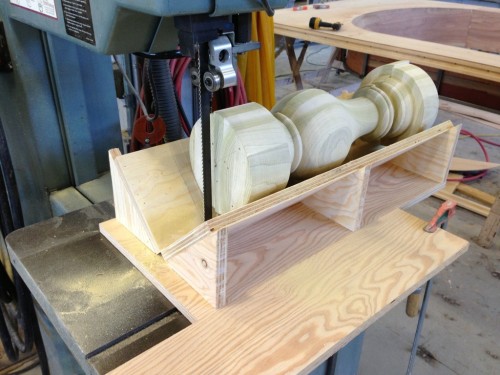
Cutting in half
Cutting in half

Next I had to split them directly in half. Luckily, we have a massive bandsaw, and I could build an oversized dowel-splitting jig to cut the whole baluster in half in one pass.
Mounting the wooden forms

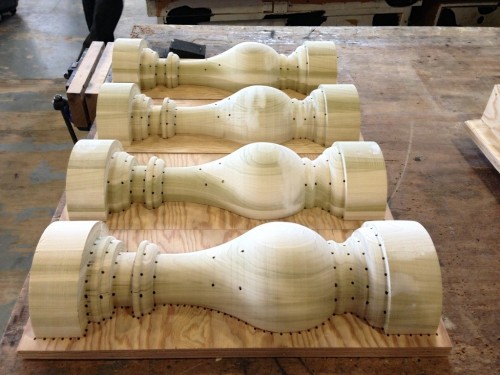
The next step included a new technique for me. I had to drill holes throughout the wooden mold for the vacuum to pull air through, paying particular attention to the undercuts. They also asked me to mount the molds on a sheet of plywood with a gap underneath, and drill holes all along the periphery. Since the vacuum form platen only has holes at regularly-spaced intervals, it would not suck the plastic tight against the bottom of the mold; this technique was like creating a custom platen to sit on top of the regular platen.
Vacuum formed copies

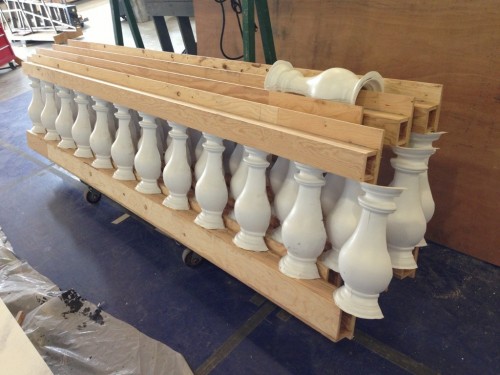
That was actually the end of my part. The scenery department took my molds and began running them through the vacuum former. I don’t have any pictures of that, but I do have a video of the machine in action. Above is a photo of the resulting pieces as they get mounted to the scenic piece.

Crazy for You Props

I have already shown off some of the props in the recent production of Crazy for You which I prop mastered, but I thought I would show a bit more of what I did on that show.

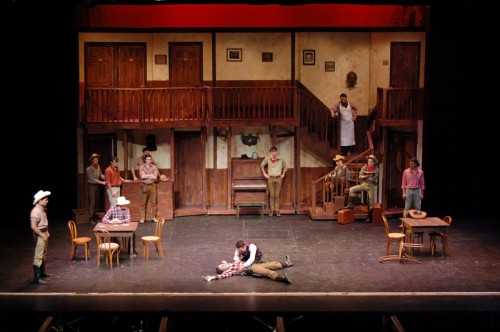
The saloon in "Crazy for You"
The saloon in “Crazy for You”

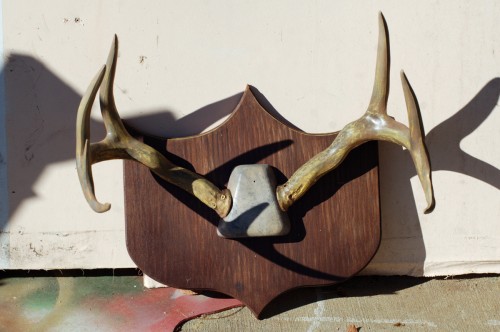
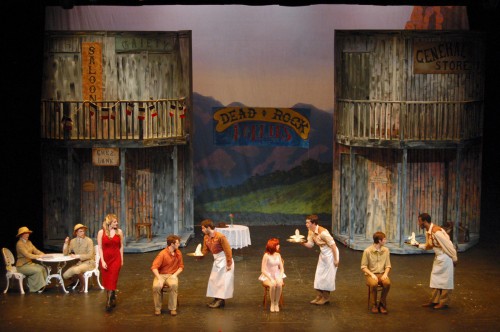
The saloon was one of the larger set pieces in this production. I dressed it out with photographs, plaques, signs and other items. Several of the objects were rigged for “tricks”, including the cuckoo clock on the second floor above the man in the apron, the antlers above the piano, and the jar on top of the piano (I highlighted the piano in a previous post). I also built the two tables you see above.

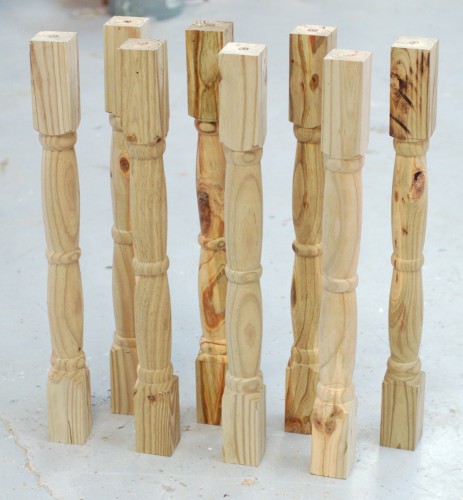
Turned table legs
Turned table legs

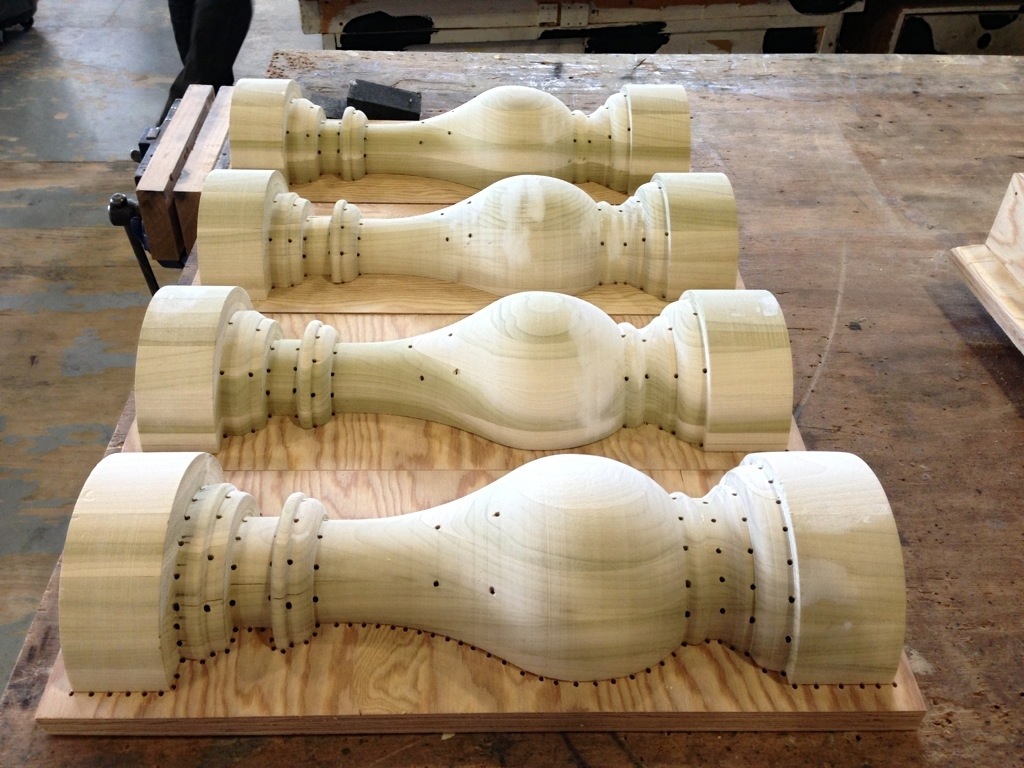
I turned the legs on a lathe to match a table the set designer and I both liked. Even though the scope and scale of this show was already pretty huge, taking the time to turn these legs really helped transform the scene.

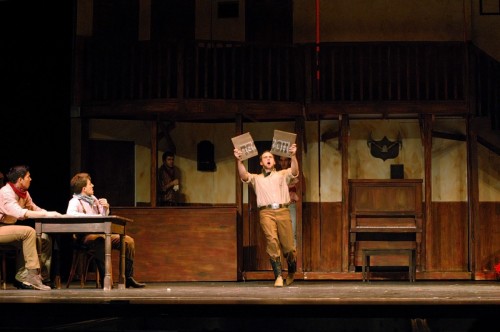
Breaking the hotel sign

The saloon also had a “hotel” sign hanging throughout the show. In the second act, the hotel’s proprietor finally grabs the sign and smashes it over his head. I made a new sign for every performance. It was a piece of lauan with grooves scored in the back with a Dremel to make it easy to break. The front was painted with a quick wash and then the letters were spray-painted on with a stencil I made.

Antlers
Antlers

I needed to find a set of antlers for one of the tricks, but had no such luck. I ended up buying some fake antlers; these are meant to simulate the sound of real antlers hitting each other and are used by hunters to draw out deer. I cut out a plaque with a routed edge, mounted the antlers, and painted everything.

Dancing benches
Dancing benches

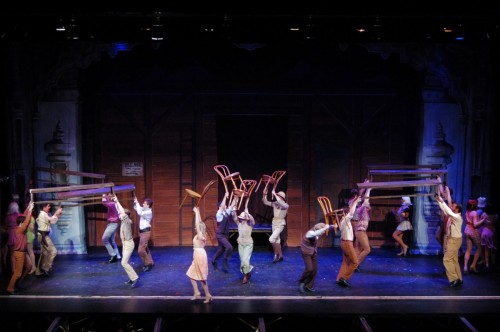
Several other scenes used a number of benches which saw some heavy-duty use. These benches were carried around (sometimes with people on them), danced on, tapped on and walked on. We had three benches in stock that they liked (from a previous production of The Crucible), so I constructed three more to match.

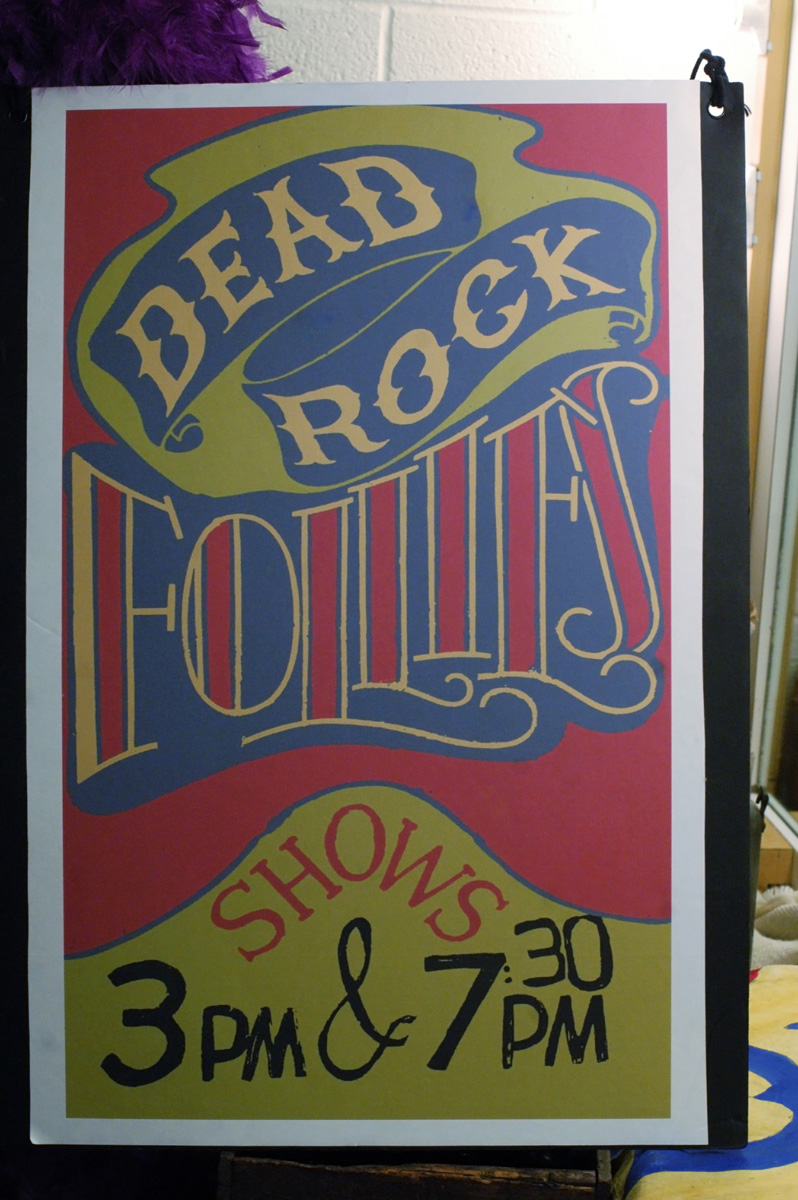
Dead Rock Follies poster

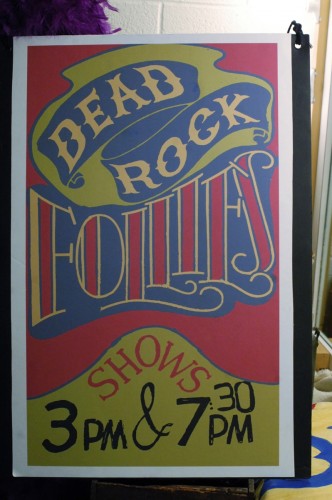
I did some graphic design on this show as well. The set designer found a great research image for the signs, which were meant to invoke a community vaudeville show performed out West in the 1930s. I mimicked the colors and layout of the research, changing the words on the poster to match what was in the script. The poster above was printed out three feet tall. I also adapted the size and scale of the poster so a similar image could be used on the flyers and programs that were also props in this show.

Chez Lank
Chez Lank

The penultimate scene in the play takes place in the Main Street of the town. Though this set piece appears throughout the play, it has been transformed for this last scene into a more fancy French-inspired café. The waiters bring out trays with fancy napkins on them during a brief musical number. The set designer and I decided it would be a nice touch if the napkins would be folded rather than just draped over their arms, so we found instructions for folding a napkin into a fleur-de-lis shape. A prop master is always finding little touches like that to shape the details in the props.

Credits:

Crazy for You, Elon University.

Directed by Catherine McNeela.

Choreography by Linda Sabo.

Set Design by Natalie Taylor Hart.

Lighting Design by Bill Webb.

Costume Design by Jack Smith.

Sound Design by Michael Smith.


Phoning it in

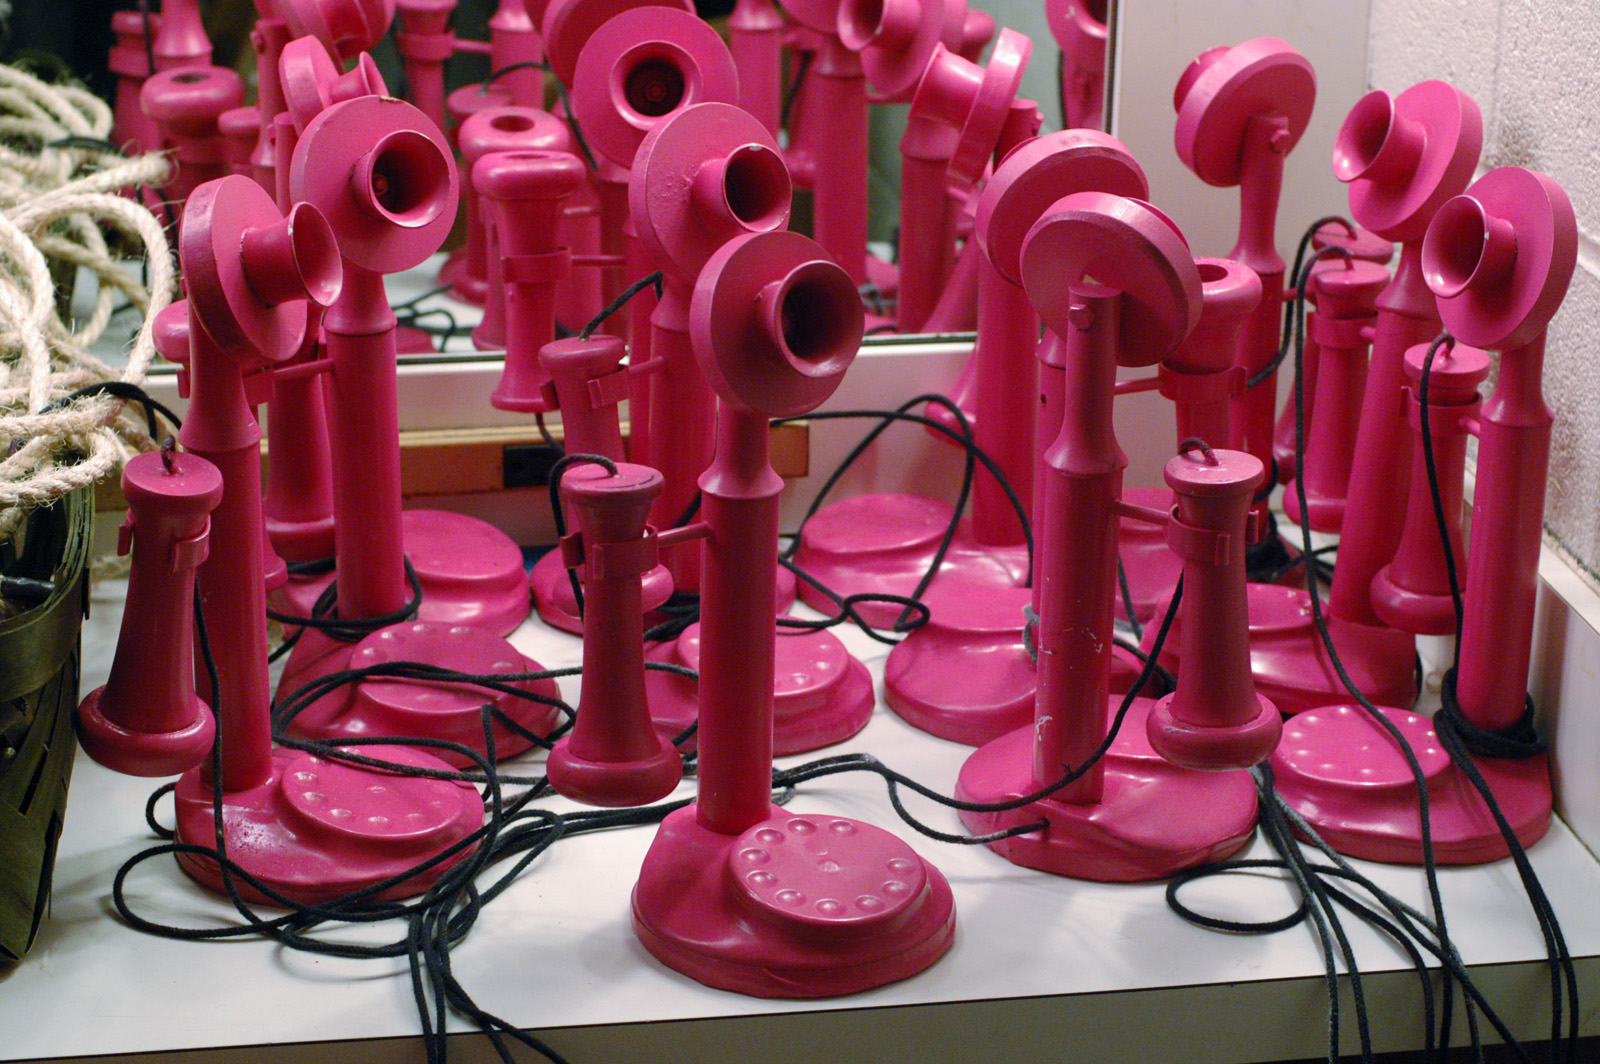
Yesterday was strike for Crazy For You, the first musical I prop mastered down here in North Carolina. I’ll be posting some of the projects I did for this production at Elon University over the next few days. One of my favorite builds on this show was a set of twelve matching pink candlestick phones. I’ve dealt with getting multiple period phones in the past, so I knew with this budget these would have to be a custom build. I have already posted about how I made a vacuum former to create the bases.

Assembling the base
Assembling the base

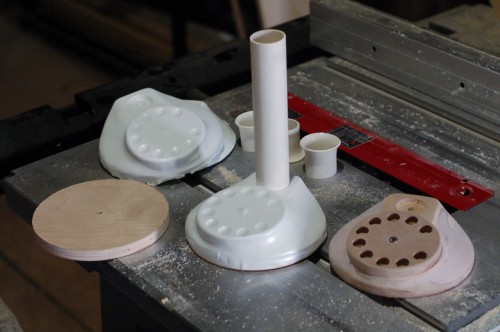
On the right in the photograph above is the model for the base of the phone. In the upper left are some vacuum-formed shells. Dead center is a shell on the base with a section of PVC pipe forming the “candlestick” portion. Behind the half-completed phone are three sections of PVC pipe with a flange in them. I made a video showing how to form these.

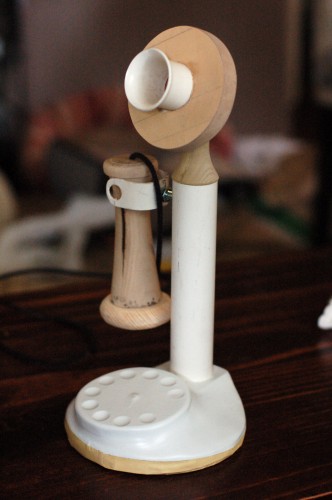
A completed but unpainted phone

The neck piece which connects the mouthpiece to the candlestick is a solid piece of poplar I turned on the lathe. The receiver (mouthpiece) was also turned on the lathe. The only difference between the prototype above and the final phone is the hook which holds the receiver. I sliced a section of PVC pipe, made a slit down one side, than used a heat gun to open it up into a “U” shape. I bent the ends out so the receivers could be pushed in and the hook would snap back to hold them snugly.

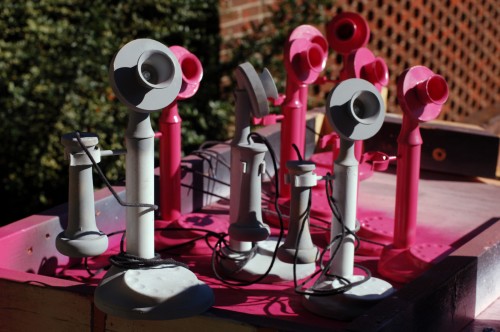
Painting the telephones

The plastic parts were primed first with a plastic spray paint primer. I then hit the rest of the parts with a sandable primer. The sandable primer helped make all the surfaces appear to be unified and made of a single material, and I could smooth out minor imperfections.

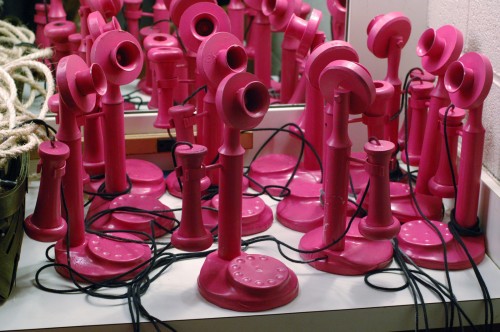
Pink candlestick telephones

All the phones were painted pink. Bright pink. The kind of pink that hurts your eyes. It was a gloss pink too, and because the phones were sufficiently primed, the gloss made them look like solid chunks of plastic. I intended to add more paint for highlights and to differentiate the parts (and maybe throw some glitter on for good measure), but this show really came down to the wire (I was working up until the house opened on Opening Night) and I ended up not having time.

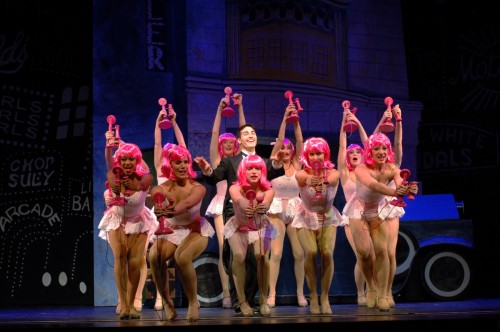
Bring! Bring! "Hello, Bobby!"
Bring! Bring! “Hello, Bobby!”

Regardless, they looked great in the context of the scene. It’s a big dance meant to be a fantasy sequence, with lots of flash and movement. You can see in the photograph above how well the color worked in that number. The shapes of the phones were distinct enough to convey their essence. They were a pretty big hit, and some of the audience thought they were rented.

A Visit to the Woodwright’s School

Last Saturday, I went with The Alamance Makers Guild to the Woodwright’s School in Pittsboro, NC. The Makers Guild is a group I discovered down here which is interested in many of the same things I am; woodworking, sculpting, fabrication, blacksmithing, science and art. Some of the members have begun designing a human-powered lathe, so the trip to the Woodwright’s School was kind of a research trip to see some of the antique human-powered tools which they have refurbished.


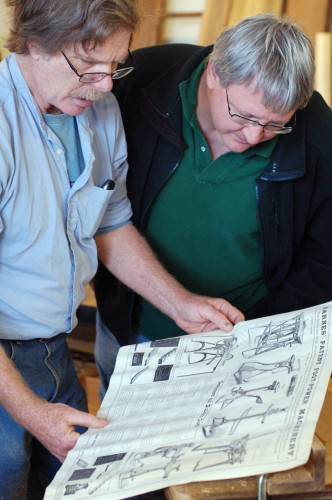
Roy and Nim look at tools

For those who don’t know, the School is run by Roy Underhill, host of the Woodwright’s Shop on PBS, which has been on the air since 1981. He showed us some of the original catalogs of these various treadle and pedal powered machines.

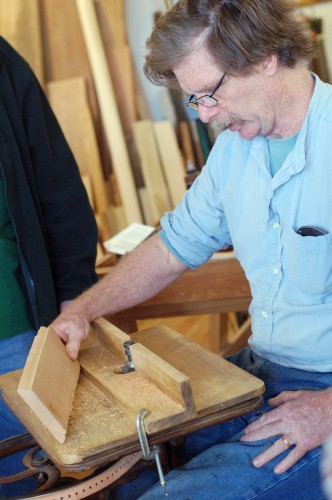
Roy Underhill using a foot-powered spindle cutter

In the photo above, Roy is using a foot-pedal-powered spindle cutter. We might recognize the modern-day equivalent of a router table or shaper; the tool has a rotating blade which cuts a shaped profile along the edge of a board of wood. The blade in the machine was a bit dull, so the end of the cut got a little wonky.

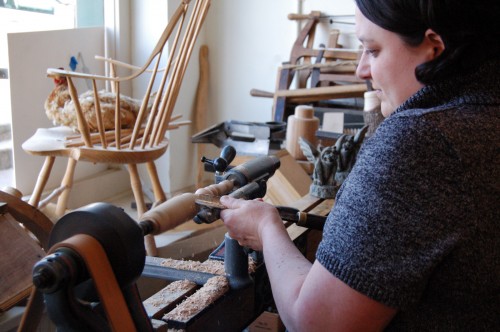
Natalie on a human-powered lathe

My wife tried out the foot-pedal-powered lathe. She just bought her own lathe at school a few days prior to this. The foot-powered one was tricky for both of us because you have to sit down to pedal. We are used to standing up and using our hips to brace the tools and our whole body to move it along the cut. This one requires you to do all the bracing and moving with just your hands, which feels awkward at first. Nonetheless, it makes some nice cuts, and it is a lot quieter than any electrically-powered machine.

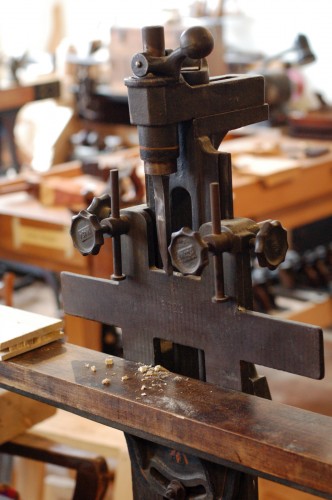
Foot-powered mortising machine

We also watched Roy demonstrate this foot-powered mortising machine. It essentially has a sharp chisel connected to a lever which you push down with your foot; several linkages give it quite a bit of mechanical advantage so the chisel just plows right through the wood like butter.

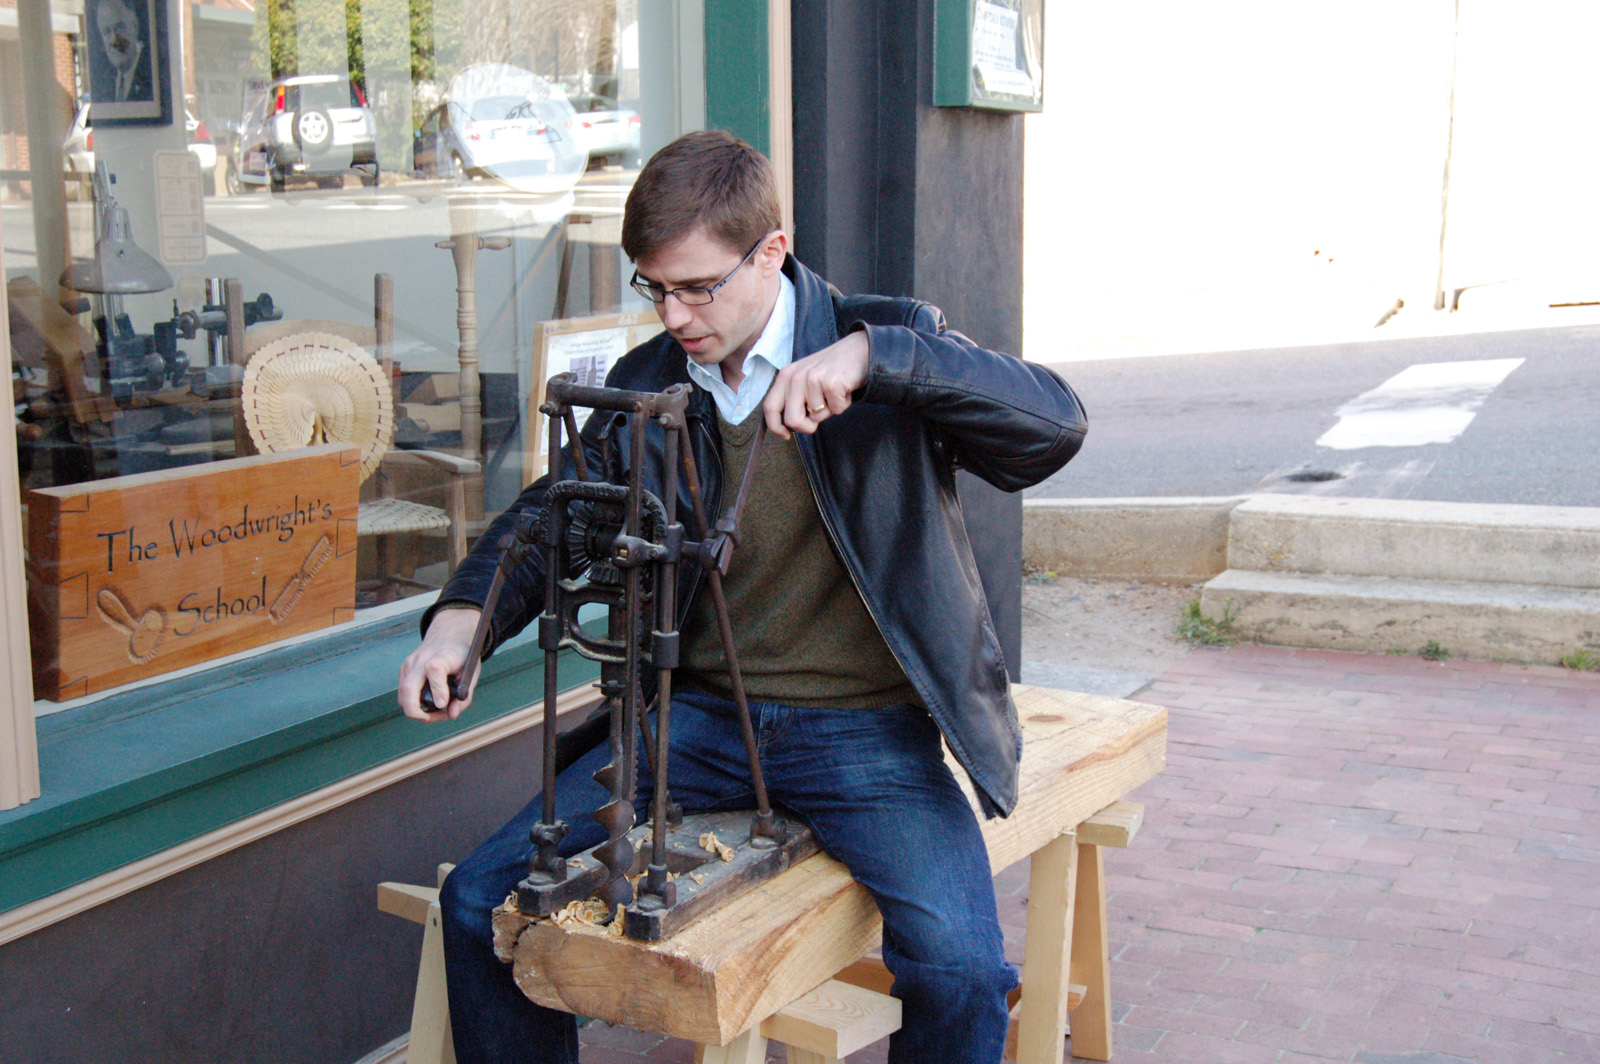
I am boring
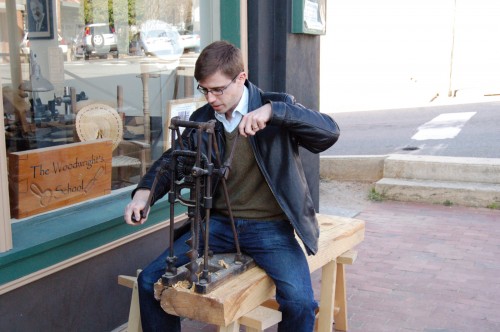
I am boring

Roy set up a boring machine outside that we all tried out. Though it was a large auger and a fairly thick plank of wood, boring through it was no problem. All of these hand and human-powered tools reminded me that if your bits and blades are sharp, it does not actually take that much effort to cut and bore. You get a good workout as well.

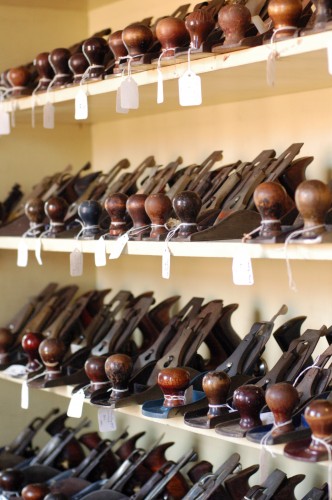
Planes all in a row
Planes all in a row

Above the school is the antique tool shop where all the tools which they find and refurbish are offered for sale. Planes, saws, calipers, folding rules, router planes, augers, mallets and many more varieties of tools known and unknown were on display.

Chandelier from Romeo and Juliet

As part of the new year, I’m going to be digging through my archives of props I’ve built in previous years. The first one is a chandelier I built for Romeo and Juliet. It was one of my first prop projects in graduate school, and the first prop I built which involved welding.

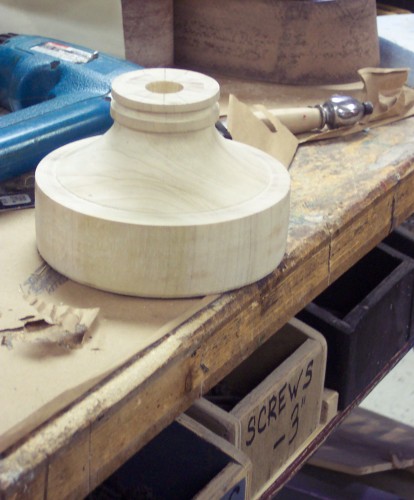
The first part I made was the body dish. I turned it on the lathe out of poplar. The outside needed to be a specific diameter, as we shall see shortly. I also drilled a hole through the center for the hanging hardware and wires to go through.

Turning the body dish
Body Dish
Body Dish

Next I cut a circle out of 3/4″ plywood to use as a template for the main ring. I made that out of several strips of what we call “wiggle wood”, which is a bendable plywood. I wrapped one layer around the circle, then glued another layer around the first one, with the seams offset so they would hold the circular shape. I added a thinner strip to the top and bottom to mimic molding.

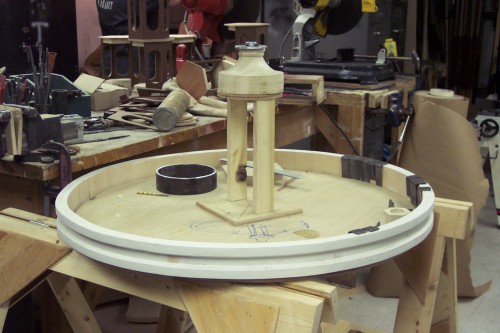
The chandelier in the jig

I left the chandelier in the jig and marked the center of the circle template. I then added a little stand with a smaller circle on top, also centered. I placed the body dish on top of that. This ensured that the body dish was centered within the ring, level, and at the correct height above the ring.

See that metal ring in the above picture? That is why I needed my body dish to be a specific diameter; the ring needs to sleeve on the outside of it. I cut the ring from a section of large pipe that was laying around. On the right side of the picture, you can see some metal brackets bunched together. These will be spread evenly around the wiggle wood ring and hold the cups for the candles. They will then have a metal rod welded to them, with the other end welded to the metal ring on the body dish.

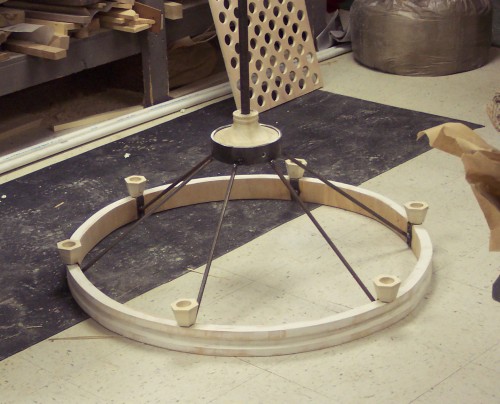
The chandelier after the welding is done

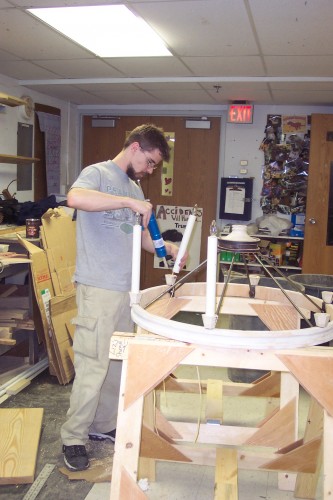
Ta-da! I next ran wires out the bottom of the cups, along the rods, and up through the center. The only thing left to do was glue the electric candles into the cups, which you can only do with a bushy beard.

Gluing the candles in

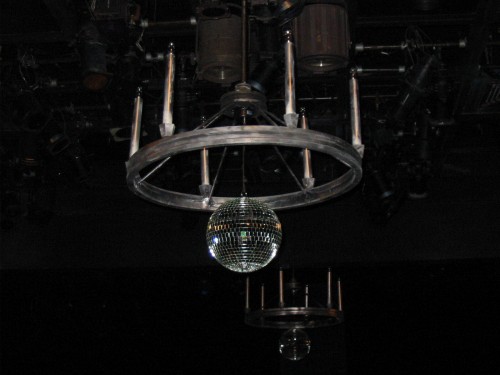
Actually, what I meant to say was that the only thing left to do was hang a big disco ball from the center, because every chandelier needs a disco ball.

Final Chandelier
Final Chandelier

Notice in the picture that I made more than one chandelier. The template and jig not only allowed me to get all the shapes and spacings correct, it also enabled me to duplicate the same prop without having to remeasure everything.