Corporeal Intangibility – The Alley Theatre made custom acrylic furniture and props for their production of The Nether, including a gramophone and a rocking horse. This was clearly an interesting project.
Working with EVA Foam for Costume Construction – Make Magazine has rounded up a number of videos and tutorials dealing with using EVA foam (or, more precisely, XLPE foam) to build armor and prop pieces.
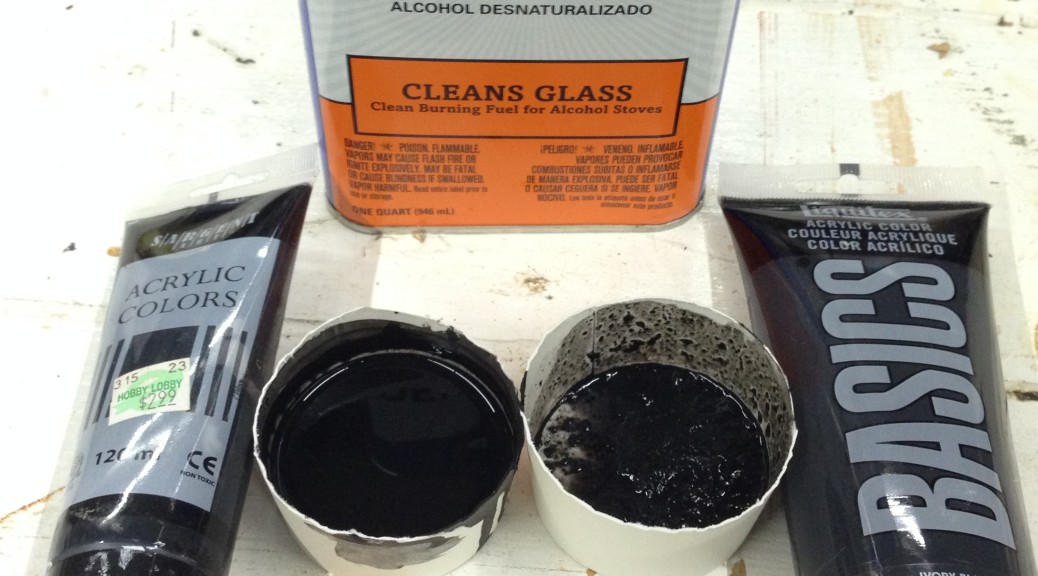
I was recently weathering a prop I’m working on. To get some grime and age on it, I decided to thin some black acrylic paint down with denatured alcohol to make a wash. I had two types of black acrylic paint laying around: Sargent and Liquitex.
They are both pretty cheap, share the same pigments, have similar consistencies, and dry to the same color. So they should be exactly the same, right?
Comparing acrylics
As you can see in the photo above, the Liquitex immediately clumped up when I began to mix it with alcohol; it turned to little globs and flakes that refused to blend in with the rest of the liquid. The Sargent on the other hand blended easily into the alcohol, making a silky smooth wash that was ready to distress my prop.
Now don’t get me wrong, I use the Liquitex paints all the time; it’s great to have a range of colors ready to go to touch up a prop or add a spot of color. But it’s obviously not made to be thinned. Some paints are better at being thinned, some mix better with other colors, some have purer pigments. Paints have a whole bunch of ingredients in them that make them act differently than each other, even within the broad categories of “acrylic” or “oil” or “lacquer”.
This is why your scenic artist favors scenic paints for certain tasks over hardware store paint. Sure, you can get some similar colors, but when it comes to mixing colors, making glazes, or just thinning them down, the cheaper hardware store paint often turns to crud.
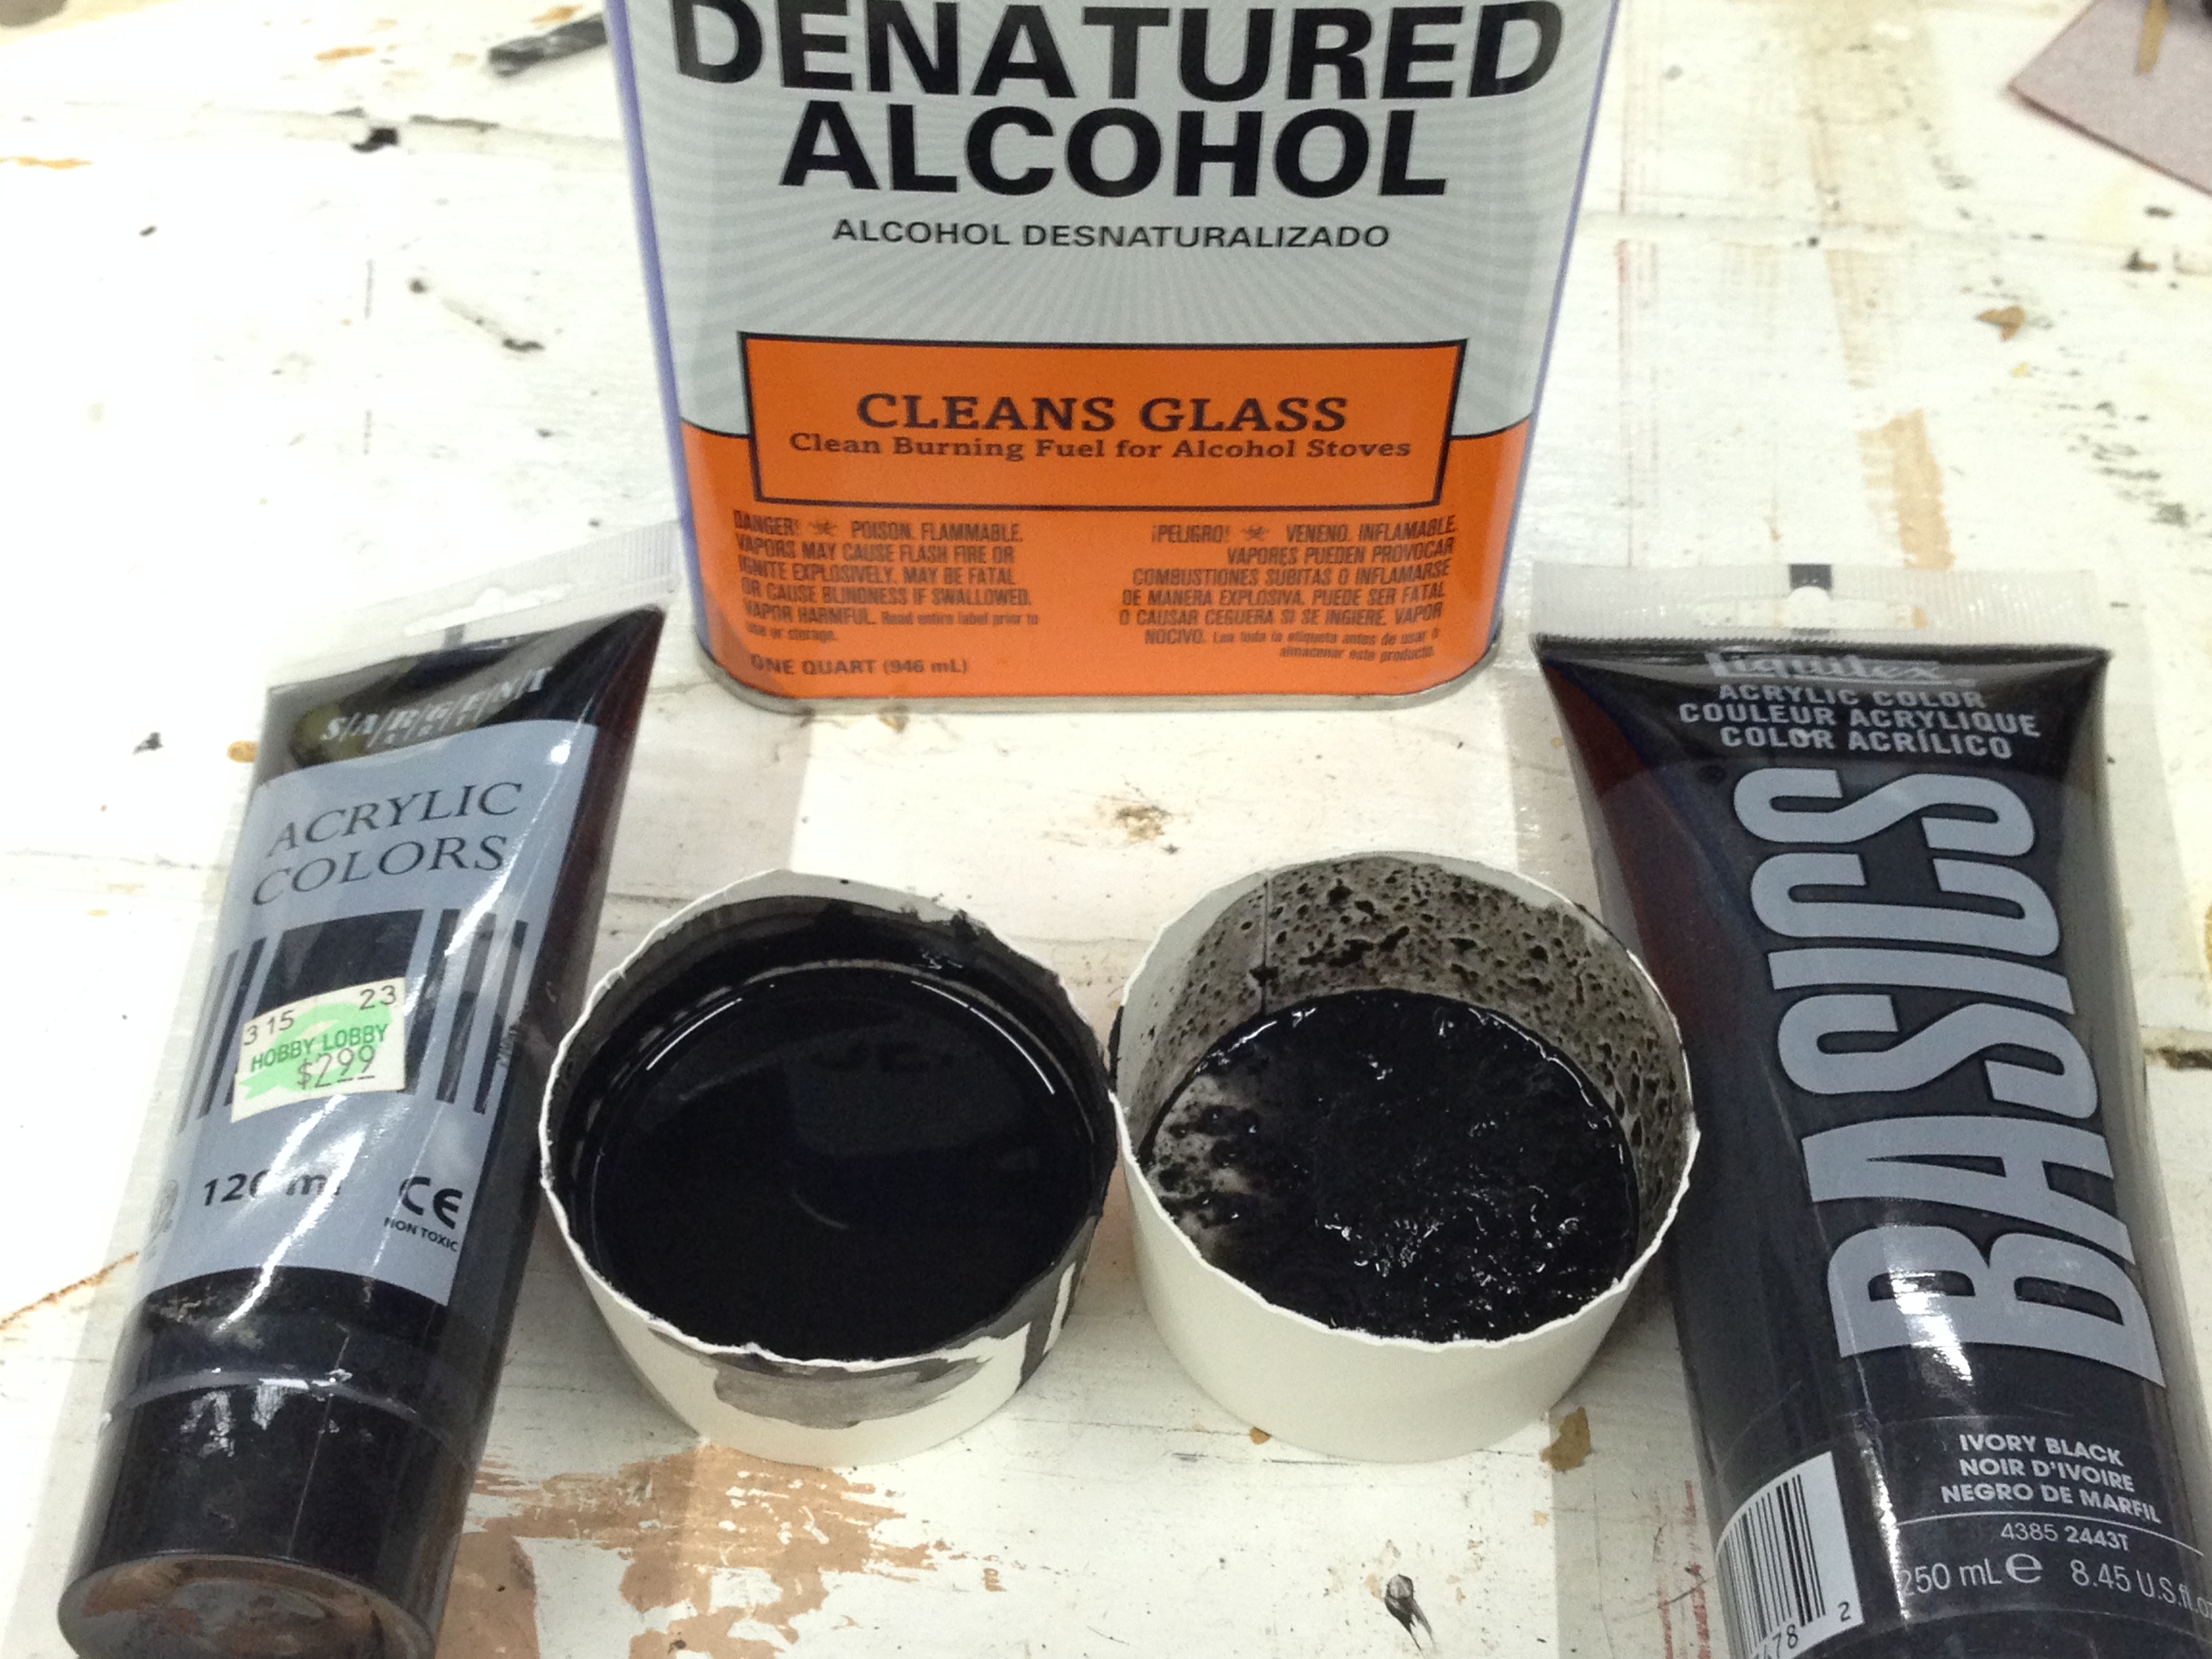
The set for 39 Steps at Triad Stage was reminiscent of an old vaudeville theatre. One of the focal points was a massive chandelier overhead. I knew we could never be able to afford to buy a five-foot diameter chandelier, and even if I could find one to rent or borrow, transporting it would be difficult. So I figured we would just spend the time making one.
39 Steps chandelier
The design of the chandelier made construction simple; it was just three rings with beads of crystals draped between them. I found rolls of garland with acrylic beads, which spared me from having to string them all individually. I took a lot of the individual crystals from another chandelier I had in stock. The arms came from an existing chandelier as well.
I put together a video showing the progression of the build. Though straightforward, it was a very time-consuming prop. Towards the end, I got help from Lisa Bledsoe and DeDe Farrell with attaching all the crystals and getting it wired.
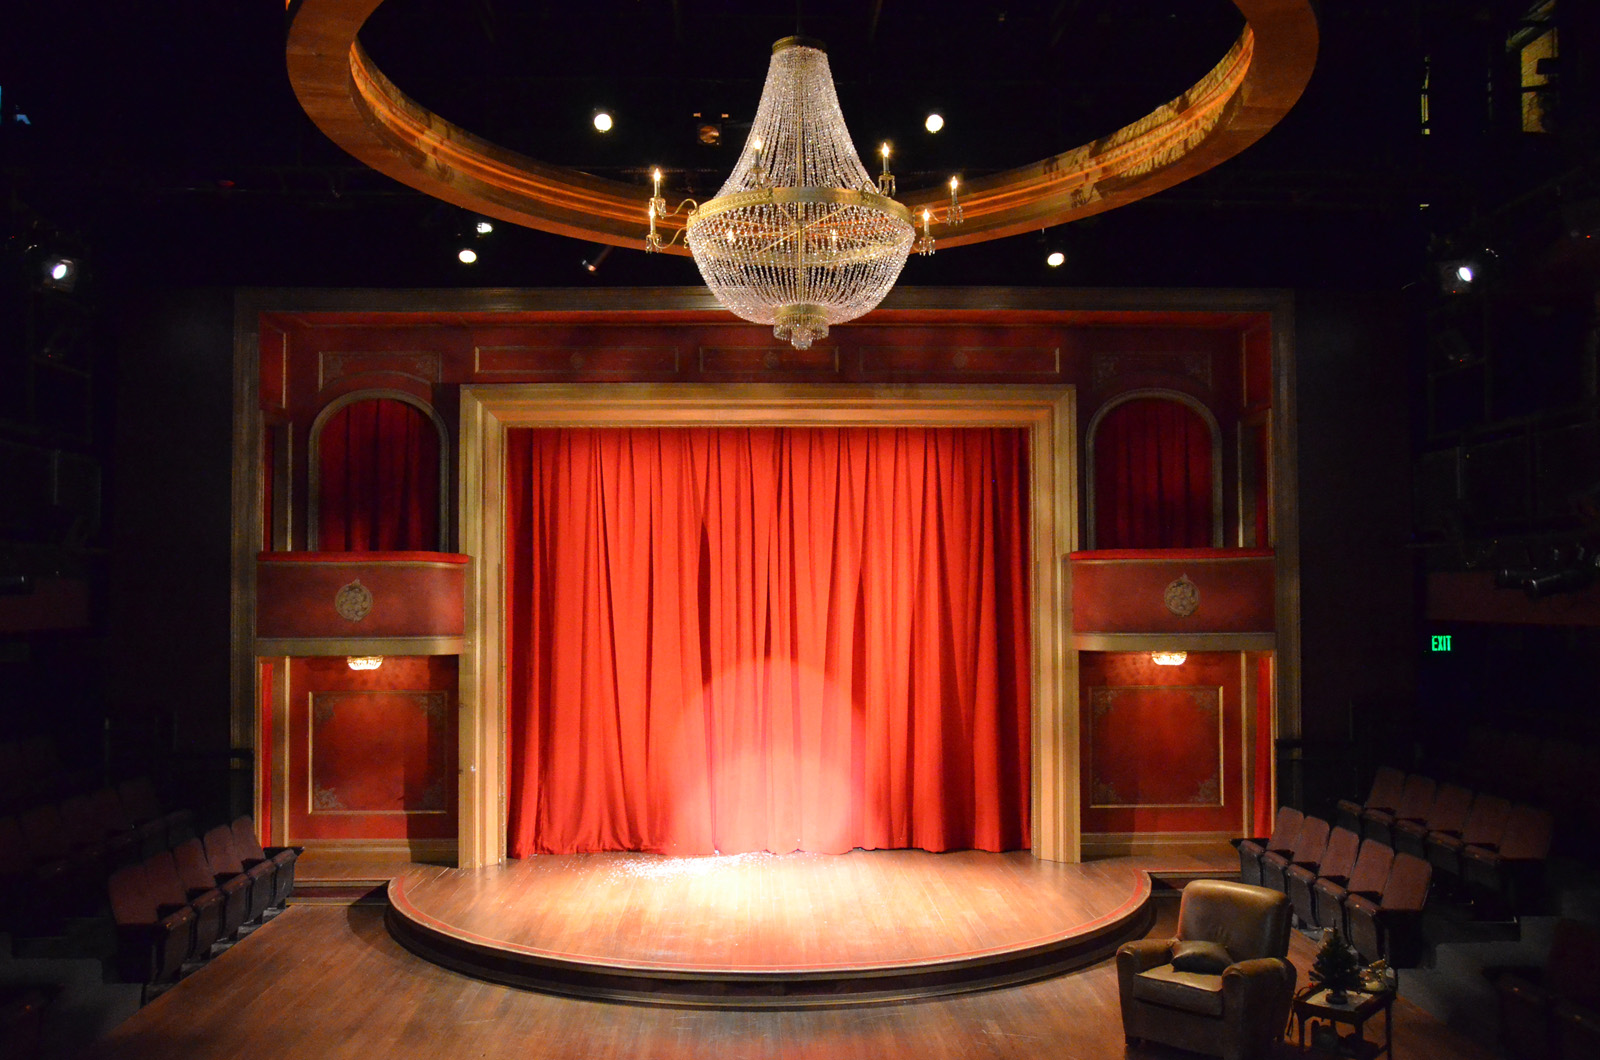
We opened Pump Boys and Dinettes here at Triad Stage a few weeks ago. Set in a diner famed for its home cookin’, we needed some pies. They sing about them, after all. Of course, we didn’t want to be buying brand new pies for every performance, so I asked my assistant, Lisa Bledsoe, to make a few.
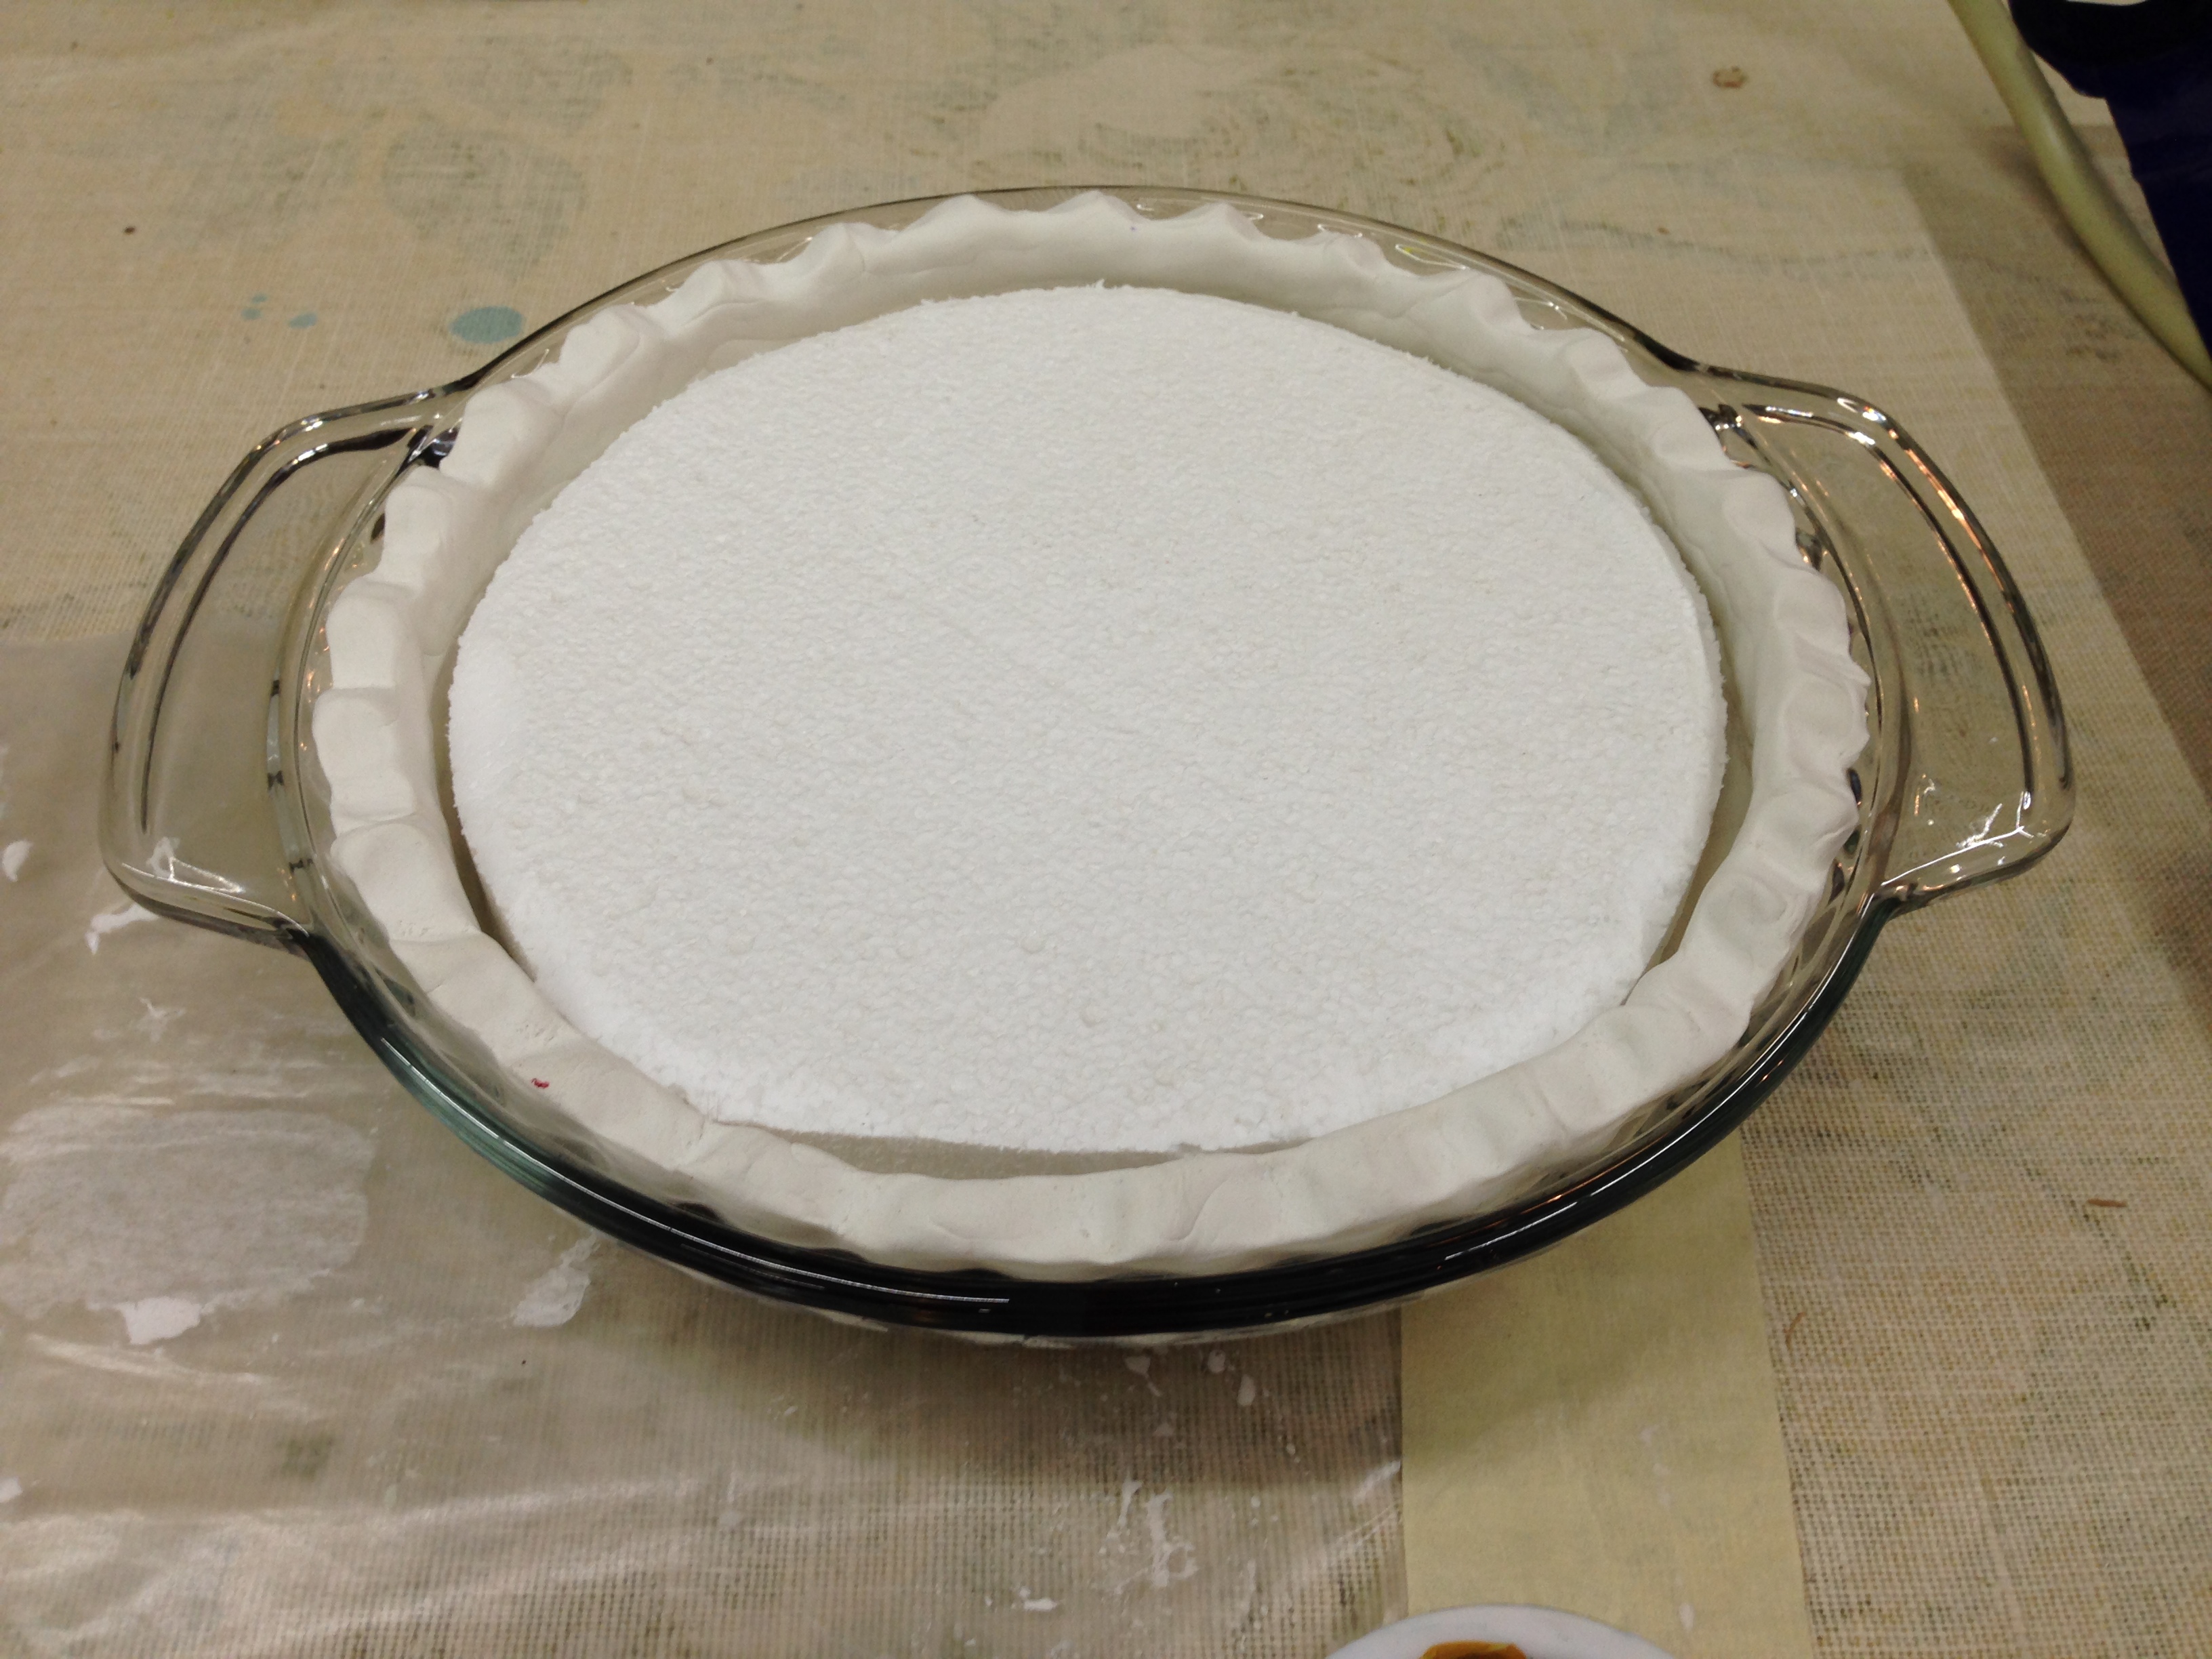
Pie crust and base
She started off making the pie crusts out of Crayola Model Magic. She shaped a layer into a glass pie tray and let it harden over night. She cut some white bead foam discs to fill most of the inside.
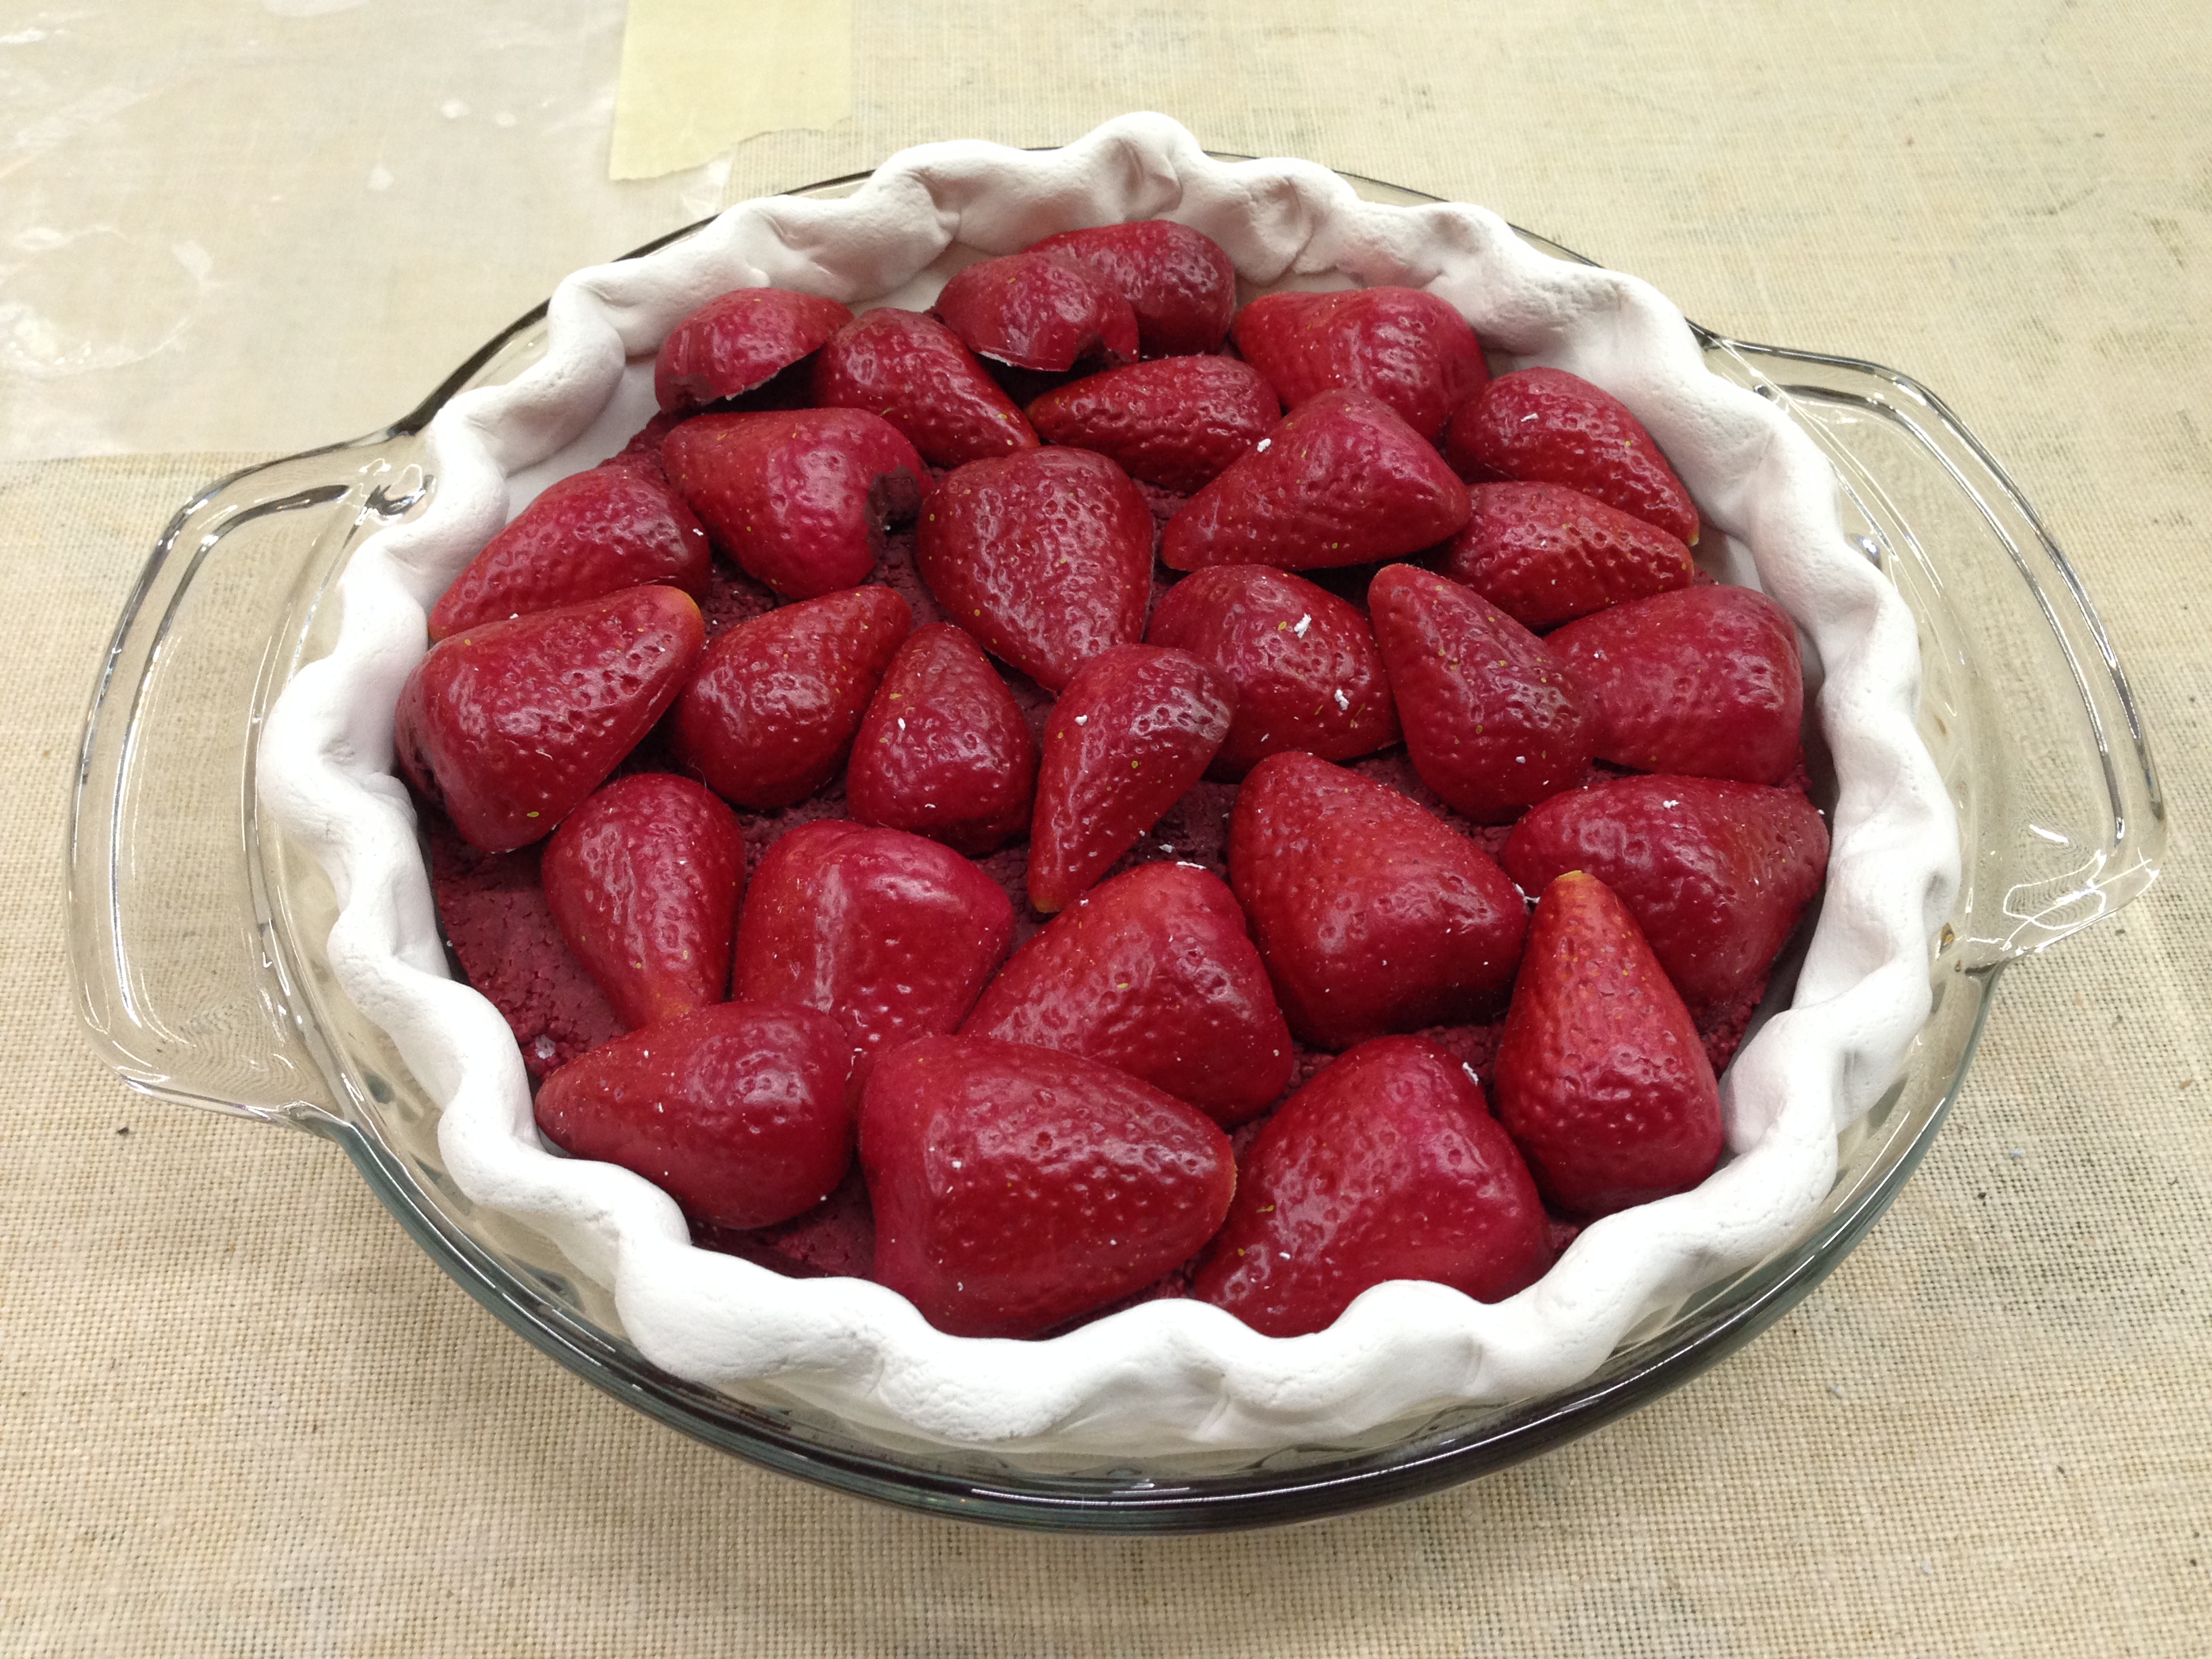
Strawberry filling
She was making two pies; a fruit pie and a coconut cream pie. For the fruit pie, she had some fake strawberries from the floral section at Hobby Lobby, and cut all of them in half to make a layer on top of the foam disc. She painted the disc red to continue the illusion that it was strawberries all the way down.
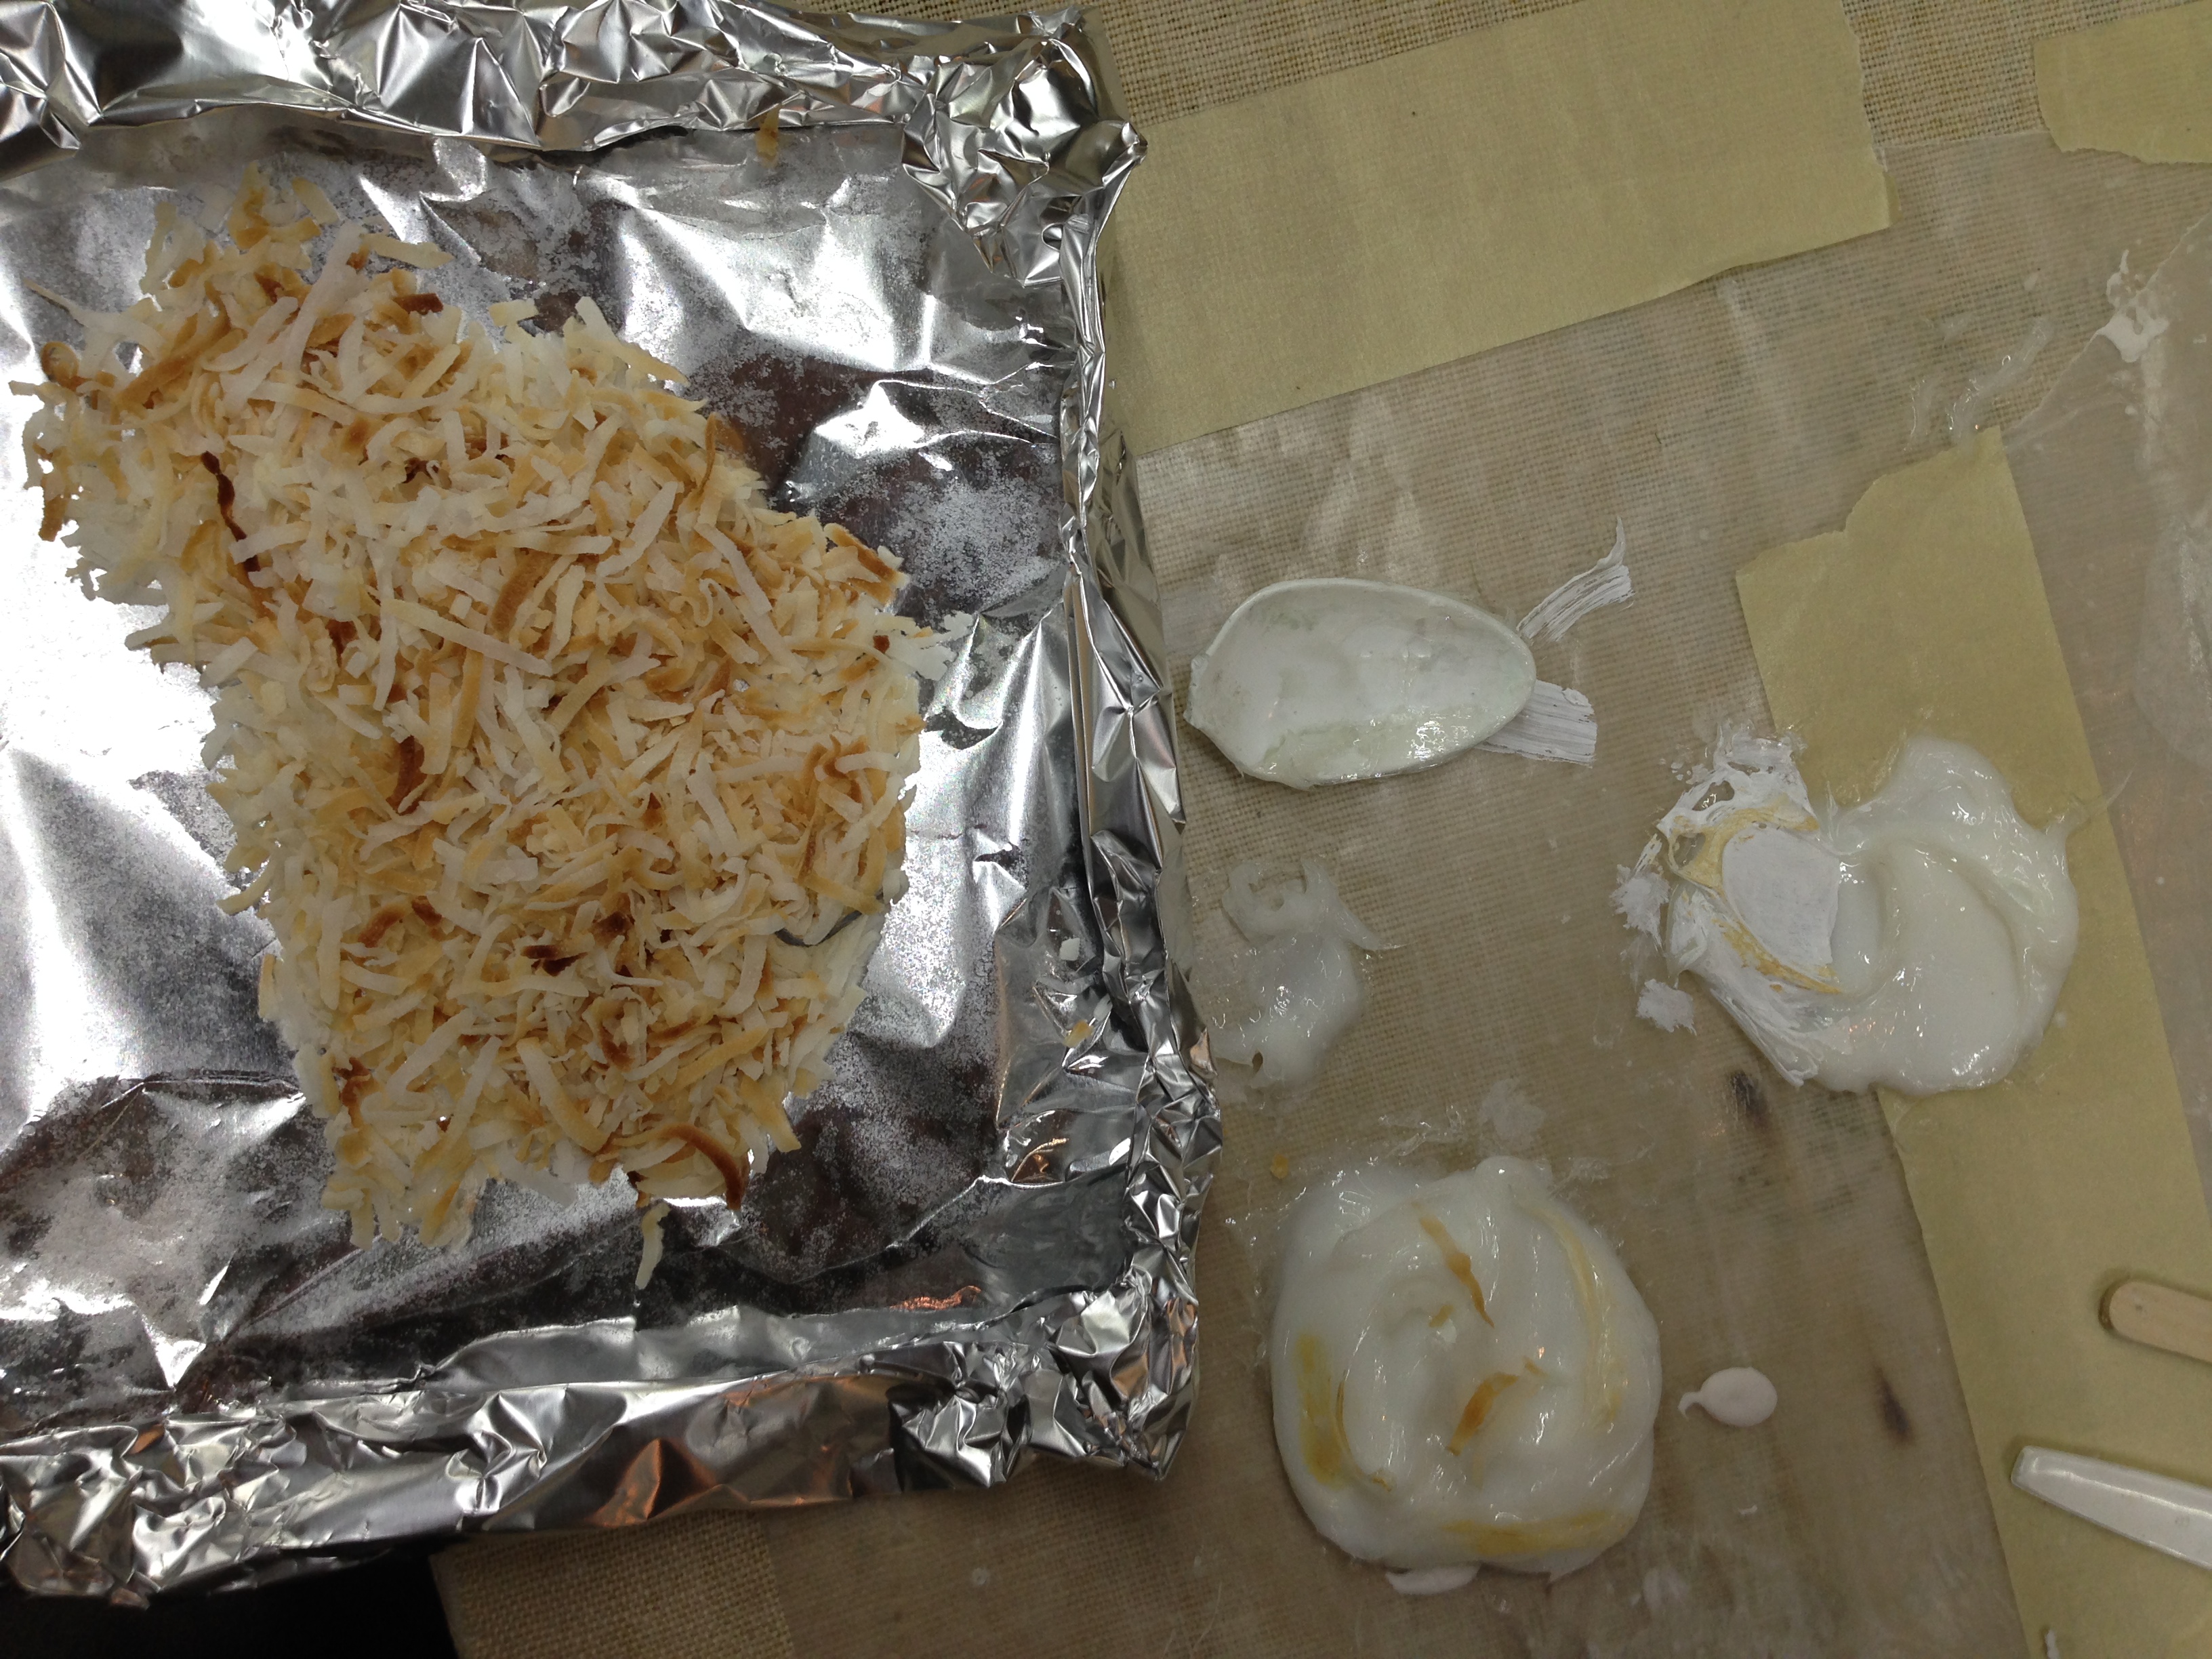
Toasted coconut
To top the coconut pie, she used actual dried coconut flakes. They were painted with acrylics to make them look toasted.
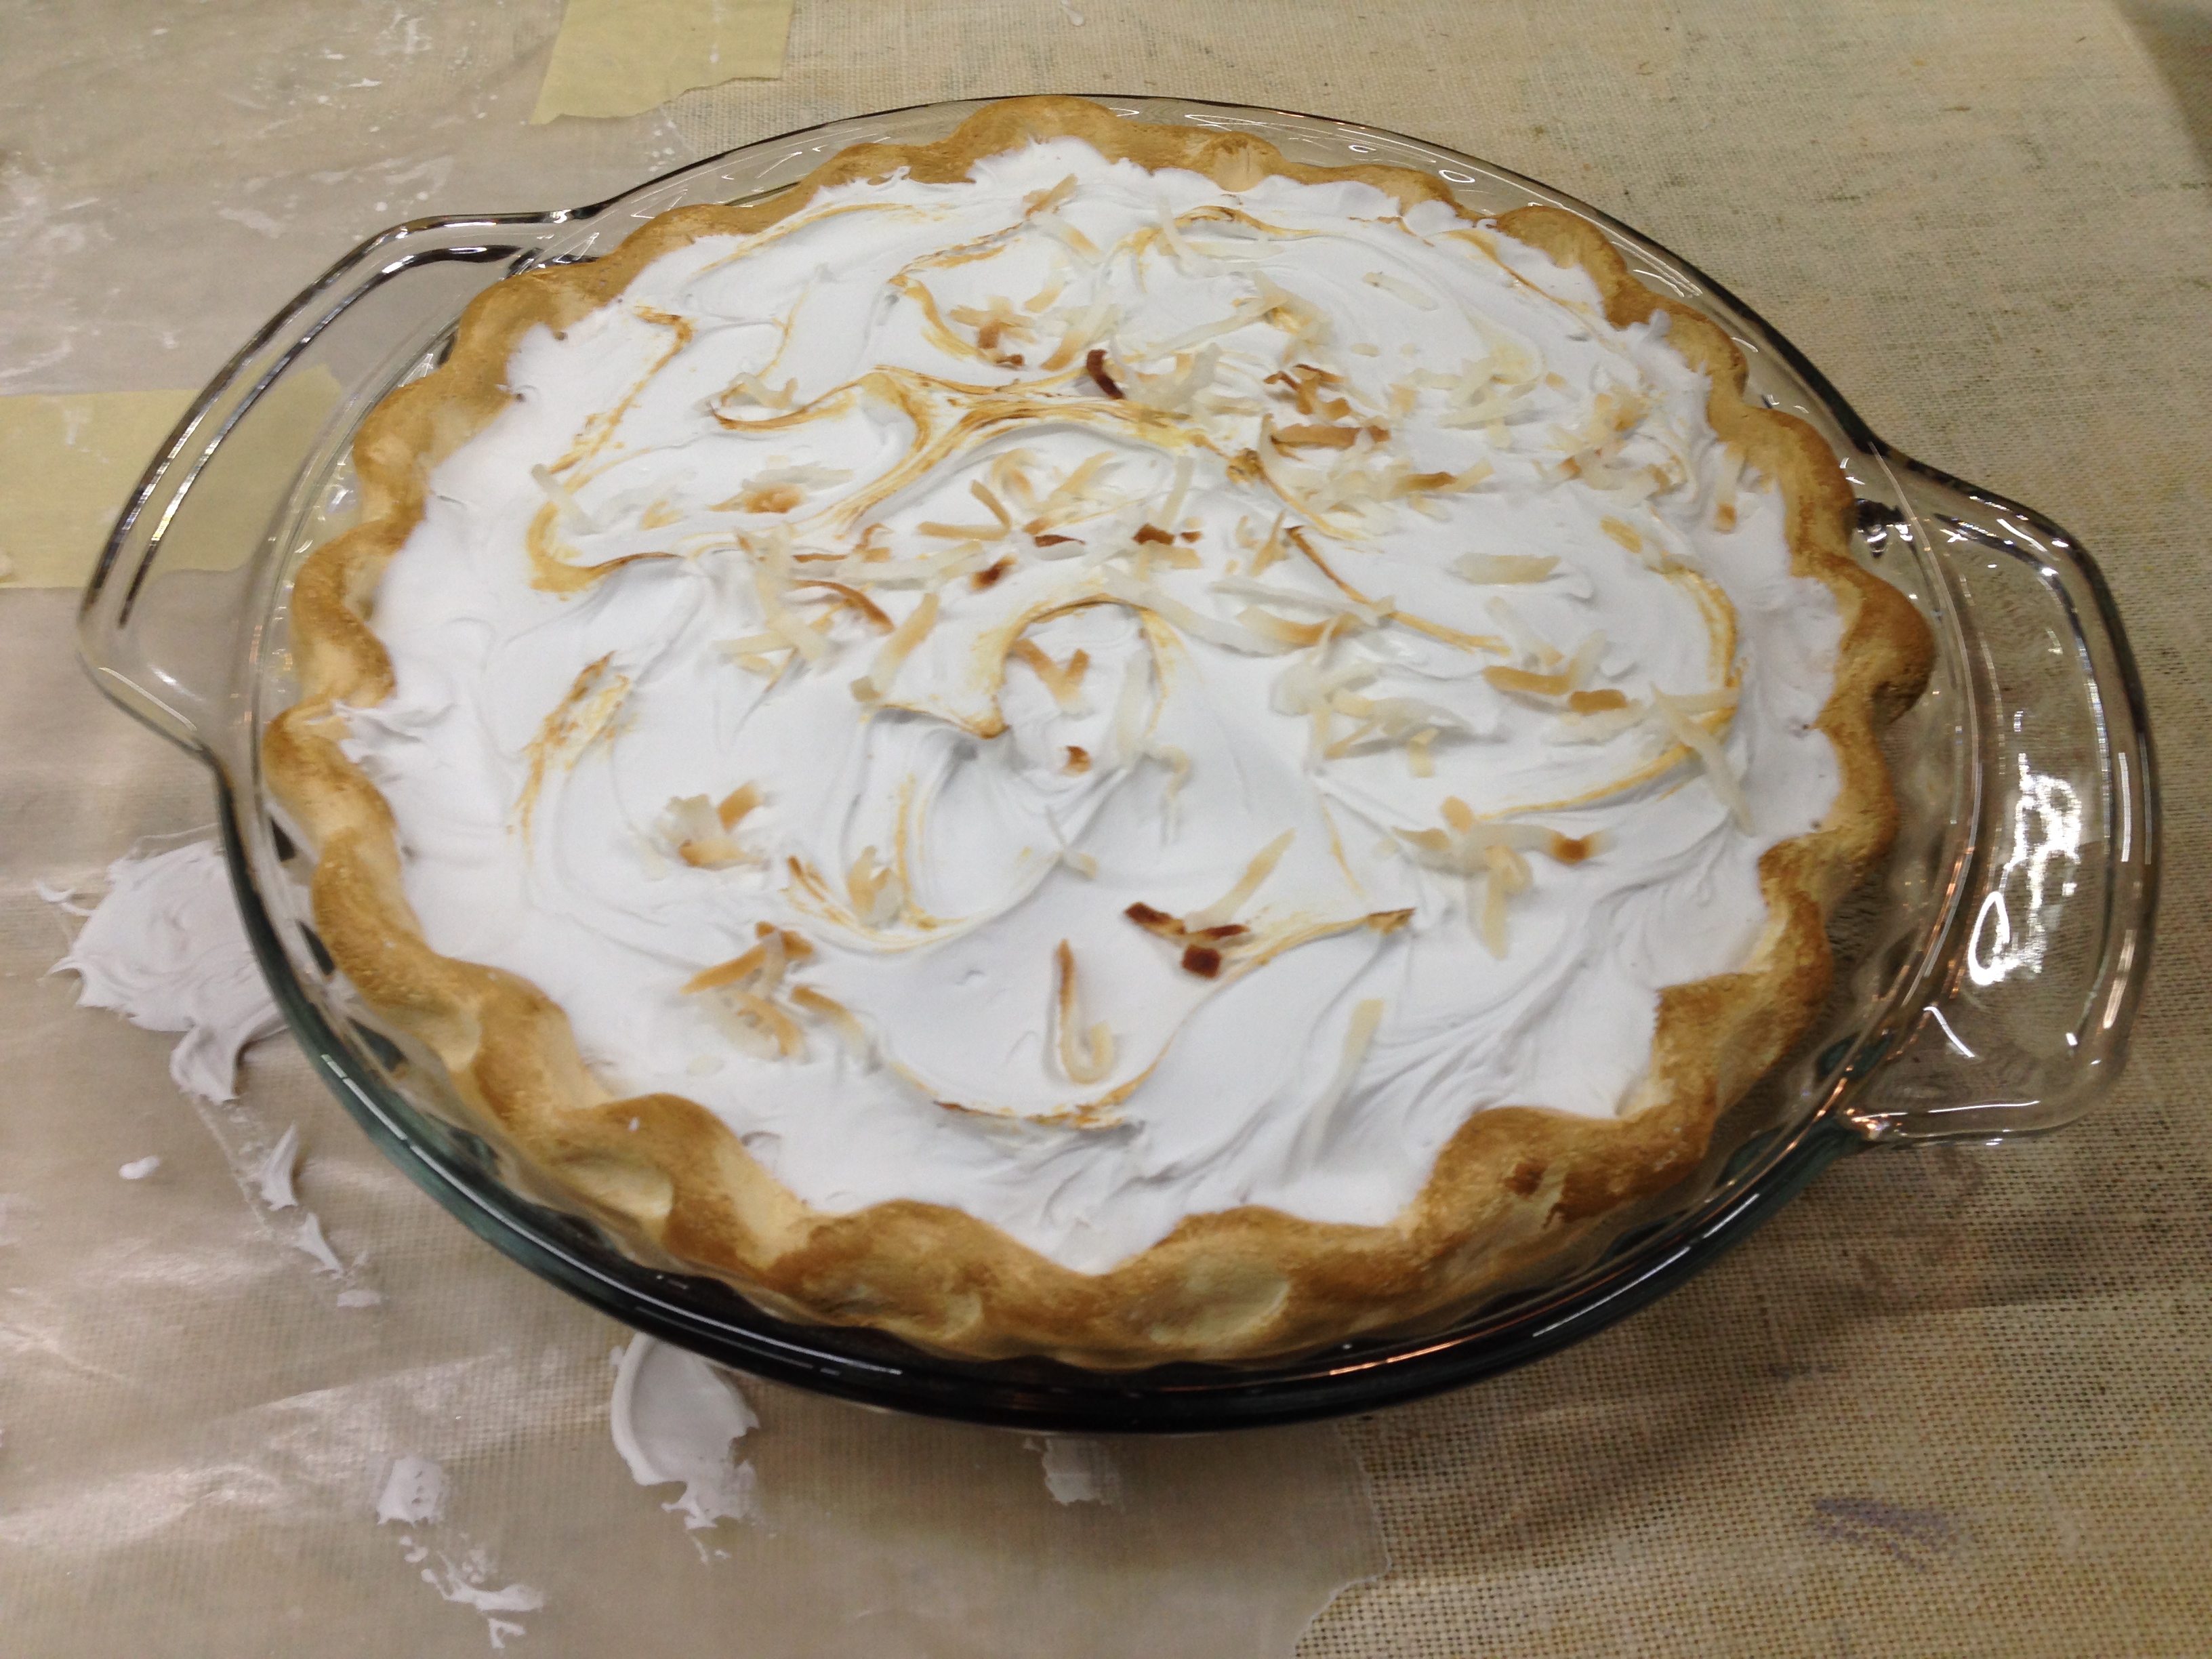
Coconut cream pie
The Model Magic did not stick to the pie tray, so she was able to pop the whole pie out and paint the crust with acrylics before popping it back in. The cream on top was made from acrylic caulk. She had visited the hardware store and picked up a few different brands and types of caulk and spackle to test out which would dry the most like a cream pie.
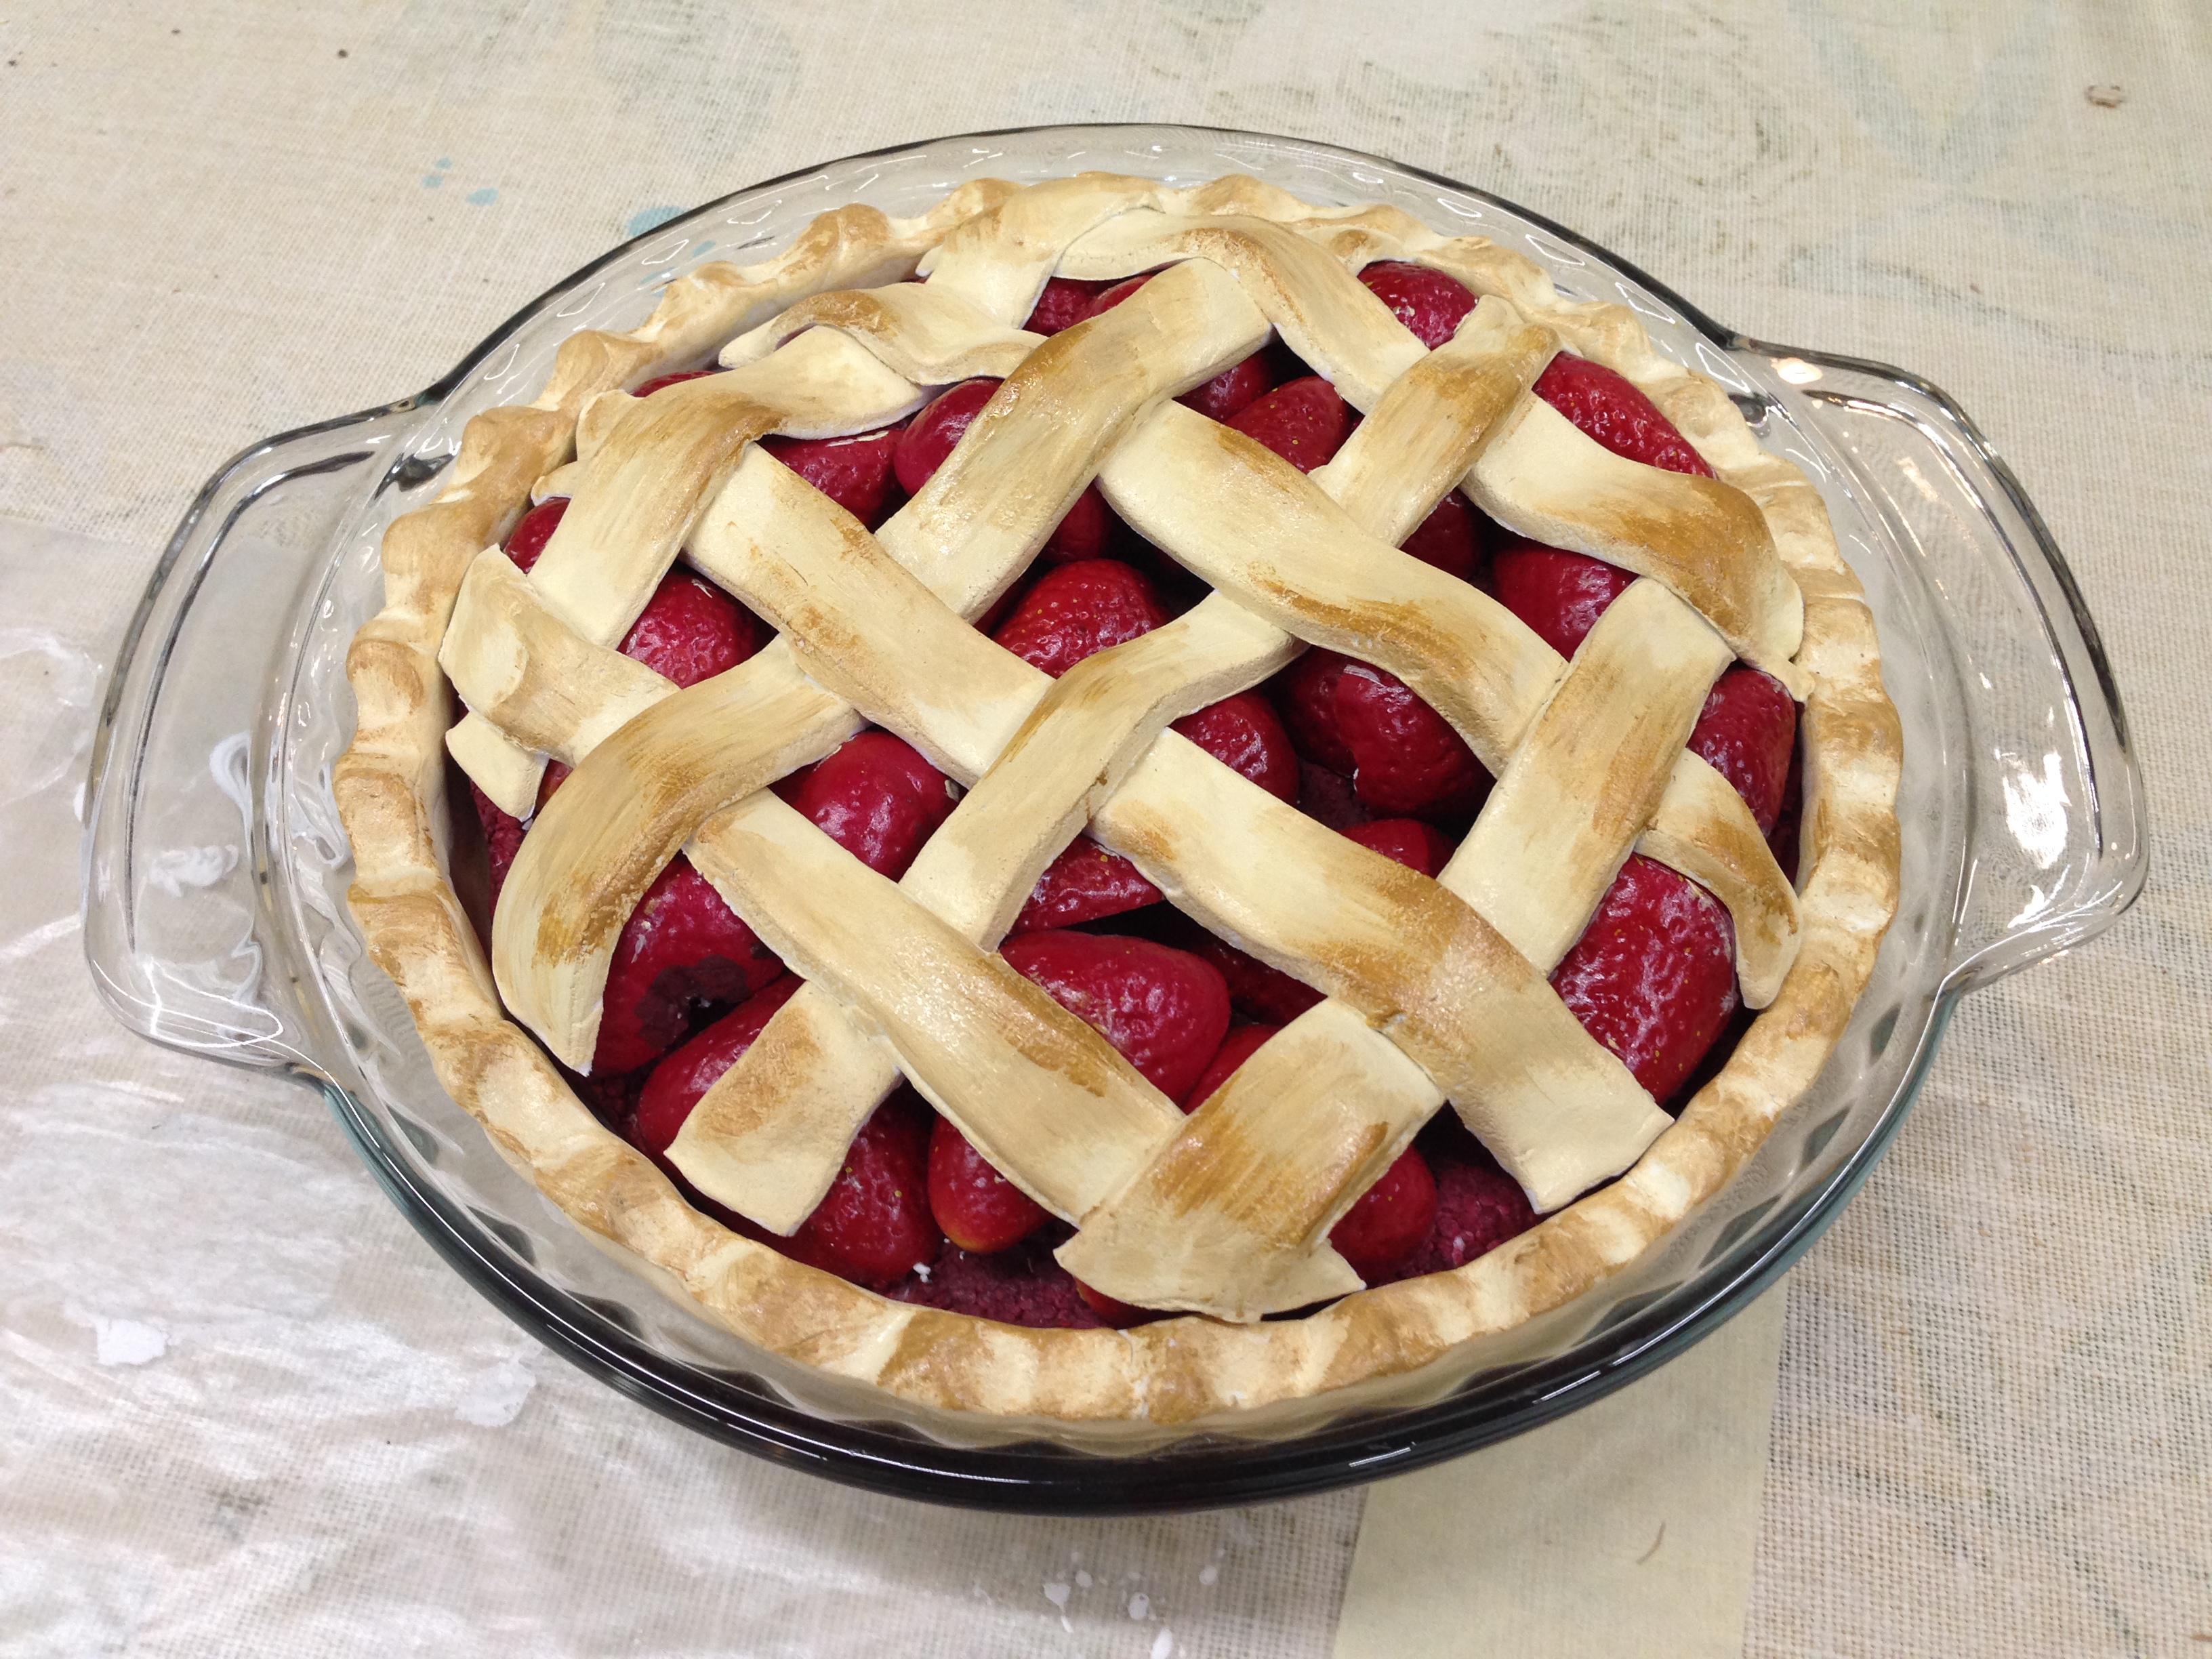
Strawberry pie
The strawberry pie got a lattice crust made of more Model Magic painted with acrylics. So there you have it; the Double Cupp Sisters’ famous pies!
Here are the last of my Legend of Zelda props I made last month for a local theatre group. I previously posted about the Master Sword, and some rupees; you can find out more about this project in general at those links if you are interested.
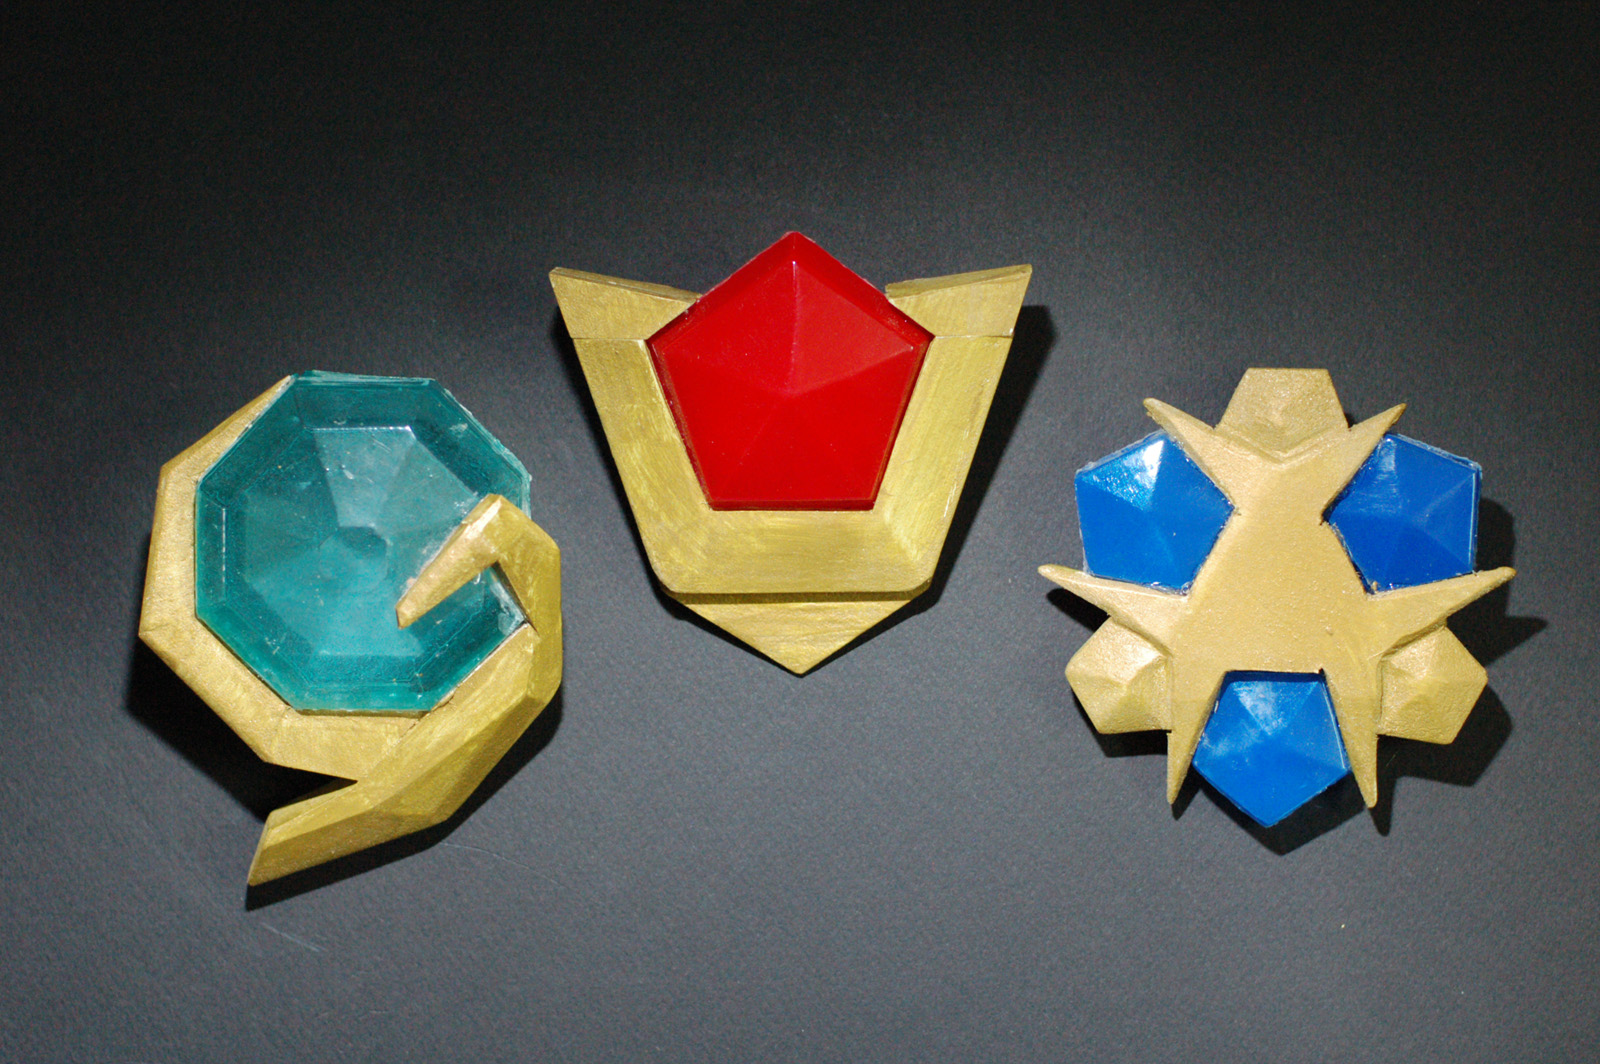
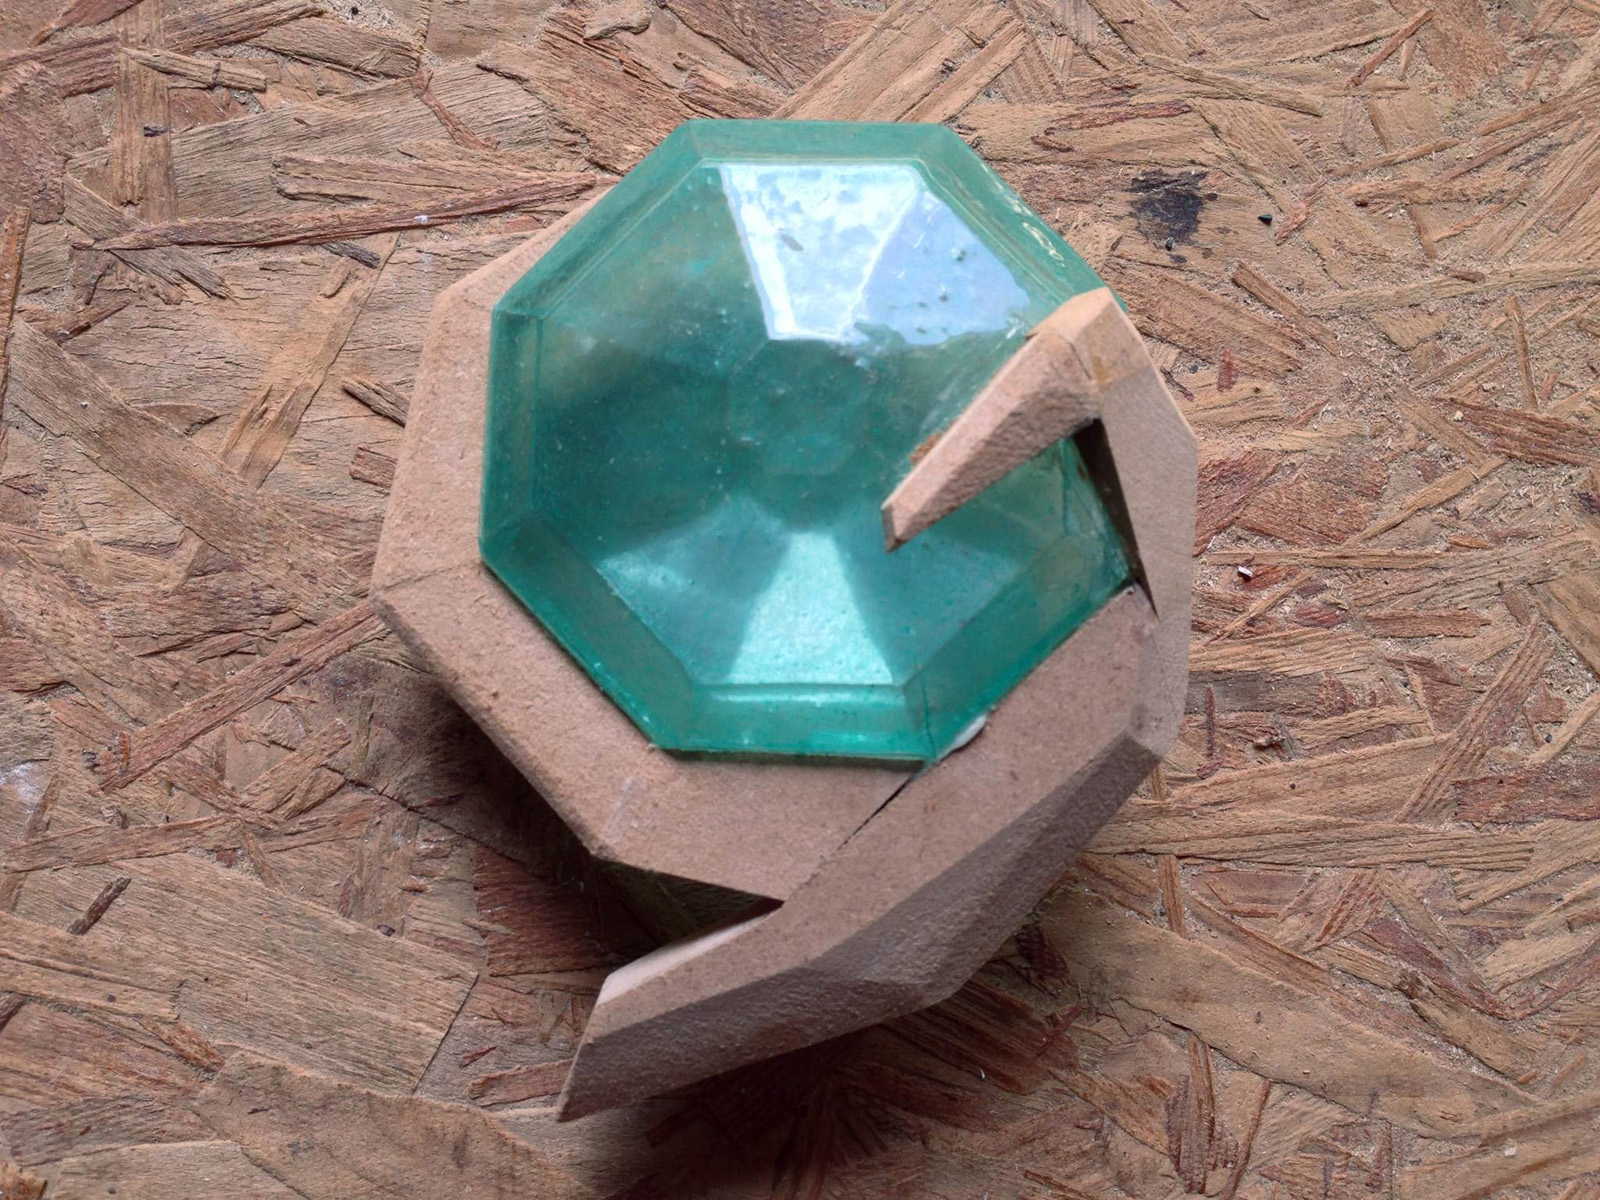
The last prop, which is actually three items, are the spiritual stones. These are various colored gems in gold settings. They have names, too: Kokiri’s Emerald, Goron’s Ruby, Zora’s Sapphire.
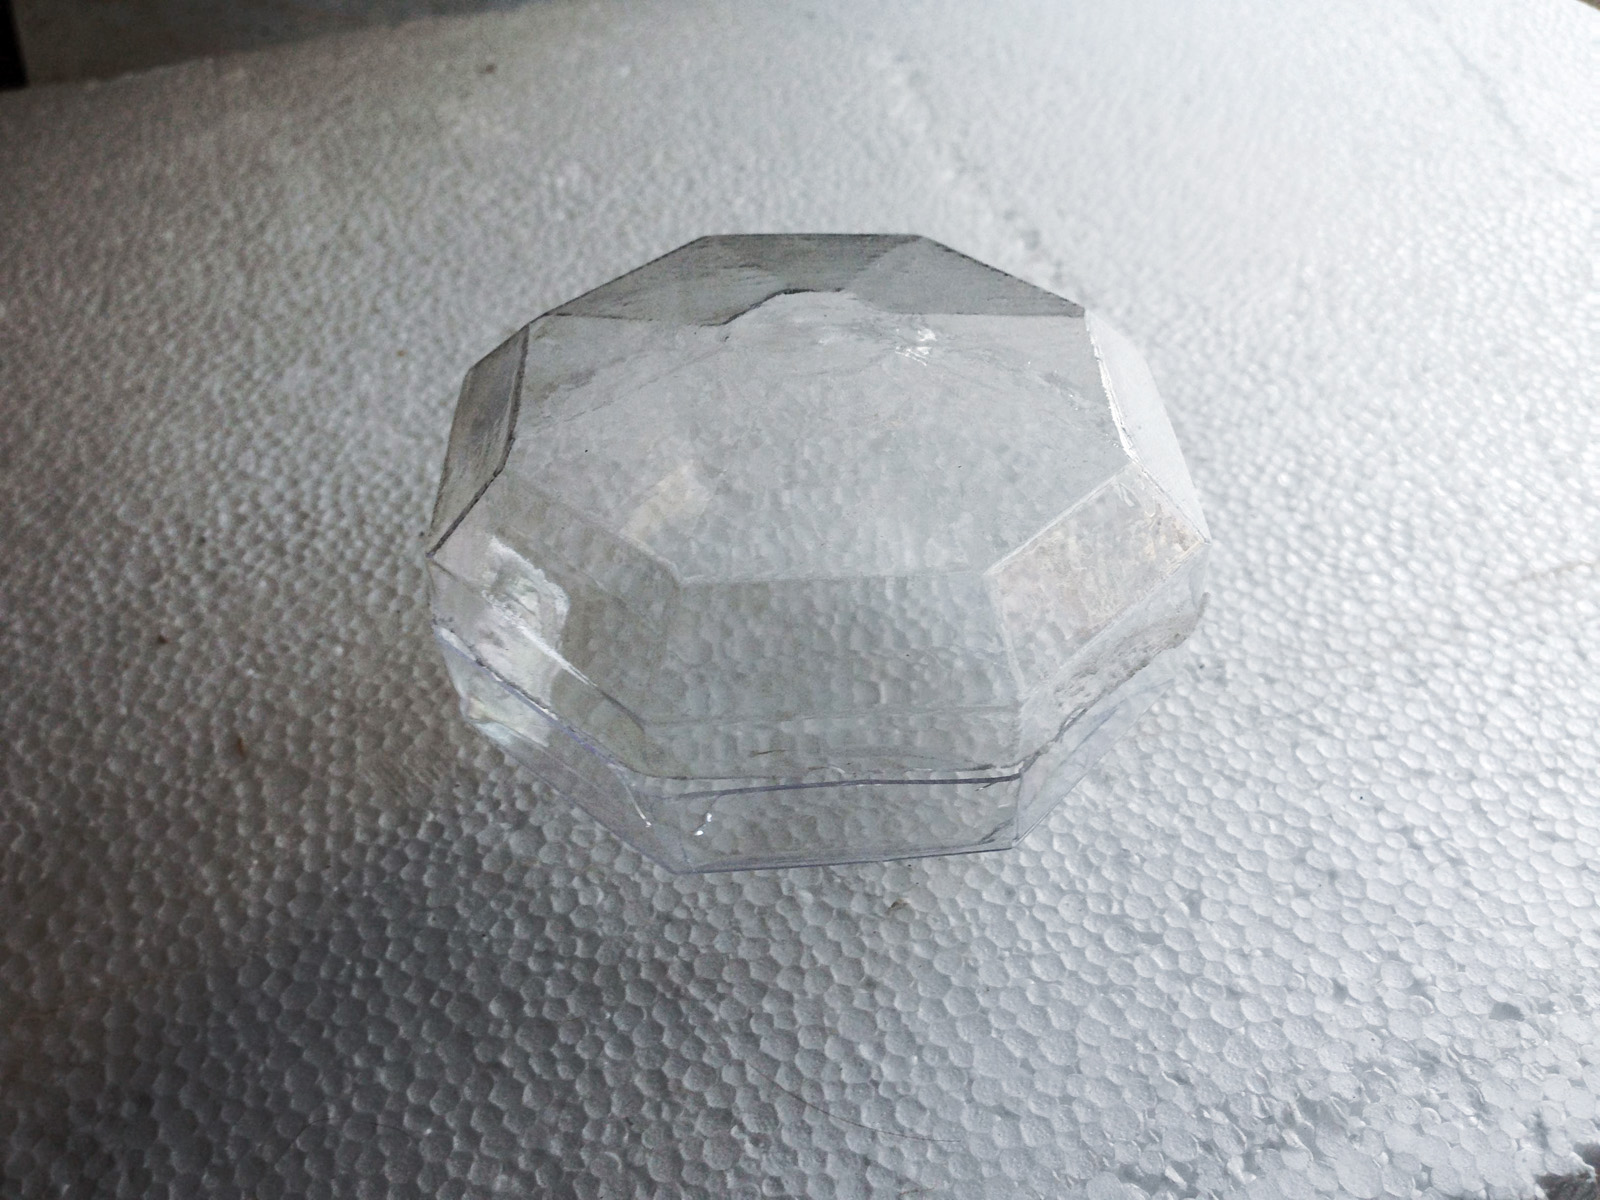
Vacuum formed jewel
As with the rupees, I cut the shape of the stone out of a piece of wood, vacuum formed two halves out of acrylic, and glued them together (painting the inside before gluing, of course).
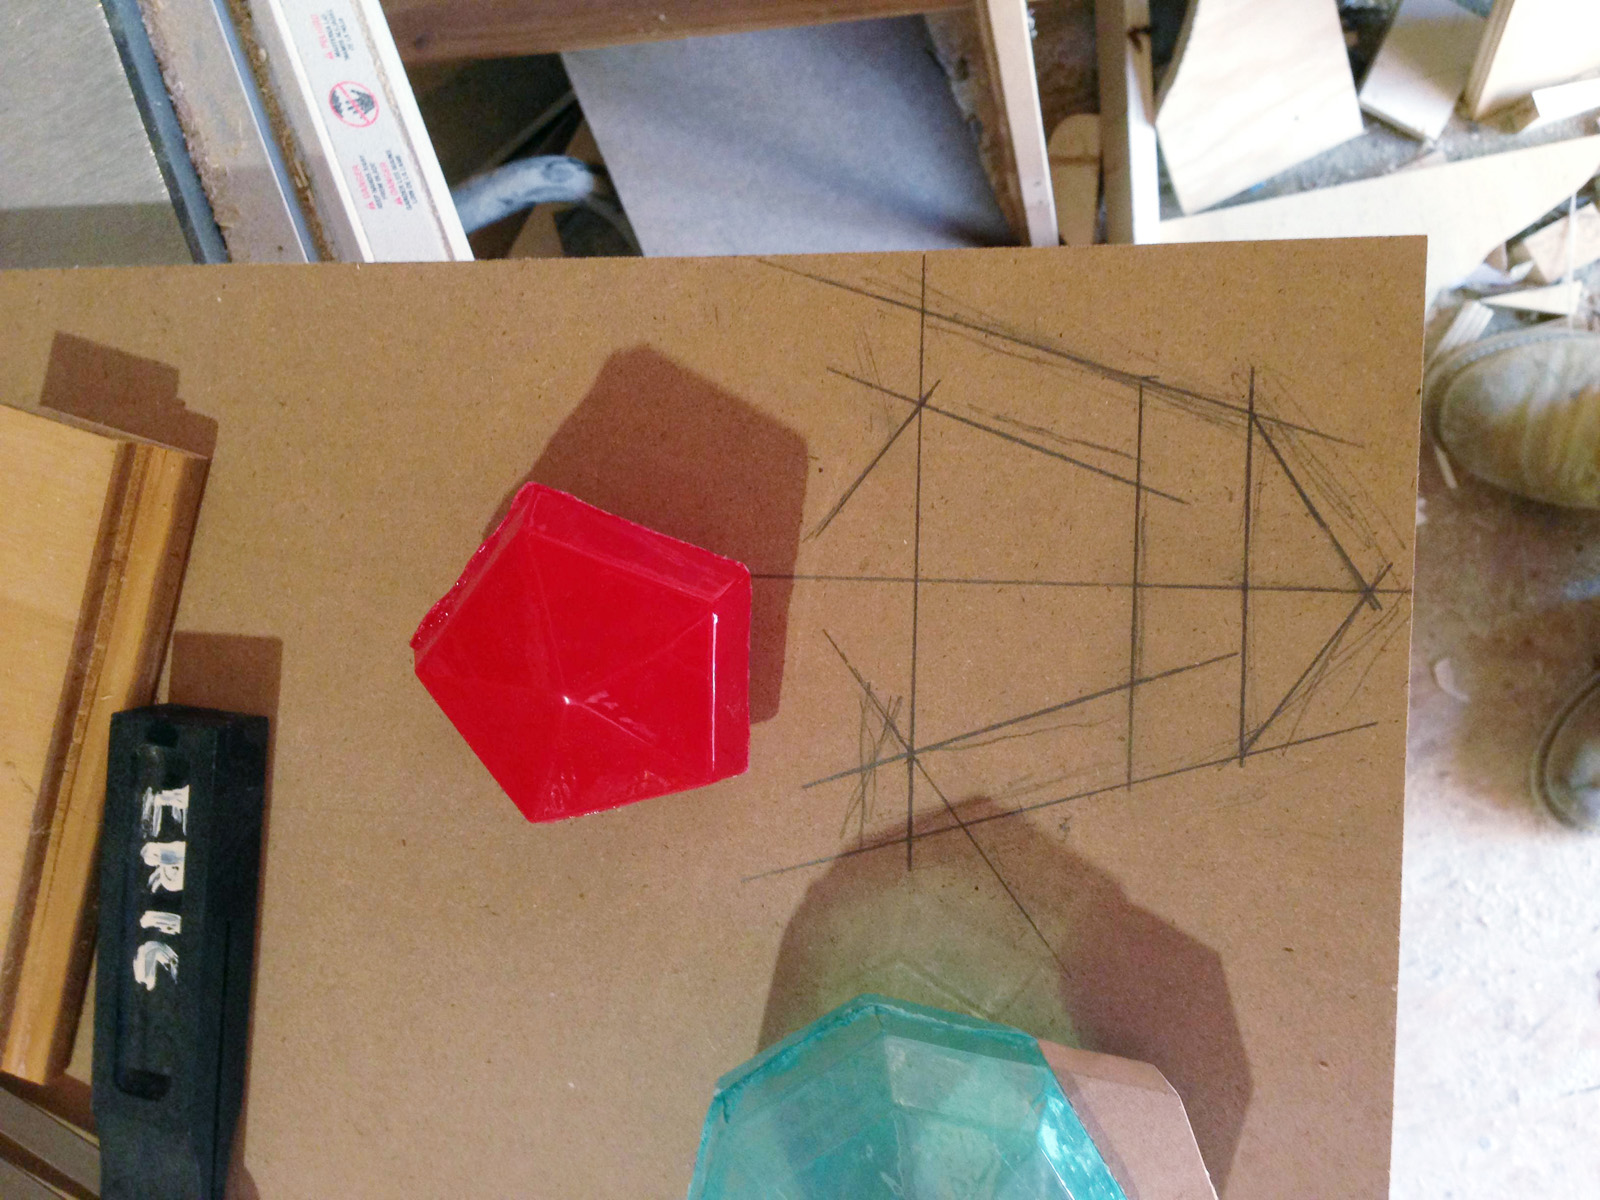
Layout of Goron’s Ruby
Starting with Goron’s Ruby, I used some reference images from the video game itself to lay out a full scale drawing of the stone’s setting onto some 3/4″ MDF.
Cut and shaped
I made most of the cuts on the table saw (my nifty cross-cutting jig lets me safely cut arbitrary angles on small pieces). The bevels were also cut on the table saw with the blade set at an angle.
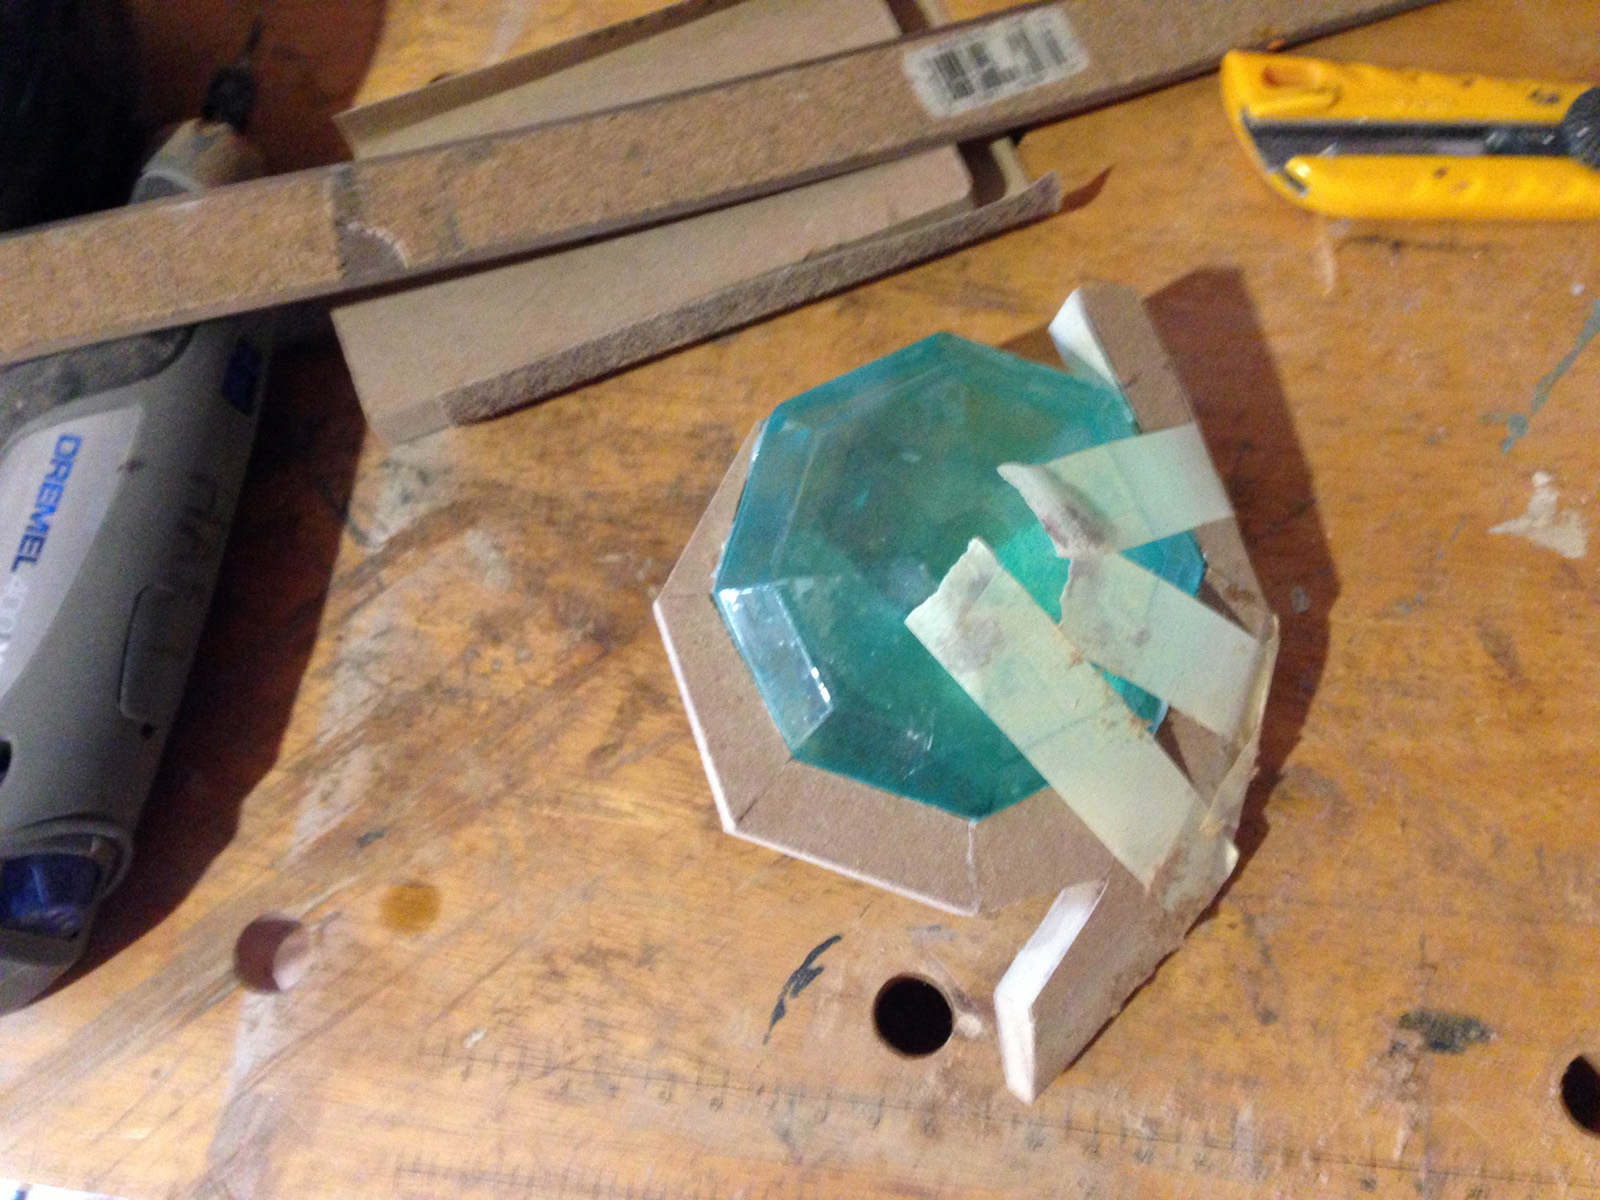
Piecing together the emerald
Since the emerald had a sort of “wrap around” design, I cut the pieces individually and glued them on one at a time to achieve an exact fit. It was a bit tricky getting all the angles right, but it gave the nicest result.
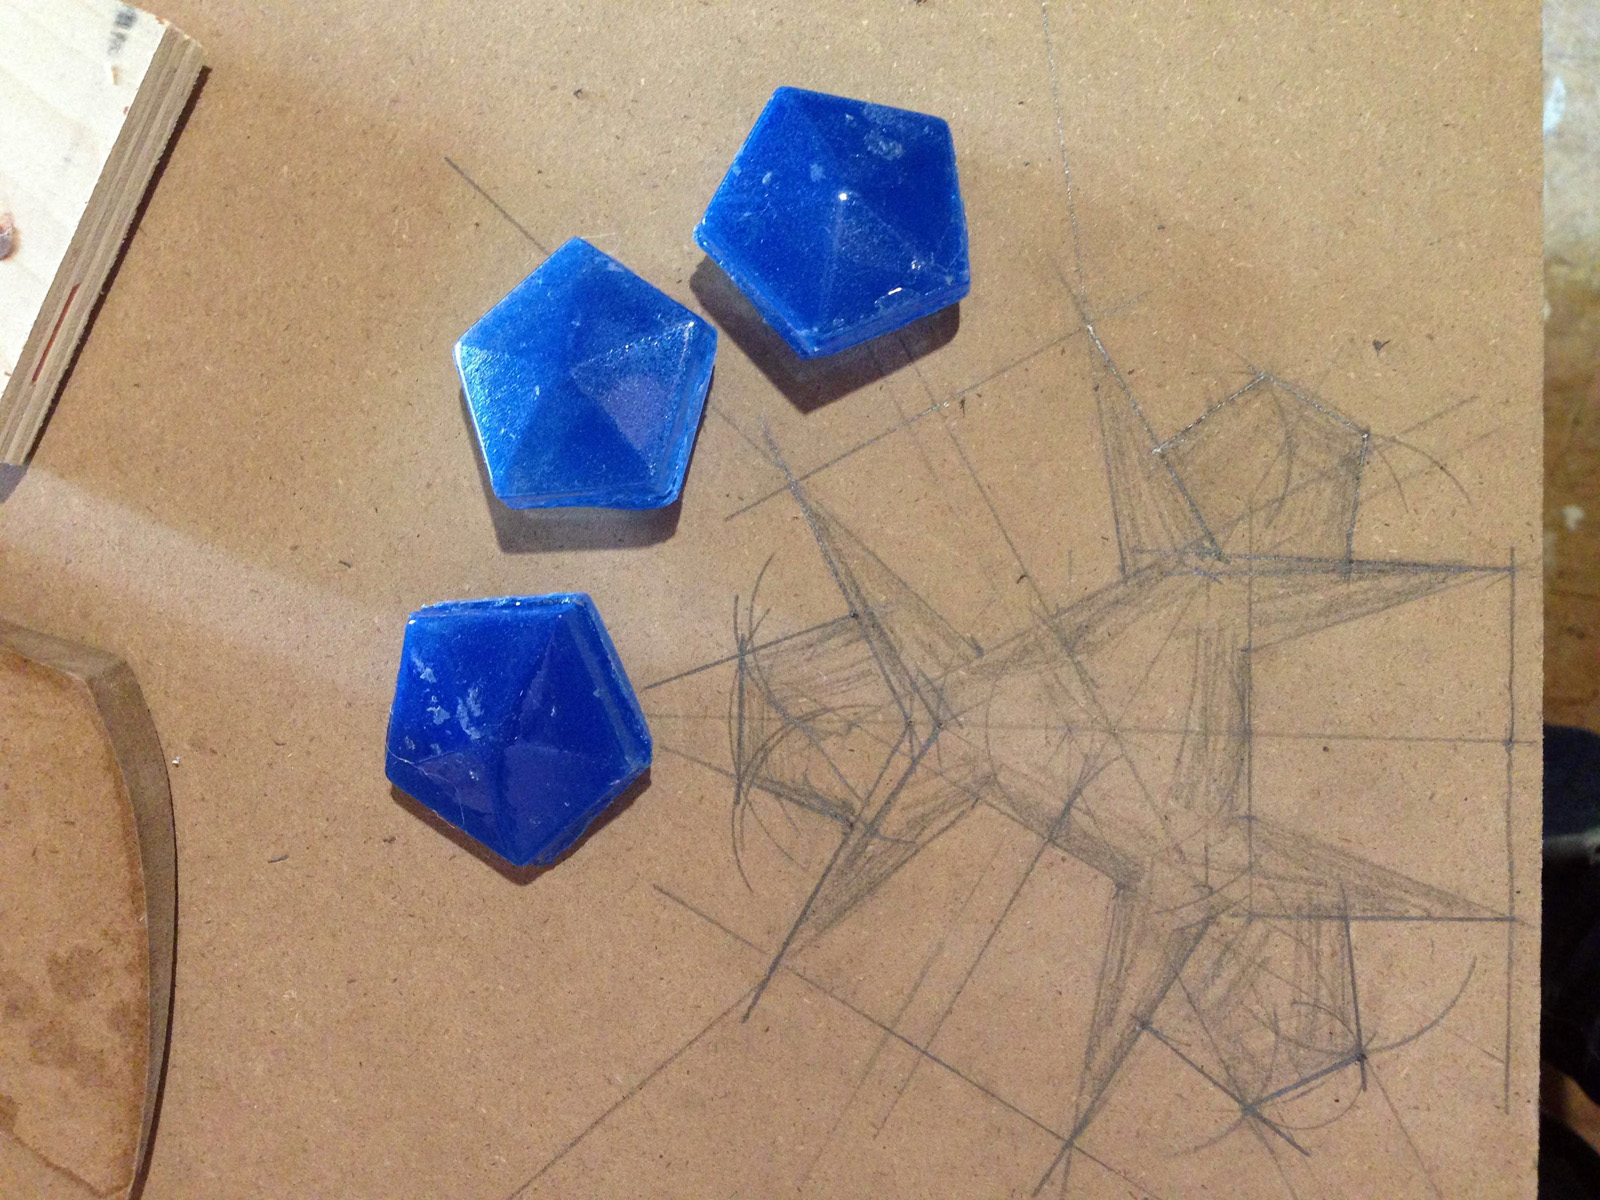
Drawing the sapphire setting
Because the shape of the sapphire is trilaterally symmetrical, I used my compass and bevel gauge to make sure all three parts were drawn the same.
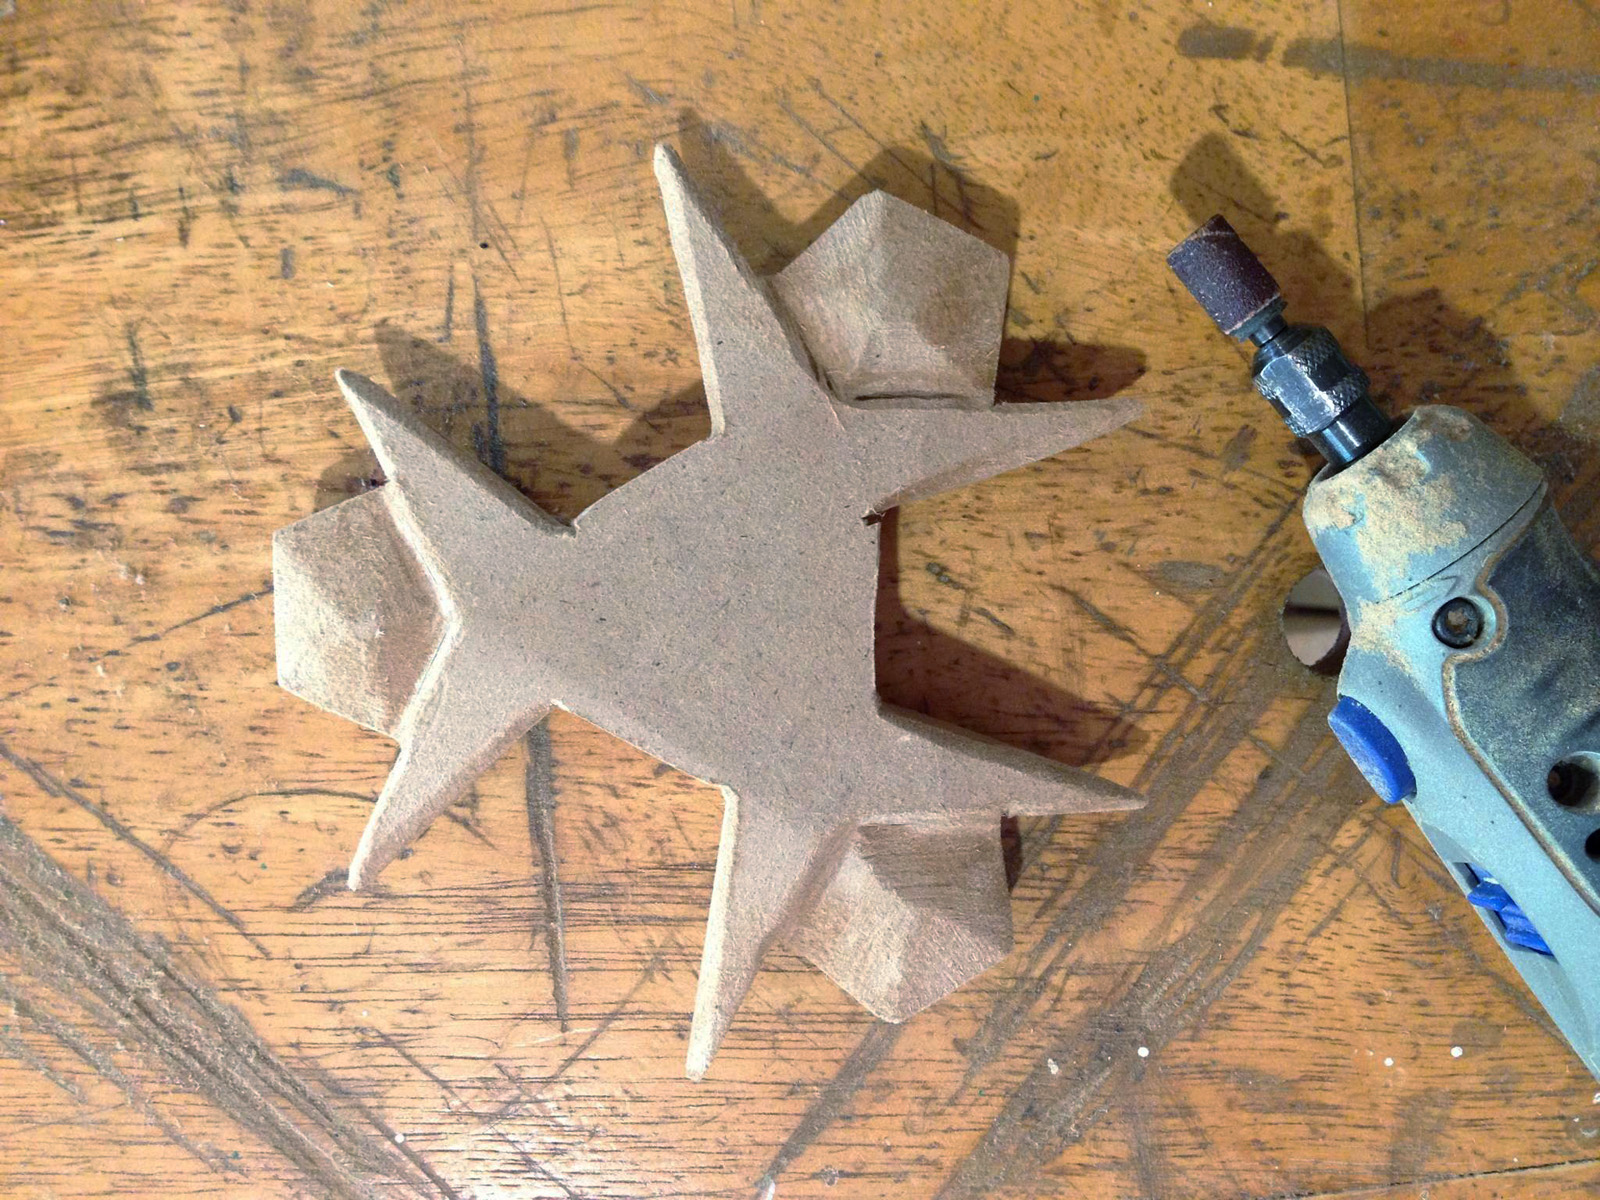
Cutting and shaping
It had to be cut out with the jigsaw and cleaned up by hand with files. Some further shaping was done with the Dremel.
Kokiri’s Emerald
Once finished, the pieces just needed to be primed and painted. The emerald was painted with the stone already attached. For the others, I painted the settings first, and then the stones were glued in (so I didn’t have to mask anything).
Spiritual Stones
Of course, it always helps to take cool photographs of your props. One day, I’ll get around to posting a quick tutorial on photography.
Making and finding props for theatre, film, and hobbies