Tag Archives: bar

Art Deco Liquor Cabinet

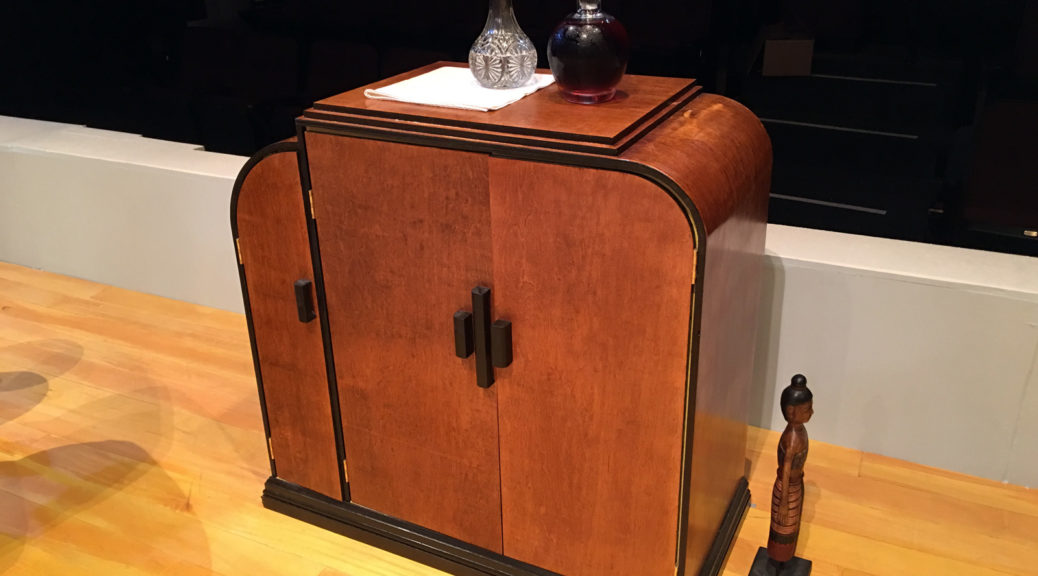
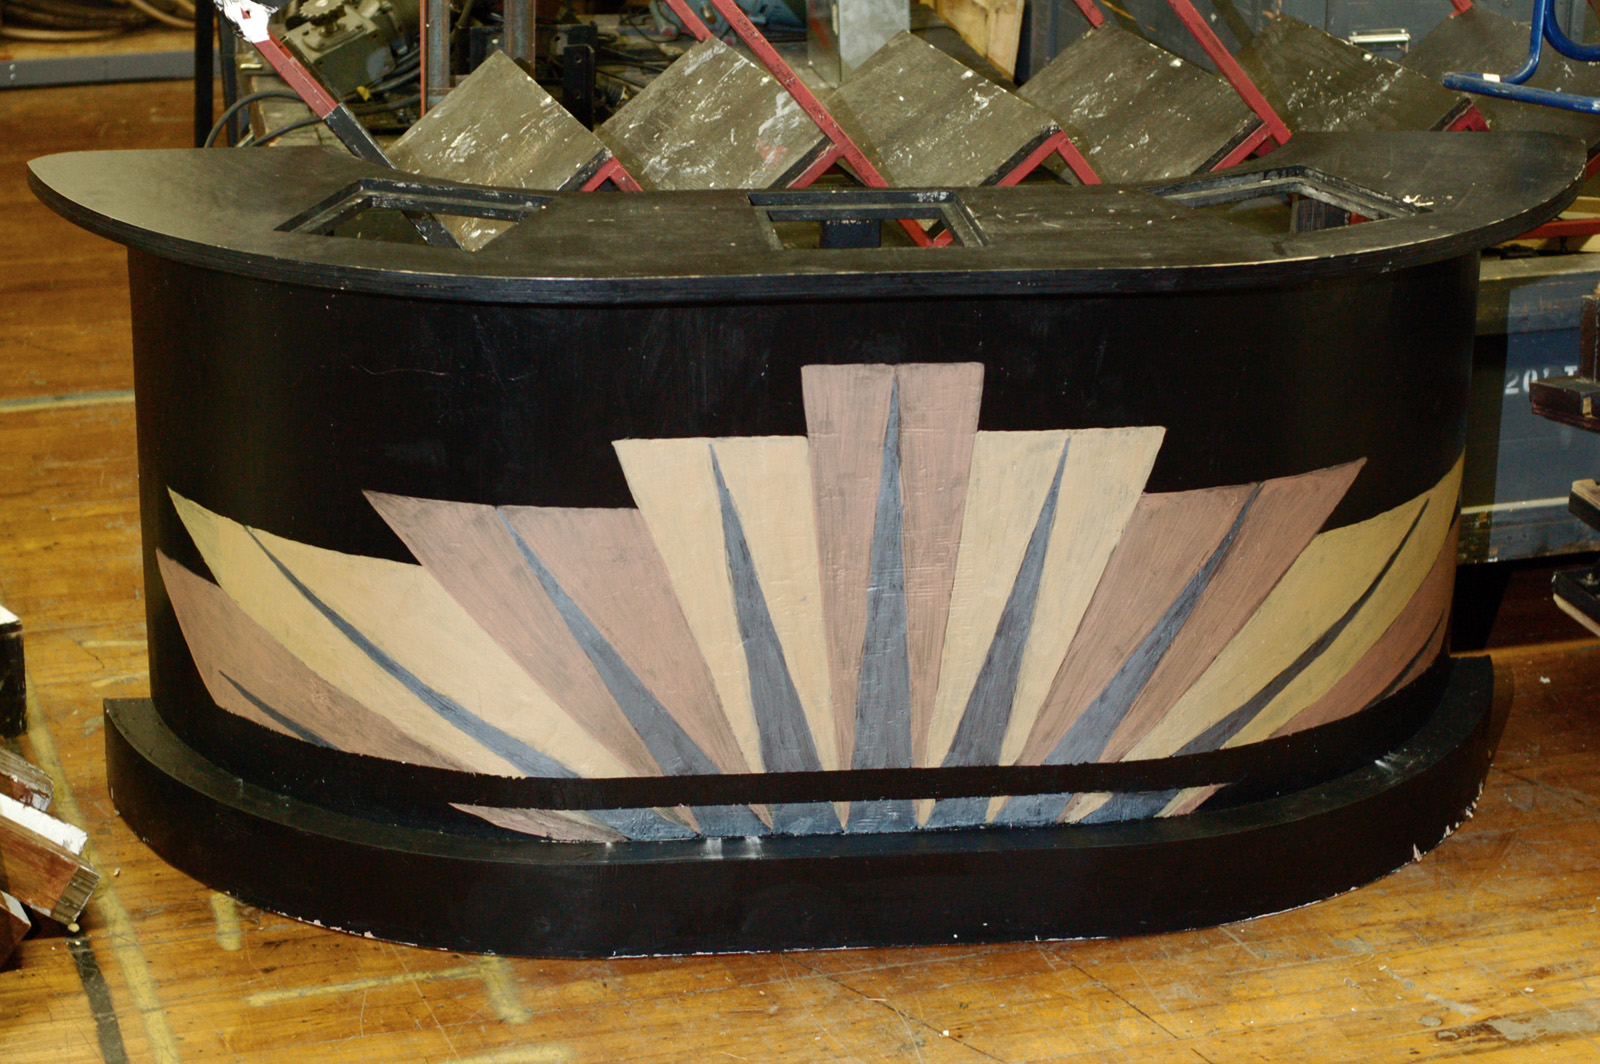
The set for Triad Stage’s And Then There Were None called for a posh, but stark, Art Deco design. One of the key furniture pieces is a liquor cabinet, since each of the ten characters has at least three drinks through the course of the play.

I had no luck sourcing an Art Deco liquor cabinet in this part of the country, so I decided to build it. Having a very distinctly Deco piece on stage would help the other less-distinctly Deco pieces feel at home in the period. Robin Vest (the scenic designer), and I passed around some research images and landed on a piece that had all the right elements but was still achievable with my equipment and time.

Making the cuts
Making the cuts

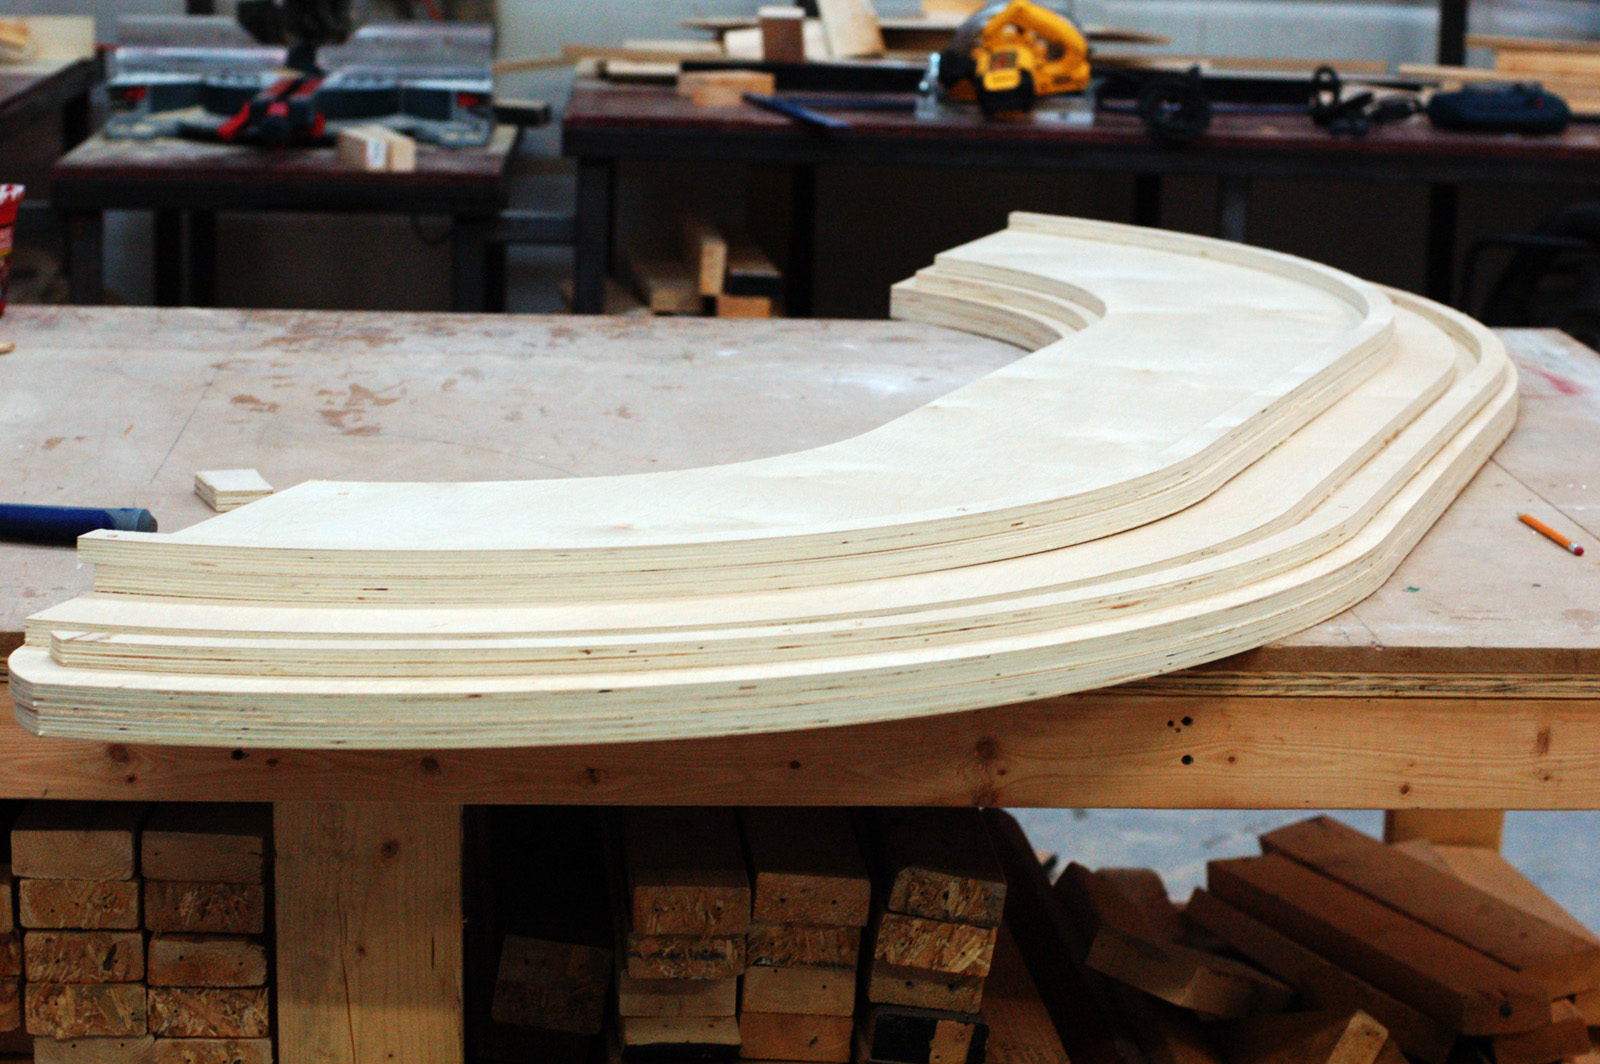
One defining element for this style of furniture is the bold, sweeping curves. These were traditionally made by bending thin sheets of wood and laminating them together to create a curved piece of plywood, then adding a highly-figured veneer on top. That was beyond my budget, but I had previously bent plywood by cutting kerfs, and thought I could do it again. The design of the cabinet was specifically chosen to easily hide the kerf cuts.

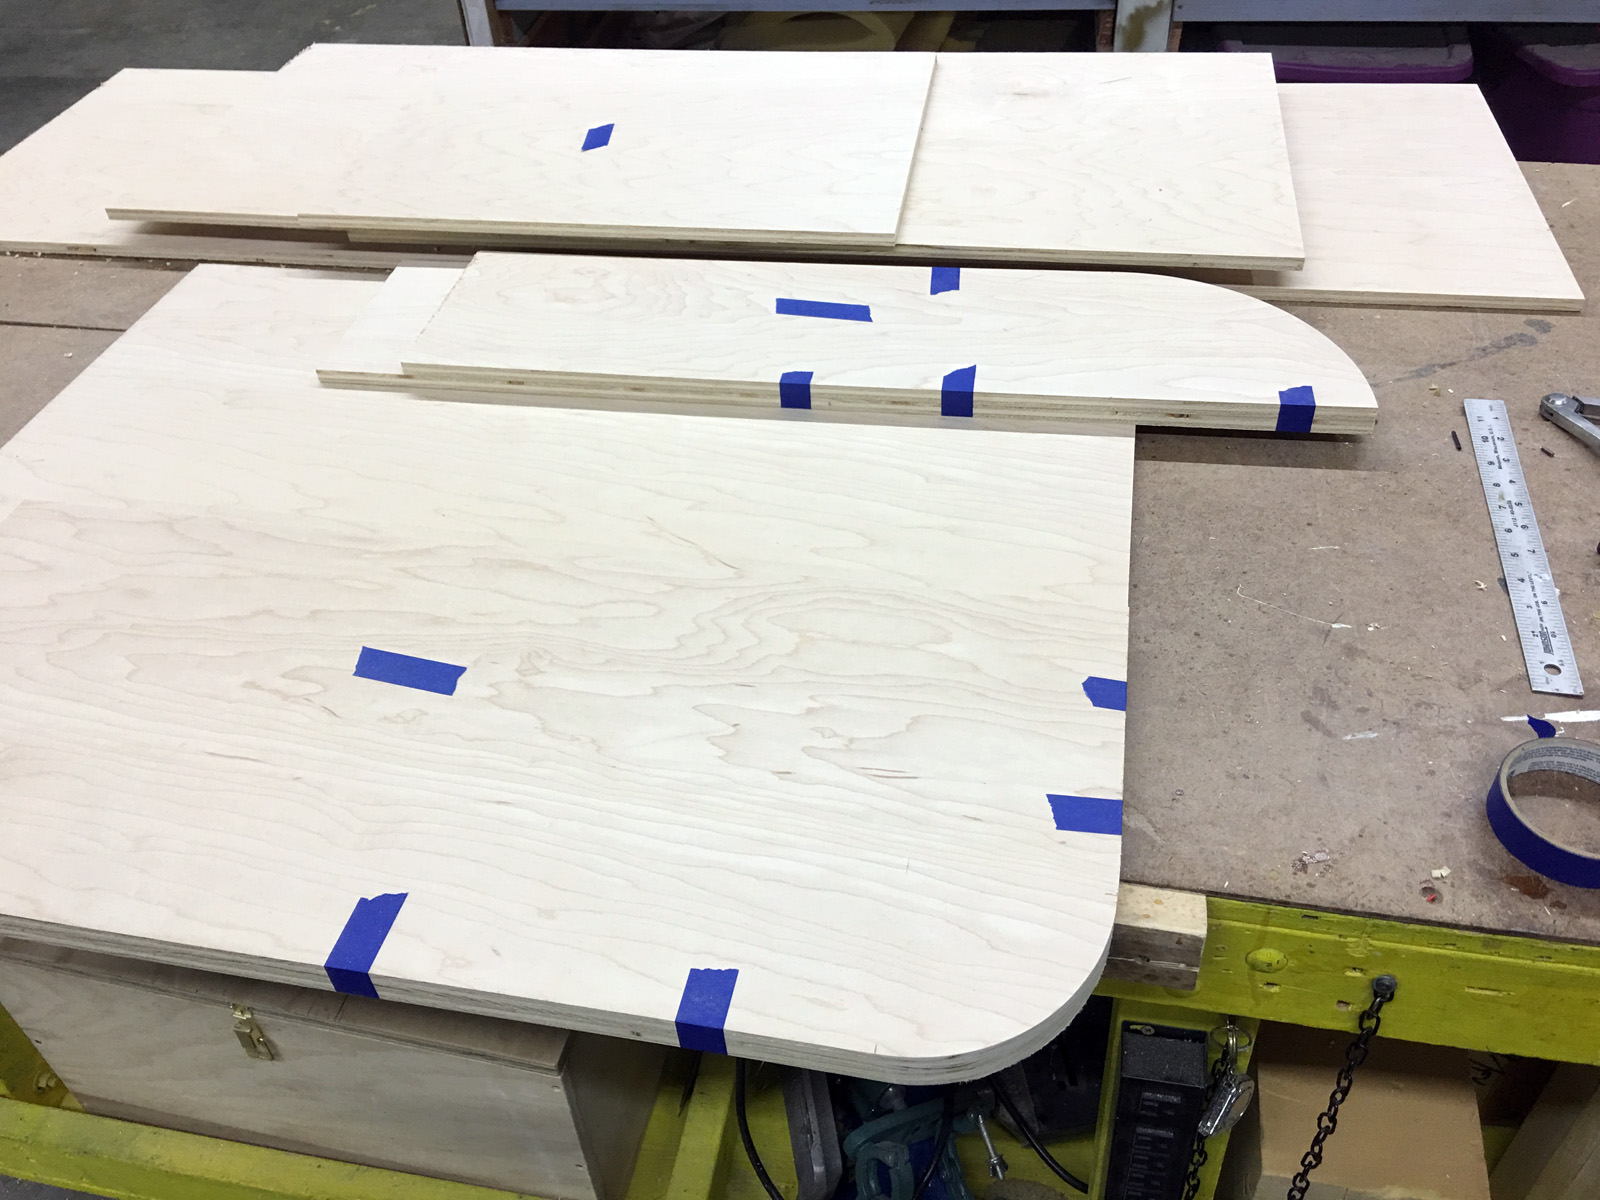
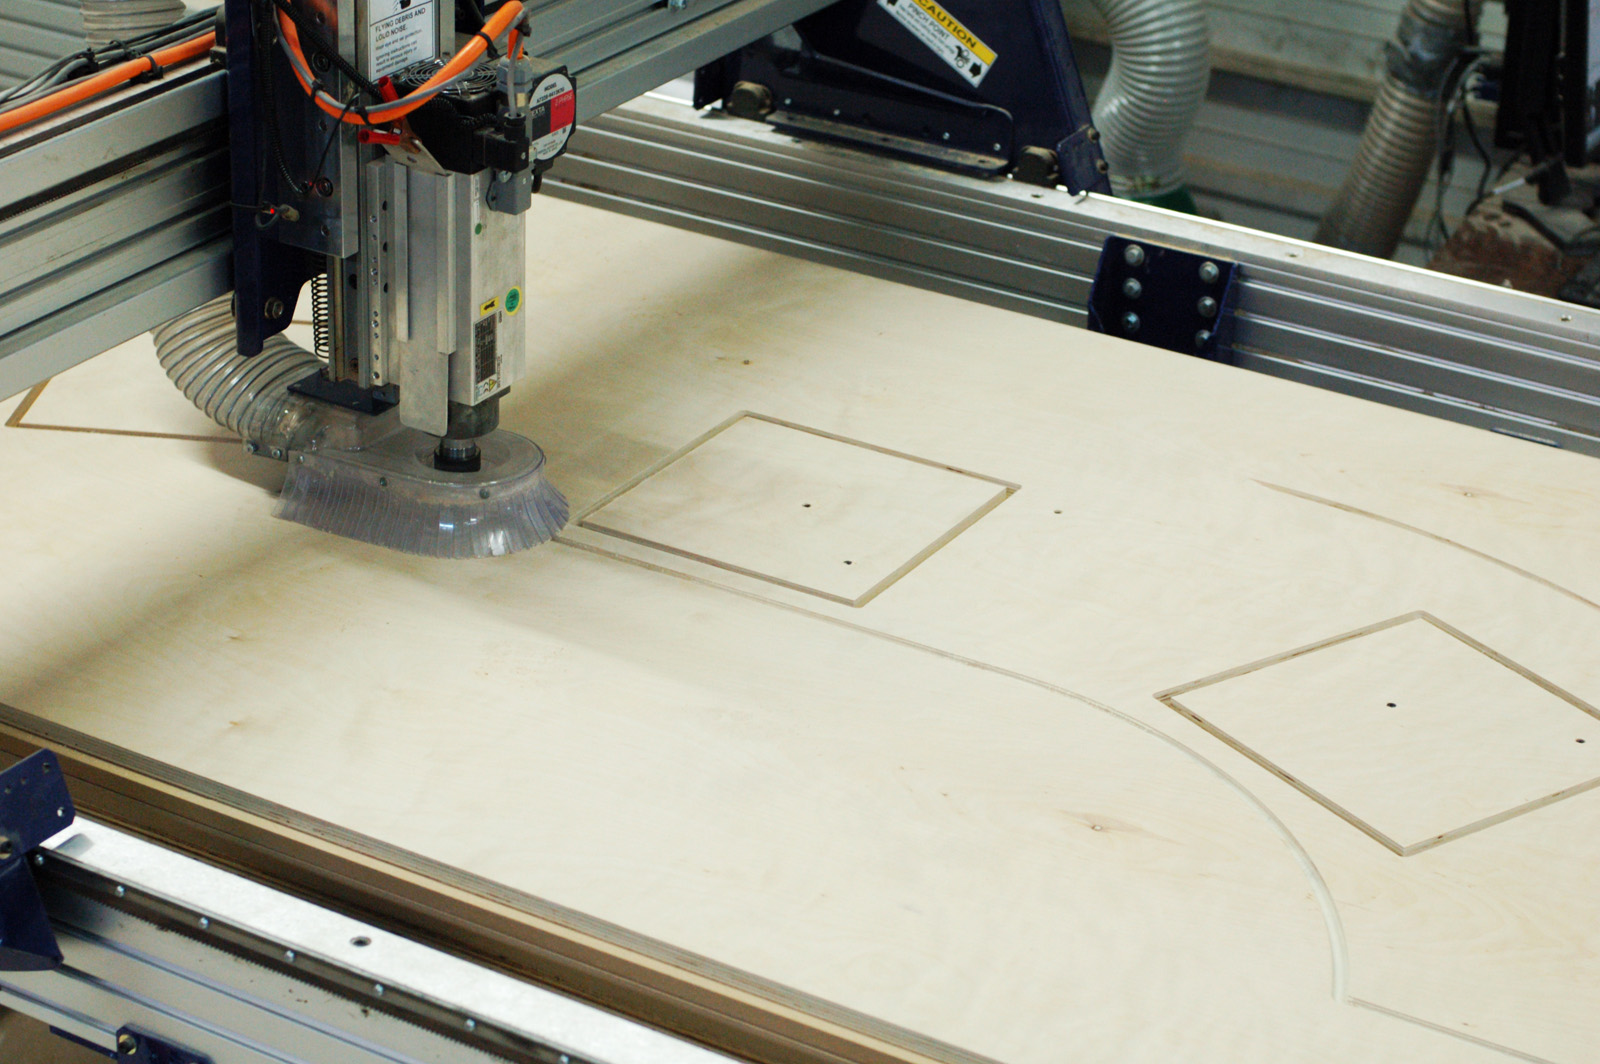
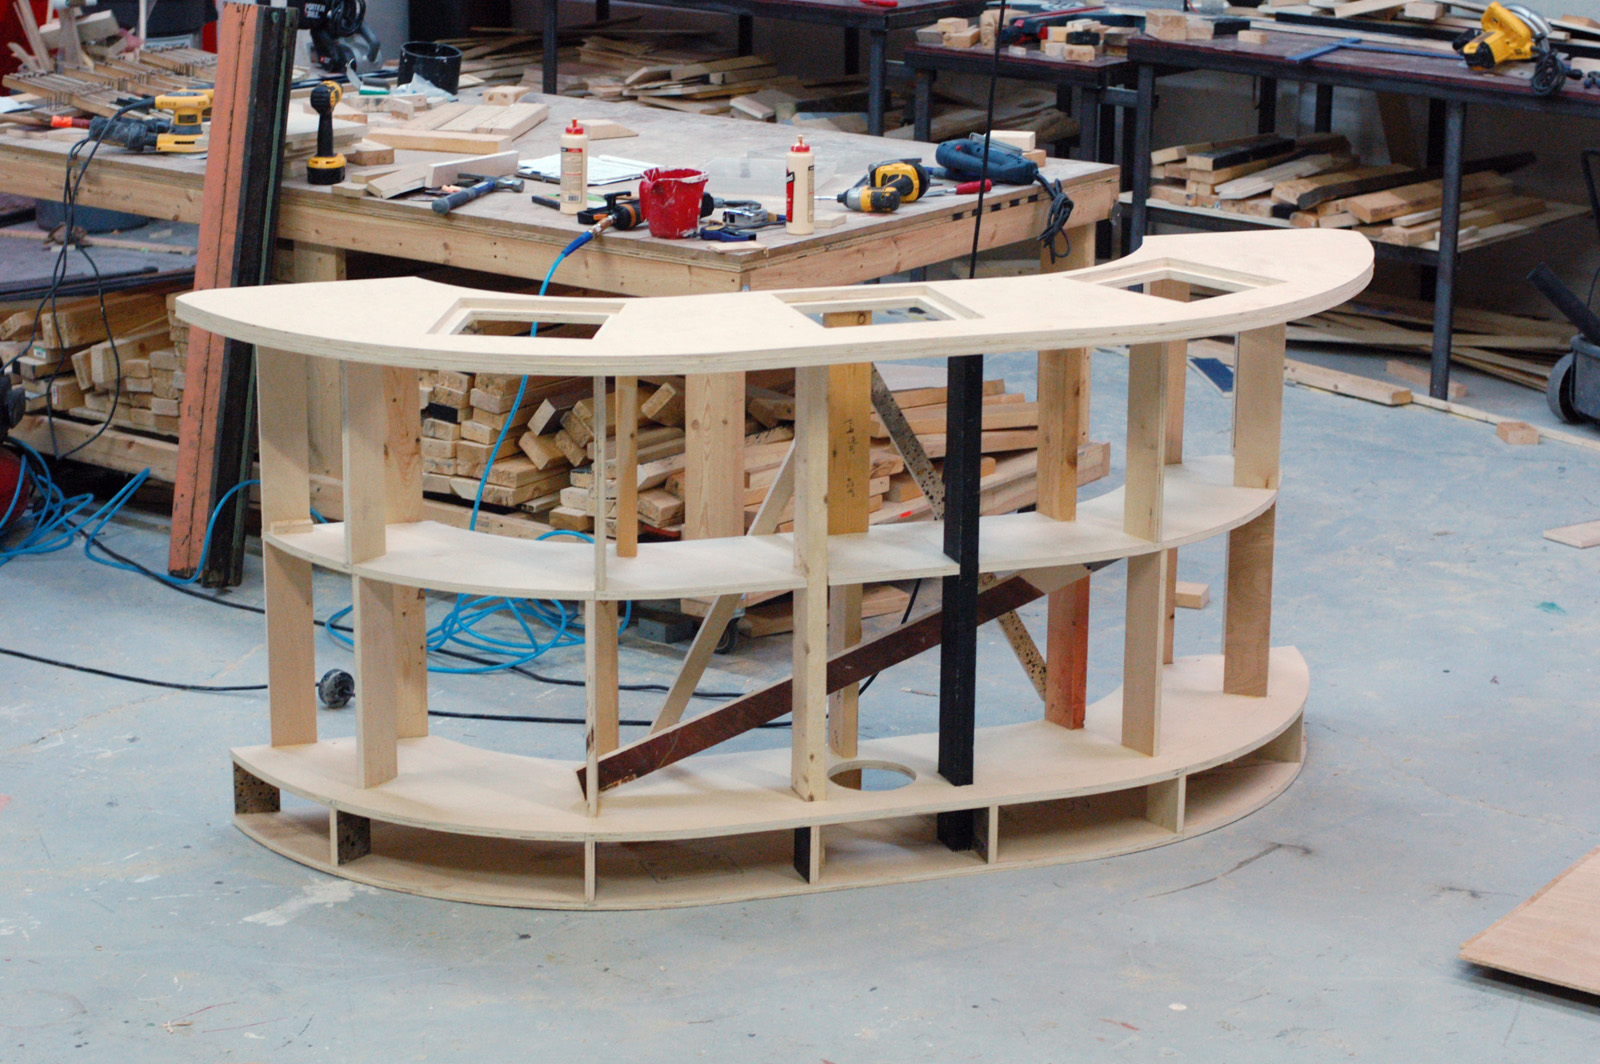
I chose some nice maple plywood from the big box store. The back of the cabinet and the doors would establish the curves, so I taped them together when gang-cutting them on the band saw.

Assembling the carcass

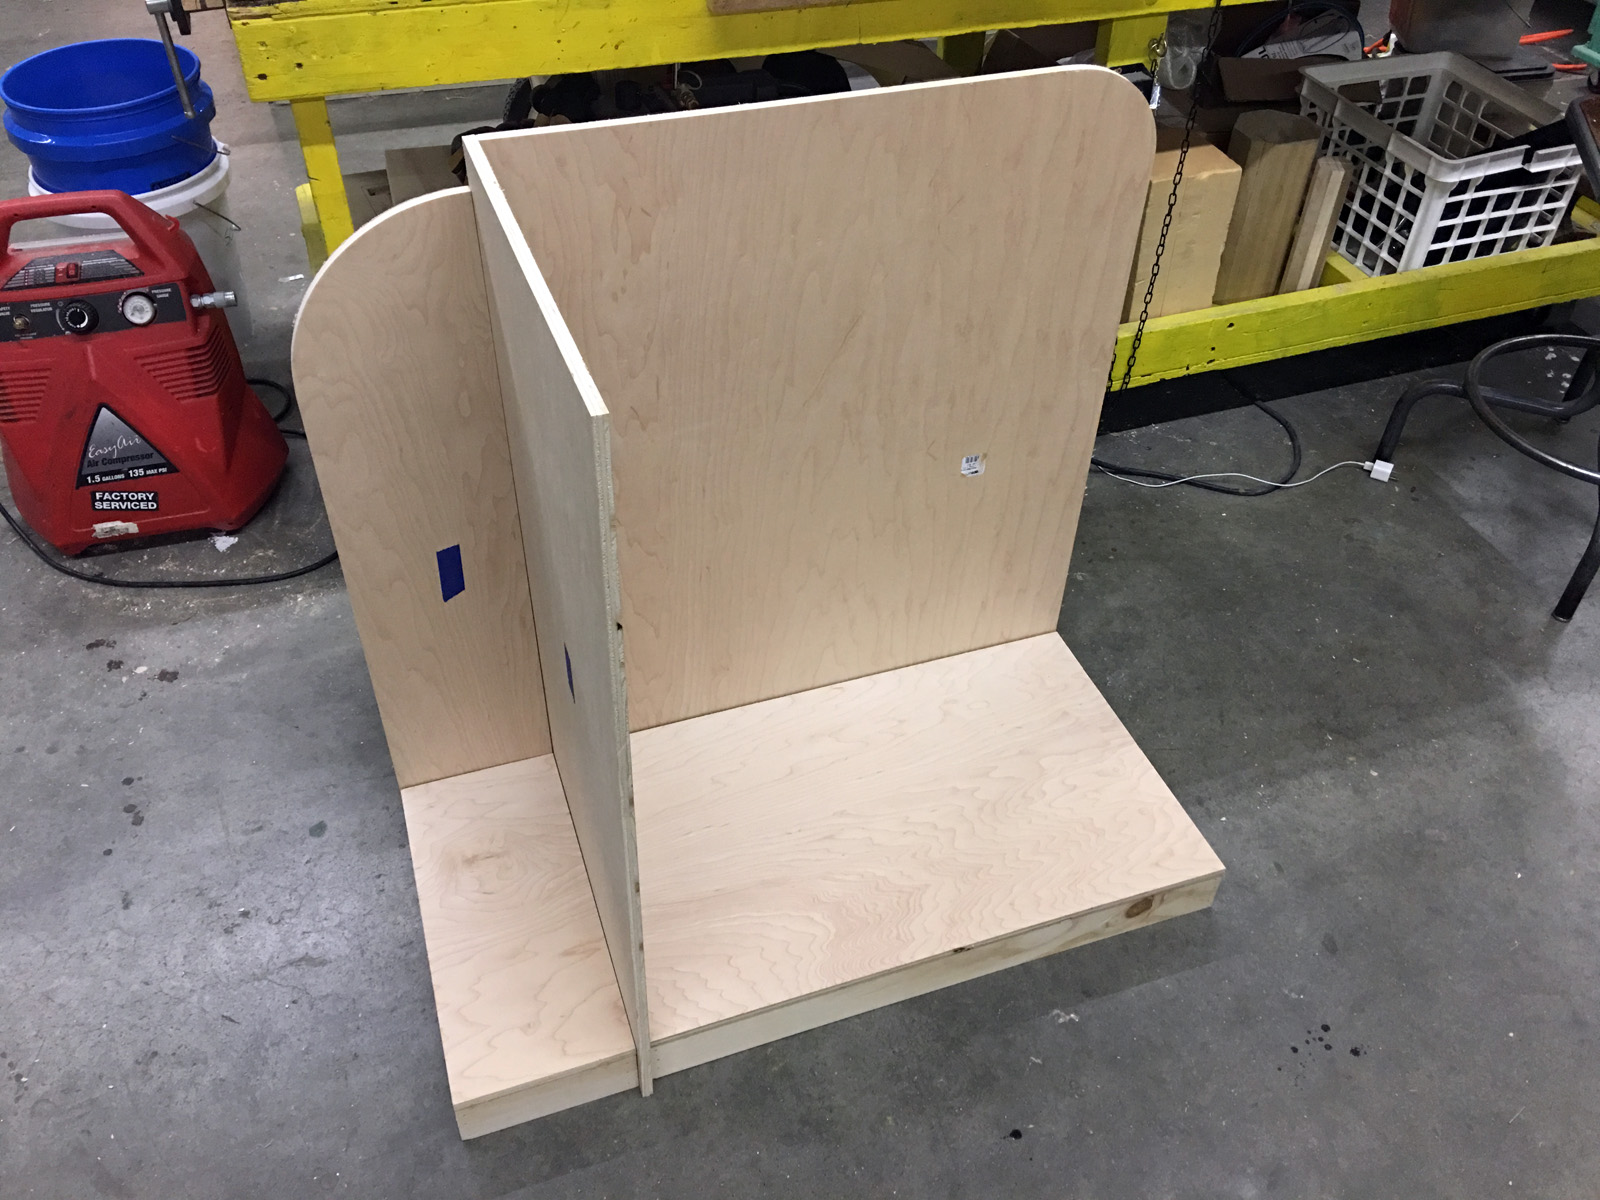
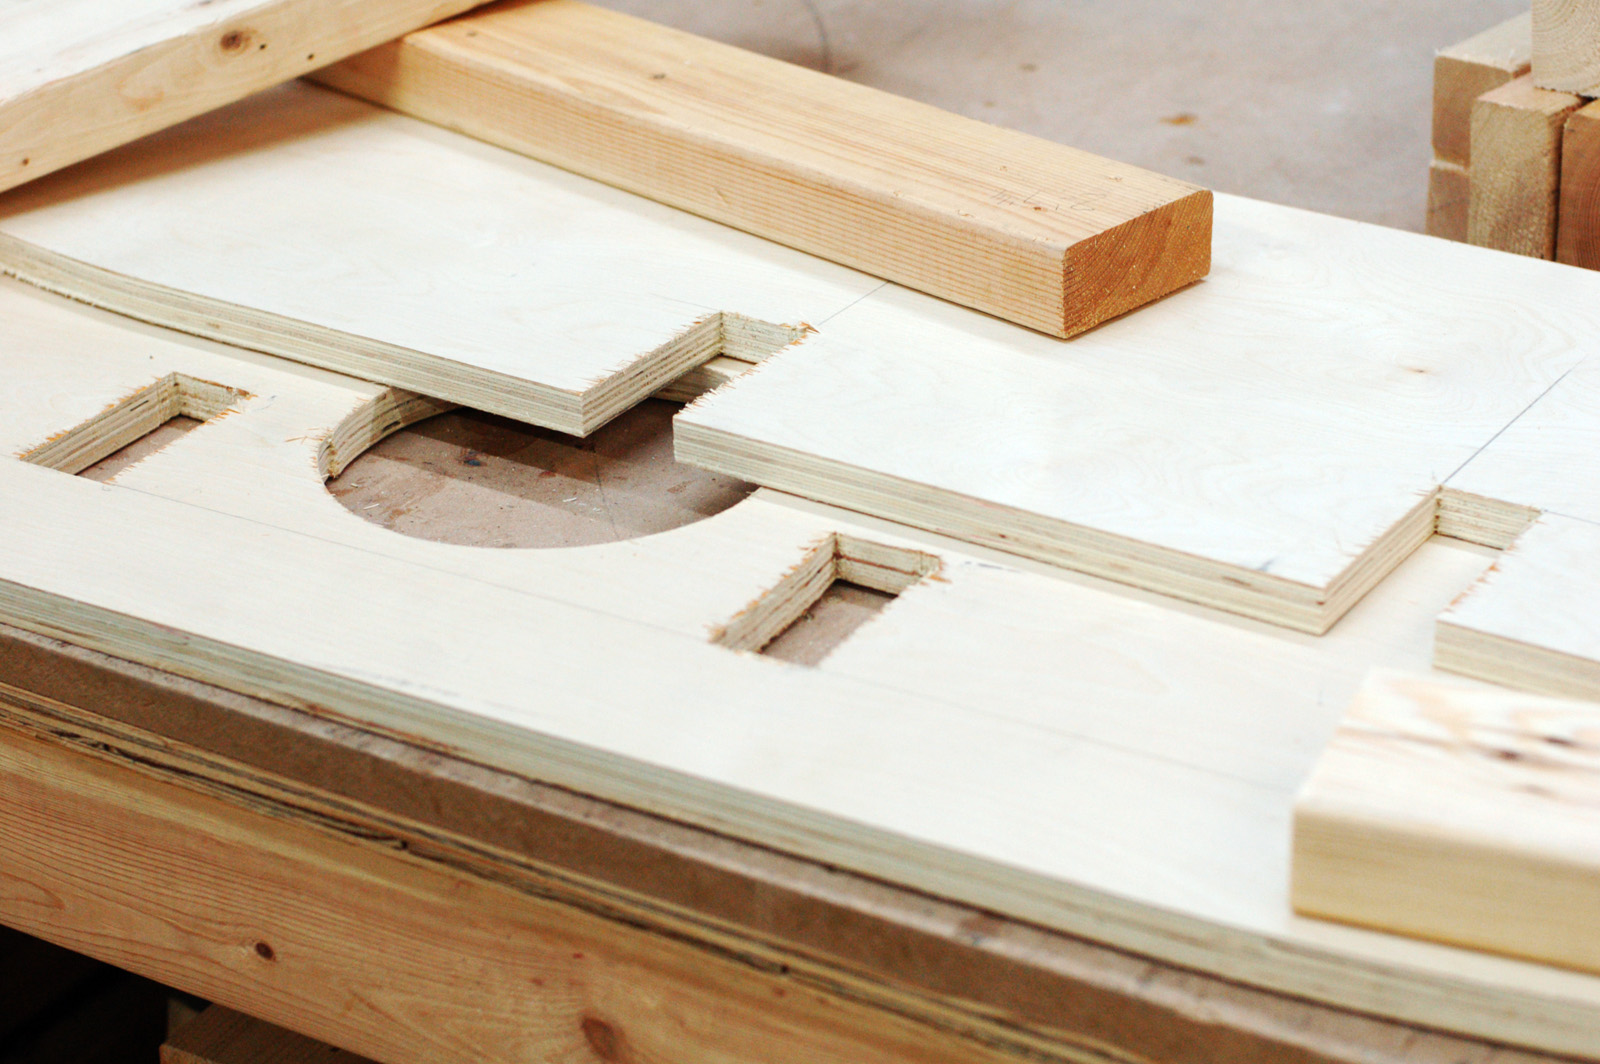
When all the flat, fixed pieces were cut, I assembled it together without glue to make sure everything was measured correctly. The cabinet was basically two parts with a door on each side.

Cutting the kerfs
Cutting the kerfs

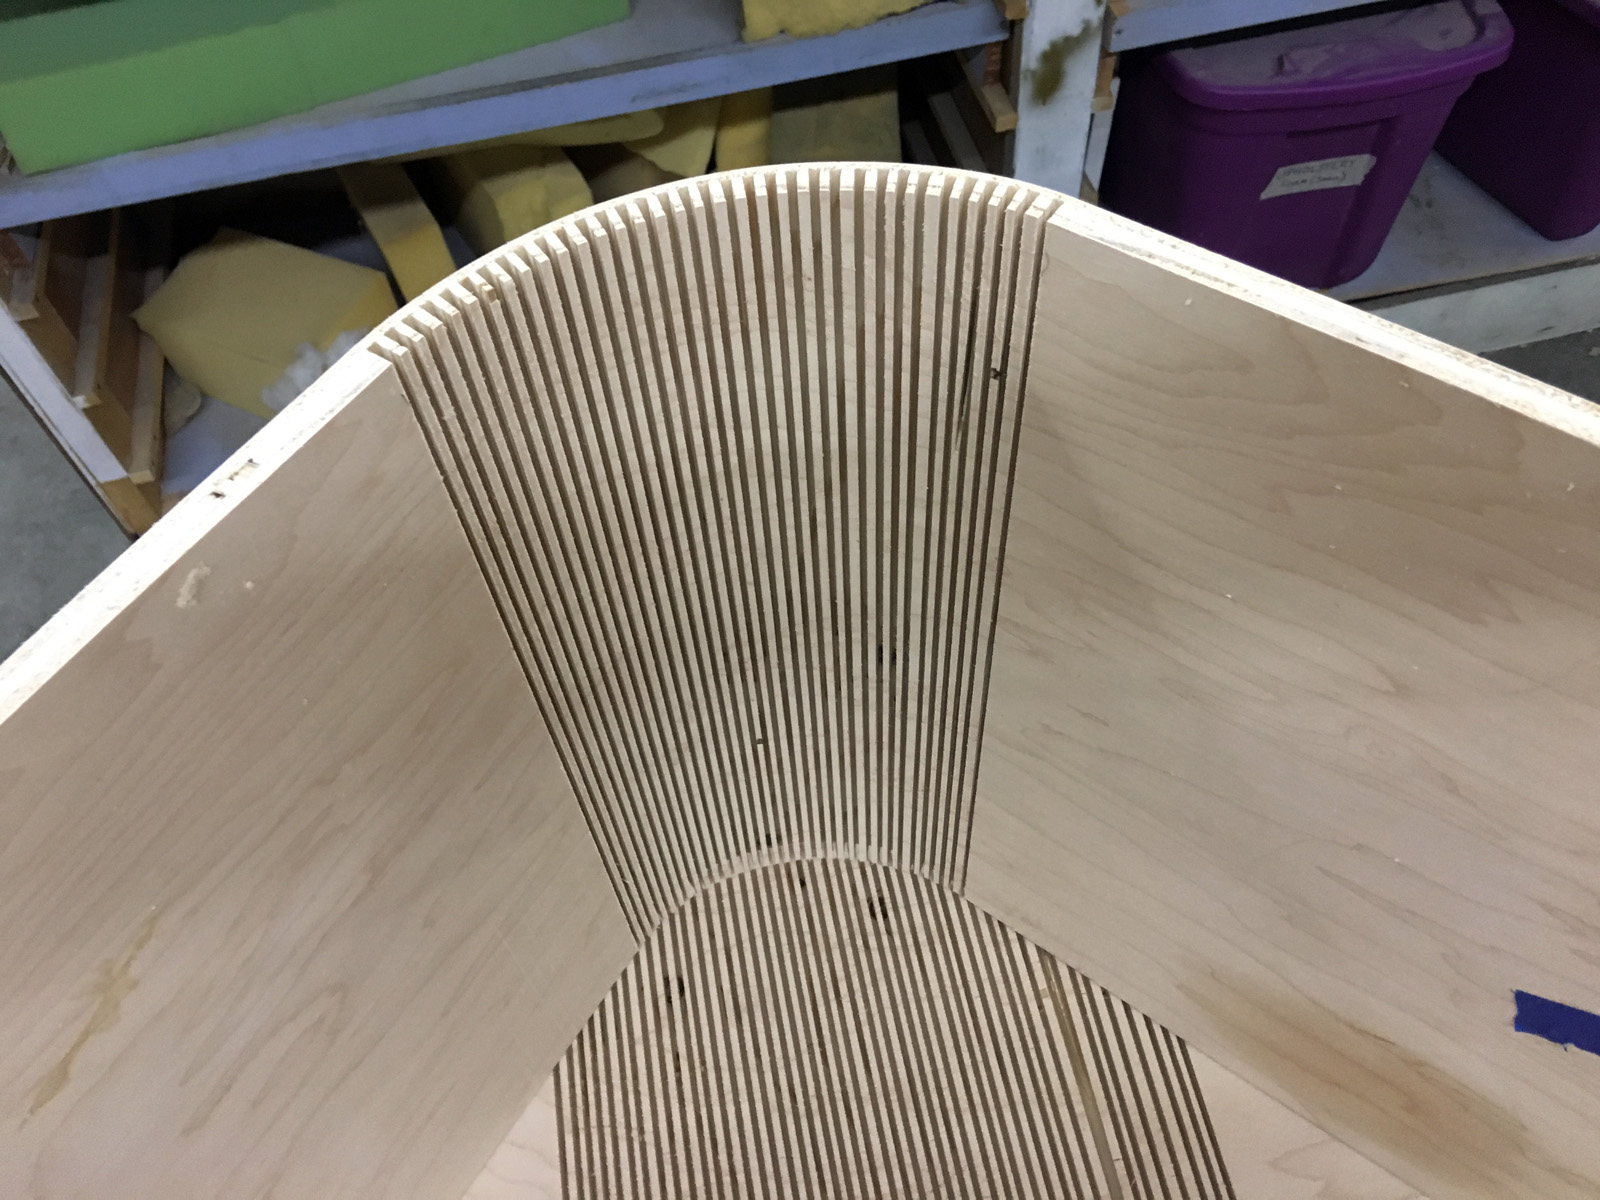
To cut the kerfs, I first measured where the curve would begin and where, roughly, it would end. I left the piece a bit long, intending to trim it to the exact size once the kerfs were all cut. You can never calculate exactly how long a piece should be when you add a curve to it; the material behaves differently than how the math predicts.

I set the blade height on the table saw so it would cut through all but the last layer of ply on my plywood. I used a sled to cross cut the groove through the length of the wood. I had a marking on the table saw so that after each cut, I could slide the wood down to make the next cut, and each cut would be evenly spaced.

I’m sure there is some formula to calculate how far apart each cut should be, but I just used a test piece of wood to make sure I was achieving the curve I needed.

Attaching the curved pieces

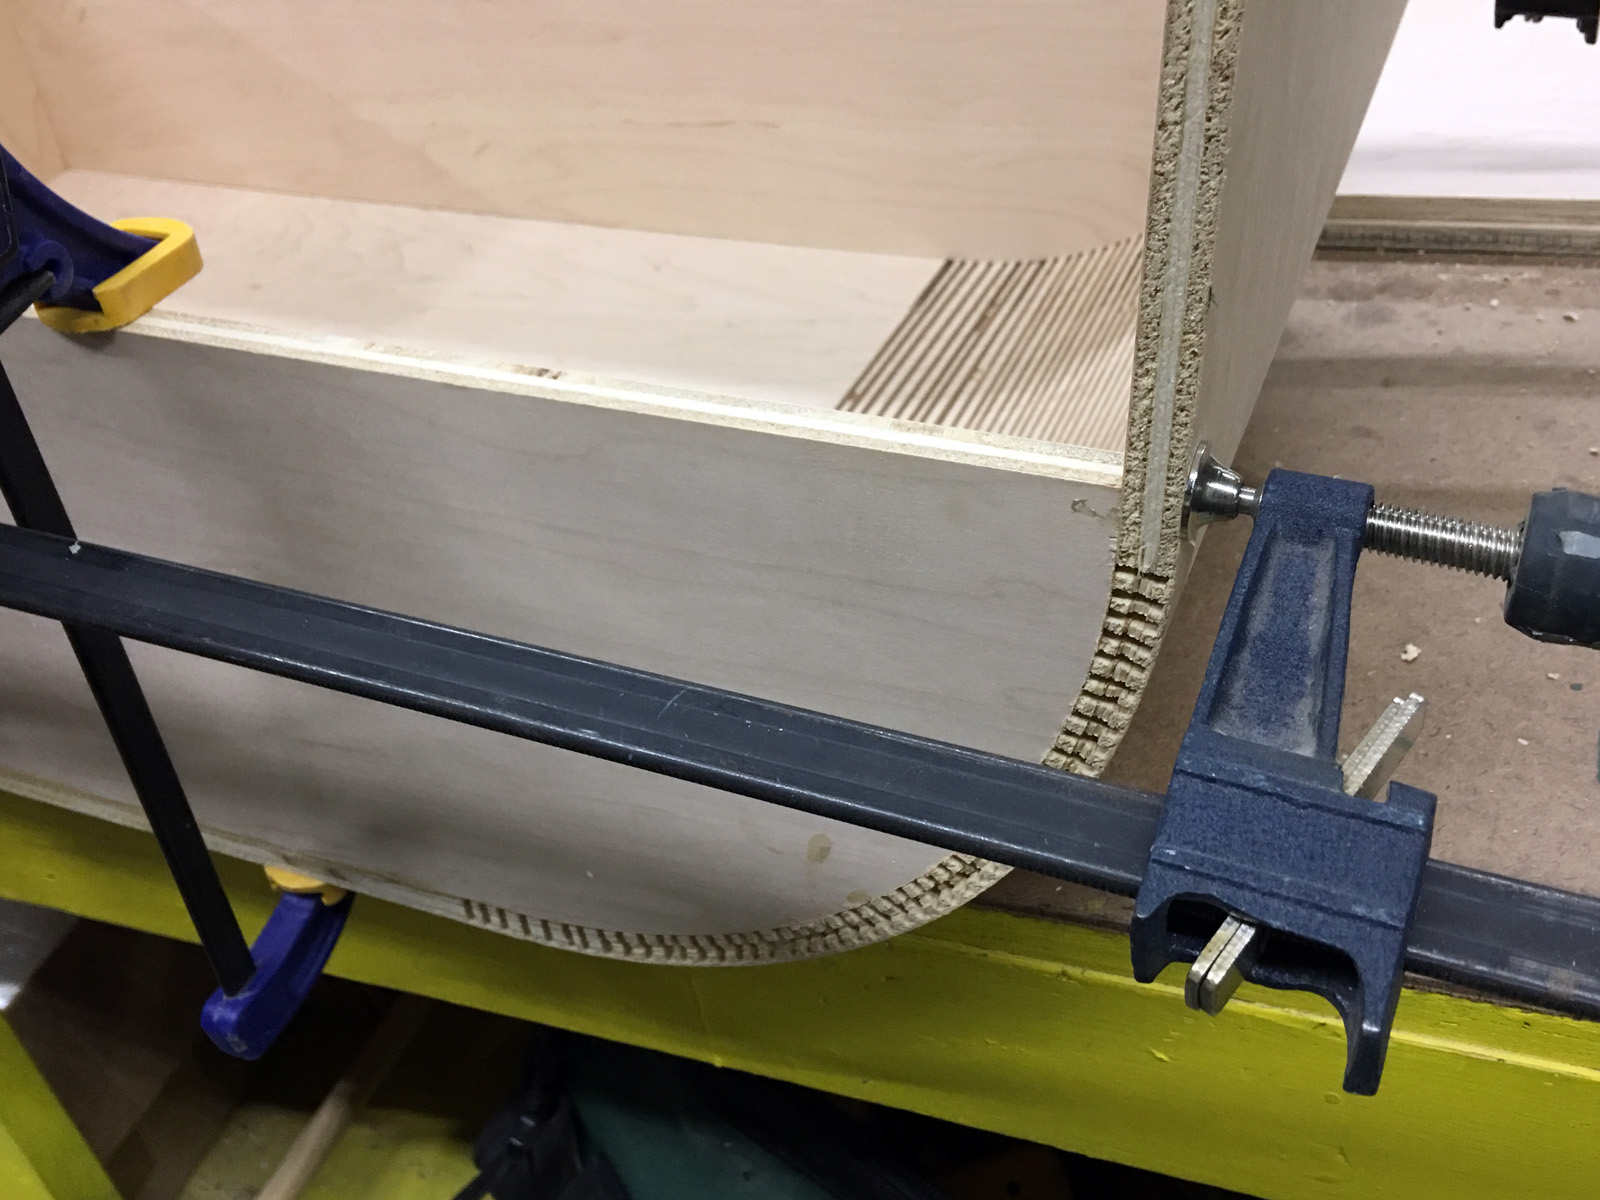
When all the kerfs were cut, I was ready to attach the bent pieces to the frame. They were glued to the back of the cabinet, while the front would be open for the doors. I clamped the doors in place so the plywood was held in the correct shape while the glue dried.

While everything was still clamped, I filled the kerf cuts with a mix of sawdust and wood glue to sort of “lock” it in place. A curved piece of wood like this can move if it is not fully supported.

The cabinet body
The cabinet body

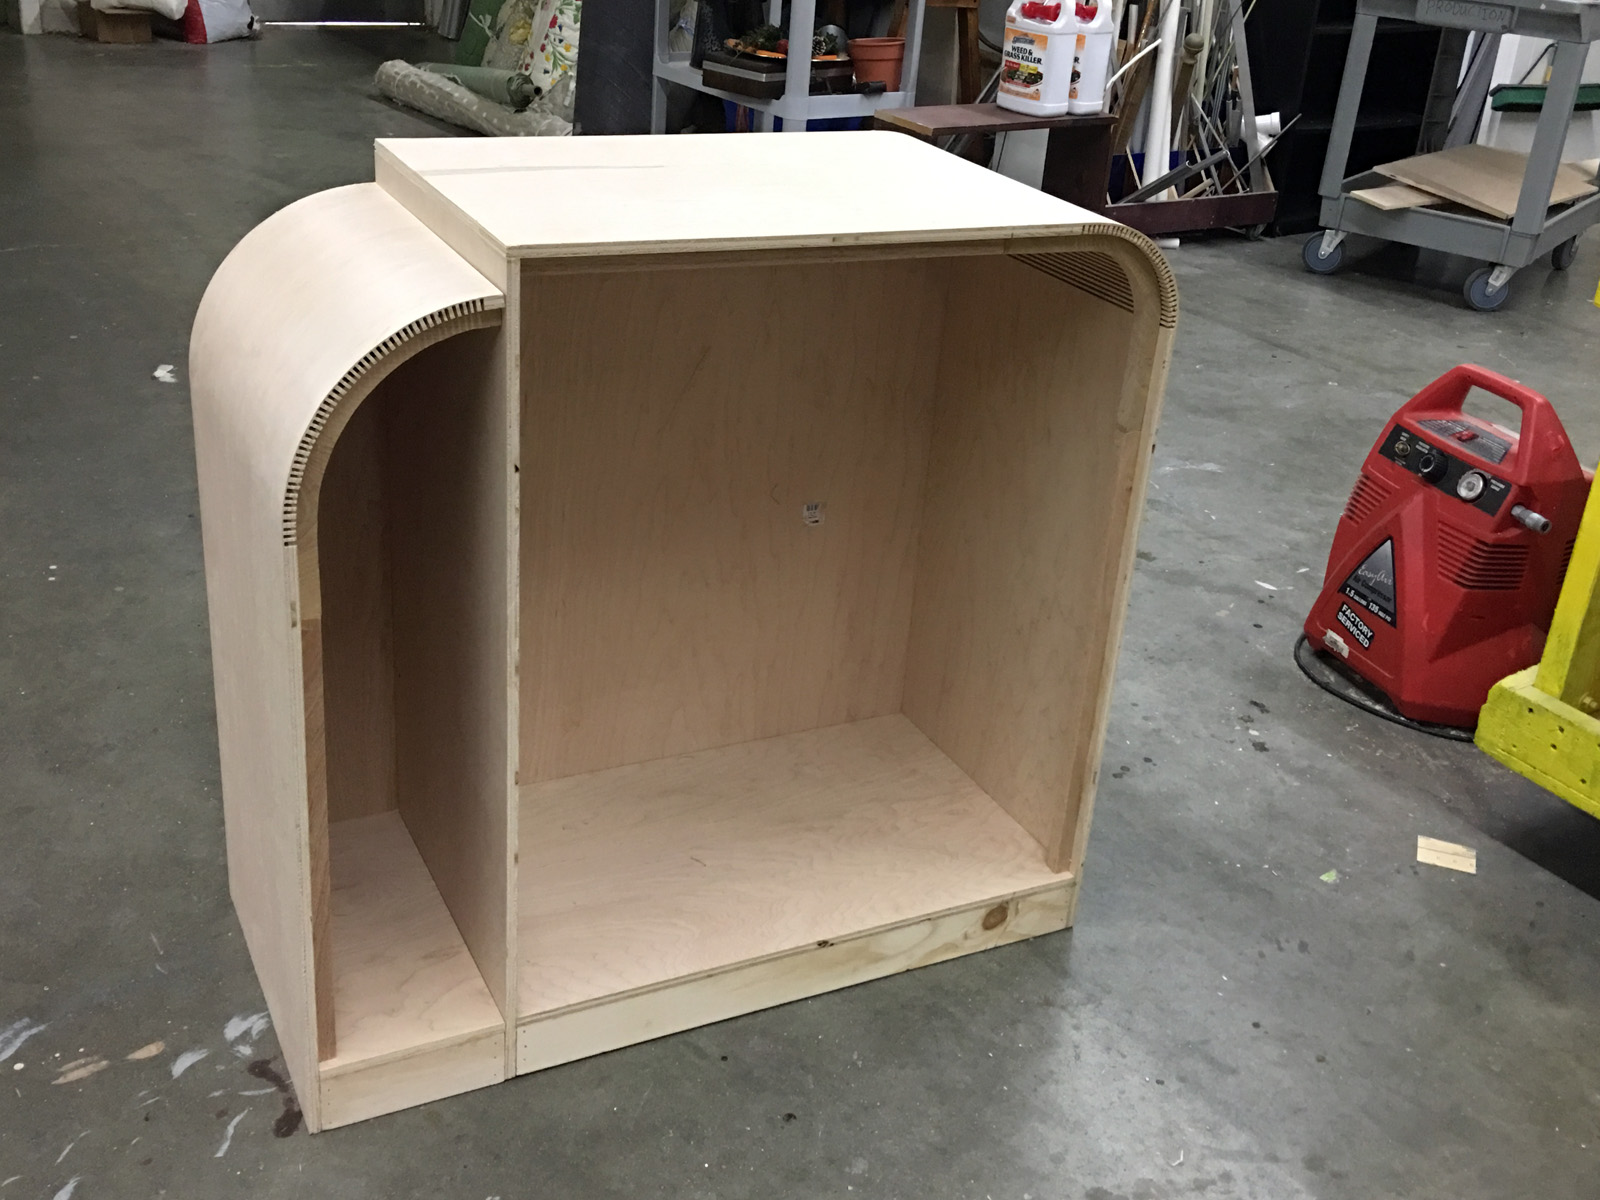
The curved pieces were a bit springy without any front supports, so I added an oak frame. It was inset so the doors would still be flush with the front when mounted; it also helped serve as a door jamb to prevent the doors from swinging inside.

Stained and shellacked

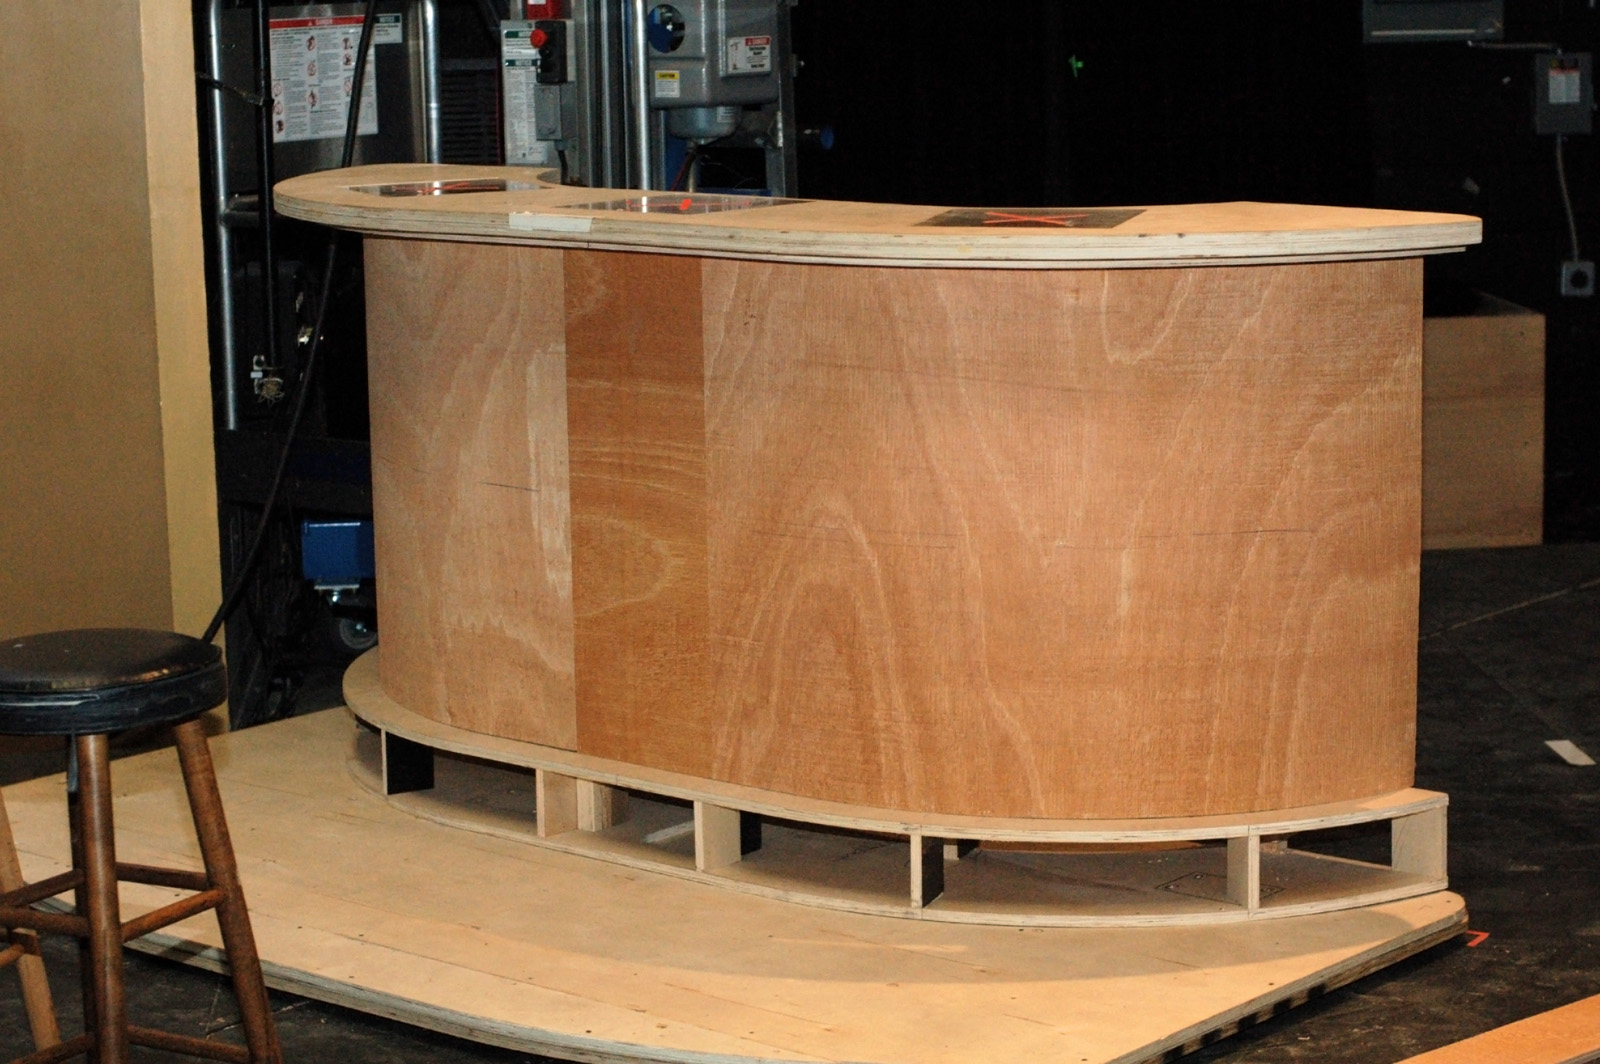
I stained the outside of the cabinet with one coat of English Chestnut stain. All the plywood edges were sanded smooth and filled, then painted black. The curved edges needed a lot of filling to close the gaps from the kerfs. Everything then got two coats of amber shellac, sanded down with some #000 steel wool after each coat.

Painted interior
Painted interior

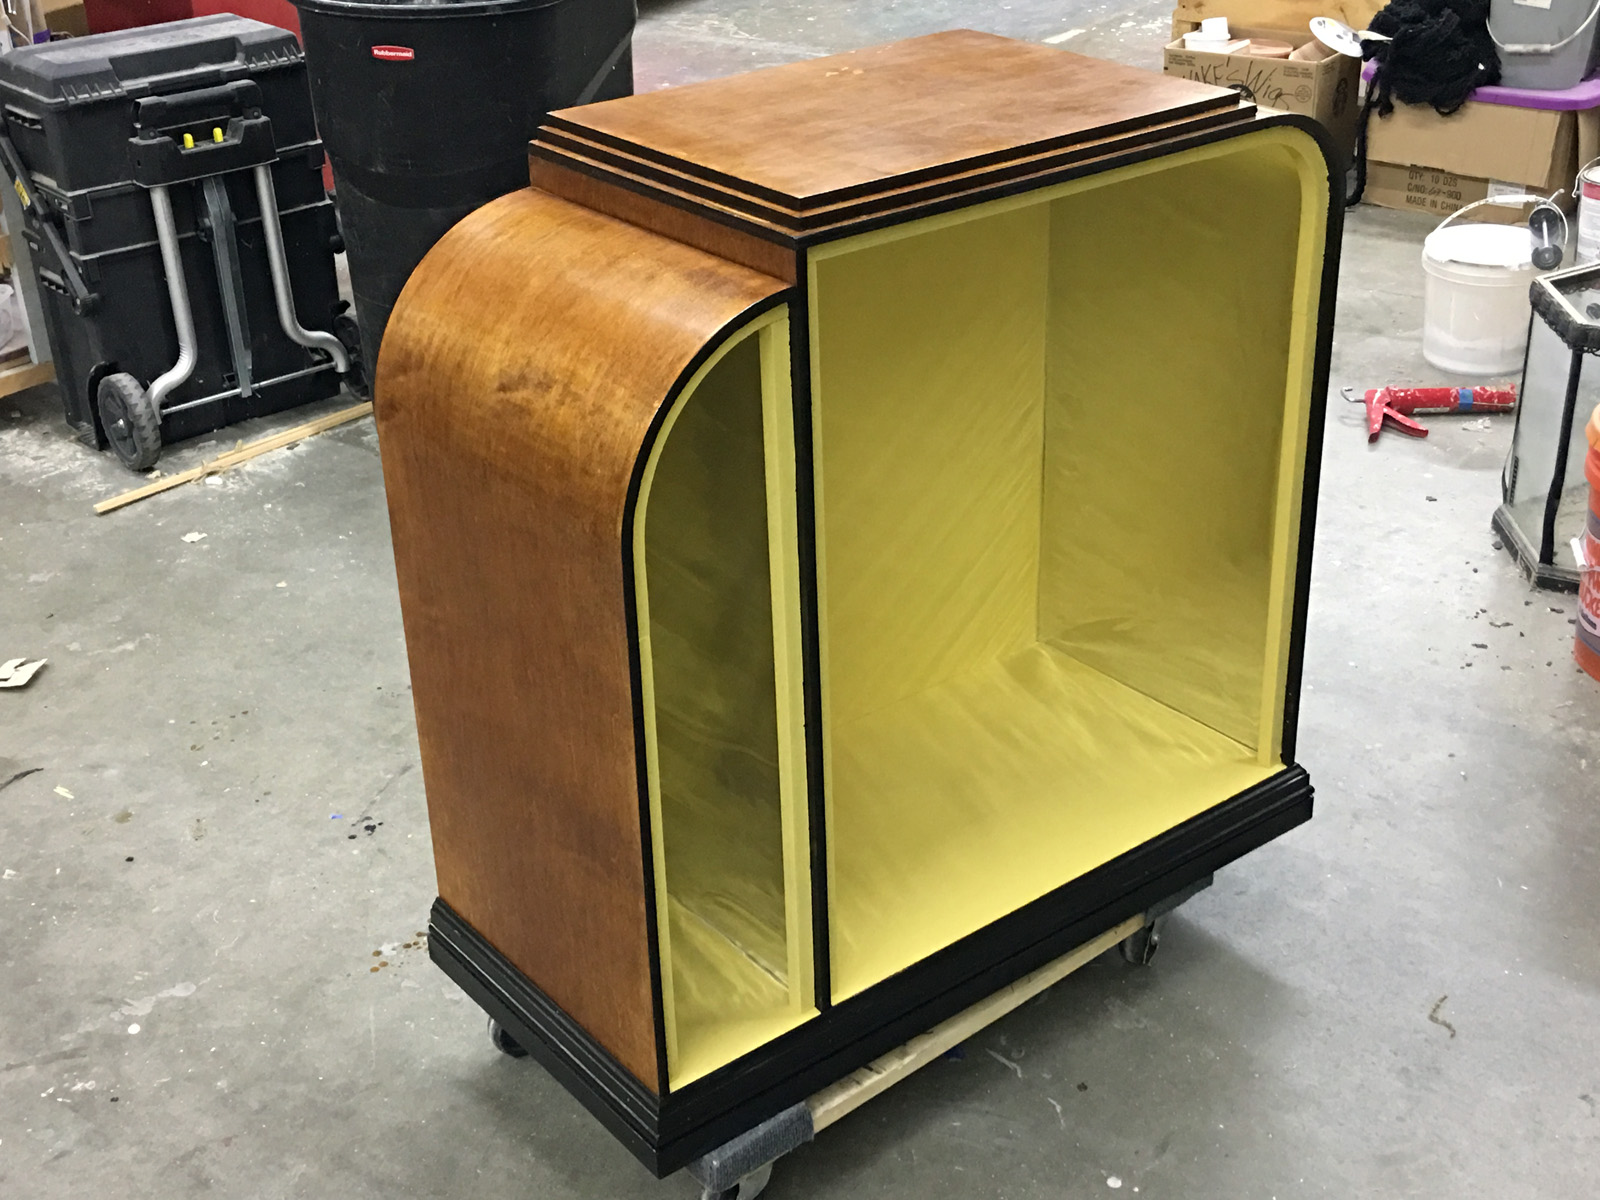
For the sides of the interior, I laid in some thick mirrored mylar I had left over from another project. A lot of liquor cabinets in this style had mirrored interiors. It also allowed me to cover the kerfs on the inside of the curves, which would have taken forever to sand smooth. The remaining interior surfaces were painted with some bright yellow I had gotten for another 1930s-inspired piece.

I also added some molding to the bottom and two more panels to the top to create the stepped design that is another characteristic of this style.

Art Deco Cabinet
Art Deco Cabinet

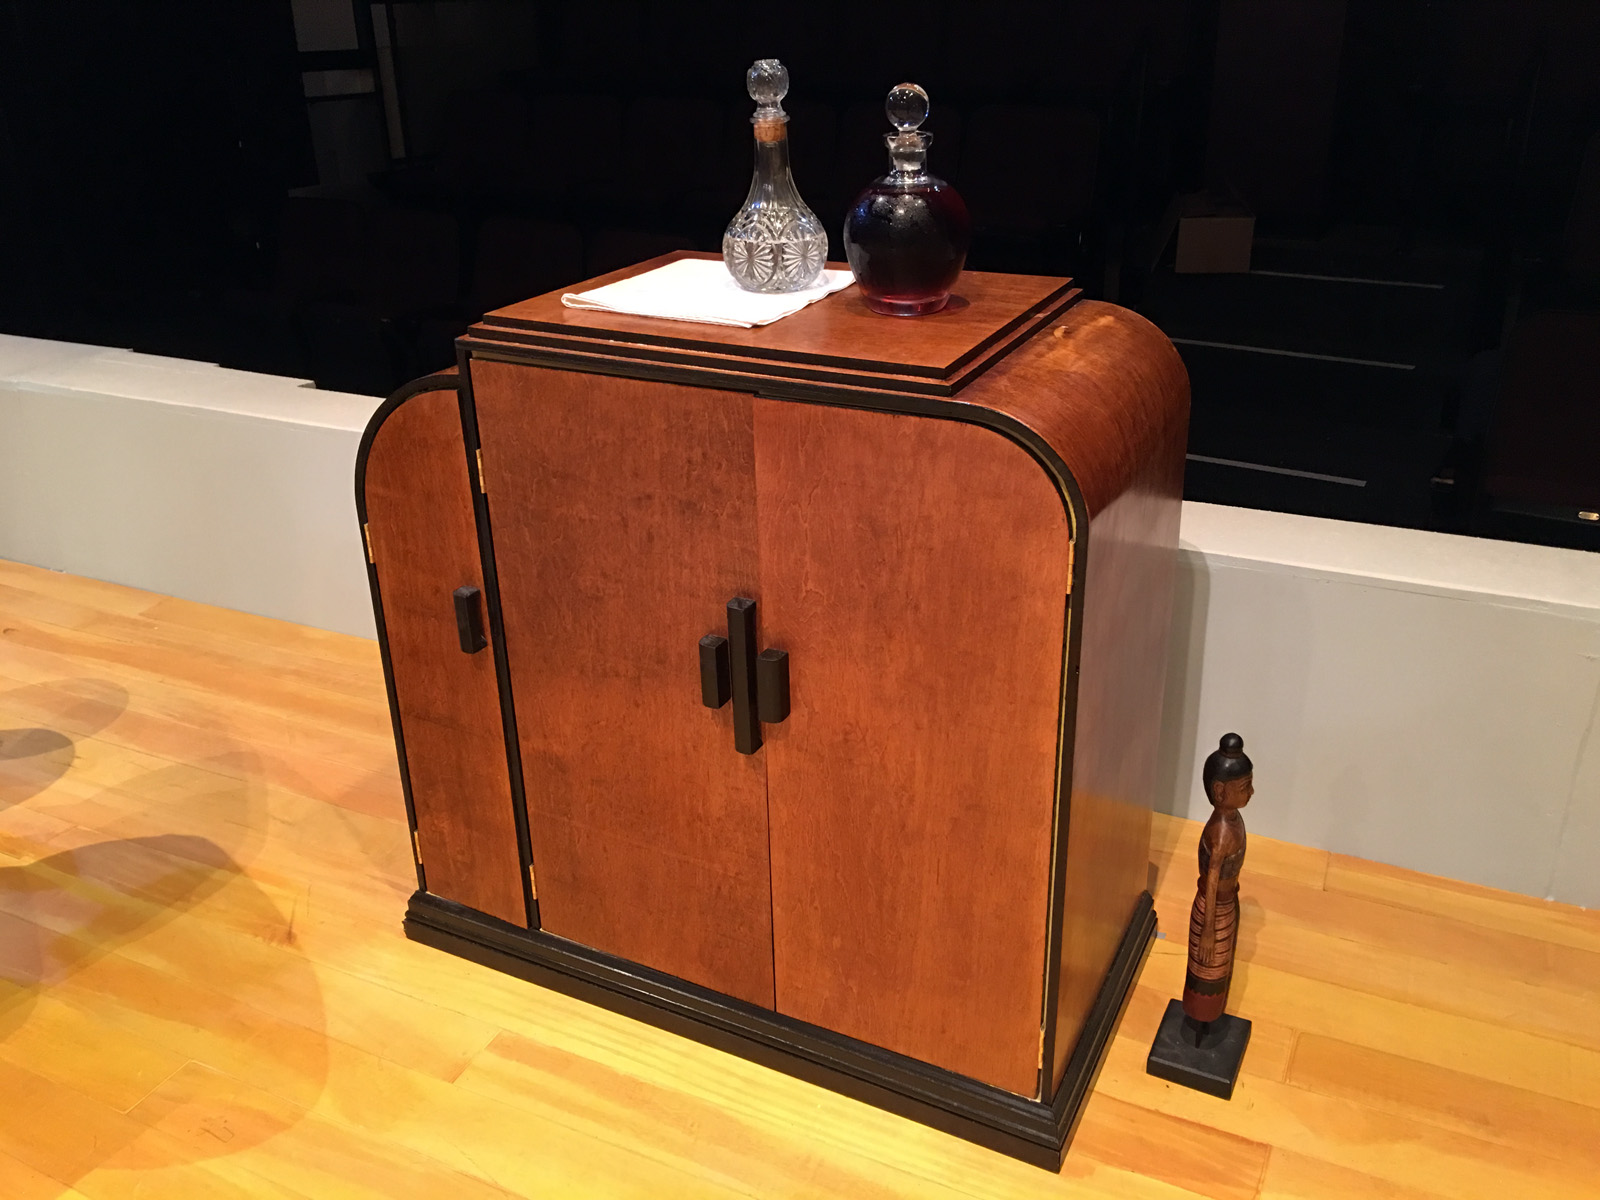
After mounting the doors, the final step was adding the handles. I cut and shaped some basic handles out of a piece of two-by-four. I added them after the doors were mounted because they all needed to line up visually with each other, even if the doors were not precisely straight and even.

Cabinet front view
Cabinet front view

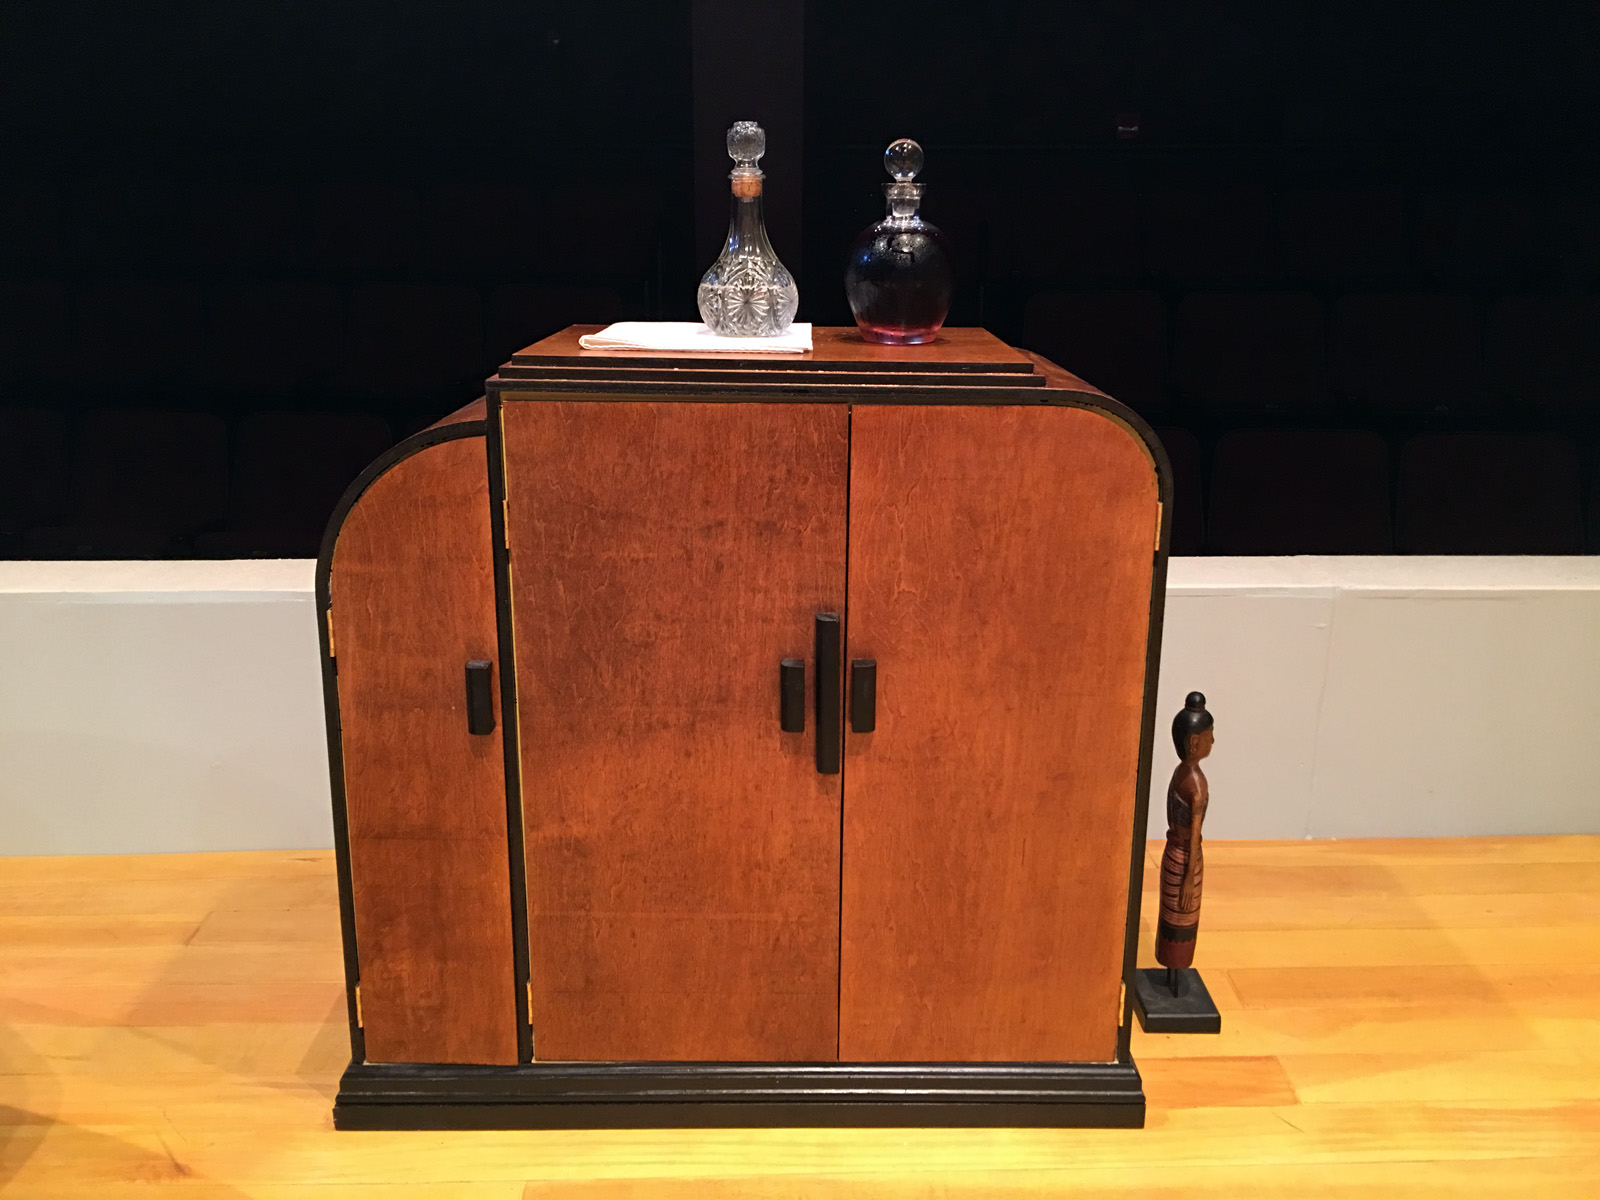
I was very proud of this piece. Even though its flaws and theatrical construction were apparent up close, it looked stunning from only a few feet away.

Building a Bar for “Anna Christie”

The first scene of Anna Christie takes place in a small waterfront bar in the New York City harbor around 1910. For our production at Triad Stage, the design had a large back bar and front bar which could appear for that scene and strike backstage when it ended. The scenic designer drafted the front bar and the back bar for the props shop to build, and away we went. Standing nine and a half feet tall, at almost twelve feet long, the back bar really pushed the limits of the definition of a “prop”.

The back bar was built mostly out of lauan with half-inch plywood framing pieces to make it as light as possible, since it would need to be pushed on and off stage a vista by three crew members.

Beginning construction

It was constructed in three sections to make transportation to the theatre possible. You can see two of the sections below, showing where the piece broke apart. You can also see the beginnings of the wood grain paint treatment which I wrote about last week.

Two sections
Two sections

Most of the vertical surfaces on the top section of this piece were meant to be antique frosted mirrors. I used some silver Mylar as the mirror, laid a section of lace on top, and spray painted through it. This left a lace-like design on the Mylar, and after a few more coats of spray frosting over the whole thing, it looked just like a mirror.

Making the mirror
Making the mirror

The unit was originally on wheels, but when it got to the theatre, the noise it made while moving was deafening. The stage floor consisted entirely of expanded steel panels. We discovered that plastic furniture gliders actually made moving the unit completely silent and fairly effortless. They also ensured the unit remained stationary when no one was touching it.

Back bar
Back bar

With some practical sconces, some lace runners and doilies, and a whole bunch of vintage liquor bottles, the piece was complete. Below is a photo of the whole setup, which includes the front bar that our prop shop also constructed.

Full bar
Full bar

You can also see a side-by-side comparison of the final piece with a research image. Obviously the proportions and specifics were changed in the design, but the inspiration is fairly clear.

Research vs final piece

A Wild Bar for a Wild Party

It is a little over a week since Elon University’s Wild Party closed, so I thought I would share some of the props I built while working as the props master on it. First is the sleek Art Deco bar. This production featured a lot of dancing and movement (in fact, the show was more of a dance piece with singing than a traditional musical) and the bar was key in a lot of the dancing. Actors jumped up and down off of it constantly and danced on top of it. Needless to say, it had to be sturdy.

Wild Party
Wild Party

The other hurdle was that I only had a bout a day to build the bar to a point that they could use it in rehearsal; it did not have to be finished, just usable. The bar had a sort of boomerang or banana shape to it. I knew it would take awhile to layout the shape, not to mention all the pieces I would need to cut that followed the shape but were inset or offset by varying amounts. Since the scenic designer, Natalie Taylor Hart, already had the footprint of the bar drafted in CAD, we decided to CNC these pieces and save some time.

CNC the top
CNC the top

The top was two layers of plywood. We were putting lights in the bar that would shine upward, so the top also had squares to hold three pieces of 3/4″ plexiglass; the squares on the top piece were large enough to fit the plexiglass, while the squares on the bottom piece were a touch smaller to create a lip for the plexiglass to sit on.

Pile of CNC pieces
Pile of CNC pieces

I also cut the footrest, a piece for a shelf in the middle, and some formers to nail the wiggle wood to. This pile of pieces would have taken awhile to draw and cut by hand, but with CAD, Natalie just had to copy the same shape over and over again, insetting the front curve by whatever measurement I gave. With this pile of pieces, I just had to cut a bunch of formers and uprights to connect them all together.

Notches and holes
Notches and holes

I decided I wanted some supports to run unbroken from the top to the bottom of the bar for strength, which meant I had to cut some notches and holes in the plywood that they could run through. If I had more time to figure the whole thing out ahead of time, I would have drawn these into the CAD. Since the pieces were already cut, I needed to measure and cut them by hand. See, even with fancy fabrication machines, you still need a solid grasp of traditional tools to build things.


Two levels complete
Two levels complete

I built the bar up one level at a time, marking carefully to keep the whole thing square and straight. I positioned the supports so they were nearly above the support below them; they were offset just a bit so I would be able to drive a nail in.

Bar skeleton
Bar skeleton

The supports along the front of the bar did double duty as formers, providing a nailing surface for the wiggle wood I would add later. I tried to keep the back as open as possible so it could be used as shelving to store all the props; the set was fairly open and skeletal, so the bar served as a place for a lot of the hand props to appear and disappear. The diagonal braces in the photograph above are just to keep the bar sturdy as they use it in rehearsal. Once the wiggle wood was added, I removed them, because the wiggle wood acted as one large piece of diagonal bracing.

Wiggle Wood
Wiggle Wood

I finished the bar onstage in between rehearsals. The curve was longer than eight feet, so I could not cover it with just one piece of wiggle wood. The center is relatively flat, so I placed a small piece directly in the center; I have found it easier to fill and sand seams between wiggle wood when they are on flat areas. The footrest also got a small strip of wiggle wood after the bar was secured to the wagon underneath it. All the faces got a thin coat of joint compound and a light sanding, and then it was on to painting.

Wild Party Bar
Wild Party Bar

You can see the bar is a bit rough around the edges in the photograph above since I did not have time to take a picture until after strike. The Art Deco design painted on the front was a great touch added by Natalie and her crew. As she also pointed out, despite all the climbing and dancing done on this bar, she never saw it sag or wobble.