Tag Archives: featured

Foam Cannon Barrels

Last week, I showed off some giant champagne bottles I made, and mentioned that they would act as the barrels of some cannons I was also building at the Santa Fe Opera. Today, I will show you the actual cannon barrels I made. We needed four cannons, so that meant four barrels.

Bandsaw Cutting Jig
Bandsaw Cutting Jig

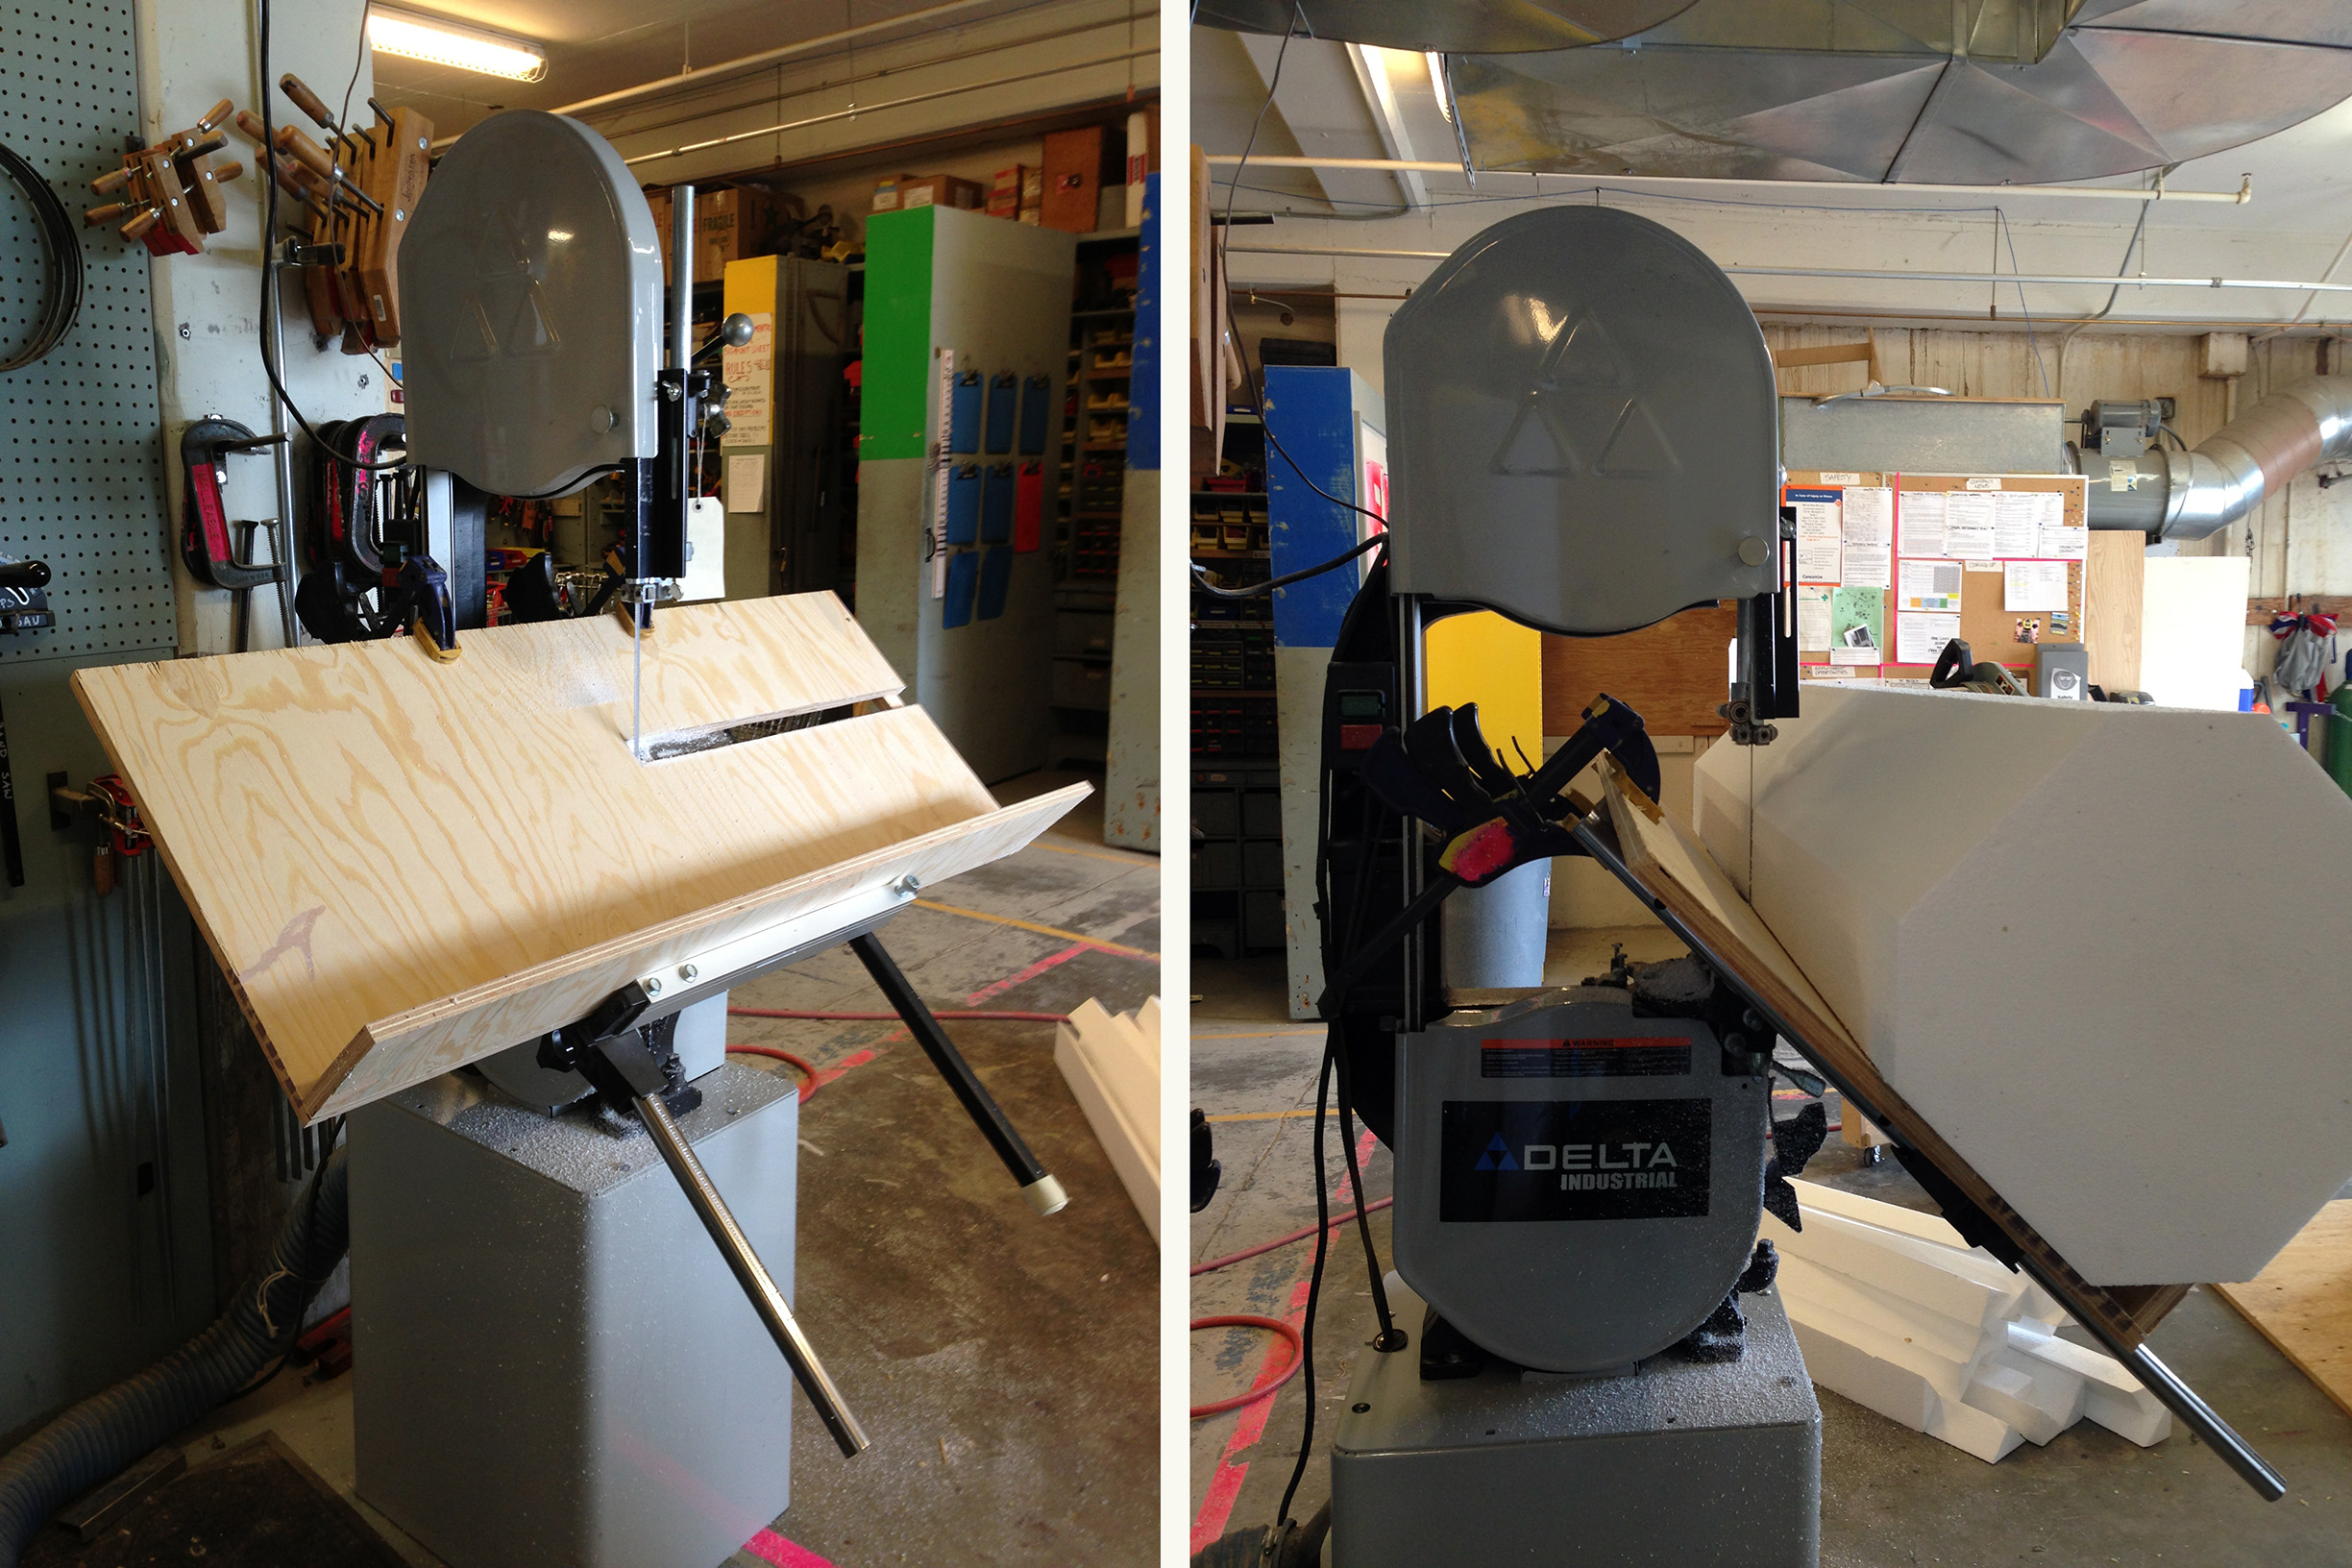
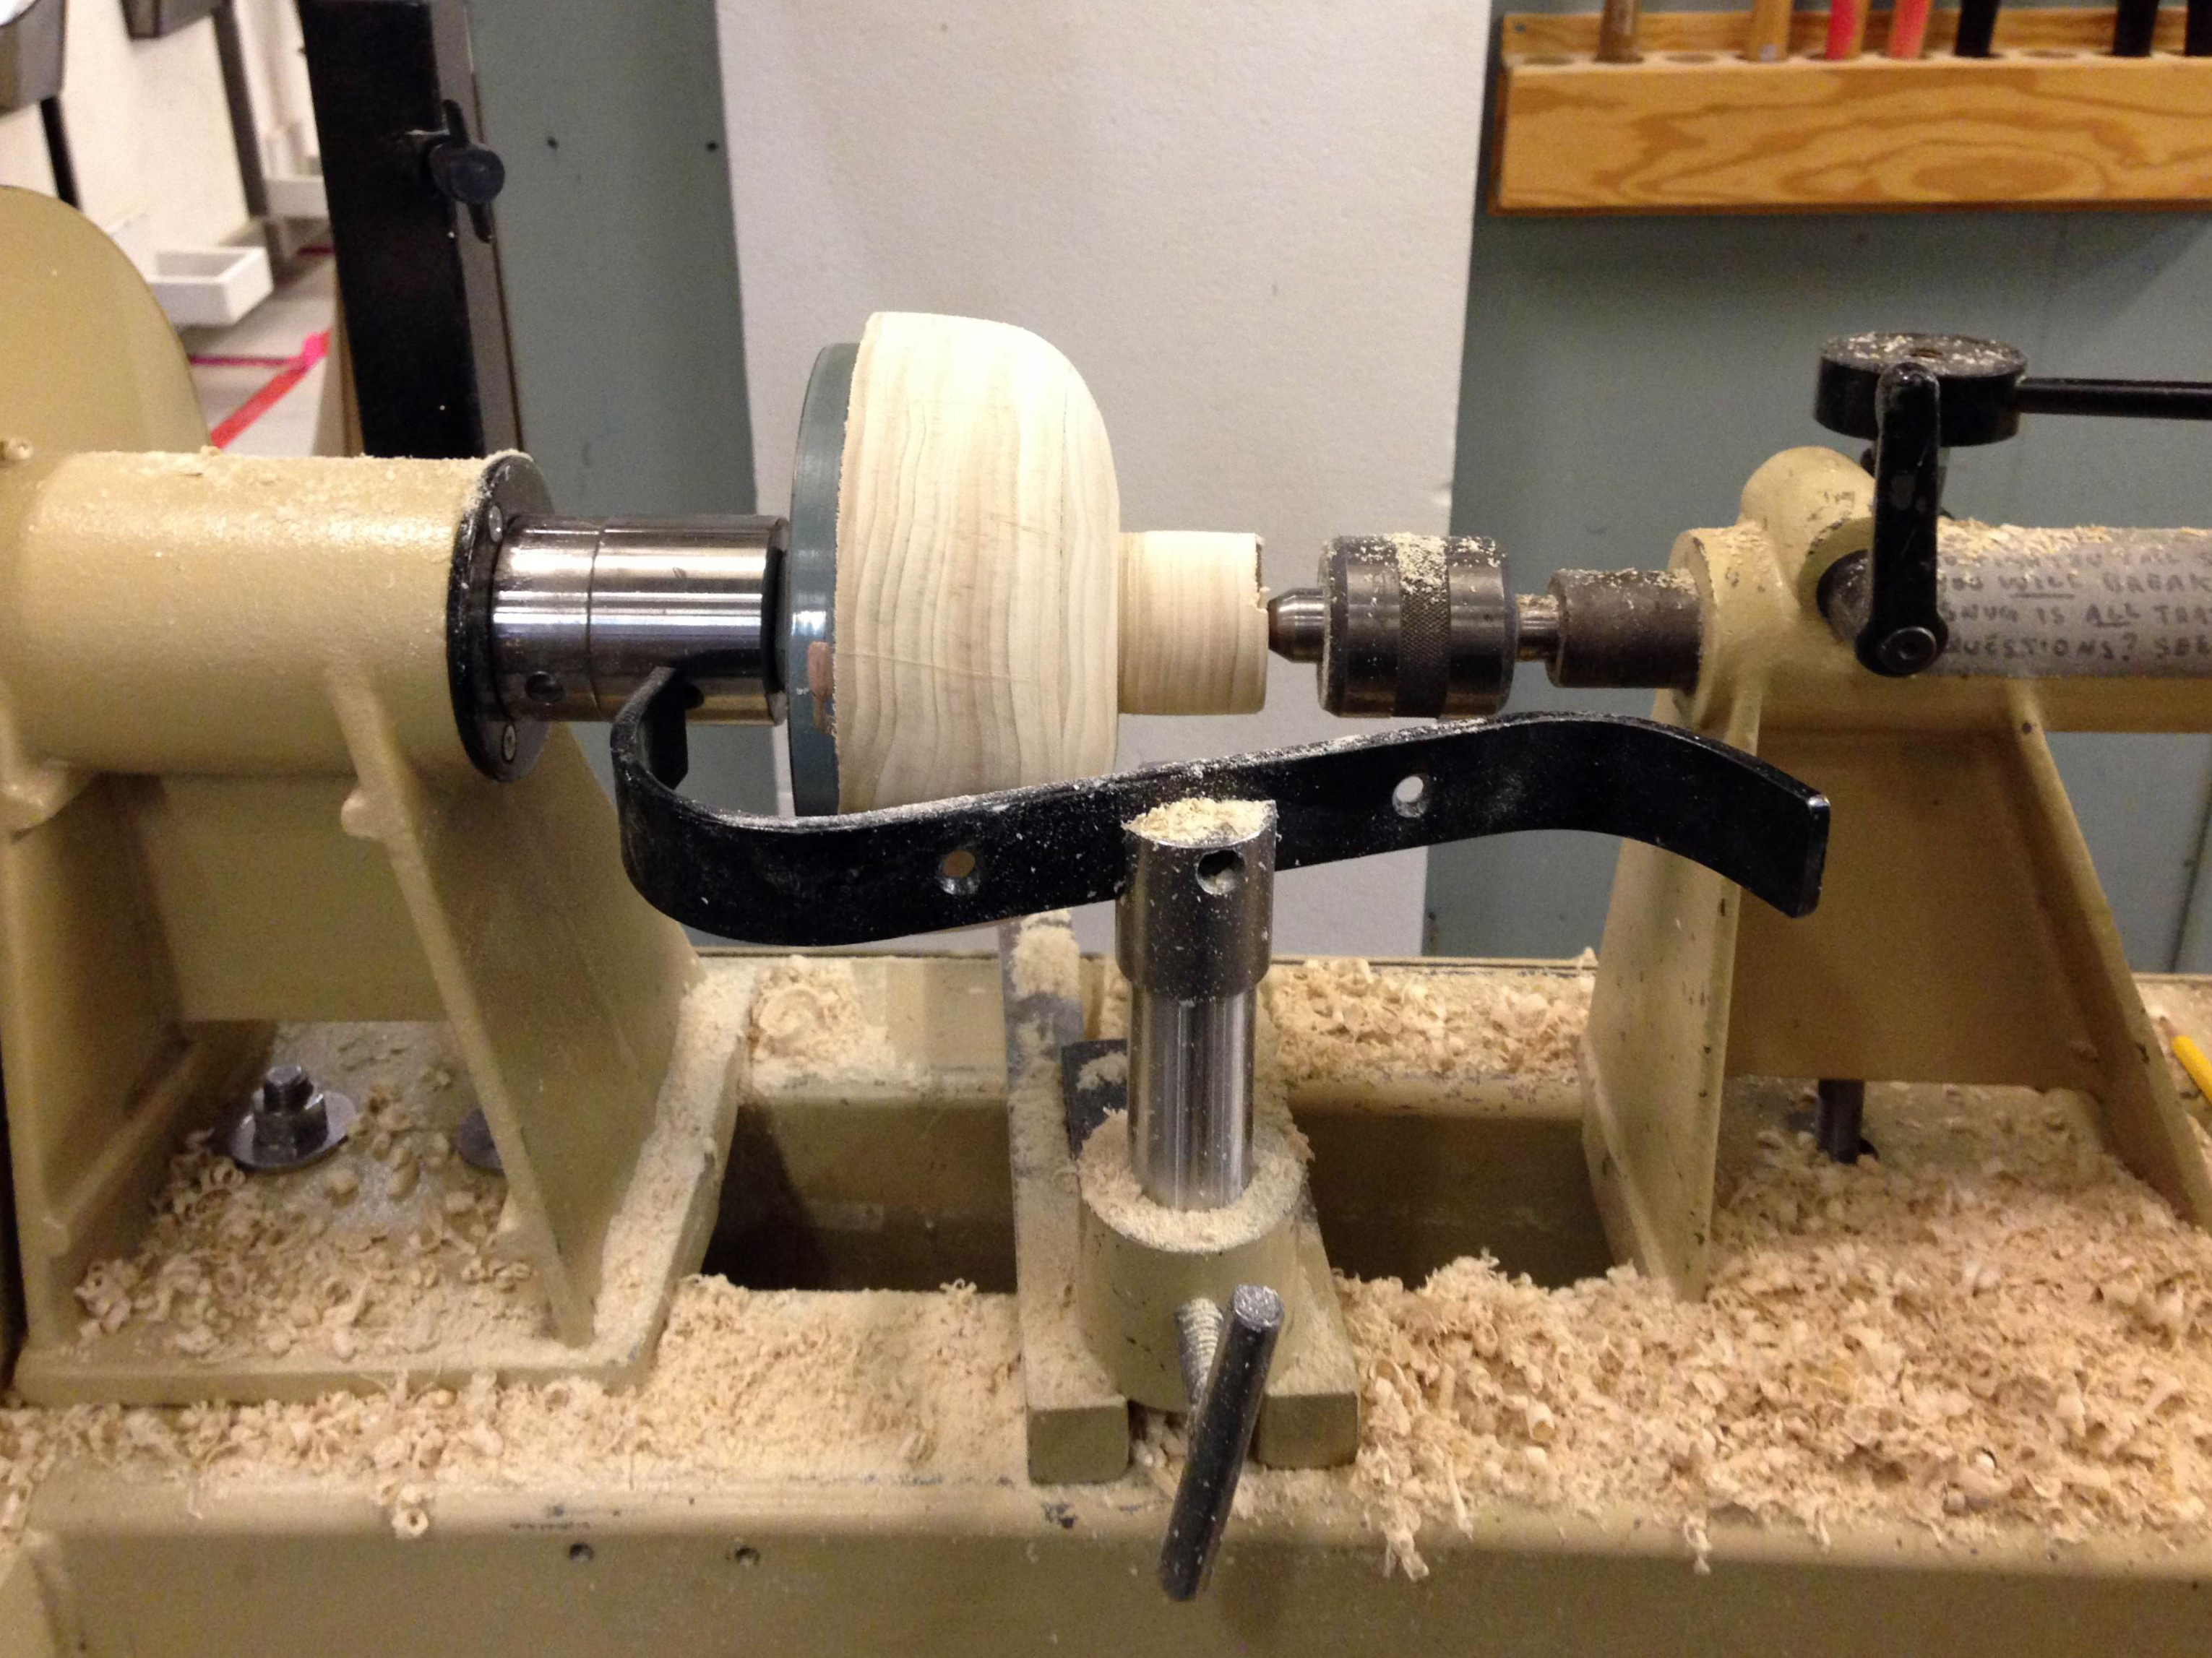
I made the barrels out of foam to keep them lightweight; the Santa Fe Opera runs their shows in repertory, so any savings in weight is much appreciated by the running crew, who have to move all the props from the basement to the stage on a daily basis. I whipped up a quick jig for the bandsaw to cut the corners from the blocks of foam I got. This meant less time turning, less dust, and it allowed the foam to actually fit on the lathe.

Turned barrels
Turned barrels

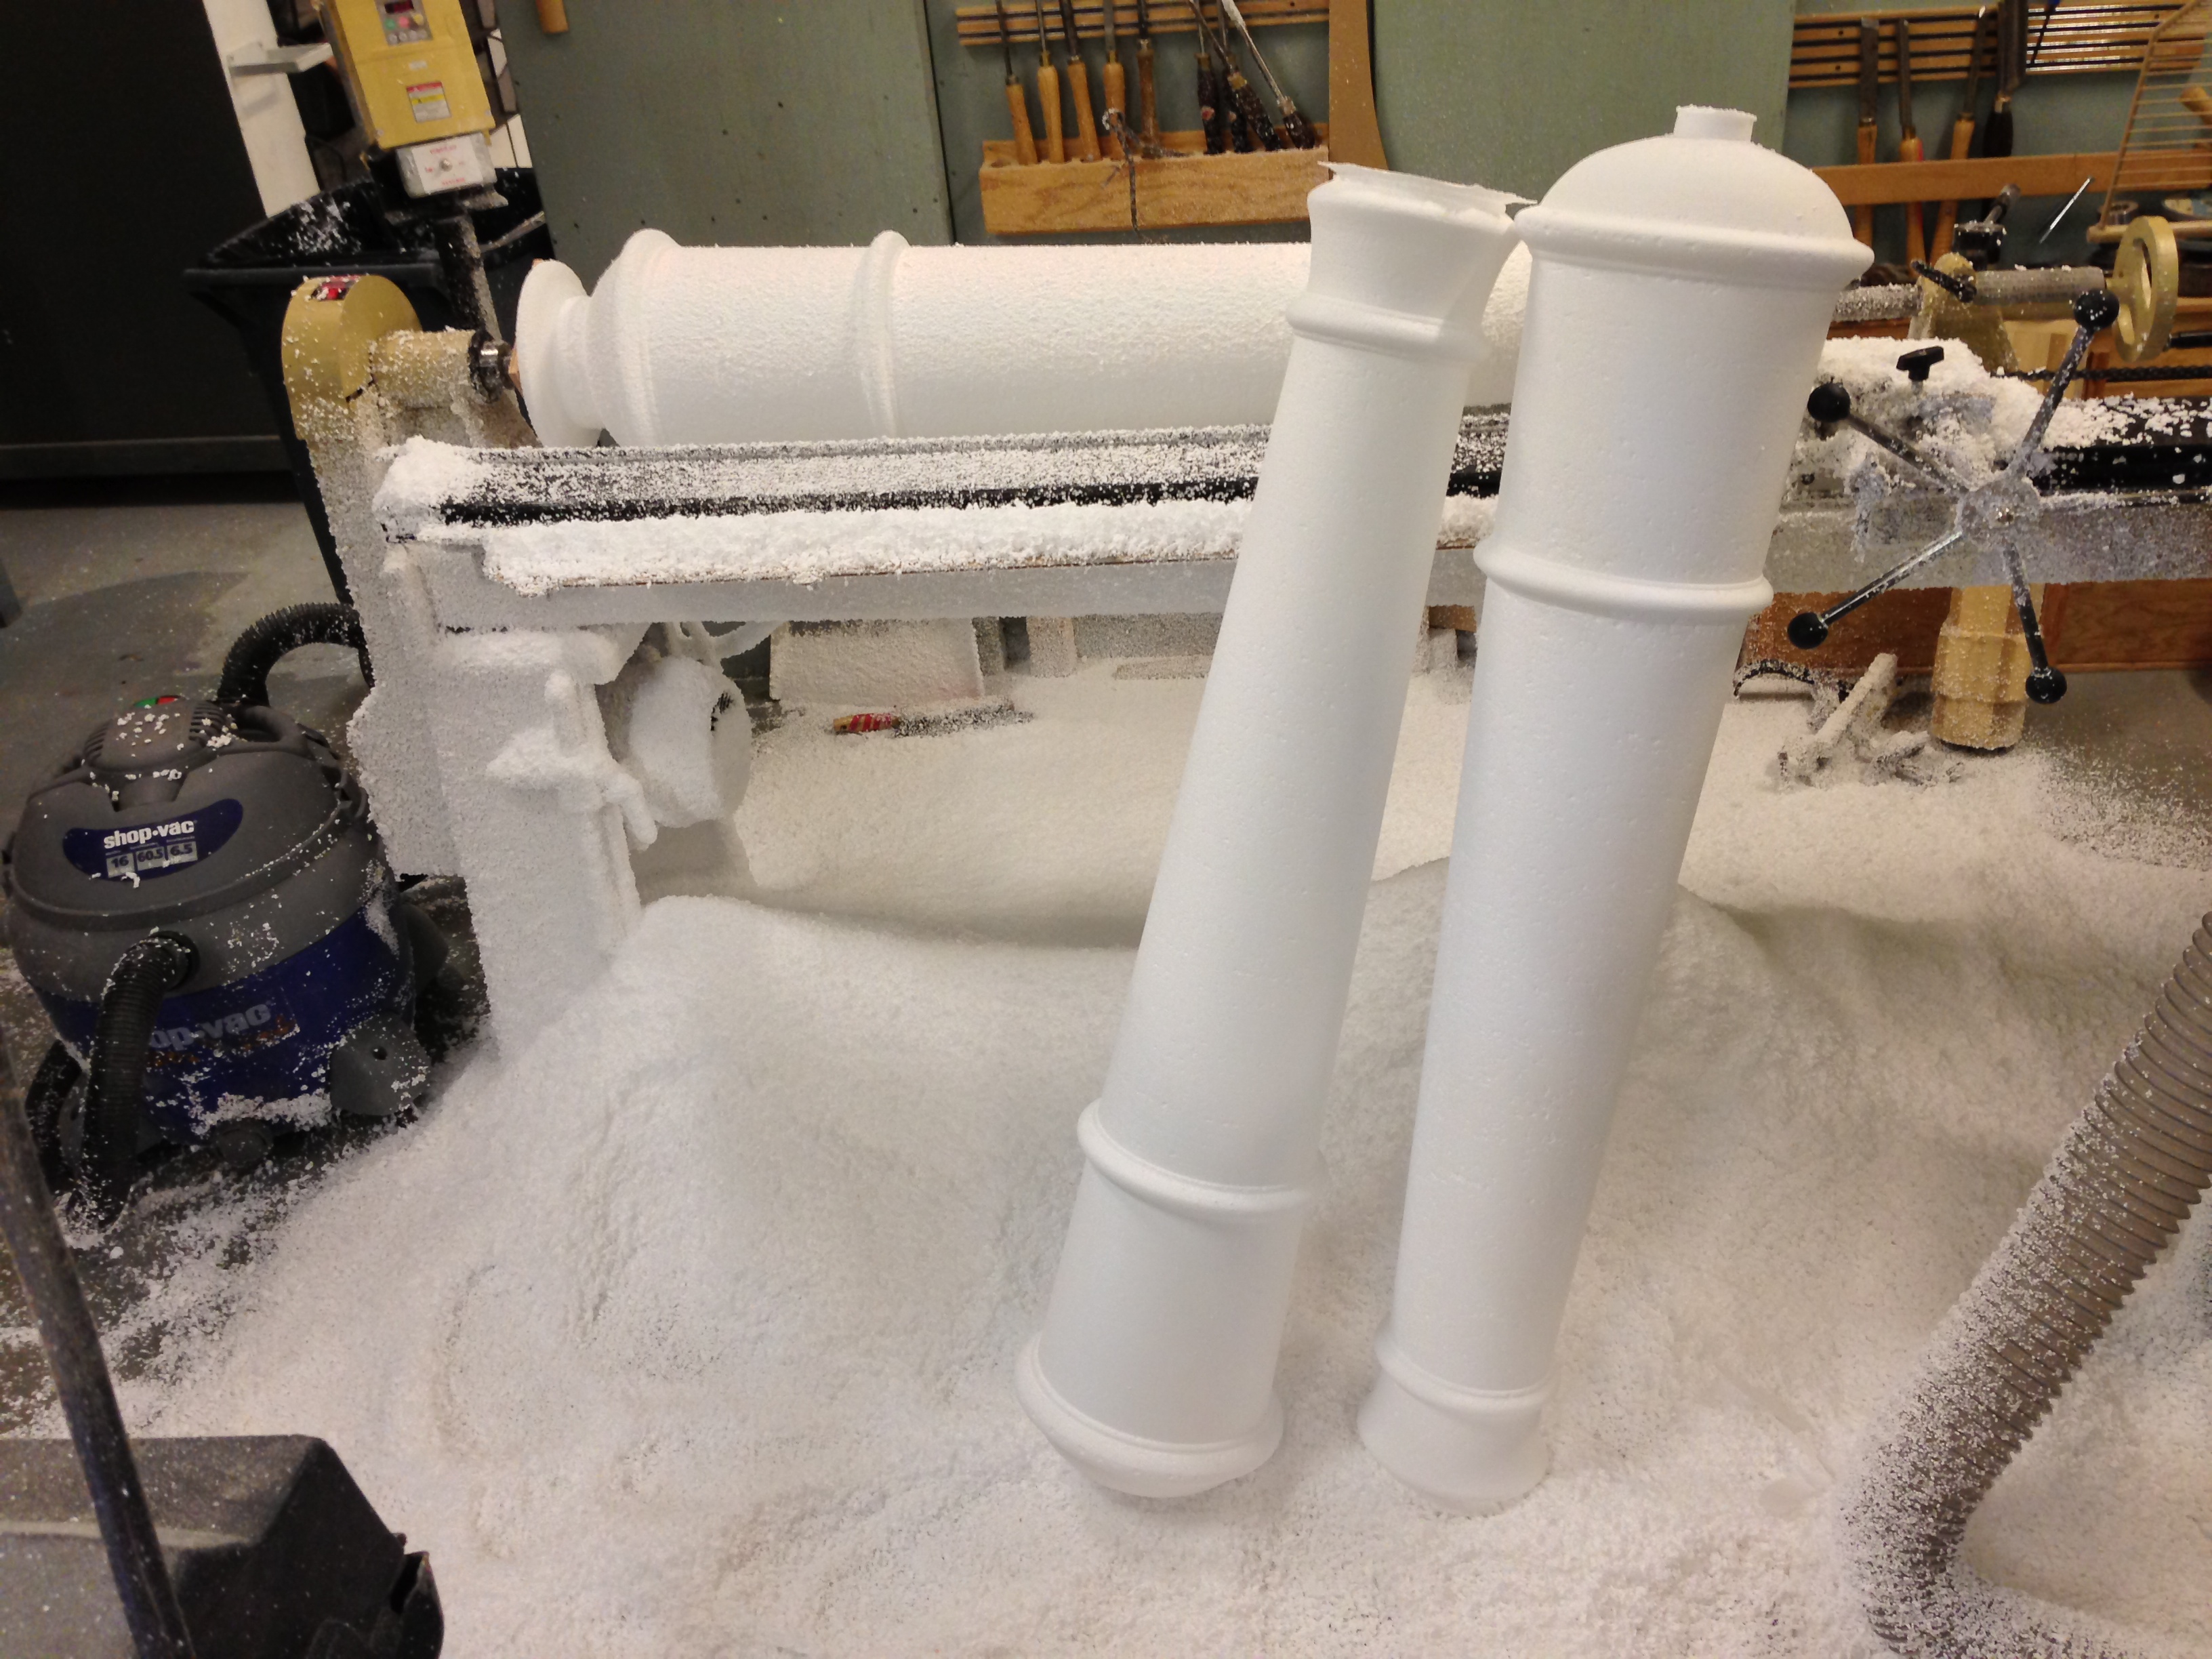
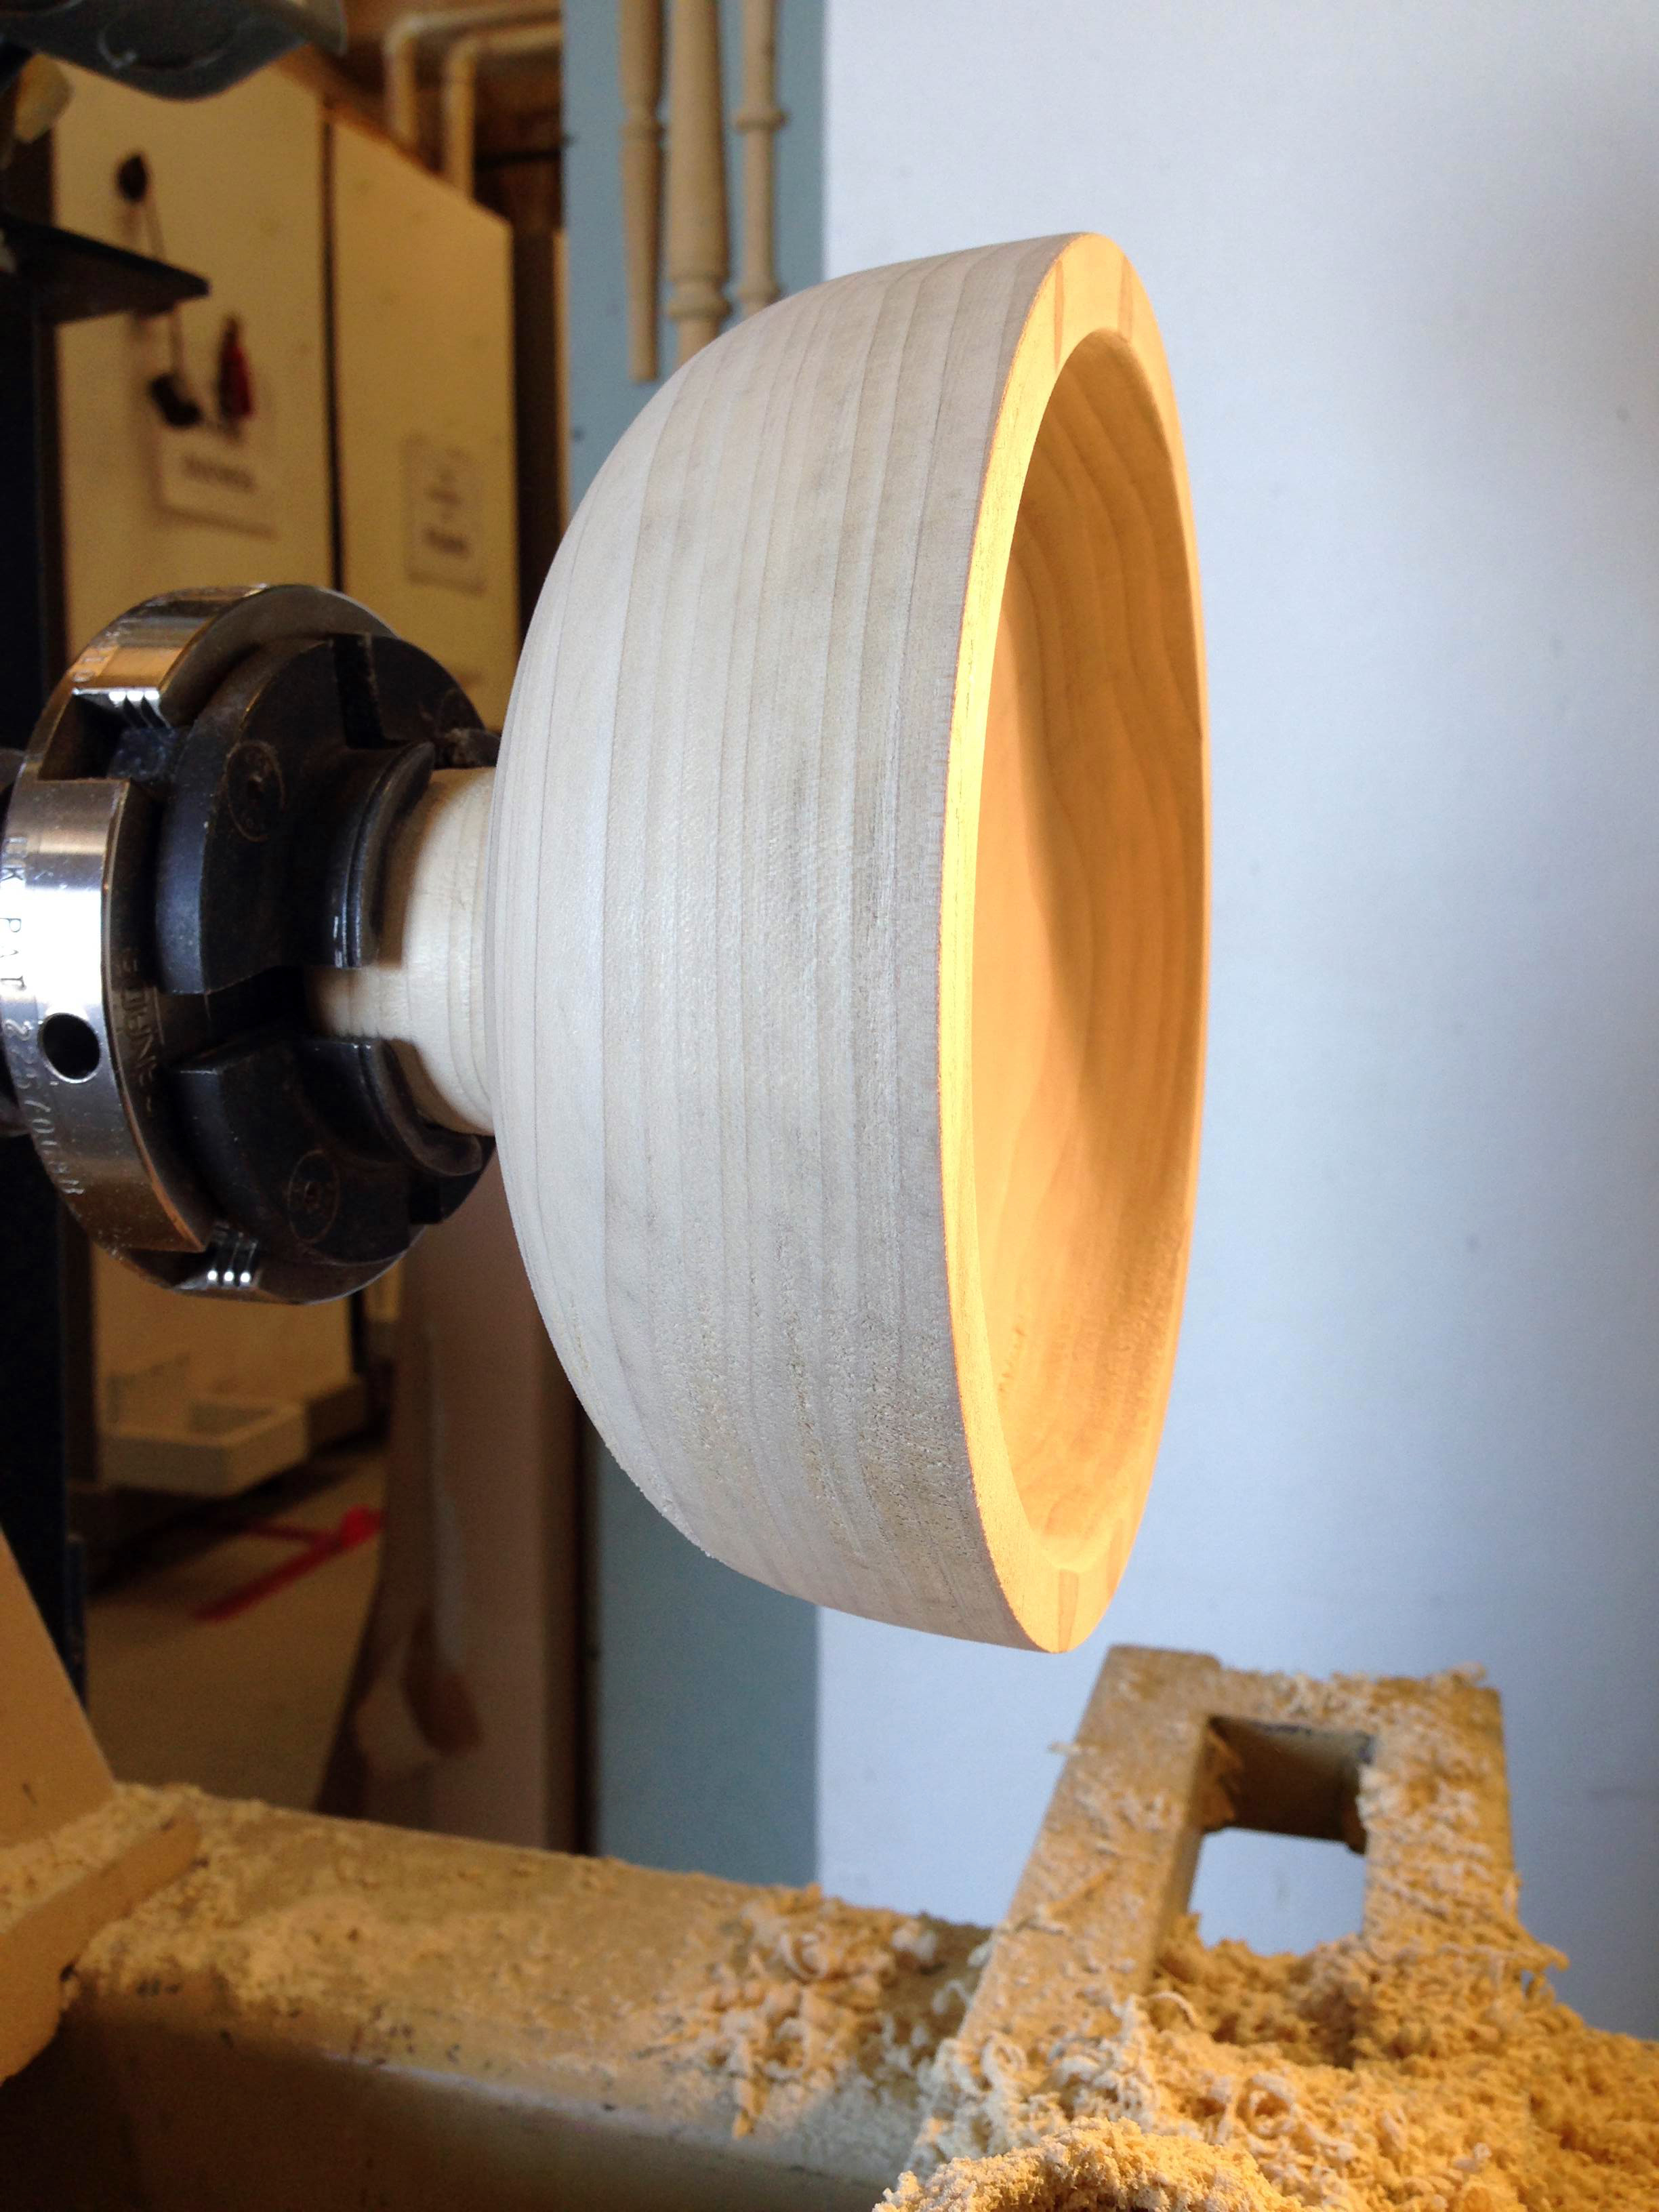
I designed a full-size template of the shape of the barrels based on the designer’s sketches and my own research. I could also use this template as a pattern on the lathe to make all four barrels exactly the same as each other. Turning foam on the lathe is fun and easy, but it makes a gigantic mess.

Coating and sanding
Coating and sanding

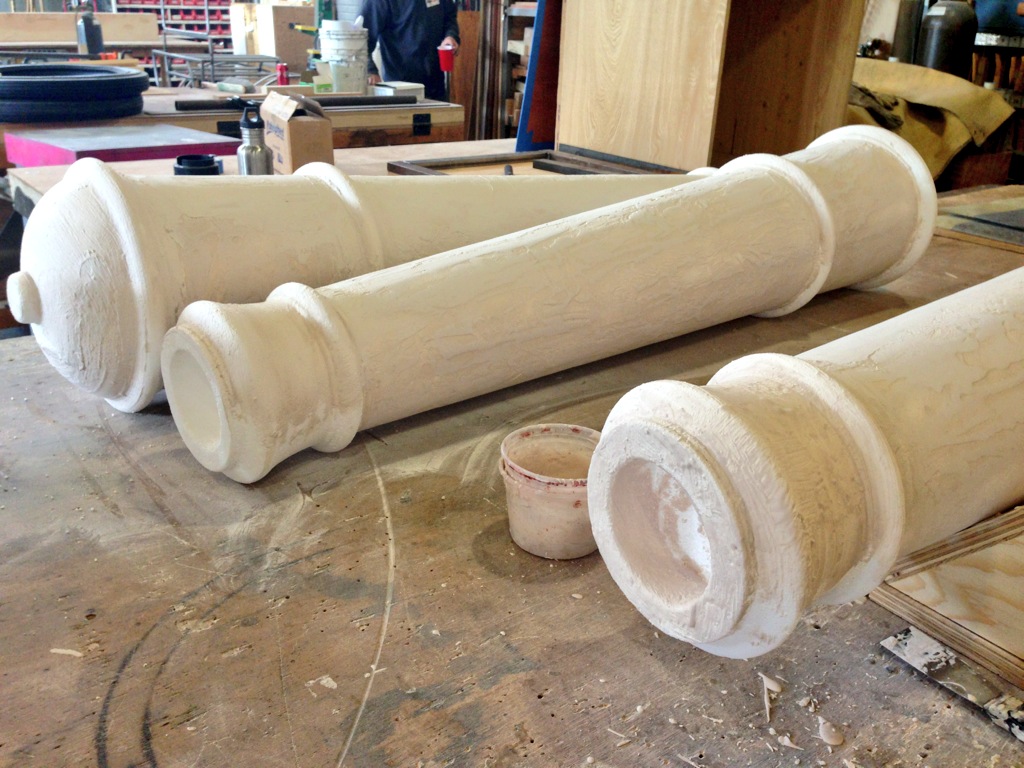
After the barrels were taken off the lathe, I began the long and laborious process of coating and sanding them. The designer wanted them to look like smooth brass without any distressing, so they needed to be absolutely flawless. I used Aqua Resin, which provided a sandable hard coat with far less toxicity than Bondo. I spent nearly a week just coating and sanding all these guys.

Drilling straight through

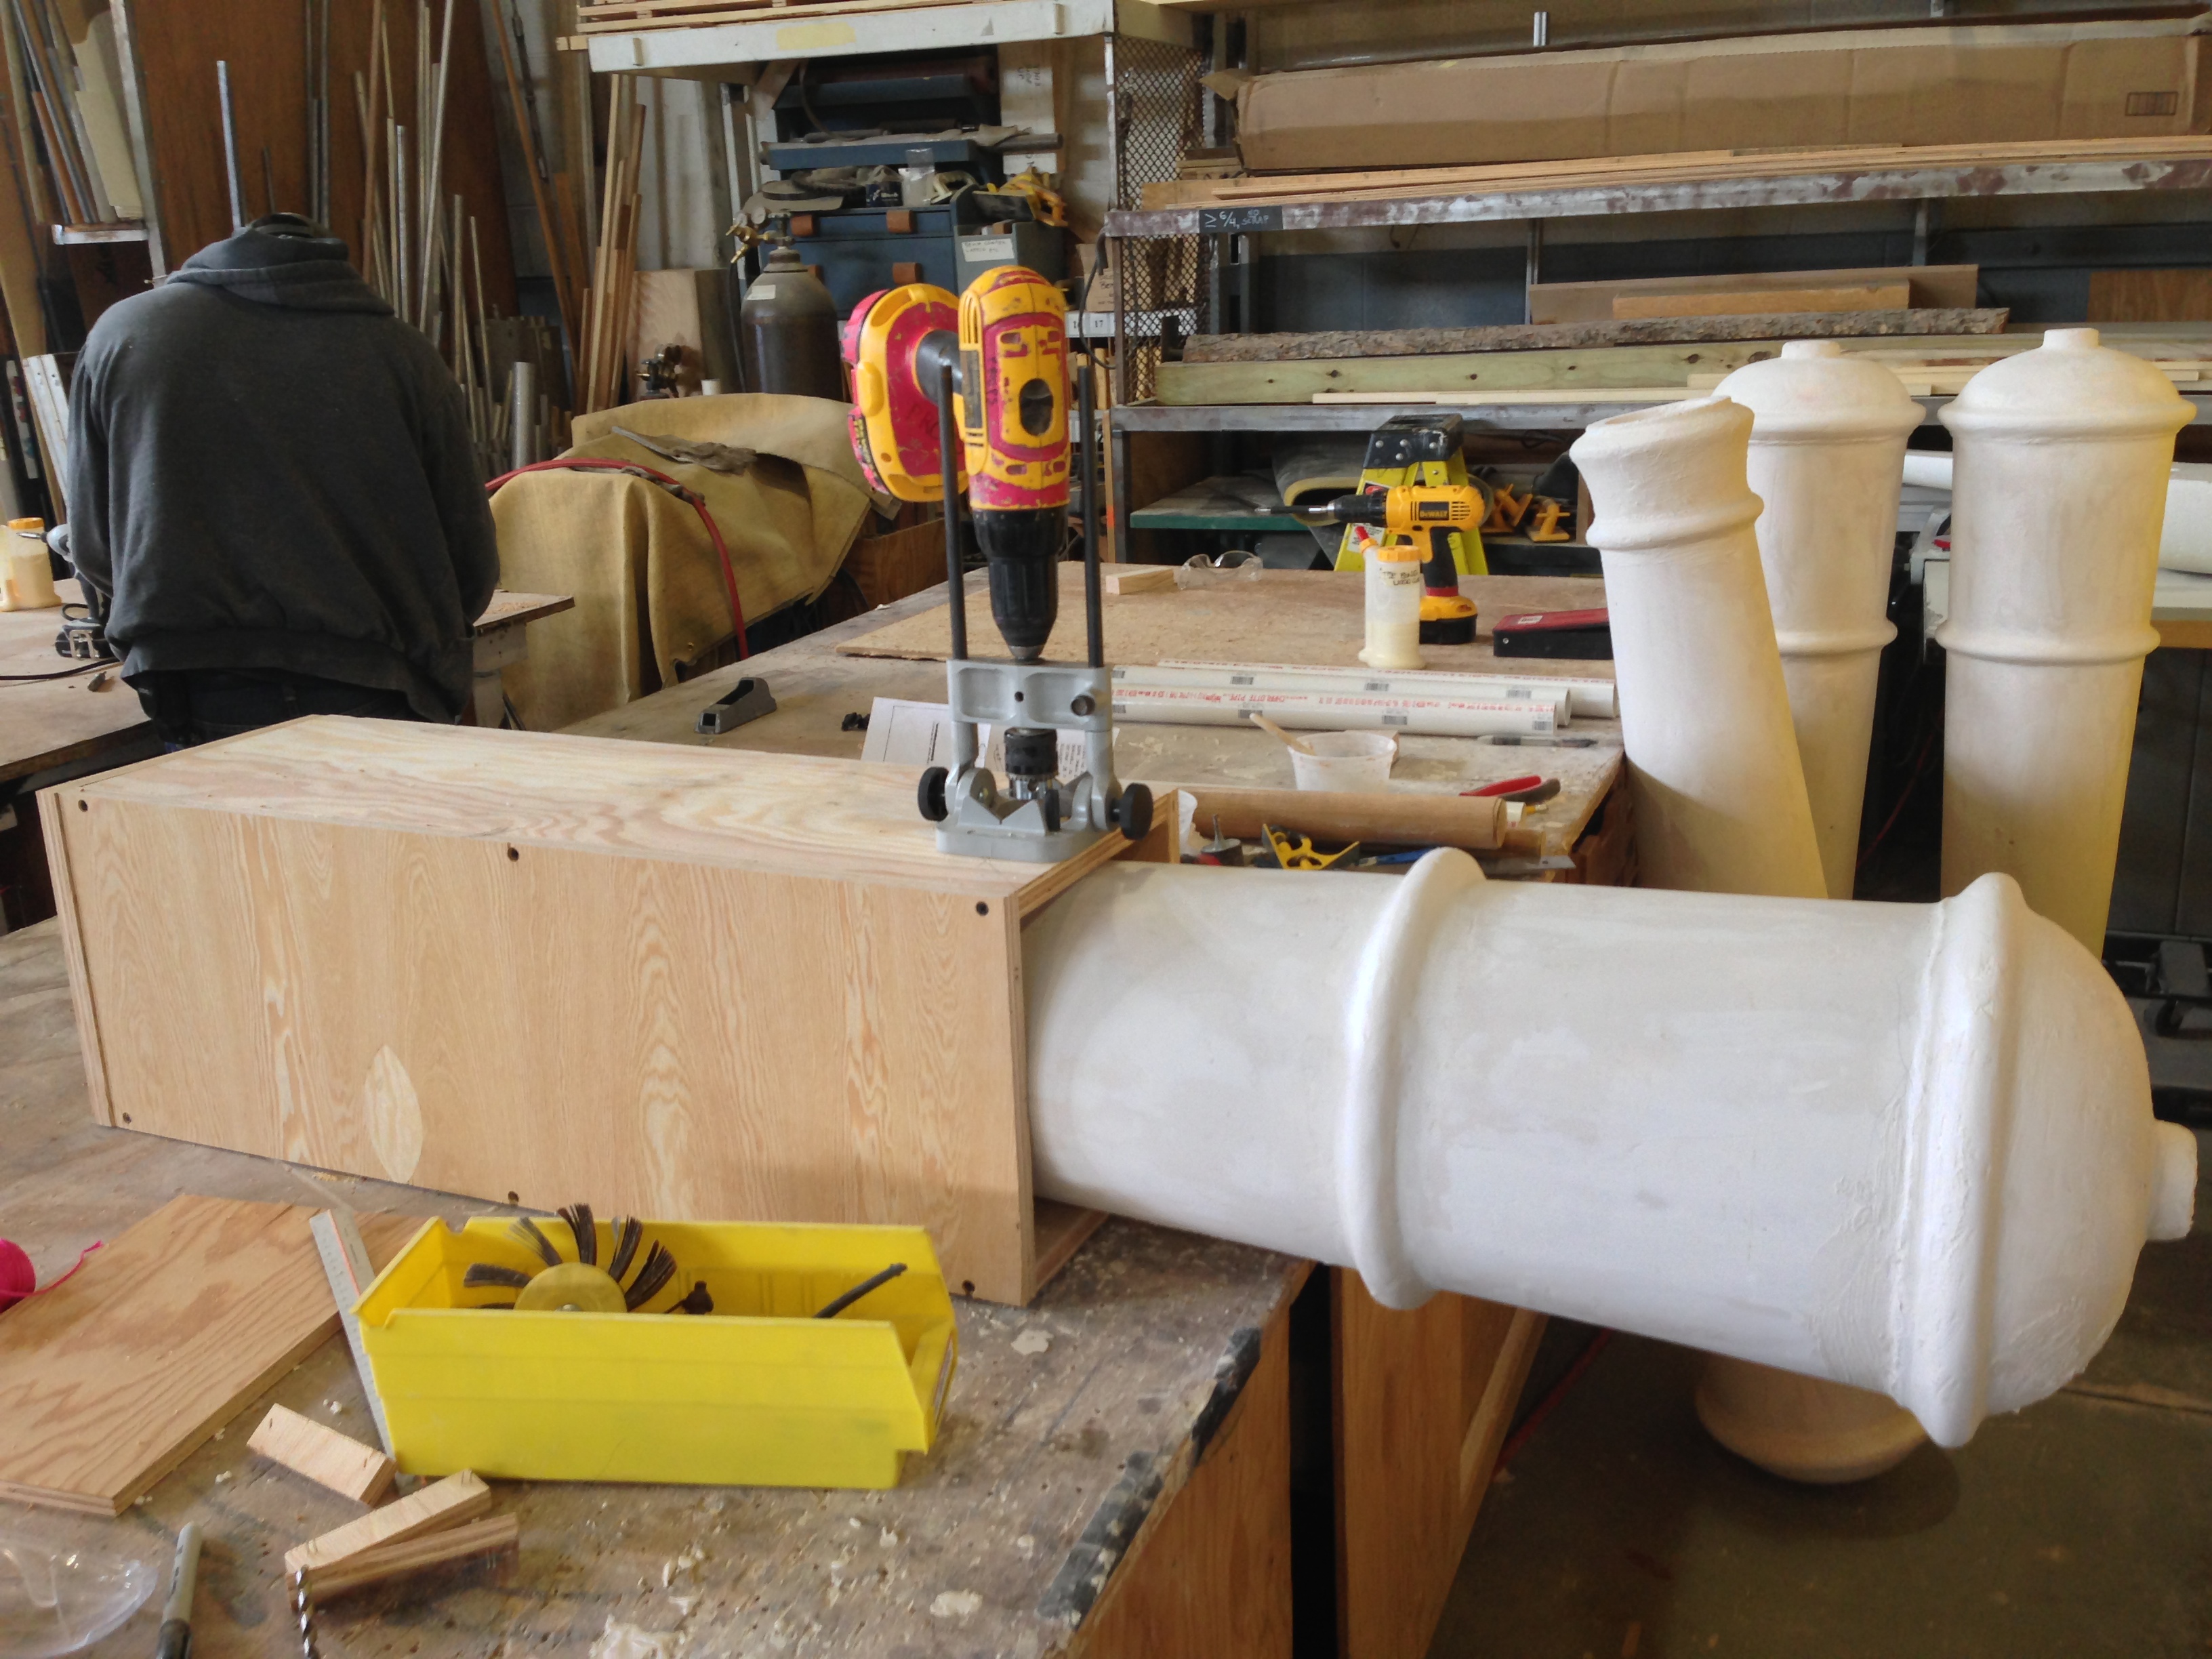
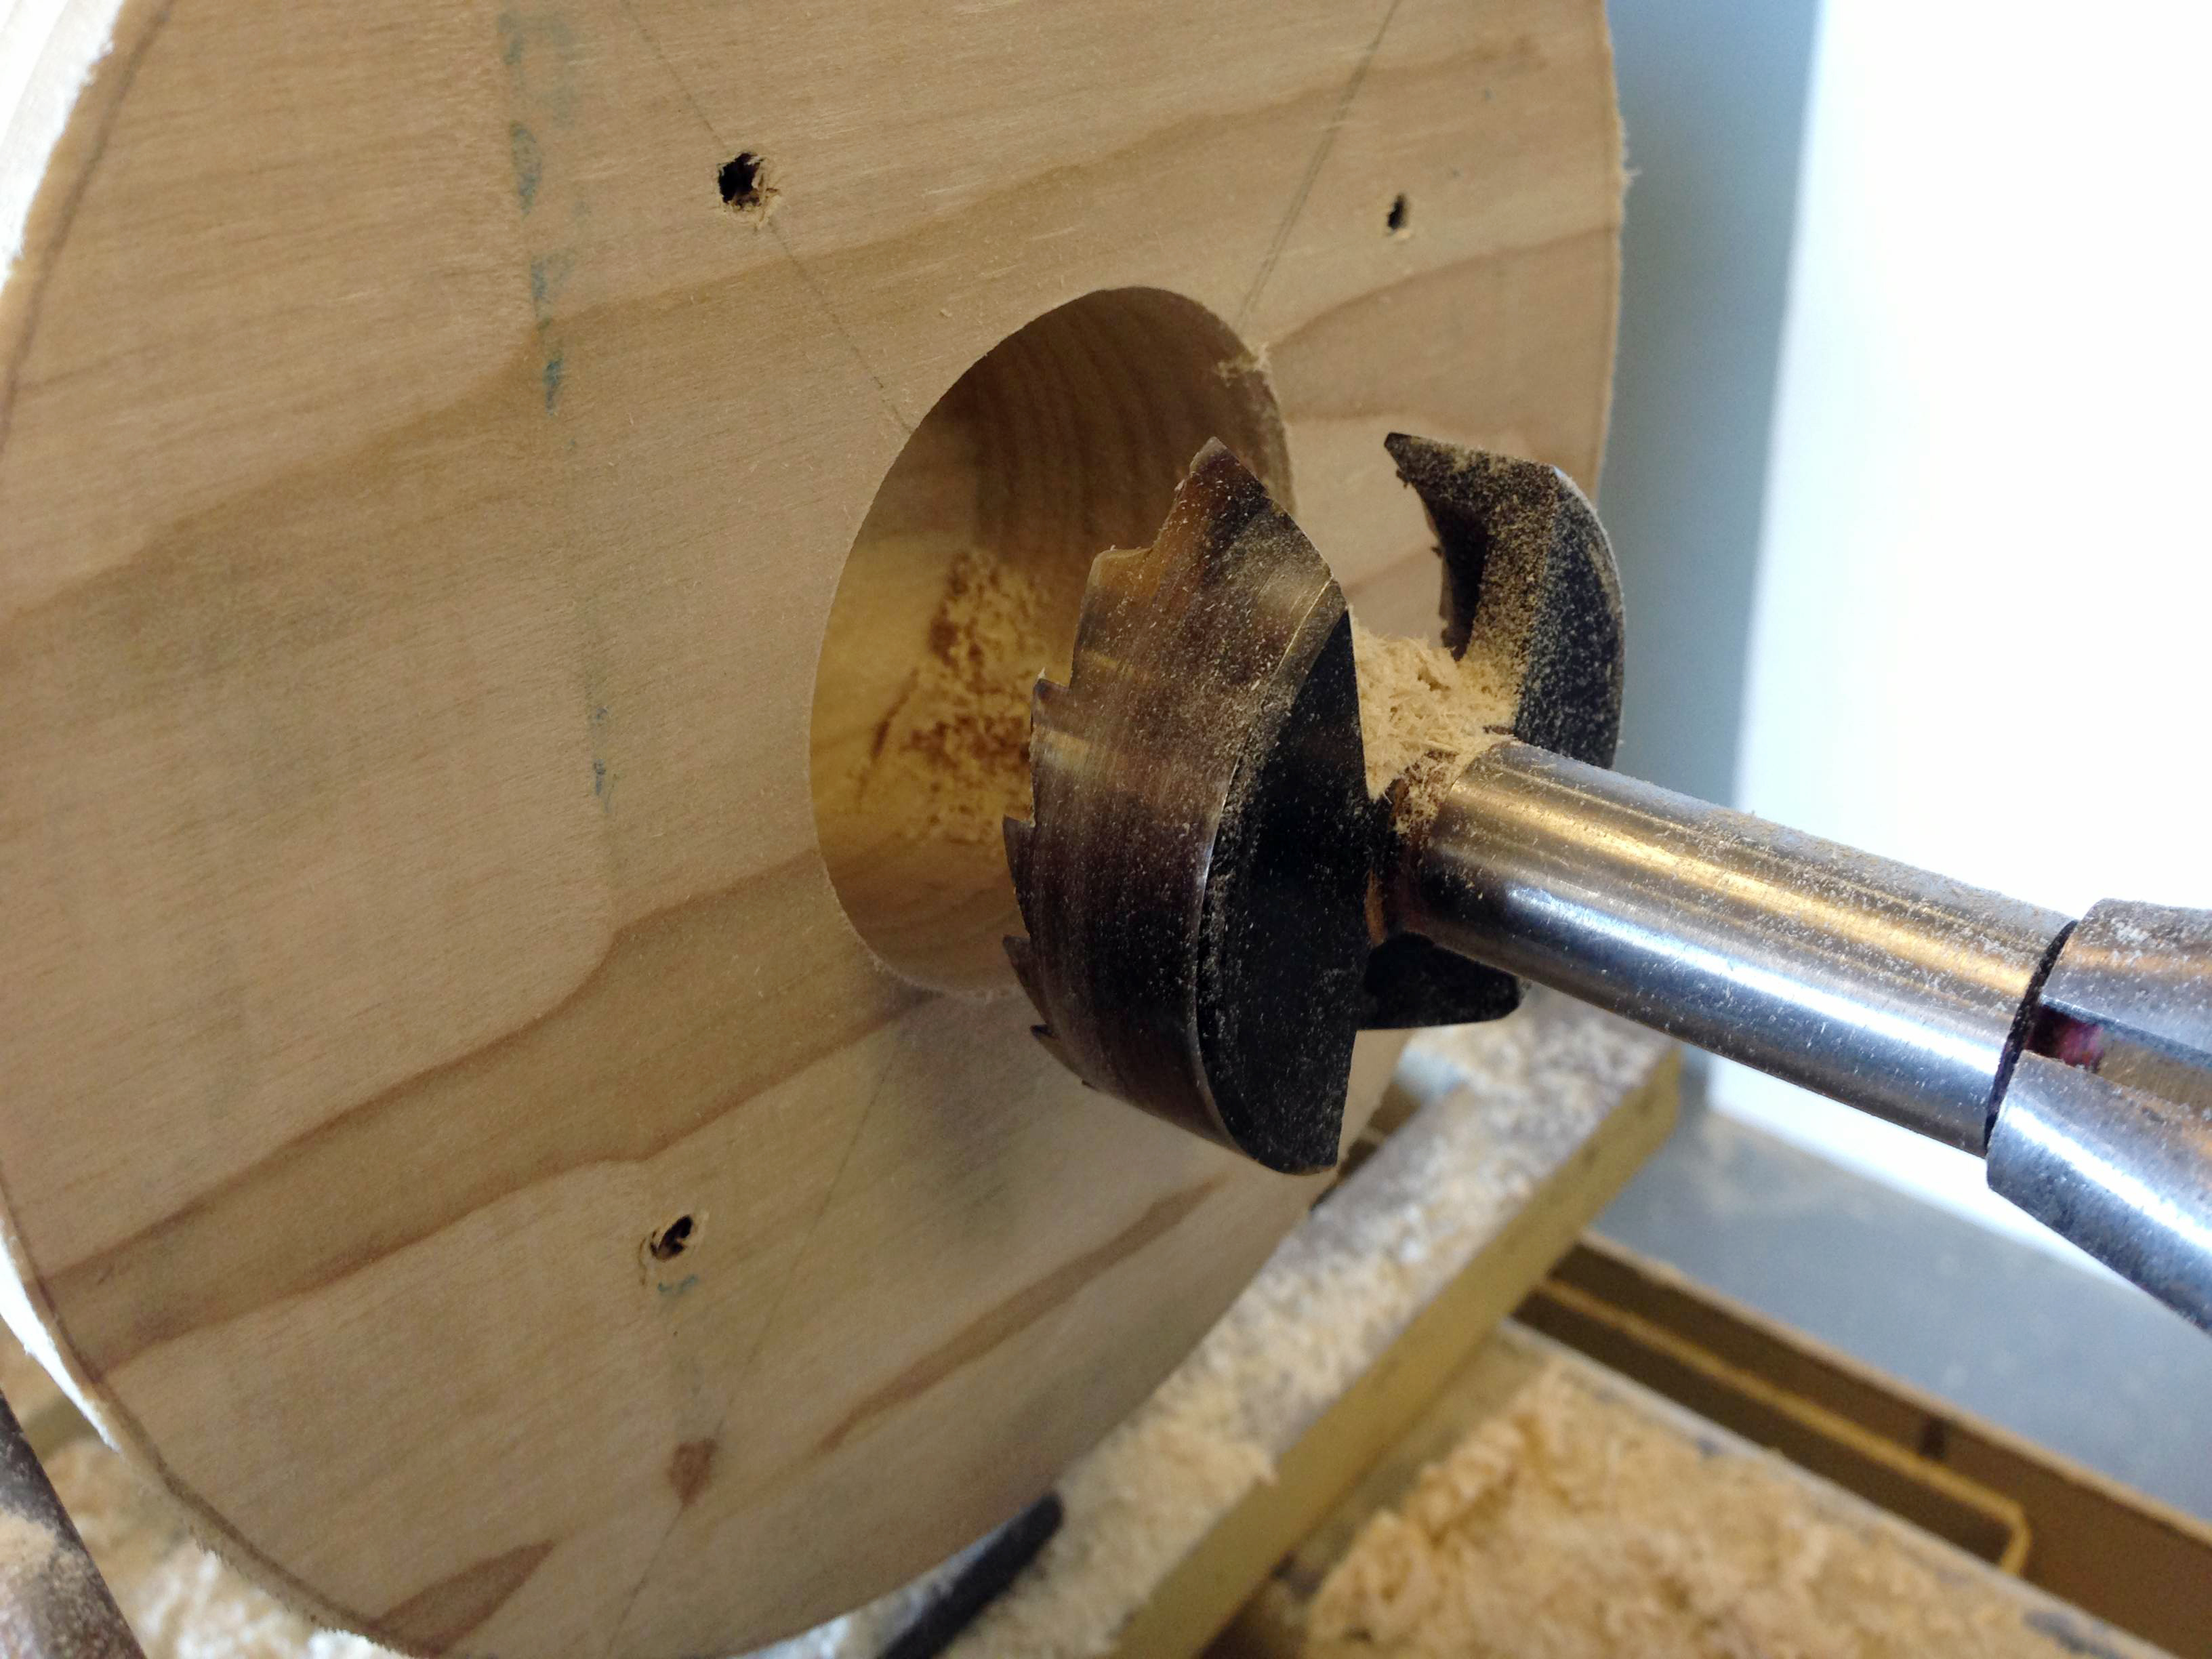
I built a jig so I could hold the barrel and a cordless drill perpendicular to each other. This provided a pilot hole for the trunnion I would add; the trunnion would be a piece of PVC pipe which would hold the cannon on the carriage and allow it to pivot up and down.

Hole
Hole

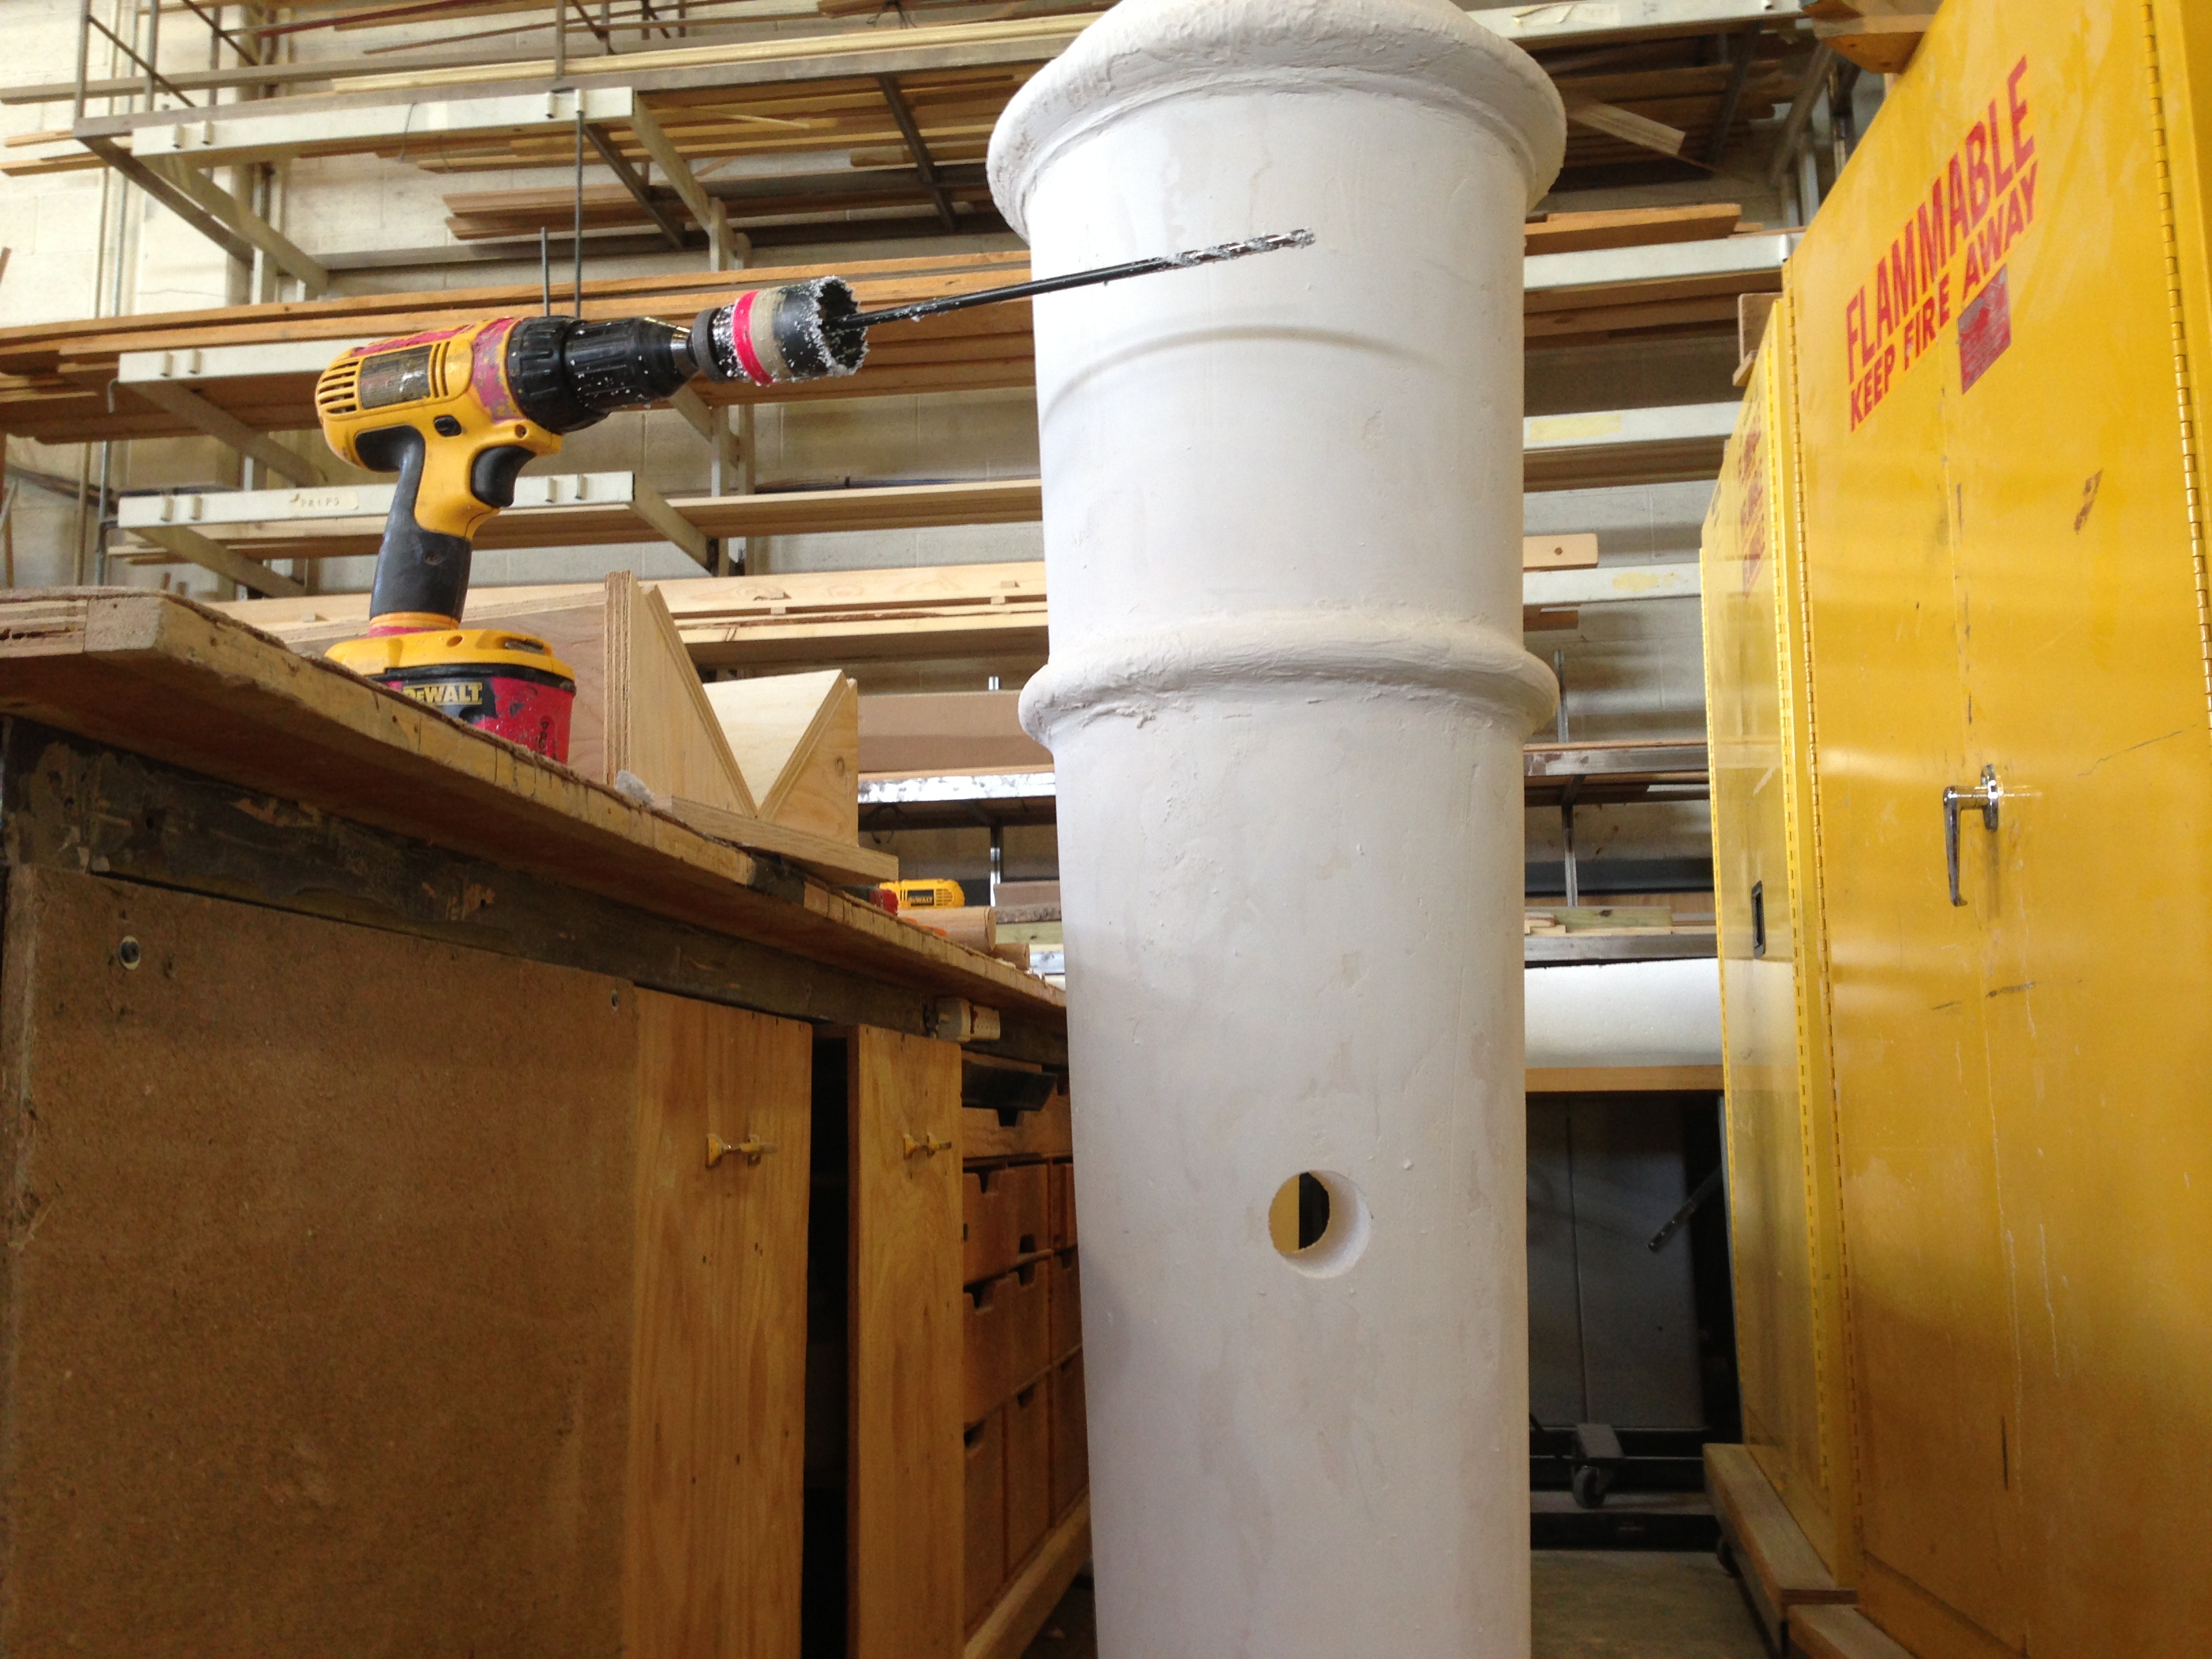
With the pilot hole drilled, I switched to a hole saw that was closer to the size of the PVC pipe. You can see in the photo above that I have an extra long pilot bit on the hole saw. This bit was long enough to pop out the other side of the barrel so I could be sure that the hole saw would exit in exactly the right place.

Finished Barrels
Finished Barrels

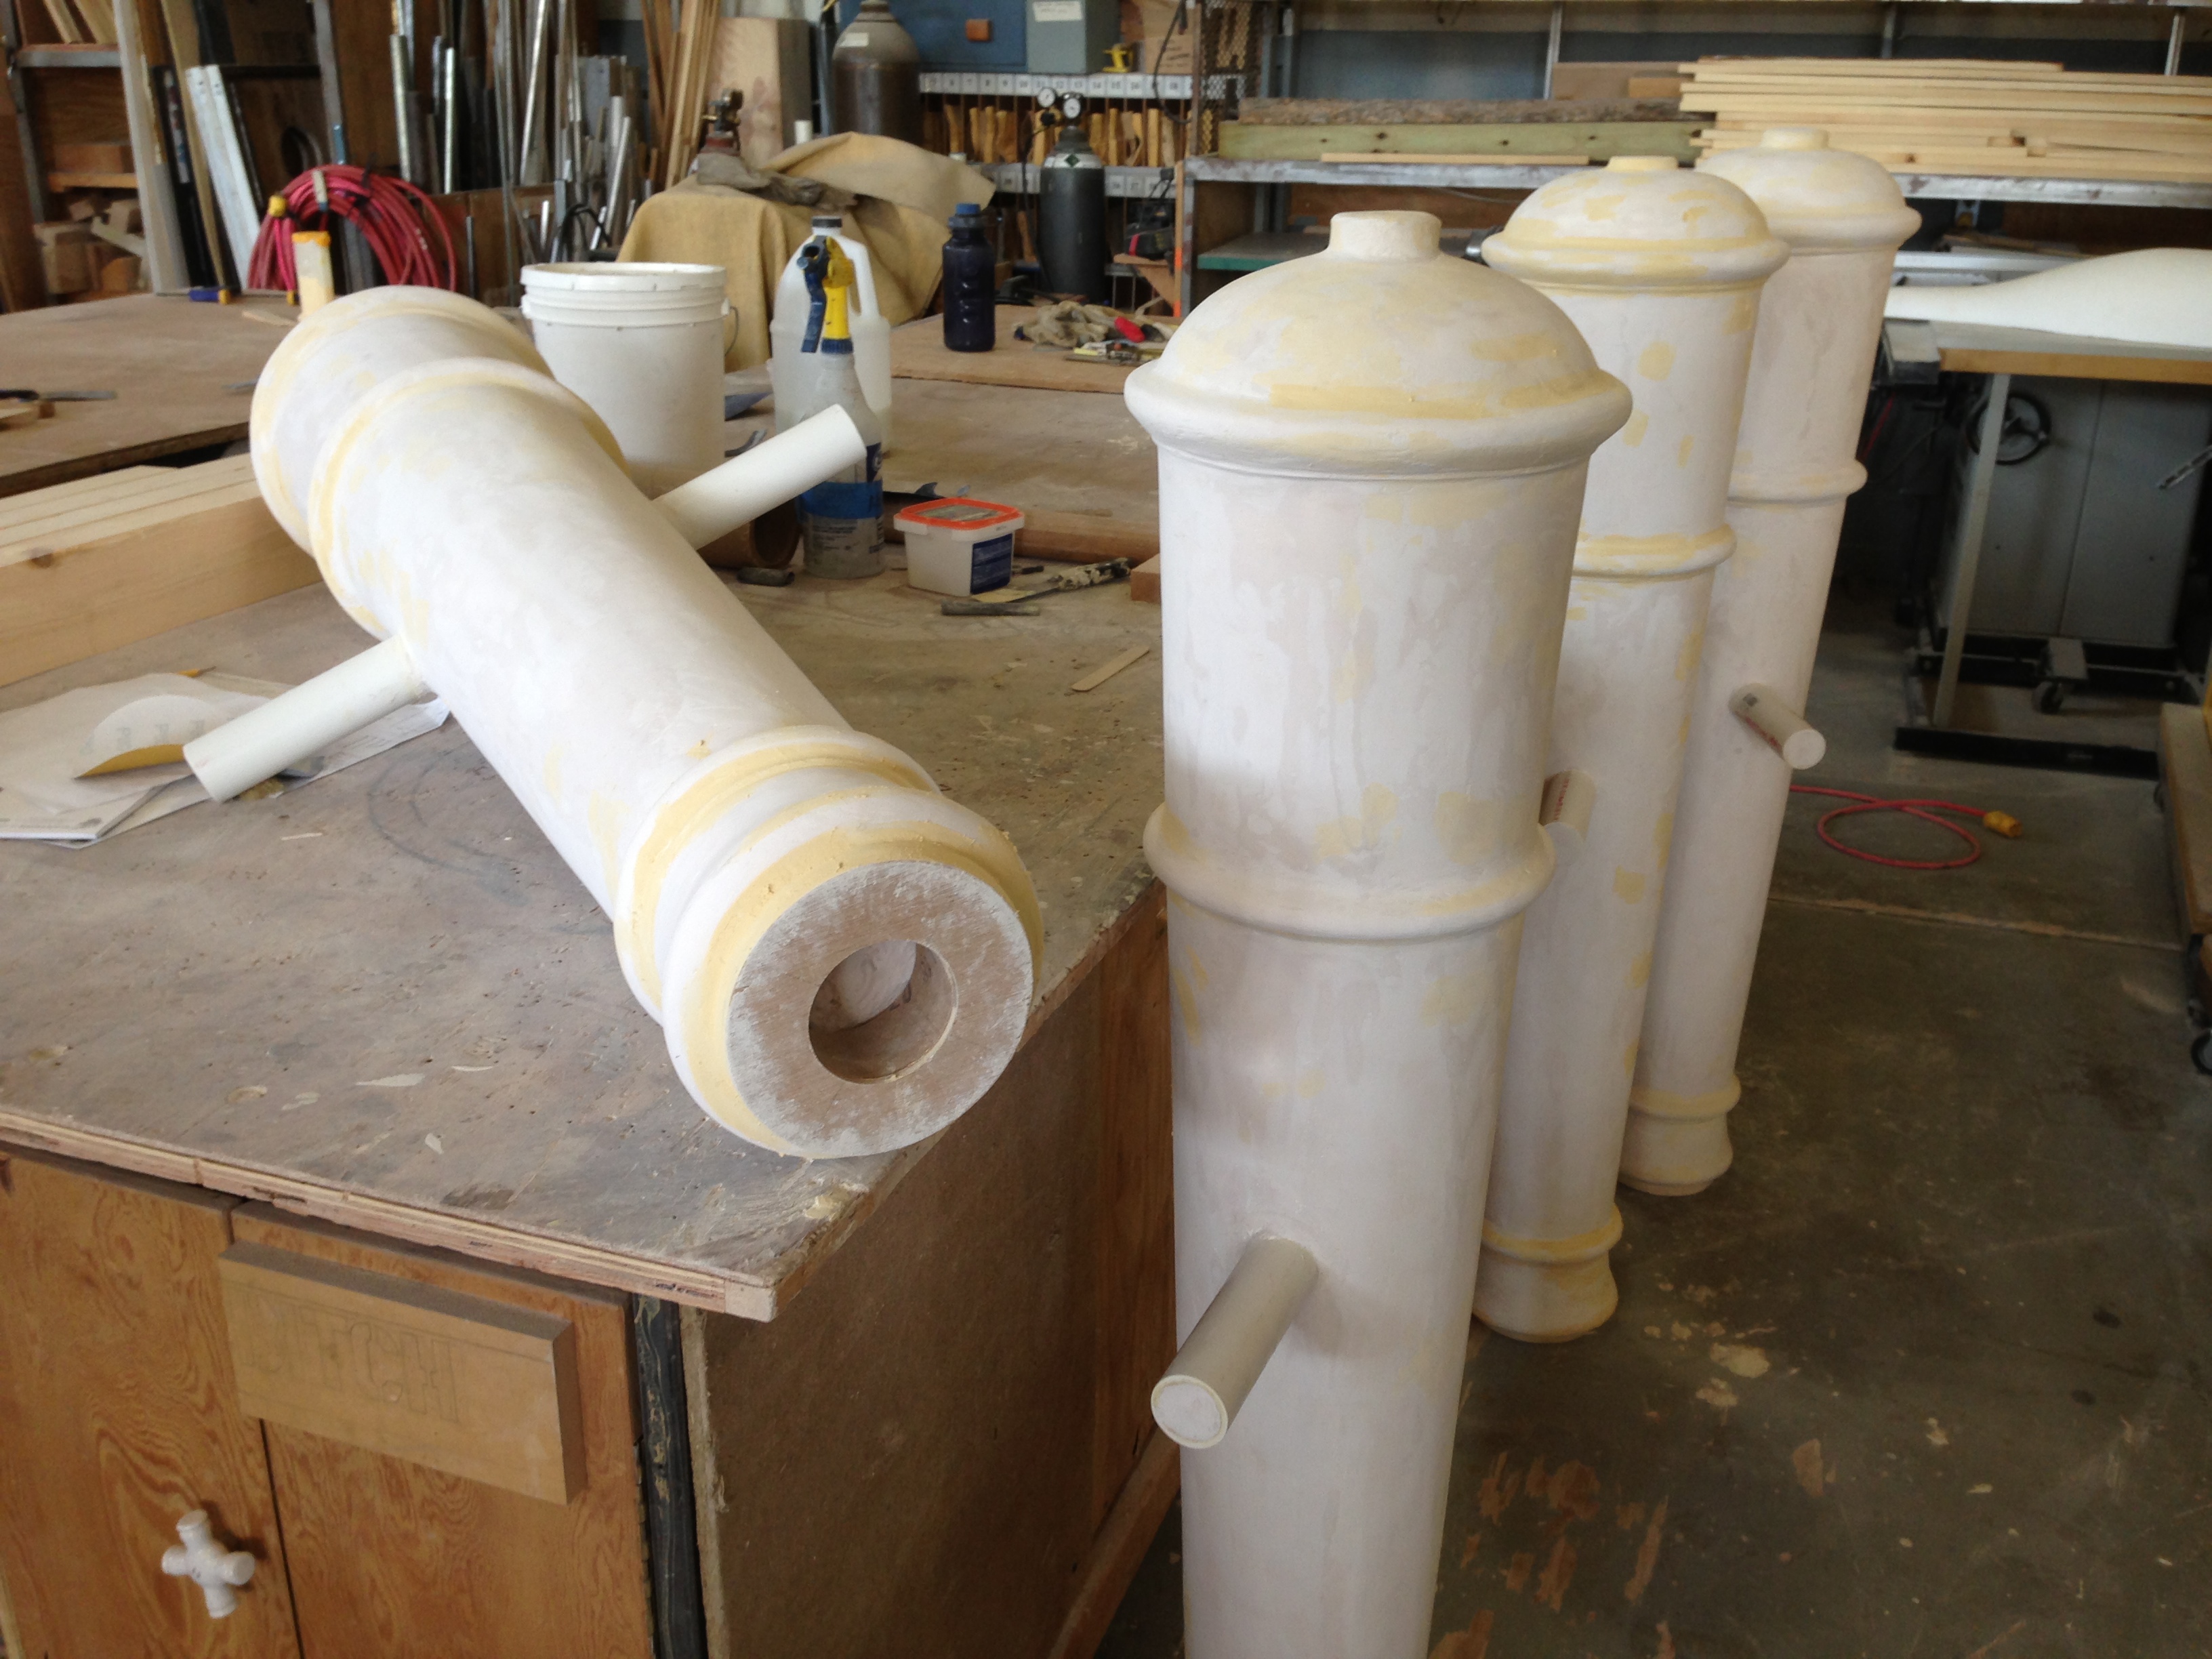
I pushed the sections of PVC pipe through the hole and capped off the ends to make them look like a solid bar. I also added some lauan rings to the ends of the barrels to help reinforce them when they were standing up.

Painted Barrels
Painted Barrels

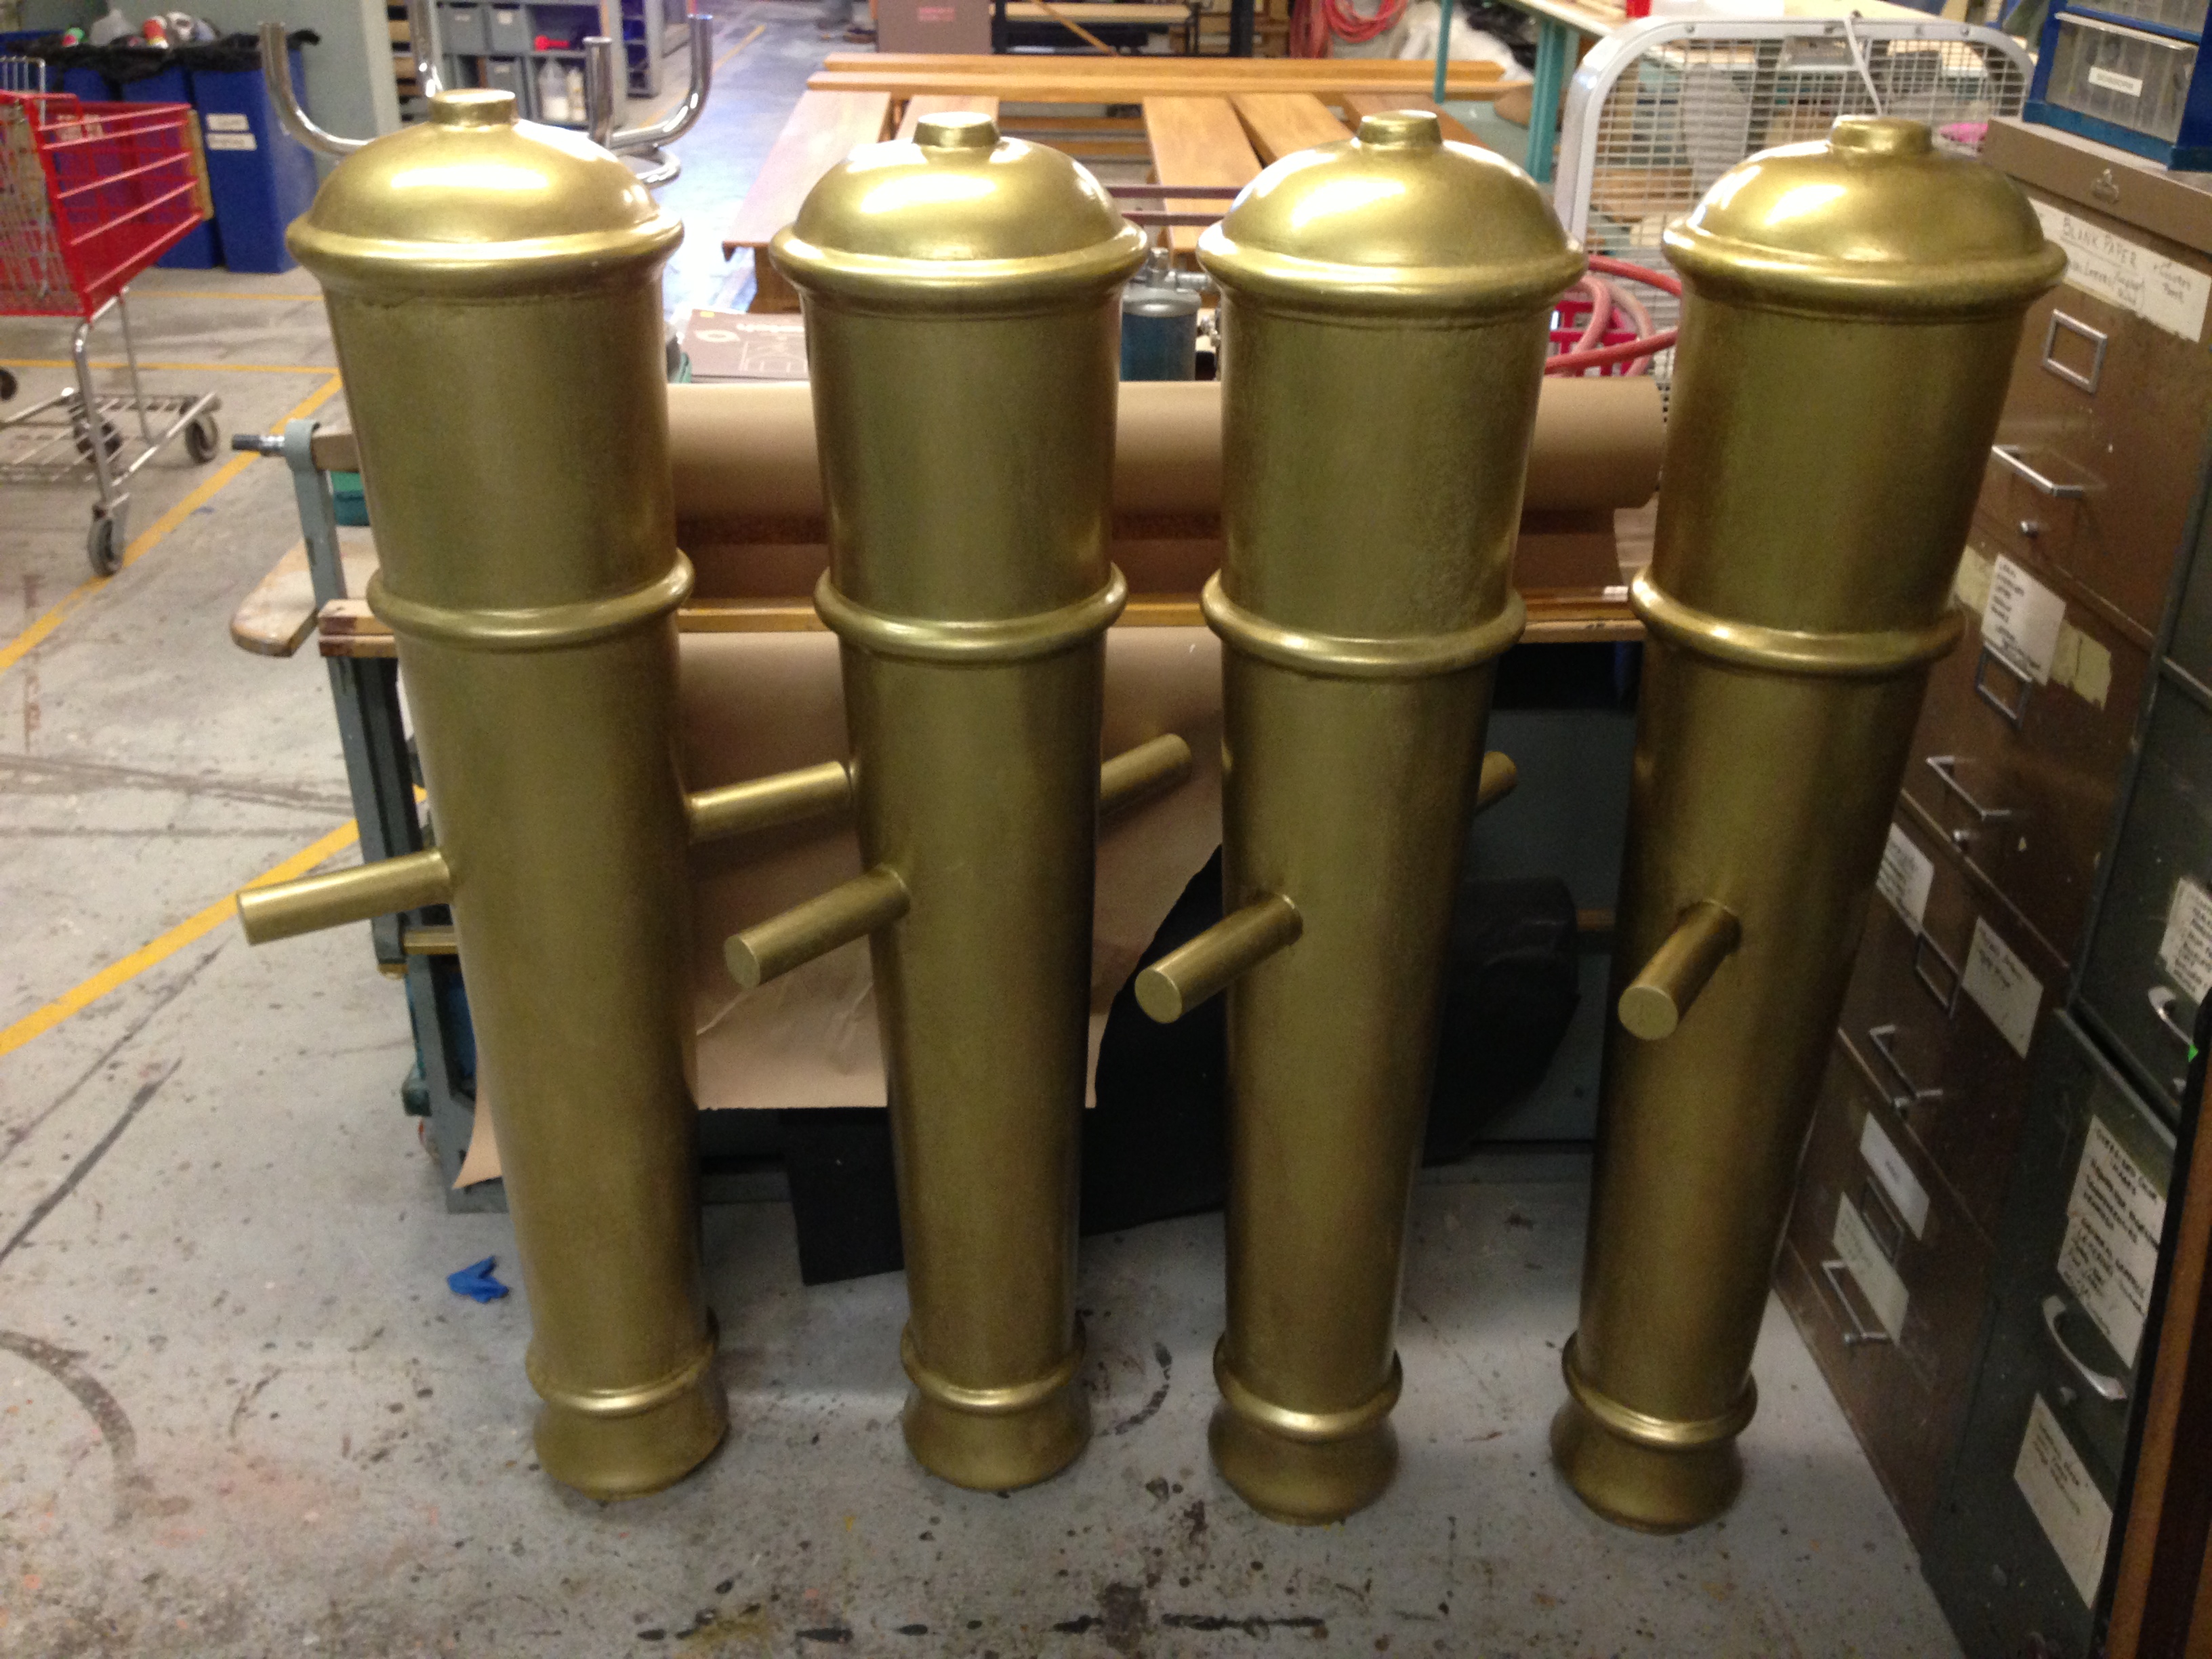
With the barrels finished, I handed them off to the painters, who gave them the great brass paint treatment that you see above. In a few days, I’ll post about how I built the carriages to these cannons, and you can see pictures of the final piece.

Turned Quaich

One of the props I built for our production of La Donna del Lago was a quaich. A quaich is a two-handled drinking vessel from Scotland; you can find out more on the Wikipedia page, which incidentally, has the research photograph I worked from.

Full-scale drawing
Full-scale drawing

I began by adapting the research photograph to a full-scale drawing of the profile I would make. This was fit to the measurements that they wanted to use, shown to the designer, then refined some more based on his feedback. When my drawing was approved, I cut a turning blank from a piece of poplar we had laying around.

Turning the outside
Turning the outside

This was the first time I have ever turned a bowl on a lathe. Our lathe is not actually set up to turn on the outboard side, so I had to turn the whole bowl on the inboard side. I began by turning the profile of the outside, leaving a large foot on the bottom that I could hold on to when it came time to turn the inside.

Hollowing out the inside

I flipped the bowl around and started hollowing out the inside. One of the other carpenters told me a trick where you first use a drill bit to remove as much of the material on the inside as you can. I grabbed the largest Forstner bit we had, stuck it in the drill bit chuck on the tailstock, and drilled out the center of my bowl.

Finished turning
Finished turning

Hollowing out the rest of the center was straightforward once I got used to how the tools acted. The tricky part about turning a bowl, compared to turning spindles, is the way the grain faces. The curve brings you from face grain to end grain, so your tool cuts differently as you move along the curve.

Unpainted quaich
Unpainted quaich

After the bowl itself was complete, I added the handles. I chiseled and Dremeled a square notch in each side of the bowl that the handles could fit into, and epoxied them in place. I also took a grinder and carved the outside so it looked like it was hand-carved with gouges.

Quaich
Quaich

The painting and faux metal strip along the top was handled by the rest of the props team. It was sealed with a food-safe sealer since the artists drank actual liquid from it every performance. It was a simple prop, but it turned out nicely and allowed me to learn some new skills in the process.

Legend of Zelda Master Sword

A while back I wrote about some rupees I made for a Legend of Zelda musical. The group doing the musical is called The League of Extraordinary Thespians, and I made a few more props for them, such as Link’s Master Sword.

Making the pattern
Making the pattern

The musical is based off of The Ocarina of Time video game, so first I had to find some accurate reference images from the game. From those, I drew out a paper pattern for the blades.

Layout for bevel
Layout for bevel

After cutting the pattern out of plywood, I made another pattern to find the bevel on the blade. I was working on three swords (one for Link, one for Dark Link, and one for a lobby display) so taking the time to make these patterns saved a lot of time in the long run.

Shaping the blade
Shaping the blade

I used a rasp and block sander to shape the blade.

Pommel and Shoulder
Pommel and Shoulder

I turned some of the handle and guard parts on a lathe. The quillon block (otherwise known as the écusson) is just a slice of PVC pipe.

Adding the quillons
Adding the quillons

For the rest of the detail on the guard, I used pieces of MDF which I shaped with my belt sander and fine tuned with a Dremel.

Continue reading Legend of Zelda Master Sword

Rupees from Legend of Zelda

For the last few weeks before I came out to Santa Fe, I was building some props for a local theatre group known as The League of Extraordinary Thespians. They are doing a musical of The Legend of Zelda: Ocarina of Time. The first props I finished were the rupees, which are a type of jewel used in the game to buy items (some of you may have already seen these in an Instructable I posted last week. Sorry).

I figured the best way to make a translucent gem was to vacuum form the shape. You remember my ultra-cheap vacuum former, correct? Before I could use that, I would need a form. I decided to do the front and back of each rupee separately, and then glue them together. So first, I would need to cut a piece of wood into a rupee shape.

Wood form
Wood form

You can see I’m using the (oddly-named) GRR-Ripper from Micro-Jig; it makes accurate cuts on tiny pieces in a safe and straight-forward manner. I did all the cuts with my table saw, giving me a pretty clean-looking rupee half.

Vacuum formed half
Vacuum formed half

I got a sheet of clear acrylic from Hobby Lobby. They only had it in one thickness; I’m not sure what it is exactly, but it’s less than 1/16″. I started vacuum forming the halves and trimming them out, leaving exactly what you see above.

Painted green
Painted green

Before gluing the halves together, I painted the insides. This way, the paint would never wear off, no matter how much the actors handled them.

For the green ones, I tried watering down acrylic paint. It was pretty tricky, since the paint kept wanting to bead up. Normally, you would lightly sand the surface of the plastic to help the paint adhere better, but that would kind of kill the “translucency” effect. So I bit the bullet and bought some blue and red spray paint so I could just lightly dust the other rupees.

Rupees
Rupees

I used a solvent-based glue (Amazing Goop) to glue the halves together. The glue was a bit thick and dried flexible, which helped make a stronger bond since the edges didn’t quite match up exactly.

And that is how you make a rupee!