Category Archives: How-to

Guides to building props or using certain techniques and materials

Into the Woods Puppets

In my last post, I detailed the build of a “Milky-White” puppet for Into the Woods. I made some smaller puppets for that production as well, including two birds and the hen that lays golden eggs.

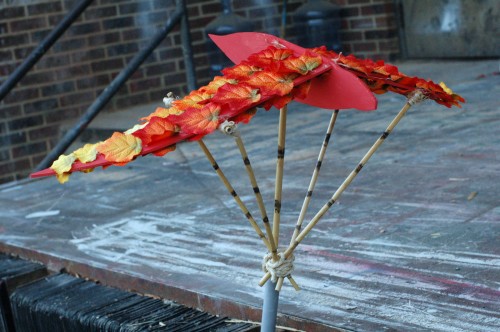
For the birds, I began experimenting with various ways with how they could be carried and flap their wings. The production team liked one where the bird was held aloft on a pole, and their wings flapped by moving a piece of PVC pipe up and down over the pole. Bamboo lashed with twine created the mechanism, and more twine was used as the “hinge” to connect the wings to the body.
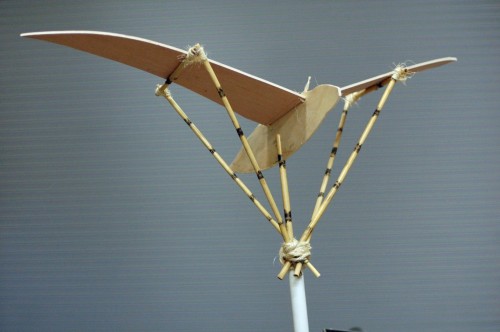
Bird puppet
Bird puppet

I covered the wings with leaves to continue with the concept of using “natural” materials to create the puppets. If you remember from the last post, the goal was not to make realistic animals, but to make items that appeared distinctly hand made from materials one might find in a forest.
Covered in feathers
Covered in feathers

I brainstormed awhile on the hen, trying to come up with a look that was interesting and distinct from the other puppets. The designers had provided me with some research of horse sculptures constructed of driftwood, so I decided to have a go at a driftwood hen.

I began with a full-scale reference sketch of a hen, and began mixing and matching pieces of driftwood until I got an assemblage that looked like a hen. I drilled tiny holes in the pieces so I could wire them together (later reinforcing some of the joints with hot glue).
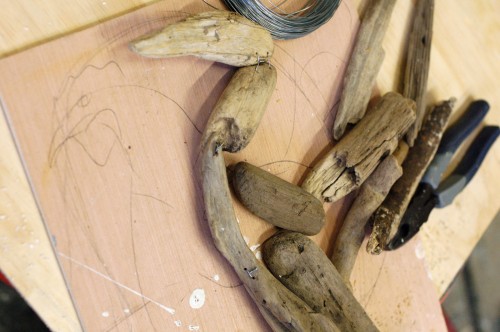
Driftwood hen
Driftwood hen

The director wanted the hen to be on “wheels” and pushed out with a stick. The stick is later removed and the hen is carried around. I built some rustic-looking wheels, and drilled a hole in the back so a stick could be added and removed. He also got some small eyes glued on.
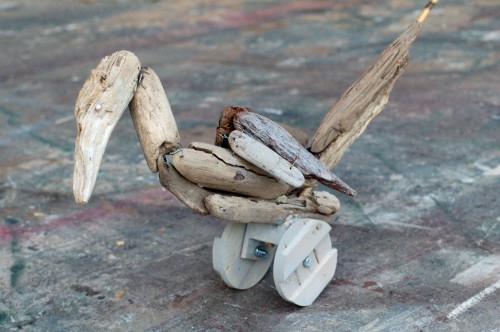
Hen on wheels
Hen on wheels

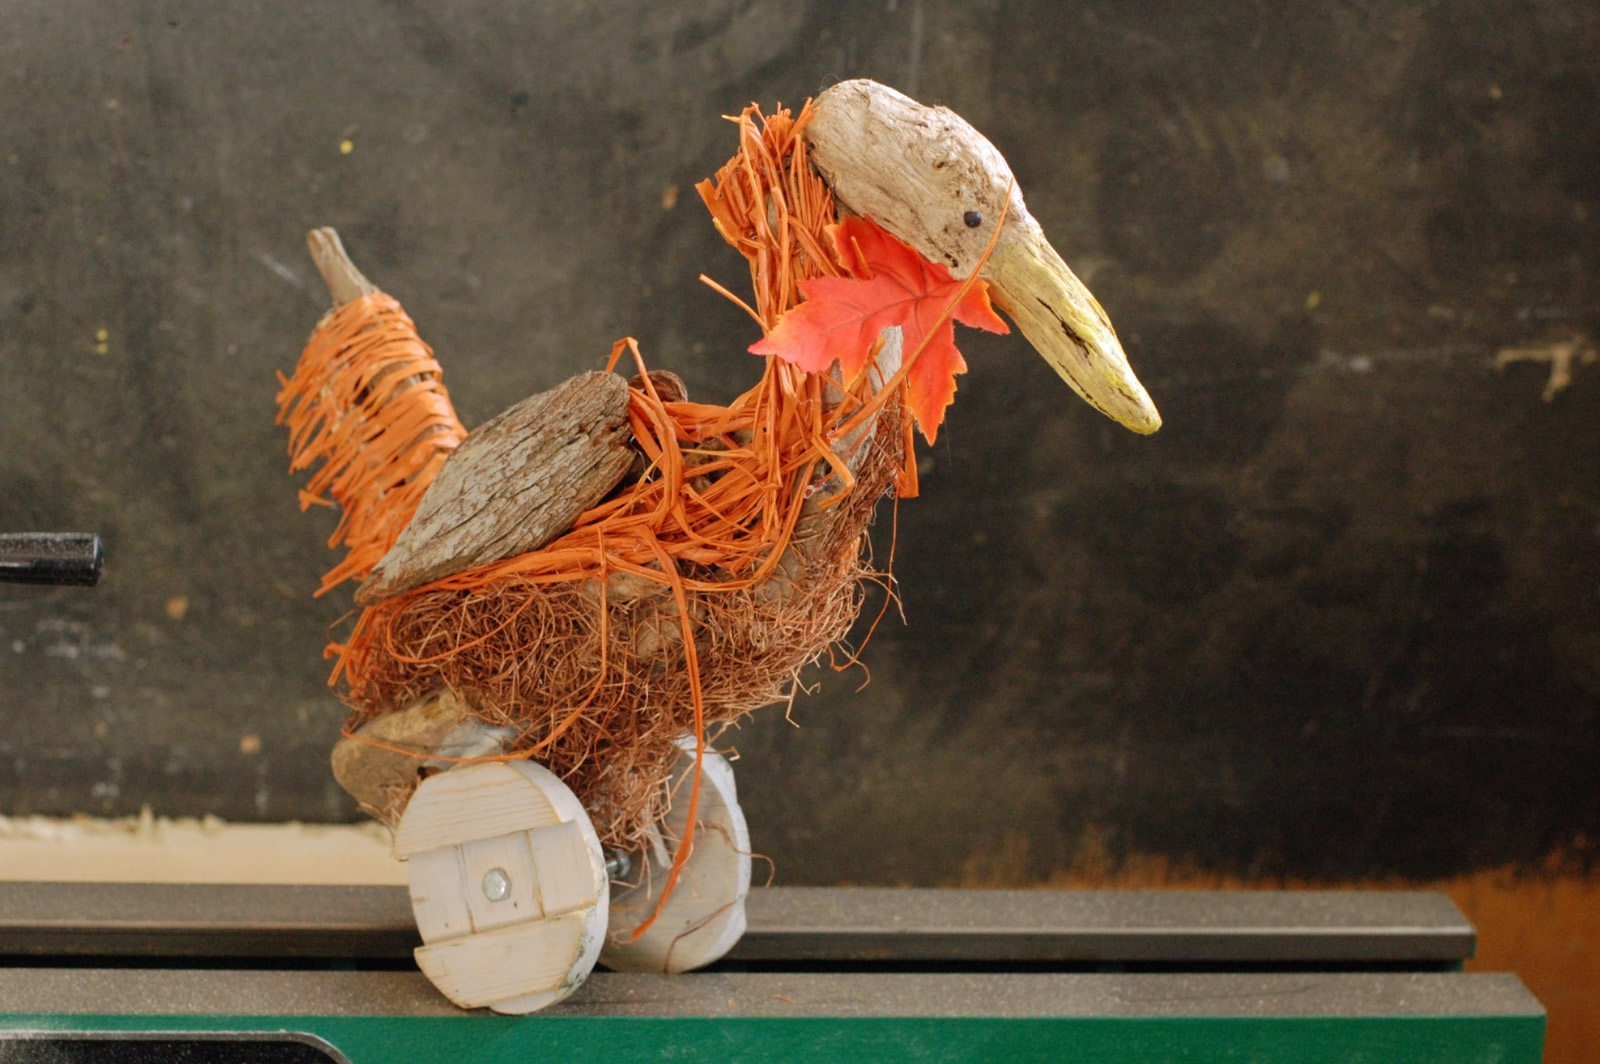
After a few rehearsals, the team wanted a hen with some more presence on stage. I added some bright orange raffia along the top, some brown moss along the bottom, and a bright orange leaf for a wattle. I also painted the eye black and the beak yellow to help distinguish the parts a bit better.
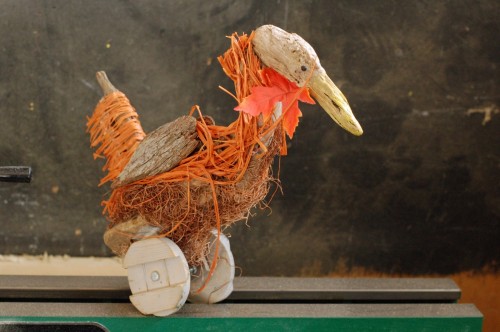
The hen that lays the golden egg

Overall, it was a fun challenge to build “puppets”, since I’ve worked with them a lot in the past, but never had the chance to build my own. It was also interesting to work with various materials I’ve never worked with before.

Milky the Cow

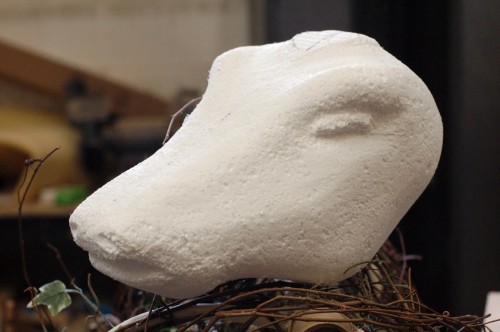
I recently finished some work on a production of Into the Woods at Elon University. The students hired me to build the animals (some may call them puppets). Milky the Cow is one of the main animals, appearing in many of the scenes. I began by sculpting a cow head in white foam.

Sculpted foam head
Sculpted foam head

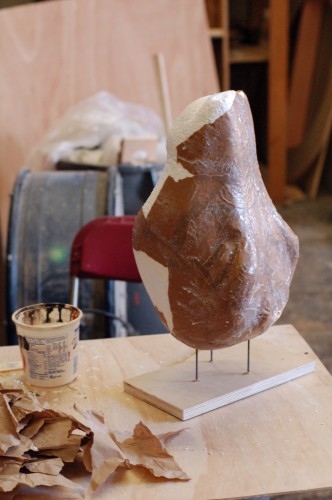
I gave the head a coating of papier-mâché. The design of the show used a lot of found object and natural material arranged to suggest a forest, rather than attempting a realistic portrayal of one. So the construction of the head proceeded in a manner to highlight the fact that it was a handmade object, rather than attempting to completely mimic an actual cow’s head.

Applying papier-mache

The body was a separate piece; it was just the torso, tail and udder, without any legs. They were basing their design off of the Regent’s Park production (which transferred to the Public Theater this past summer, though I left just before it came).

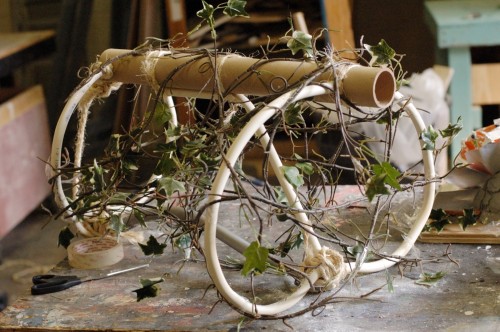
I started with a structure made of a cardboard tube “spine” and some bent PVC pipe to define the shape. I than began wrapping vines around to create the outer surface. Everything was wired in place, but I also added some twine to make it appear as though it was lashed together.

Body structure
Body structure

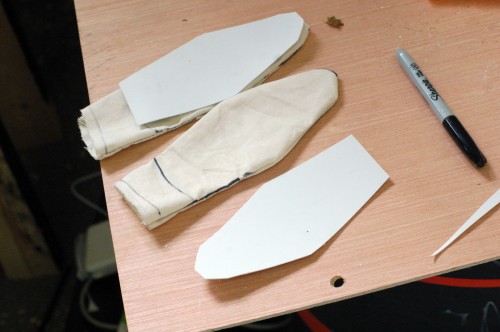
Next for the head were some ears. I patterned and sewed them out of muslin, with a piece of styrene inside to give it some stiffness. Once the ears were on the head, I heated them with a hot air gun so I could curl and shape them. When cool, the styrene retained that shape.

Ears
Ears

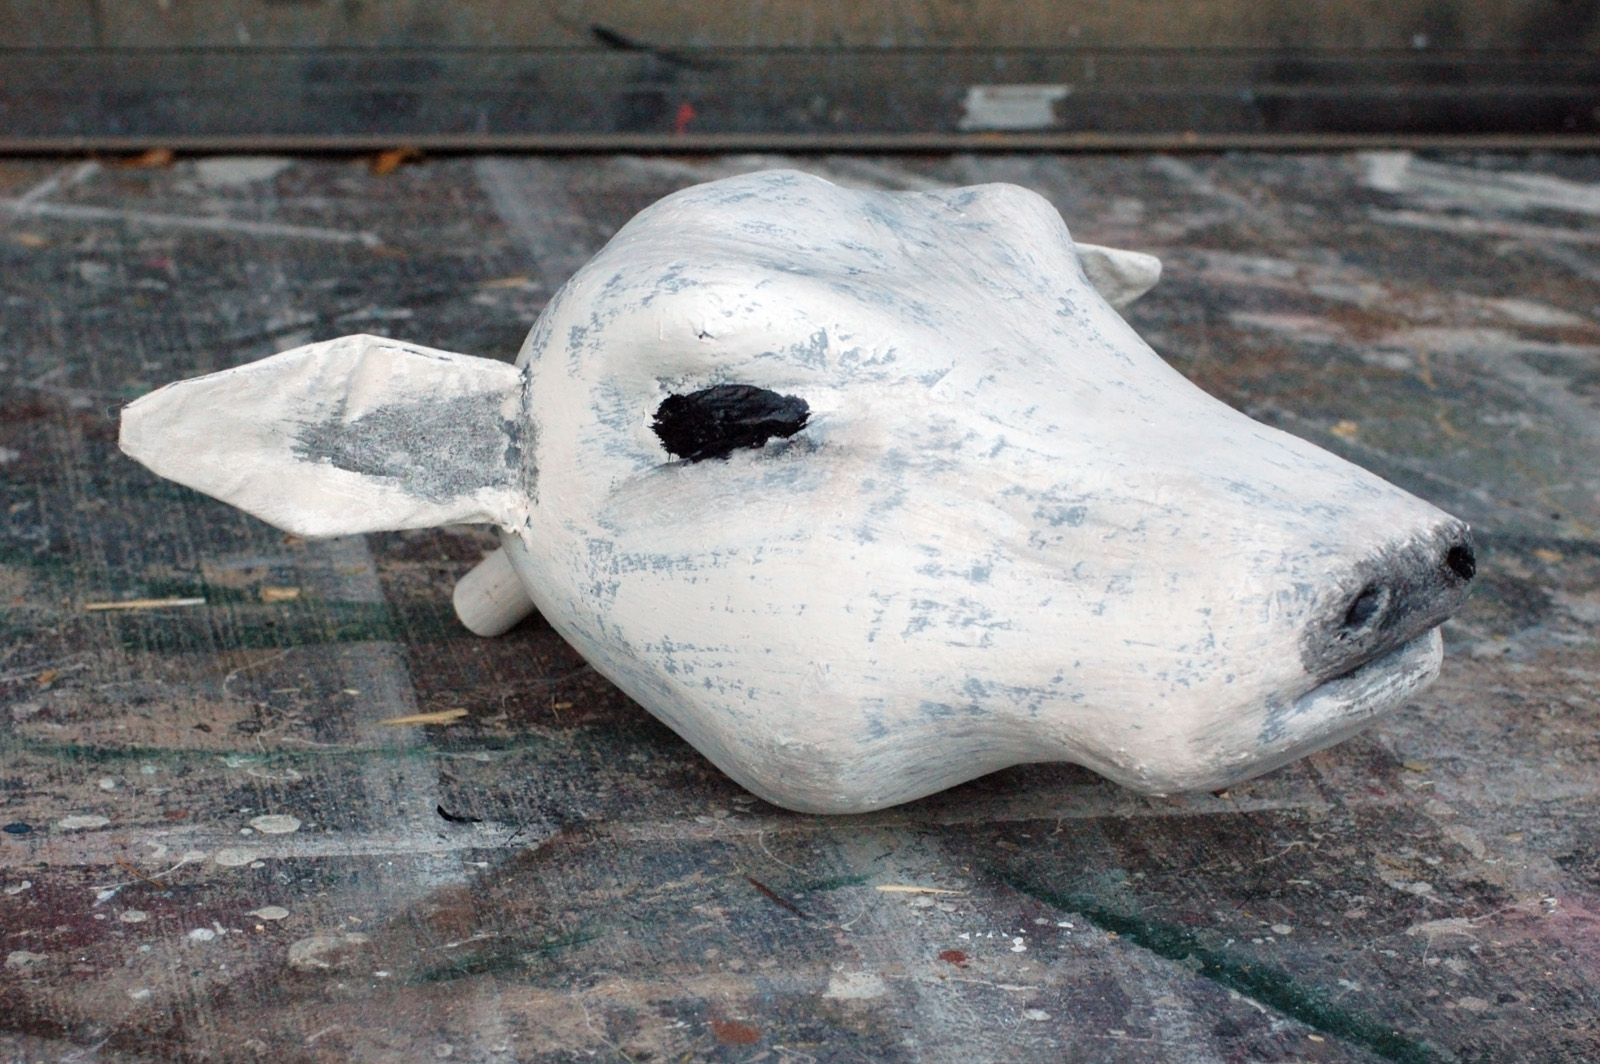
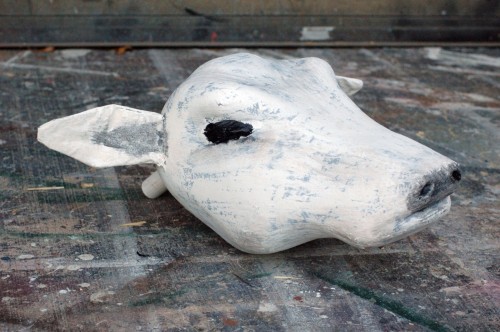
The head got a coat of grey primer, followed by a dry brush of off-white over top. I glued a dowel coming out of the back of the head so the handler could hold onto it and manipulate it around.

Cow head
Cow head

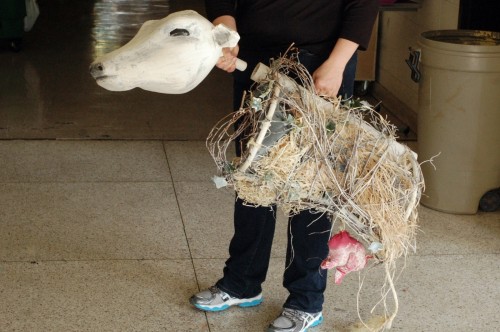
The udder was a few pieces of red fabric which I patterned, sewed, and stuffed with polyester batting. I lined the inside of the body with some screen material so the actors could throw objects inside as Milky “ate” them, and they would be easy to retrieve after the show. I added some raffia to beef out the body since the vines did not give enough coverage on their own.

Milky White
Milky White

So there you have it; one Milky the Cow!

A Disappearing Turkey

To all of my American readers, I hope you have a Happy Thanksgiving this week! Brian Wolfe from Costume Armour sent me some photographs of a trick turkey they recently created, which seems apropos to the holiday.

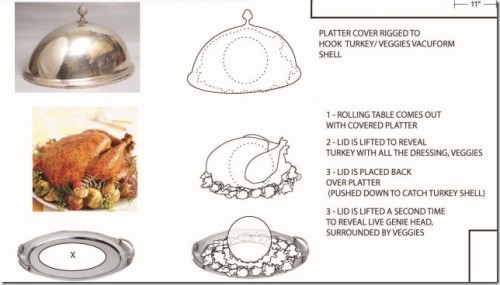
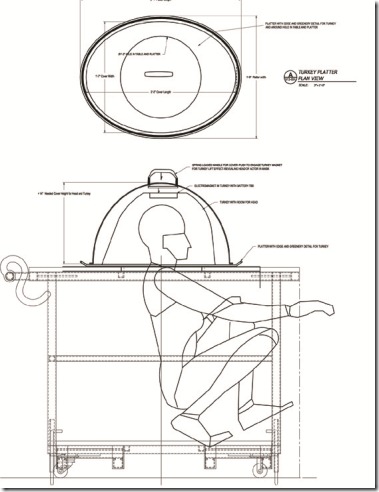
For this trick, a waiter needed to walk in with a food cart. He lifts the lid off of a covered tray revealing a delicious roast turkey. He replaces the lid, and the next time the lid is removed, the turkey is gone. Instead, an actor’s head is on the tray, and the actor begins to speak.

This is the drawing he shared with me:

Drawing for a turkey trick

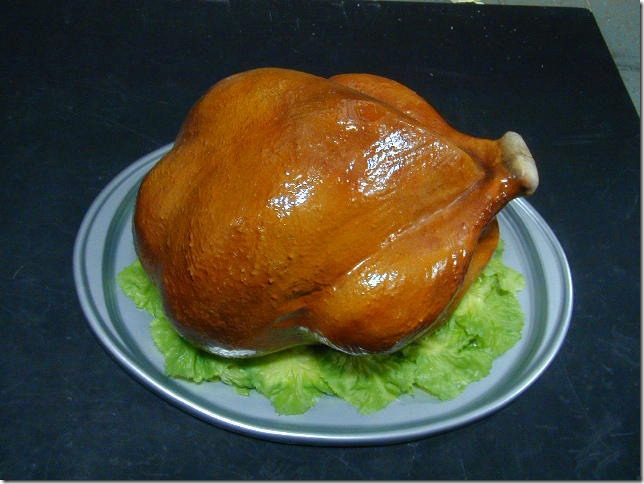
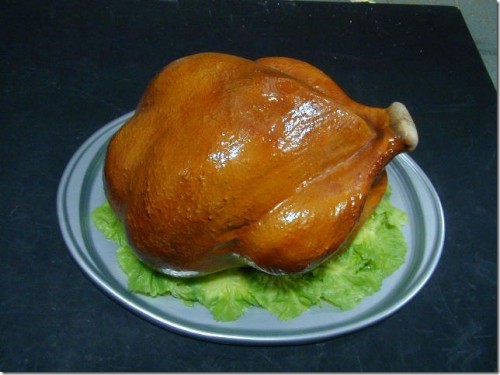
They needed a giant, oversized turkey with enough room inside to fit a head; it also needed to be light enough that it could be lifted along with the tray (you will see why in a minute). They had a rubber turkey in stock, but it was too small and heavy. So they decided to vacuum form a new one. They carved the turkey in foam, made a two-piece mold, and vacuum formed it in 0.04″ Kydex plastic.

Vacuum formed turkey halves

They cut out the pieces, glued them together, and painted them. Next, they cut a large hole in the bottom:

Hole in the bottom of the turkey

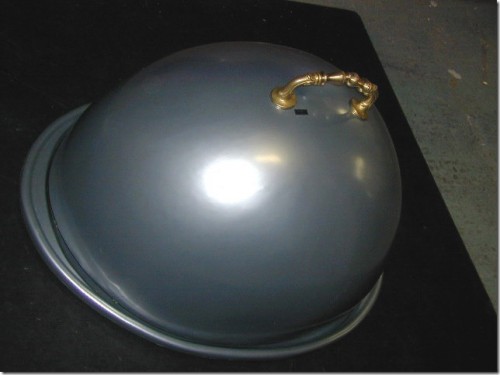
The tray was also vacuum formed, this time in a heavy 0.093″ Kydex plastic with a metallic finish. The bottom was formed over a wooden mold, while the lid used a plaster mold. They also added some artificial lettuce which was bought.

Vacuum formed turkey

A brass drawer pull completed the look to the lid. The small black rectangle next to it in the photograph below is a small toggle switch:

Tray Cover
Tray Cover

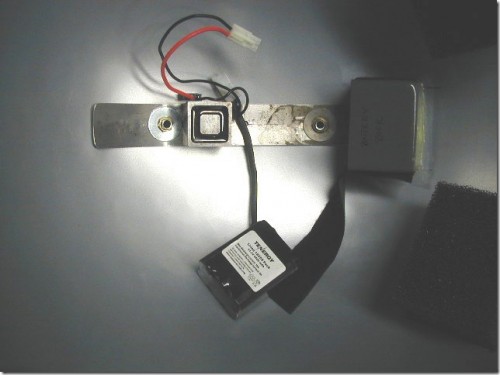
When the waiter flips this switch, a small battery-powered electromagnet turns on (shown in the next photograph). The turkey had a small piece of flat steel hidden on top which is grabbed by this magnet. So when the magnet is on and the tray lid is lifted, the turkey travels along with it, hidden from the audience’s view.

Battery and magnet
Battery and magnet

The diagram below illustrates how the whole trick was set up. I’ve seen this same basic principle carried out in a number of different ways, but the combination of the hollow turkey and electromagnet makes this execution especially elegant; you can control whether the turkey or head is visible simply by the flick of a switch. The actor underneath does not have to do anything.

Turkey trick diagram

Hope you enjoyed this! Have a Happy Thanksgiving!

Player Piano for Crazy for You

Another project I worked on for Crazy for You at Elon University was a player piano. The piano sits against the wall of the saloon for a number of scenes. It has a couple of gags; when we first see it, a cowboy is playing a song on it, then gets up and walks away as the piano continues to play. Later, another cowboy fires a gun which hits the piano and causes it to start playing on its own again until it is kicked.

We began by looking for a real piano which we could take apart and modify. After a few weeks of unsuccessful searching, I decided I would just build one. After all, it needed to be a custom size to fit into the set, so transporting and modifying a real piano might be just as labor-intensive. The exterior of a piano is not really that complicated; it’s mostly a giant box with various levels of molding and details. The tricky part was getting it to play on its own.

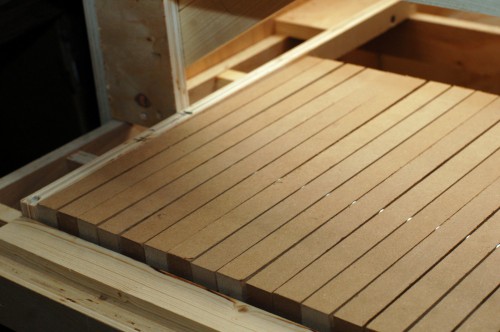
Detail of the piano keyboard

One of the perks of working at a university is that you have a lot of crew members backstage who can operate tricks by hand. I knew the player piano could be worked manually from behind, so I just needed to figure out how to make that work. I cut out a set of piano keys from 3/4″ MDF and drilled a hole through each one. I ran a piece of metal rod through all the holes; I added a washer between each piece of MDF as a spacer. You can just make out the washers in the photograph above, catching a glint of light. This method allowed the MDF “keys” to pivot around the rod. I set the “keyboard” in the piano and added  blocks underneath to limit their movement to that which a piano has. You will notice the holes were drilled offset from the center. The extra length in the back gave the back extra weight; when you let go of a key in the front, gravity would pull the back down, returning the key to its natural position. This simple mechanism would allow someone in front to play the keyboard normally, and someone in the back could make the piano appear to play on its own by pushing the keys up.

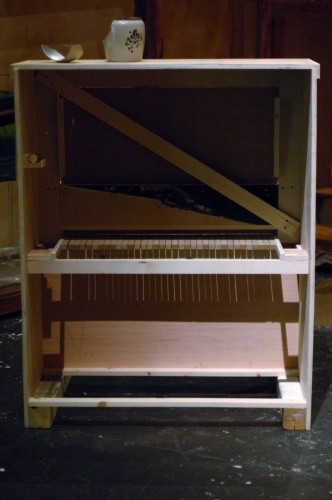
A view from the back

In the view from the back, you can hopefully get a better sense of what is going on. The keys can be accessed from behind; pushing them up causes the keys in front to move down, as if the piano is playing itself. When you let go of the keys in behind, they return to their normal position. The piano was pushed up against the wall, and a hole was cut in the flat, allowing a crew member to reach in and “play” the piano without being seen by the audience. The music itself was played live by the orchestra.

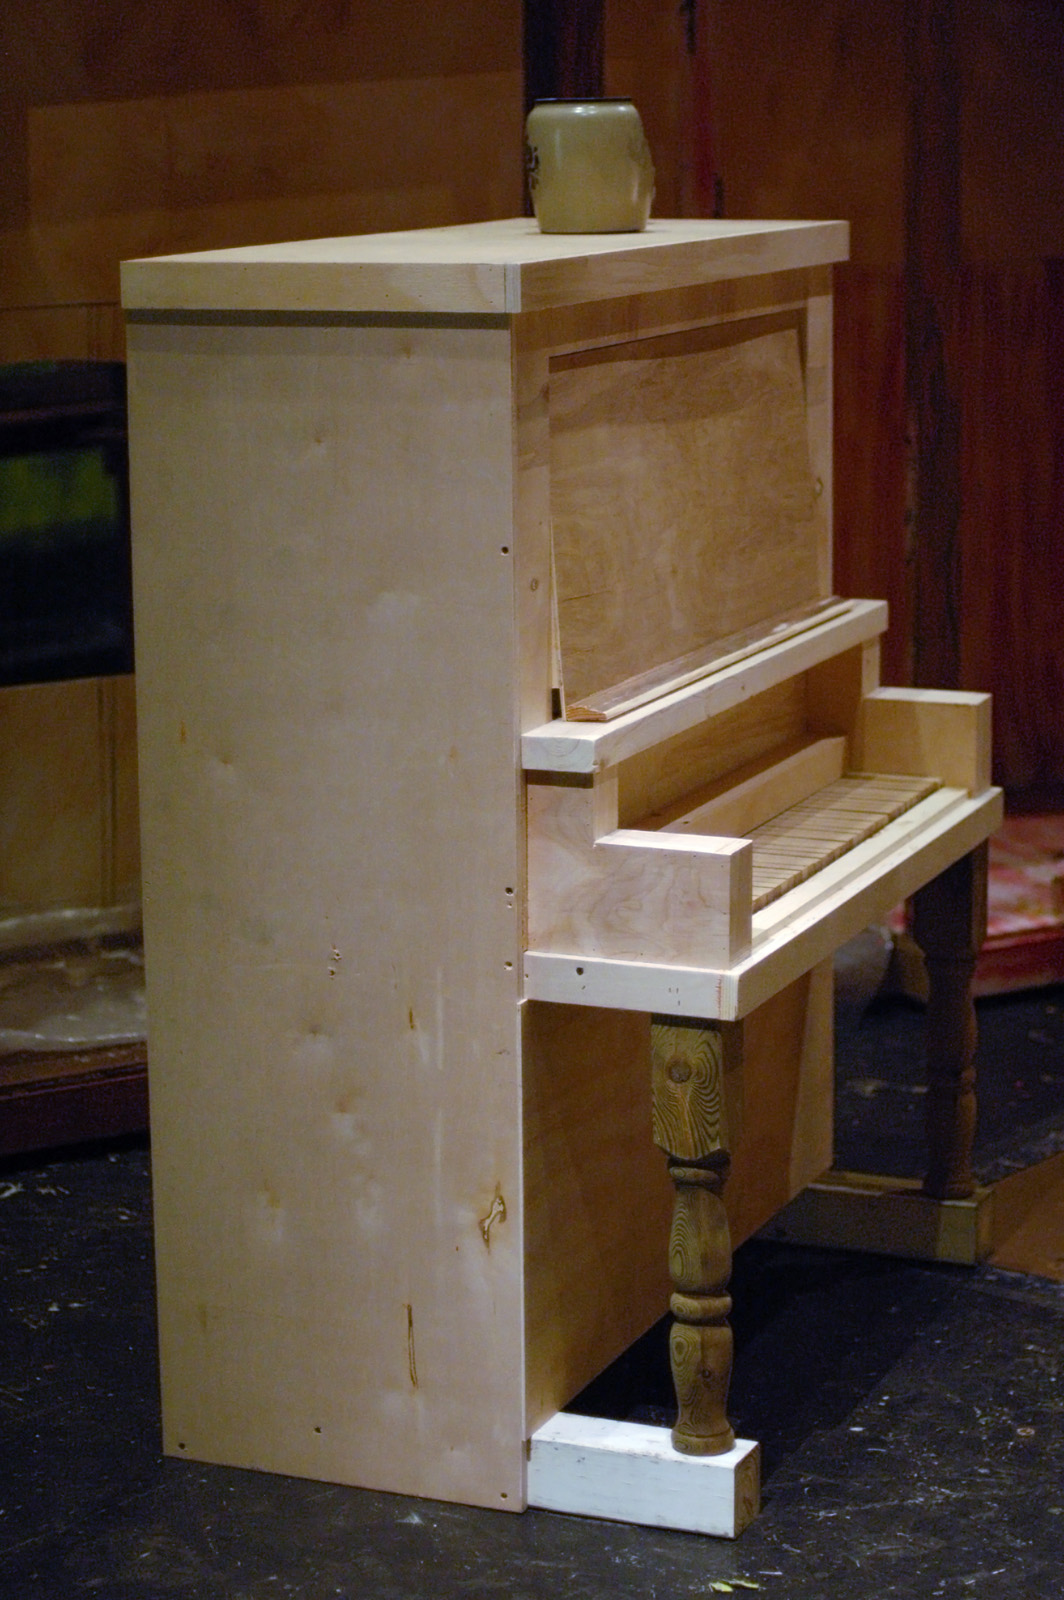
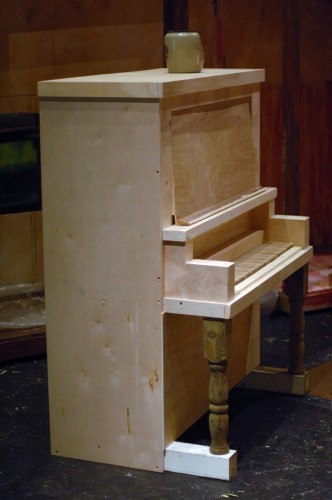
The finished, unpainted piano

The photograph above shows the piano immediately before it is painted. I managed to build the entire thing with scrap material, amazingly enough. The scene shop at Elon has a CNC machine, and it produces some wacky off-cuts. The scene shop usually doesn’t have time to trim the edges to make them square and usable again, but I do, so it gives me some nice large pieces of quality plywood and lauan.

The saloon in Crazy for You

The piano was painted to match a lot of the other woodwork used in the saloon scene. I cut some black keys out of black foam core and hot glued them on top of the white keys; they basically moved along with the white keys as they were played, but were not playable on their own. With the keys painted white and the piano painted with dark wood tones, it gave enough contrast that even the balcony seats could witness that the piano was playing on its own. All in all, it was a pretty fun prop for having been built in little over a day.

Phoning it in

Yesterday was strike for Crazy For You, the first musical I prop mastered down here in North Carolina. I’ll be posting some of the projects I did for this production at Elon University over the next few days. One of my favorite builds on this show was a set of twelve matching pink candlestick phones. I’ve dealt with getting multiple period phones in the past, so I knew with this budget these would have to be a custom build. I have already posted about how I made a vacuum former to create the bases.

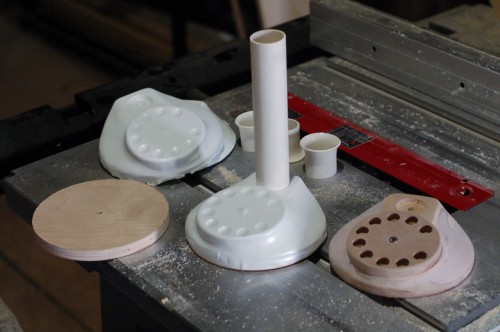
Assembling the base
Assembling the base

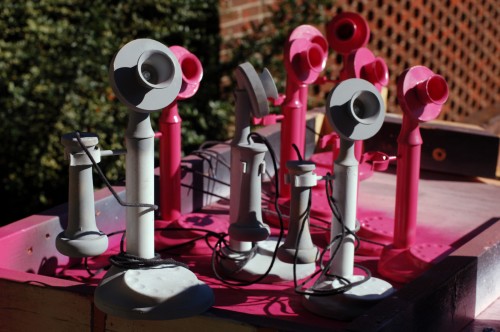
On the right in the photograph above is the model for the base of the phone. In the upper left are some vacuum-formed shells. Dead center is a shell on the base with a section of PVC pipe forming the “candlestick” portion. Behind the half-completed phone are three sections of PVC pipe with a flange in them. I made a video showing how to form these.

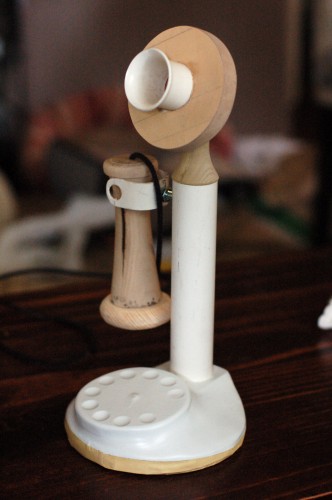
A completed but unpainted phone

The neck piece which connects the mouthpiece to the candlestick is a solid piece of poplar I turned on the lathe. The receiver (mouthpiece) was also turned on the lathe. The only difference between the prototype above and the final phone is the hook which holds the receiver. I sliced a section of PVC pipe, made a slit down one side, than used a heat gun to open it up into a “U” shape. I bent the ends out so the receivers could be pushed in and the hook would snap back to hold them snugly.

Painting the telephones

The plastic parts were primed first with a plastic spray paint primer. I then hit the rest of the parts with a sandable primer. The sandable primer helped make all the surfaces appear to be unified and made of a single material, and I could smooth out minor imperfections.

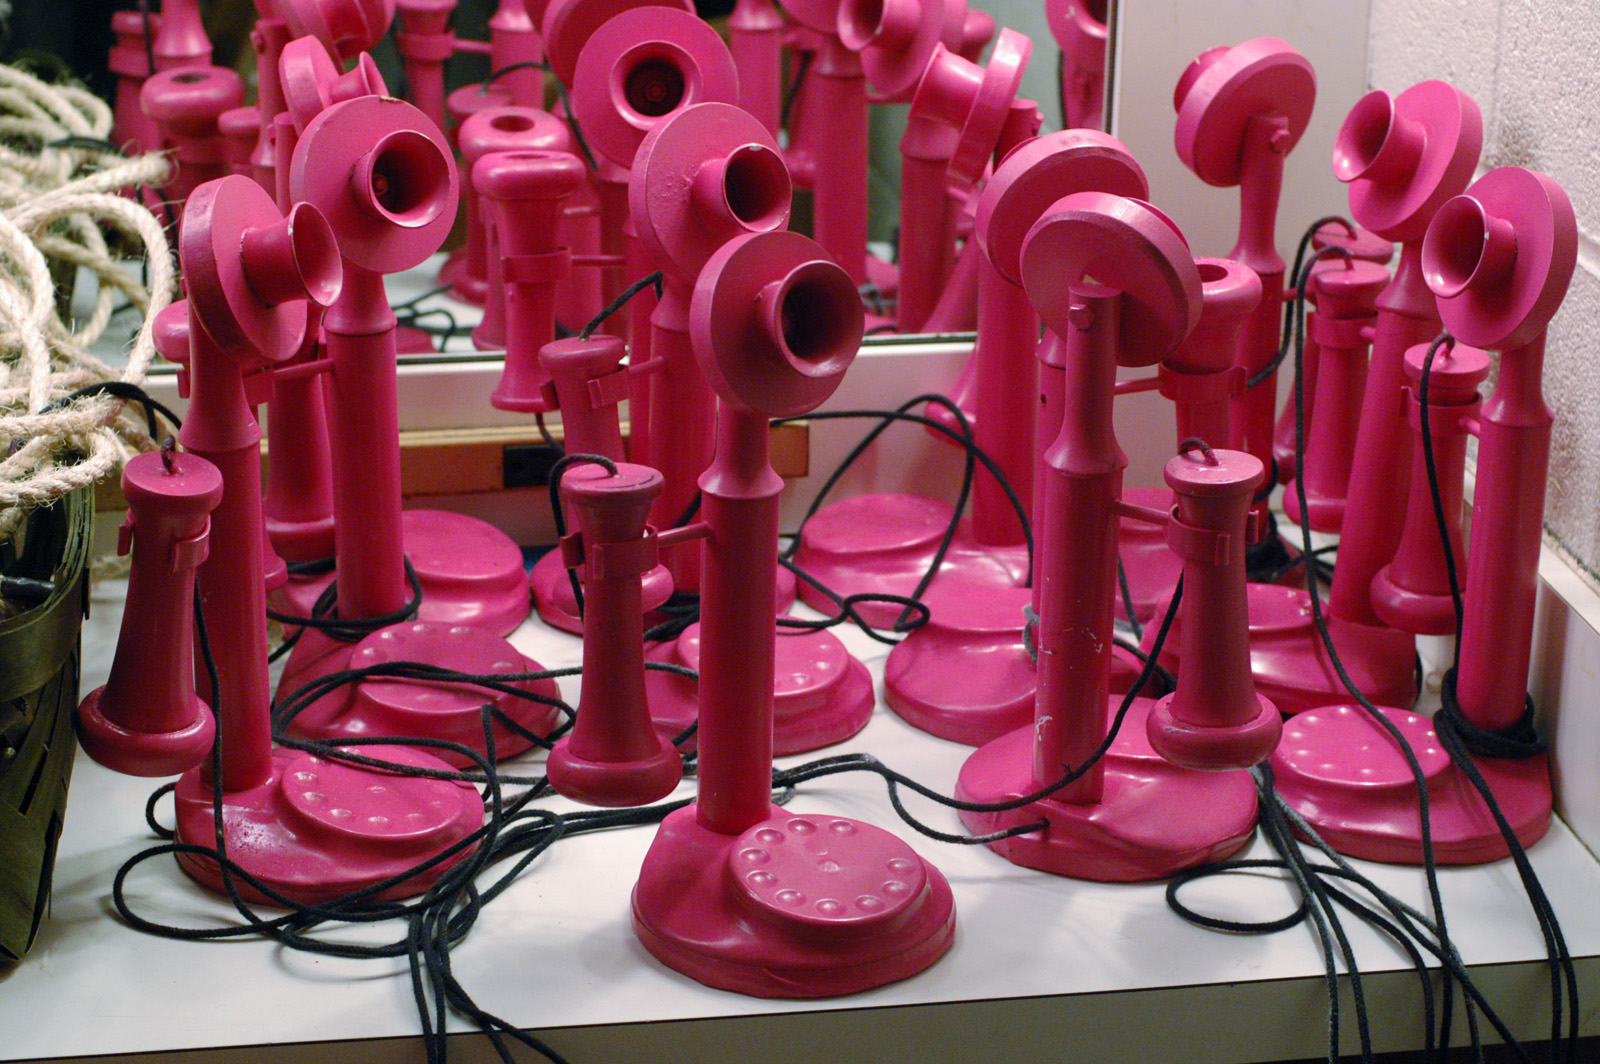
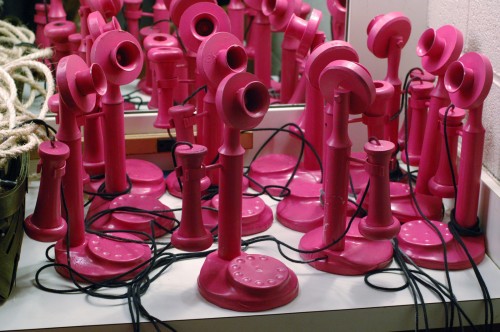
Pink candlestick telephones

All the phones were painted pink. Bright pink. The kind of pink that hurts your eyes. It was a gloss pink too, and because the phones were sufficiently primed, the gloss made them look like solid chunks of plastic. I intended to add more paint for highlights and to differentiate the parts (and maybe throw some glitter on for good measure), but this show really came down to the wire (I was working up until the house opened on Opening Night) and I ended up not having time.

Bring! Bring! "Hello, Bobby!"
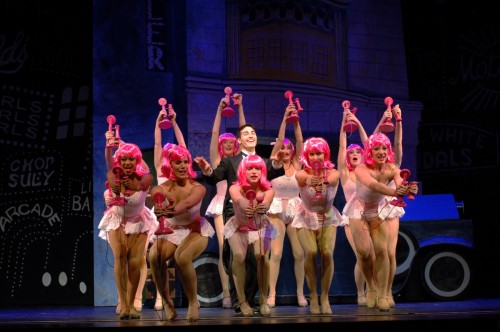
Bring! Bring! “Hello, Bobby!”

Regardless, they looked great in the context of the scene. It’s a big dance meant to be a fantasy sequence, with lots of flash and movement. You can see in the photograph above how well the color worked in that number. The shapes of the phones were distinct enough to convey their essence. They were a pretty big hit, and some of the audience thought they were rented.